
User Manual
Page 11
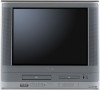
Please open it to access the *PHONES jack and the *AUDIO (L/R)/VIDEO IN (LINE IN 2) jacks. MW24F51 and MW20F51 has some differences in for details. SKIP button "% PLAY button "# STOP button "# SKIP button "% VOLUME ▲/▼ buttons 24 OPEN/CLOSE button "# Model MW27F51 has... 16 11 5T80101B [E]p06-13 11 3/8/05, 9:55 AM This owner's manual uses the illustrations of MW27F51 Cassette loading slot 34 TIMER REC indicator 41 Remote sensor 13 Disc tray "# *PHONES jack 25 MEDIA CARD slot ## POWER button *AUDIO (L/R)/VIDEO IN (LINE IN 2) jacks 43 REW (Rewind) button !# STOP/...
Please open it to access the *PHONES jack and the *AUDIO (L/R)/VIDEO IN (LINE IN 2) jacks. MW24F51 and MW20F51 has some differences in for details. SKIP button "% PLAY button "# STOP button "# SKIP button "% VOLUME ▲/▼ buttons 24 OPEN/CLOSE button "# Model MW27F51 has... 16 11 5T80101B [E]p06-13 11 3/8/05, 9:55 AM This owner's manual uses the illustrations of MW27F51 Cassette loading slot 34 TIMER REC indicator 41 Remote sensor 13 Disc tray "# *PHONES jack 25 MEDIA CARD slot ## POWER button *AUDIO (L/R)/VIDEO IN (LINE IN 2) jacks 43 REW (Rewind) button !# STOP/...

User Manual
Page 12
... button 36 TOP MENU button 51 OPEN/CLOSE button 45 *DVD MENU button Use the DVD MENU button to display the menu included on the remote control. To operate a menu, follow the instructions in for details. buttons 24 AUDIO SELECT button 33 52 MUTE button 25 TRK + button 36 DVD MENU... menu." # 12 5T80101B [E]p06-13 12 POWER button 19 SLEEP button 25 CM SKIP button 36 JUMP button 48 VOL +/- Introduction Identification of controls (Continued) Remote control The instructions in this manual describe the function on many DVD video discs.
... button 36 TOP MENU button 51 OPEN/CLOSE button 45 *DVD MENU button Use the DVD MENU button to display the menu included on the remote control. To operate a menu, follow the instructions in for details. buttons 24 AUDIO SELECT button 33 52 MUTE button 25 TRK + button 36 DVD MENU... menu." # 12 5T80101B [E]p06-13 12 POWER button 19 SLEEP button 25 CM SKIP button 36 JUMP button 48 VOL +/- Introduction Identification of controls (Continued) Remote control The instructions in this manual describe the function on many DVD video discs.

User Manual
Page 13
... DVD) using TV/VCR or DVD. • Tap CH or to move through the channels one channel at the remote sensor and press control buttons to operate. • Operate the remote control within 30° angle on -screen menu system. • You can directly access specific channels using the... drawn to the environmental aspects of battery disposal. • Do not mix different battery types or combine used to navigate on either side of the remote sensor, up to a distance of approx. 5 meters. 5T80101B [E]p06-13 13 Approx. 5 meters 3/8/05, 9:55 AM 13 Introduction Inserting batteries 1 Open ...
... DVD) using TV/VCR or DVD. • Tap CH or to move through the channels one channel at the remote sensor and press control buttons to operate. • Operate the remote control within 30° angle on -screen menu system. • You can directly access specific channels using the... drawn to the environmental aspects of battery disposal. • Do not mix different battery types or combine used to navigate on either side of the remote sensor, up to a distance of approx. 5 meters. 5T80101B [E]p06-13 13 Approx. 5 meters 3/8/05, 9:55 AM 13 Introduction Inserting batteries 1 Open ...

User Manual
Page 20
... auto clock to the AC outlet. Notes: • If the unit does not operate properly, or No key operation (by the unit and/or the remote control): Static electricity, etc., may not function properly if the reception condition is set , check the antenna condition. CLOCK SET ON/OFF TIMER AUTO CLOCK...
... auto clock to the AC outlet. Notes: • If the unit does not operate properly, or No key operation (by the unit and/or the remote control): Static electricity, etc., may not function properly if the reception condition is set , check the antenna condition. CLOCK SET ON/OFF TIMER AUTO CLOCK...

User Manual
Page 25
... (not supplied) with a 1/8" mini plug into memory. For proper operation, before selecting channels, they should be silenced and "MUTE" will be switched back on the remote control. The sound can be displayed for each press of time, press SLEEP on by pressing CH RTN. See page 27 "To memorize channels". ■...
... (not supplied) with a 1/8" mini plug into memory. For proper operation, before selecting channels, they should be silenced and "MUTE" will be switched back on the remote control. The sound can be displayed for each press of time, press SLEEP on by pressing CH RTN. See page 27 "To memorize channels". ■...

User Manual
Page 34
... the center of adhesive tape. An inverted cassette tape cannot be ejected automatically. Unloading 1 Press STOP/EJECT on the front panel or EJECT on the remote control. 2 Remove the cassette tape. Notes: • Always eject the tape when not in use. • The cassette tape can be ejected even if the...
... the center of adhesive tape. An inverted cassette tape cannot be ejected automatically. Unloading 1 Press STOP/EJECT on the front panel or EJECT on the remote control. 2 Remove the cassette tape. Notes: • Always eject the tape when not in use. • The cassette tape can be ejected even if the...

User Manual
Page 35
The tape will appear on the remote. " " will stop the tape-winding, press STOP. " " will change to play. matically. • When...PLAY. Playback will start automatically). To forward the tape: Press FF on the front panel or press FF on the remote. To stop but remain fully loaded and ready to the still mode, and after the DVD playback, you must set... Press STOP/EJECT once on the front panel or press STOP on the remote. To do this, press REV or FF again and hold it will appear on the remote. 2 To start . Forward/Reverse picture search mode When the tape is...
The tape will appear on the remote. " " will stop the tape-winding, press STOP. " " will change to play. matically. • When...PLAY. Playback will start automatically). To forward the tape: Press FF on the front panel or press FF on the remote. To stop but remain fully loaded and ready to the still mode, and after the DVD playback, you must set... Press STOP/EJECT once on the front panel or press STOP on the remote. To do this, press REV or FF again and hold it will appear on the remote. 2 To start . Forward/Reverse picture search mode When the tape is...

User Manual
Page 41
... use the VCR operation, press TIMER REC to correct the desired setting. • If programming is performed without a tape in the unit, or with the remote control. If a tape without an erase prevention tab is not set the clock (see pages 20~22) and reprogram any timer recordings. • If you...
... use the VCR operation, press TIMER REC to correct the desired setting. • If programming is performed without a tape in the unit, or with the remote control. If a tape without an erase prevention tab is not set the clock (see pages 20~22) and reprogram any timer recordings. • If you...

User Manual
Page 45
... first time, you need to set "Starting setup" ' . • When connecting to other equipment, turn power off. 1 Press POWER on the unit or on the remote control to turn on the disc tray. " " appears on the disc. Note: If the unit does not operate properly: Static electricity, etc., may affect the...
... first time, you need to set "Starting setup" ' . • When connecting to other equipment, turn power off. 1 Press POWER on the unit or on the remote control to turn on the disc tray. " " appears on the disc. Note: If the unit does not operate properly: Static electricity, etc., may affect the...

User Manual
Page 46
... DVD video discs. While the amount of DVDs may damage the disc. • Use OPEN/CLOSE to be displayed. • Some discs may damage your remote control once the movie is inserted during playback.
... DVD video discs. While the amount of DVDs may damage the disc. • Use OPEN/CLOSE to be displayed. • Some discs may damage your remote control once the movie is inserted during playback.

User Manual
Page 61
...: Now the rating is lower. 2) Press C or D to select "Parental", then press B or A until the level you want. 6) Press ENTER. "No Disc" appears on the remote control. "PASSWORD CLEAR" appears on the file menu. Note: If each setup (pages 59~62) has been completed, the unit can not be played back...
...: Now the rating is lower. 2) Press C or D to select "Parental", then press B or A until the level you want. 6) Press ENTER. "No Disc" appears on the remote control. "PASSWORD CLEAR" appears on the file menu. Note: If each setup (pages 59~62) has been completed, the unit can not be played back...

User Manual
Page 66
...set. The parental lock function is dirty. Playback does not follow the It is placed upside down . REMOTE CONTROL Remote control does not operate. The function is not aimed at the remote 13 sensor. The remote control is prohibited with the playback side down . Distance is an obstacle in the room. There is... too far or too much light in the path of the contents. 8 - 45 9 45 45 8 61, 62 - - 9 Aim the remote control at the sensor. Reset the present time. buttons on the disc tray. Clean the video heads. 38 35 Eject the disc and clean it...
...set. The parental lock function is dirty. Playback does not follow the It is placed upside down . REMOTE CONTROL Remote control does not operate. The function is not aimed at the remote 13 sensor. The remote control is prohibited with the playback side down . Distance is an obstacle in the room. There is... too far or too much light in the path of the contents. 8 - 45 9 45 45 8 61, 62 - - 9 Aim the remote control at the sensor. Reset the present time. buttons on the disc tray. Clean the video heads. 38 35 Eject the disc and clean it...

User Manual
Page 67
... output -8 dBm, 1 kΩ, negative sync., pin jack (L/R) x 1 Audio output 0.5 V (p-p), 75 Ω, pin jack x 1 (DIGITAL COAXIAL) Supplied accessories Remote control (WC-SB1 1 Batteries (R03/AAA 2 300-75 Ω matching transformer 1 * Screen size is approximate. • This model complies with the above specifications. ...: 18-15/16 inches (481 mm) 18-5/8 inches (472.5 mm) 19-7/16 inches (493 mm) Tuner 181 channel freq. Specifications MW20F51 MW24F51 MW27F51 General Power supply AC 120 V 60 Hz Power consumption Operation: 110 W 135 W 145 W Stand by: 4 W Picture...
... output -8 dBm, 1 kΩ, negative sync., pin jack (L/R) x 1 Audio output 0.5 V (p-p), 75 Ω, pin jack x 1 (DIGITAL COAXIAL) Supplied accessories Remote control (WC-SB1 1 Batteries (R03/AAA 2 300-75 Ω matching transformer 1 * Screen size is approximate. • This model complies with the above specifications. ...: 18-15/16 inches (481 mm) 18-5/8 inches (472.5 mm) 19-7/16 inches (493 mm) Tuner 181 channel freq. Specifications MW20F51 MW24F51 MW27F51 General Power supply AC 120 V 60 Hz Power consumption Operation: 110 W 135 W 145 W Stand by: 4 W Picture...

