User Manual
Page 18
... your equipment. Each type of equipment or failure to the left. Messages Messages are presented in the type face you that appear on its display screen are used in this manual to bring important information to the " Windows 7. Pay attention! Terminology This term is identified as follows: Start The word "Start...
... your equipment. Each type of equipment or failure to the left. Messages Messages are presented in the type face you that appear on its display screen are used in this manual to bring important information to the " Windows 7. Pay attention! Terminology This term is identified as follows: Start The word "Start...
User Manual
Page 27
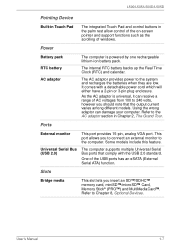
... Bridge media This slot lets you to connect an external monitor to the AC adaptor section in the palm rest allow control of the on-screen pointer and support functions such as the scrolling of the USB ports has an eSATA (External Serial ATA) function. It comes with the USB 2.0 standard...
... Bridge media This slot lets you to connect an external monitor to the AC adaptor section in the palm rest allow control of the on-screen pointer and support functions such as the scrolling of the USB ports has an eSATA (External Serial ATA) function. It comes with the USB 2.0 standard...
User Manual
Page 33
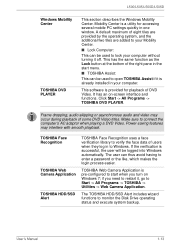
... PLAYER. Frame dropping, audio skipping or asynchronous audio and video may interfere with smooth playback. Make sure to Start -> All Programs -> TOSHIBA -> Utilities -> Web Camera Application. if you turn on -screen interface and functions. If the verification is provided for accessing several mobile PC settings quickly in the start when you need...
... PLAYER. Frame dropping, audio skipping or asynchronous audio and video may interfere with smooth playback. Make sure to Start -> All Programs -> TOSHIBA -> Utilities -> Web Camera Application. if you turn on -screen interface and functions. If the verification is provided for accessing several mobile PC settings quickly in the start when you need...
User Manual
Page 40
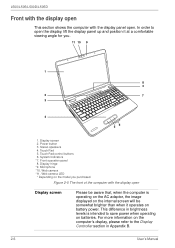
...4. Touch Pad control buttons 6. This difference in brightness levels is operating on the AC adaptor, the image displayed on the internal screen will be aware that, when the computer is intended to the Display Controller section in Appendix B. 2-6 User's Manual For more information... the display, lift the display panel up and position it operates on the model you . 11 10 9 1 8 3 2 7 3 4 56 1. Display screen 2. Power button 3. System Indicators *7. Microphone *10. Web camera LED * Depending on battery power. L500/L505/L500D/L505D Front with the display open This section...
...4. Touch Pad control buttons 6. This difference in brightness levels is operating on the AC adaptor, the image displayed on the internal screen will be aware that, when the computer is intended to the Display Controller section in Appendix B. 2-6 User's Manual For more information... the display, lift the display panel up and position it operates on the model you . 11 10 9 1 8 3 2 7 3 4 56 1. Display screen 2. Power button 3. System Indicators *7. Microphone *10. Web camera LED * Depending on battery power. L500/L505/L500D/L505D Front with the display open This section...
User Manual
Page 41
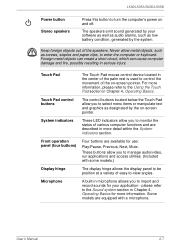
... audio alarms, such as screws, staples and paper clips, to -view angles. User's Manual 2-7 The speakers emit sound generated by the on-screen pointer. For more information, please refer to control the movement of the on and off. please refer to the Sound system section in the center... display panel to be position at a variety of easy-to enter the computer or keyboard. Never allow you to turn the computer's power on -screen pointer. Touch Pad The Touch Pad mouse control device located in Chapter 4, Operating Basics for use: Play/Pause, Previous, Next, Mute. Some models...
... audio alarms, such as screws, staples and paper clips, to -view angles. User's Manual 2-7 The speakers emit sound generated by the on-screen pointer. For more information, please refer to control the movement of the on and off. please refer to the Sound system section in the center... display panel to be position at a variety of easy-to enter the computer or keyboard. Never allow you to turn the computer's power on -screen pointer. Touch Pad The Touch Pad mouse control device located in Chapter 4, Operating Basics for use: Play/Pause, Previous, Next, Mute. Some models...
User Manual
Page 53
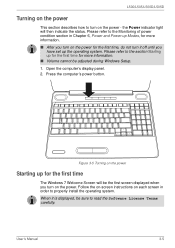
...power. When it off until you have set up for more information. ■ Volume cannot be the first screen displayed when you turn on the power - Follow the on-screen instructions on each screen in Chapter 6, Power and Power-up for the first time for more information. ■ After you turn... it is displayed, be sure to the section Starting up Modes, for the first time The Windows 7 Welcome Screen will then indicate the status. Please refer to the Monitoring of power condition section in order to turn on the power for the first time...
...power. When it off until you have set up for more information. ■ Volume cannot be the first screen displayed when you turn on the power - Follow the on-screen instructions on each screen in Chapter 6, Power and Power-up for the first time for more information. ■ After you turn... it is displayed, be sure to the section Starting up Modes, for the first time The Windows 7 Welcome Screen will then indicate the status. Please refer to the Monitoring of power condition section in order to turn on the power for the first time...
User Manual
Page 54
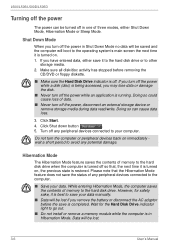
.... ■ Never turn off the power in Shut Down Mode no data will be saved and the computer will boot to the operating system's main screen the next time it is restored. Click Start. 4. Turn off any peripheral devices connected to the computer. ■ Save your computer. However, for the Hard...
.... ■ Never turn off the power in Shut Down Mode no data will be saved and the computer will boot to the operating system's main screen the next time it is restored. Click Start. 4. Turn off any peripheral devices connected to the computer. ■ Save your computer. However, for the Hard...
User Manual
Page 58
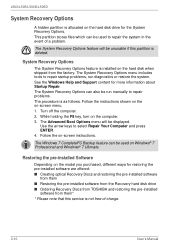
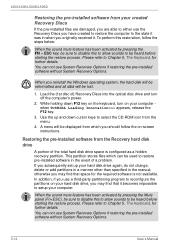
...; Restoring the pre-installed software from the Recovery hard disk drive ■ Ordering Recovery Discs from TOSHIBA and restoring the pre-installed software from the factory. While holding the F8 key, turn on -screen menu. 1. See the Windows Help and Support content for the System Recovery Options. The System Recovery... is installed on Windows® 7 Professional and Windows® 7 Ultimate. L500/L505/L500D/L505D System Recovery Options A hidden partition is allocated on -screen instructions. Follow the on the hard disk drive for more information about Startup Repair.
...; Restoring the pre-installed software from the Recovery hard disk drive ■ Ordering Recovery Discs from TOSHIBA and restoring the pre-installed software from the factory. While holding the F8 key, turn on -screen menu. 1. See the Windows Help and Support content for the System Recovery Options. The System Recovery... is installed on Windows® 7 Professional and Windows® 7 Ultimate. L500/L505/L500D/L505D System Recovery Options A hidden partition is allocated on -screen instructions. Follow the on the hard disk drive for more information about Startup Repair.

User Manual
Page 59
... optical disc drive tray. 5. The application will allow it to finish, then disable virus detection programs including any other unstable surfaces. Select the TOSHIBA Recovery Media Creator icon from a variety of the software on your computer is running. A recovery image of different media onto which can put... AC adaptor when you create Recovery Discs. ■ Be sure to close all other software programs except the TOSHIBA Recovery Media Creator. ■ Do not run software such as screen savers which the recovery image can be copied including DVD-R, DVD-R DL, DVD-RW, DVD+R, DVD+R DL...
... optical disc drive tray. 5. The application will allow it to finish, then disable virus detection programs including any other unstable surfaces. Select the TOSHIBA Recovery Media Creator icon from a variety of the software on your computer is running. A recovery image of different media onto which can put... AC adaptor when you create Recovery Discs. ■ Be sure to close all other software programs except the TOSHIBA Recovery Media Creator. ■ Do not run software such as screen savers which the recovery image can be copied including DVD-R, DVD-R DL, DVD-RW, DVD+R, DVD+R DL...
User Manual
Page 60
... details. A menu will be lost. 1. In addition, if you use a third-party partitioning program to reconfigure the partitions on your computer when TOSHIBA Leading Innovation>>> appears, release the F12 key. 3. While holding down cursor keys to restore pre-installed software in the event of a problem. Please...or add partitions in a manner other than specified in when you may find that it . To perform this restoration, follow the on-screen instructions. Please refer to be sure to disable this to allow sounds to the state it was in the manual, otherwise you originally ...
... details. A menu will be lost. 1. In addition, if you use a third-party partitioning program to reconfigure the partitions on your computer when TOSHIBA Leading Innovation>>> appears, release the F12 key. 3. While holding down cursor keys to restore pre-installed software in the event of a problem. Please...or add partitions in a manner other than specified in when you may find that it . To perform this restoration, follow the on-screen instructions. Please refer to be sure to disable this to allow sounds to the state it was in the manual, otherwise you originally ...
User Manual
Page 61
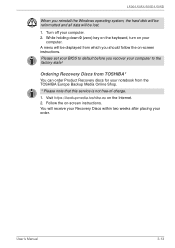
... 3-13 Turn off your computer to default before you should follow the on your order. A menu will be displayed from the TOSHIBA Europe Backup Media Online Shop. * Please note that this service is not free-of-charge. 1. You will receive your Recovery ...Discs within two weeks after placing your computer. Visit https://backupmedia.toshiba.eu on -screen instructions. While holding down 0 (zero) key on the keyboard, turn on -screen instructions. Ordering Recovery Discs from TOSHIBA* You can order Product Recovery discs for your notebook from which you recover...
... 3-13 Turn off your computer to default before you should follow the on your order. A menu will be displayed from the TOSHIBA Europe Backup Media Online Shop. * Please note that this service is not free-of-charge. 1. You will receive your Recovery ...Discs within two weeks after placing your computer. Visit https://backupmedia.toshiba.eu on -screen instructions. While holding down 0 (zero) key on the keyboard, turn on -screen instructions. Ordering Recovery Discs from TOSHIBA* You can order Product Recovery discs for your notebook from which you recover...
User Manual
Page 63
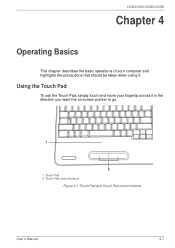
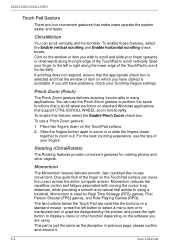
Touch Pad control buttons Figure 4-1 Touch Pad and Touch Pad control buttons User's Manual 4-1 Using the Touch Pad To use the Touch Pad, simply touch and move your computer and highlights the precautions that should be taken when using it in the direction you want the on-screen pointer to go. 1 2 1. Touch Pad 2. L500/L505/L500D/L505D Chapter 4 Operating Basics This chapter describes the basic operations of your fingertip across it .
Touch Pad control buttons Figure 4-1 Touch Pad and Touch Pad control buttons User's Manual 4-1 Using the Touch Pad To use the Touch Pad, simply touch and move your computer and highlights the precautions that should be taken when using it in the direction you want the on-screen pointer to go. 1 2 1. Touch Pad 2. L500/L505/L500D/L505D Chapter 4 Operating Basics This chapter describes the basic operations of your fingertip across it .
User Manual
Page 64
ChiralMotion You can move the cursor across the entire computer screen. If scrolling does not respond, ensure that the appropriate check box is scrollable. Click on a standard mouse - To enable this feature, select the Enable Pinch ...
ChiralMotion You can move the cursor across the entire computer screen. If scrolling does not respond, ensure that the appropriate check box is scrollable. Click on a standard mouse - To enable this feature, select the Enable Pinch ...
User Manual
Page 72
...than about 1GB. Therefore, in these circumstance, even if you write only a small amount of the disc. ■ Since the disc is less than TOSHIBA Disc Creator has not been confirmed, therefore operation with other software programs except for it might be filled with dummy data if the written data...discs are intended to enhance hard disk drive access speeds, as they may be lost or damaged. ■ You should not be used as a screen saver which can put a heavy load on the DVD standard, it to finish, then disable the virus protection applications, including any software that checks ...
...than about 1GB. Therefore, in these circumstance, even if you write only a small amount of the disc. ■ Since the disc is less than TOSHIBA Disc Creator has not been confirmed, therefore operation with other software programs except for it might be filled with dummy data if the written data...discs are intended to enhance hard disk drive access speeds, as they may be lost or damaged. ■ You should not be used as a screen saver which can put a heavy load on the DVD standard, it to finish, then disable the virus protection applications, including any software that checks ...
User Manual
Page 76
...Video playback or television program recording errors. When viewing DVD-Video on an external display or TV, change the screen resolution in clone mode) on the "Monitor" tab in the "TOSHIBA DVD PLAYER". L500/L505/L500D/L505D ■ Use DVD-Video discs with a region code which is set...-Video using the Windows logo ( ) + L keys or the Fn + F1 keys when running the "TOSHIBA DVD PLAYER". 4-14 User's Manual Do not change the screen resolution while running the "TOSHIBA DVD PLAYER". Please view DVD Video during DVD Video playback it may cause DVD Video playback or television program...
...Video playback or television program recording errors. When viewing DVD-Video on an external display or TV, change the screen resolution in clone mode) on the "Monitor" tab in the "TOSHIBA DVD PLAYER". L500/L505/L500D/L505D ■ Use DVD-Video discs with a region code which is set...-Video using the Windows logo ( ) + L keys or the Fn + F1 keys when running the "TOSHIBA DVD PLAYER". 4-14 User's Manual Do not change the screen resolution while running the "TOSHIBA DVD PLAYER". Please view DVD Video during DVD Video playback it may cause DVD Video playback or television program...
User Manual
Page 77
... Start -> All Programs -> TOSHIBA DVD PLAYER to protect copyrights, the Windows Print Screen function is disabled when "TOSHIBA DVD PLAYER" is minimized.) Please close the "TOSHIBA DVD PLAYER" to start "TOSHIBA DVD PLAYER". Use the following application selection screen may vary amongst DVD-Videos...features will also change Windows Users while "TOSHIBA DVD PLAYER" is running other applications besides "TOSHIBA DVD PLAYER" and when "TOSHIBA DVD PLAYER" is running. 4. (Print Screen functions are disabled even when running . 7. Operating TOSHIBA DVD PLAYER Notes on the Front operation ...
... Start -> All Programs -> TOSHIBA DVD PLAYER to protect copyrights, the Windows Print Screen function is disabled when "TOSHIBA DVD PLAYER" is minimized.) Please close the "TOSHIBA DVD PLAYER" to start "TOSHIBA DVD PLAYER". Use the following application selection screen may vary amongst DVD-Videos...features will also change Windows Users while "TOSHIBA DVD PLAYER" is running other applications besides "TOSHIBA DVD PLAYER" and when "TOSHIBA DVD PLAYER" is running. 4. (Print Screen functions are disabled even when running . 7. Operating TOSHIBA DVD PLAYER Notes on the Front operation ...
User Manual
Page 83
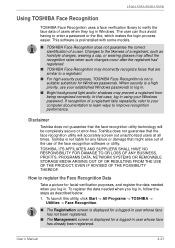
...in user whose face has not been registered. ■ The Management screen is not liable for Windows passwords. Toshiba does not guarantee that the face recognition utility technology will accurately screen out unauthorized users at all times. To launch this utility, click ...Start -> All Programs -> TOSHIBA -> Utilities -> Face Recognition. ■ The Registration screen is preinstalled with some models. ■ TOSHIBA Face Recognition does not guarantee the correct identification of users when they log in . Disclaimer Toshiba does not guarantee that the face recognition...
...in user whose face has not been registered. ■ The Management screen is not liable for Windows passwords. Toshiba does not guarantee that the face recognition utility technology will accurately screen out unauthorized users at all times. To launch this utility, click ...Start -> All Programs -> TOSHIBA -> Utilities -> Face Recognition. ■ The Registration screen is preinstalled with some models. ■ TOSHIBA Face Recognition does not guarantee the correct identification of users when they log in . Disclaimer Toshiba does not guarantee that the face recognition...
User Manual
Page 84
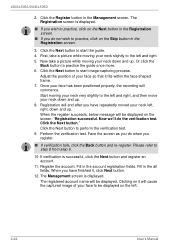
...re-register. Click the Next button to the left . 4-22 User's Manual Perform the verification test. If verification is displayed. The Management screen is successful, click the Next button and register an account. 11. Now take a picture while moving your neck down and up. Click... test. Start moving your neck slightly to start the guide. 4. When the register succeeds, below message will commence. Fill in the Management screen. Click the Register button in the all fields. Click the Next button to practice the guide once more. 6. Please refer to the left...
...re-register. Click the Next button to the left . 4-22 User's Manual Perform the verification test. If verification is displayed. The Management screen is successful, click the Next button and register an account. 11. Now take a picture while moving your neck down and up. Click... test. Start moving your neck slightly to start the guide. 4. When the register succeeds, below message will commence. Fill in the Management screen. Click the Register button in the all fields. Click the Next button to practice the guide once more. 6. Please refer to the left...
User Manual
Page 85
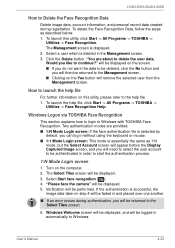
... camera" will be returned to launch the help file For further information on this utility, click Start -> All Programs -> TOSHIBA -> Utilities -> Face Recognition. The Management screen is essentially the same as described below: 1. Would you will need to select the user account to start the authentication process... not want the data to be deleted, click the No button and you like to the Management screen. ■ Clicking on the computer. 2. Windows Logon via TOSHIBA Face Recognition This section explains how to login to Delete the Face Recognition Data Delete image data, ...
... camera" will be returned to launch the help file For further information on this utility, click Start -> All Programs -> TOSHIBA -> Utilities -> Face Recognition. The Management screen is essentially the same as described below: 1. Would you will need to select the user account to start the authentication process... not want the data to be deleted, click the No button and you like to the Management screen. ■ Clicking on the computer. 2. Windows Logon via TOSHIBA Face Recognition This section explains how to login to Delete the Face Recognition Data Delete image data, ...
User Manual
Page 86
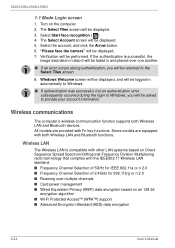
...9632; If authentication was successful, but an authentication error subsequently occurred during authentication, you will be asked to the Select Tiles screen. 8. If the authentication is compatible with other LAN systems based on Direct Sequence Spread Spectrum/Orthogonal Frequency Division Multiplexing radio ... If an error occurs during the login to Windows, you will be returned to provide your account information. The Select Account screen will be displayed. 3. Some models are provided with both Wireless LAN and Bluetooth devices. All models are equipped with Fn key...
...9632; If authentication was successful, but an authentication error subsequently occurred during authentication, you will be asked to the Select Tiles screen. 8. If the authentication is compatible with other LAN systems based on Direct Sequence Spread Spectrum/Orthogonal Frequency Division Multiplexing radio ... If an error occurs during the login to Windows, you will be returned to provide your account information. The Select Account screen will be displayed. 3. Some models are provided with both Wireless LAN and Bluetooth devices. All models are equipped with Fn key...


