User Guide
Page 29
... for the first time 53 Opening the display panel 53 Your computer's features and specifications ....54 Turning on the power 54 Adding memory 55 Installing a memory module 56 Removing a memory module 61 Hard Drive Recovery Utilities 63 Creating Recovery CDs/DVDs 63 Hard Disk Drive Recovery using the recovery partition 65 Hard Disk...
... for the first time 53 Opening the display panel 53 Your computer's features and specifications ....54 Turning on the power 54 Adding memory 55 Installing a memory module 56 Removing a memory module 61 Hard Drive Recovery Utilities 63 Creating Recovery CDs/DVDs 63 Hard Disk Drive Recovery using the recovery partition 65 Hard Disk...
User Guide
Page 33
... Using an instant password 162 Setting a user password 162 Disabling a user password 162 PC Diagnostic Tool 163 TOSHIBA Power Saver 164 SD Memory Card Format 166 Mouse Utility 167 TOSHIBA Mobile Extension 168 TOSHIBA Zooming Utility 170 TOSHIBA Button Controls 171 CD/DVD Drive Acoustic Silencer 172 Fn-esse 173 Starting Fn-esse 174 Using...
... Using an instant password 162 Setting a user password 162 Disabling a user password 162 PC Diagnostic Tool 163 TOSHIBA Power Saver 164 SD Memory Card Format 166 Mouse Utility 167 TOSHIBA Mobile Extension 168 TOSHIBA Zooming Utility 170 TOSHIBA Button Controls 171 CD/DVD Drive Acoustic Silencer 172 Fn-esse 173 Starting Fn-esse 174 Using...

User Guide
Page 34
34 Contents Resolving hardware conflicts on your own .....189 Fixing a problem with Device Manager ...........190 Memory problems 192 Power and the batteries 193 Keyboard problems 195 Display problems 196 Disk drive problems 198 DVD-ROM or multi-...computing habits 214 Data and system configuration backup in Windows XP 215 If you need further assistance 221 Before you contact Toshiba 221 Contacting Toshiba 222 Other Toshiba Internet Web sites 223 Toshiba's worldwide offices 223 Appendix A: Hot Keys 225 Volume Mute 225 Password security 226 Without a password 226 With a password...
34 Contents Resolving hardware conflicts on your own .....189 Fixing a problem with Device Manager ...........190 Memory problems 192 Power and the batteries 193 Keyboard problems 195 Display problems 196 Disk drive problems 198 DVD-ROM or multi-...computing habits 214 Data and system configuration backup in Windows XP 215 If you need further assistance 221 Before you contact Toshiba 221 Contacting Toshiba 222 Other Toshiba Internet Web sites 223 Toshiba's worldwide offices 223 Appendix A: Hot Keys 225 Volume Mute 225 Password security 226 Without a password 226 With a password...

User Guide
Page 45
... cooling fan may have a CPU cooling fan that can block the air intake, preventing air from reaching the CPU. See "Connecting to , a mouse, keyboard, printer, memory, and PC cards. These components include, but are not limited to a power source" on page 48. Getting Started Setting up your software" on page 46...
... cooling fan may have a CPU cooling fan that can block the air intake, preventing air from reaching the CPU. See "Connecting to , a mouse, keyboard, printer, memory, and PC cards. These components include, but are not limited to a power source" on page 48. Getting Started Setting up your software" on page 46...

User Guide
Page 47
...on page 46. Adding optional external devices NOTE Before adding external devices or memory, Toshiba recommends setting up your software" on your desktop or by going to the Toshiba web site at register.toshiba.com. Once you must be completed by a Local Area Network. Customer... Product Registration will not diminish Customer rights under this limited Warranty. Getting Started Registering your computer with Toshiba Product registration is strongly recommended, and allows Toshiba to send the Customer periodic updates, announcements, and special offers applicable to the product.
...on page 46. Adding optional external devices NOTE Before adding external devices or memory, Toshiba recommends setting up your software" on your desktop or by going to the Toshiba web site at register.toshiba.com. Once you must be completed by a Local Area Network. Customer... Product Registration will not diminish Customer rights under this limited Warranty. Getting Started Registering your computer with Toshiba Product registration is strongly recommended, and allows Toshiba to send the Customer periodic updates, announcements, and special offers applicable to the product.

User Guide
Page 48
...electrical outlet, or to charge the computer's battery. Always grasp the plug directly. Failure to follow this instruction may want to: ❖ Add more memory (see "Adding memory" on page 55) ❖ Connect a mouse (see "Using a mouse" on page 80) ❖ Connect a full-size keyboard (see "...optional external diskette drive" on page 82) ❖ Install PC Cards (see "Inserting and removing PC Cards" on page 148) ❖ Install flash memory cards (see "Using the Bridge Media Adapter Slot (optional)" on a power cord/cable to remove a plug from a socket. 48 Getting Started Connecting ...
...electrical outlet, or to charge the computer's battery. Always grasp the plug directly. Failure to follow this instruction may want to: ❖ Add more memory (see "Adding memory" on page 55) ❖ Connect a mouse (see "Using a mouse" on page 80) ❖ Connect a full-size keyboard (see "...optional external diskette drive" on page 82) ❖ Install PC Cards (see "Inserting and removing PC Cards" on page 148) ❖ Install flash memory cards (see "Using the Bridge Media Adapter Slot (optional)" on a power cord/cable to remove a plug from a socket. 48 Getting Started Connecting ...

User Guide
Page 55
... or visit accessories.toshiba.com. Getting Started Adding memory 55 3 Press and hold the power button in until the operating system has loaded completely. Sample turning on the system indicator panel glow green-about one second. Adding memory HINT: To purchase additional memory modules, see the... accessories information packaged with enough memory to increase the computer's memory if you turn on the computer for the first time, do not turn ...
... or visit accessories.toshiba.com. Getting Started Adding memory 55 3 Press and hold the power button in until the operating system has loaded completely. Sample turning on the system indicator panel glow green-about one second. Adding memory HINT: To purchase additional memory modules, see the... accessories information packaged with enough memory to increase the computer's memory if you turn on the computer for the first time, do not turn ...

User Guide
Page 56
... accessed by removing and replacing the memory module in that is accessible on page 46. If you install or remove a memory module, turn off the computer using the Start menu. NOTE Before adding external devices or memory, Toshiba recommends setting up your software" on... the bottom of your computer, and memory capacity can be upgraded by a Toshiba authorized service provider. To avoid damaging the computer's screws, use a standard Phillips...
... accessed by removing and replacing the memory module in that is accessible on page 46. If you install or remove a memory module, turn off the computer using the Start menu. NOTE Before adding external devices or memory, Toshiba recommends setting up your software" on... the bottom of your computer, and memory capacity can be upgraded by a Toshiba authorized service provider. To avoid damaging the computer's screws, use a standard Phillips...

User Guide
Page 57
...on removing the battery, see "Changing the main battery" on page 123. 5 Close the display panel and turn the computer upside down . Memory module slot cover Sample locating the memory module slot cover The Shut Down window appears. 2 Click Shut down to the computer, including the AC adapter. 4 Remove the battery. The... operating system turns off the computer. 3 Unplug and remove any cables connected to locate the memory module slot cover. Getting Started Adding memory 57 If the computer is on, click Start, Shut Down.
...on removing the battery, see "Changing the main battery" on page 123. 5 Close the display panel and turn the computer upside down . Memory module slot cover Sample locating the memory module slot cover The Shut Down window appears. 2 Click Shut down to the computer, including the AC adapter. 4 Remove the battery. The... operating system turns off the computer. 3 Unplug and remove any cables connected to locate the memory module slot cover. Getting Started Adding memory 57 If the computer is on, click Start, Shut Down.

User Guide
Page 58
... handle the module, touch a grounded metal surface to touch its pin connector on the side you can damage the memory module. 58 Getting Started Adding memory 6 Using a standard Phillips No. 1 screwdriver, unscrew the screw that you insert into the computer. Sample unscrewing the... memory module slot cover 7 Remove the memory slot cover. 8 Place the screw and the cover in a safe place so that secures the memory module slot cover....
... handle the module, touch a grounded metal surface to touch its pin connector on the side you can damage the memory module. 58 Getting Started Adding memory 6 Using a standard Phillips No. 1 screwdriver, unscrew the screw that you insert into the computer. Sample unscrewing the... memory module slot cover 7 Remove the memory slot cover. 8 Place the screw and the cover in a safe place so that secures the memory module slot cover....

User Guide
Page 59
...the gold connector bar faces the slot, at a slight angle to the socket. Sample inserting the memory module into the slot 11 Hold the memory module by its antistatic packaging. clip clip Sample inserting the memory module into the socket on the underside of the computer. Getting Started Adding... memory 59 9 Remove the new memory module from its edges so that the module is inserted completely into the socket and lined up squarely with ...
...the gold connector bar faces the slot, at a slight angle to the socket. Sample inserting the memory module into the slot 11 Hold the memory module by its antistatic packaging. clip clip Sample inserting the memory module into the socket on the underside of the computer. Getting Started Adding... memory 59 9 Remove the new memory module from its edges so that the module is inserted completely into the socket and lined up squarely with ...

User Guide
Page 60
.... For information on inserting the battery, see "Changing the main battery" on either side of the memory module snap into place when the memory module is properly inserted. 14 Replace the memory module slot cover and tighten the screw. 15 Re-insert the battery. 60 Getting Started Adding... memory Sample aligning the memory module in place. The memory module should be completely inserted into place. clip clip Sample pressing down on the memory module connector until the clips snap into the socket and level when ...
.... For information on inserting the battery, see "Changing the main battery" on either side of the memory module snap into place when the memory module is properly inserted. 14 Replace the memory module slot cover and tighten the screw. 15 Re-insert the battery. 60 Getting Started Adding... memory Sample aligning the memory module in place. The memory module should be completely inserted into place. clip clip Sample pressing down on the memory module connector until the clips snap into the socket and level when ...

User Guide
Page 61
... slot cover. You can verify that the computer has recognized it on page 62. Do not remove the memory module while the computer is in "Checking total memory" on , perform the following message appears when you turn on the power: Warning: Resume Failure Press Any Key To Continue If the ... damage the computer and the device. The computer could hang up when you turn the power on . Do not try to remove a memory module: 1 Complete steps 1-8 in memory will not be lost. In either of the above cases, the Standby configuration will be saved. TECHNICAL NOTE: You must have at least...
... slot cover. You can verify that the computer has recognized it on page 62. Do not remove the memory module while the computer is in "Checking total memory" on , perform the following message appears when you turn on the power: Warning: Resume Failure Press Any Key To Continue If the ... damage the computer and the device. The computer could hang up when you turn the power on . Do not try to remove a memory module: 1 Complete steps 1-8 in memory will not be lost. In either of the above cases, the Standby configuration will be saved. TECHNICAL NOTE: You must have at least...

User Guide
Page 62
...NOTE: You must have at least one memory module installed for the computer to a 45 degree angle and slide it . The memory module pops up slightly. 3 Gently lift the memory module to work. Checking total memory When you add or remove a memory module, you can check that the ...computer has recognized the change. Sample removing the memory module 4 Replace the memory module slot cover and tighten the ...
...NOTE: You must have at least one memory module installed for the computer to a 45 degree angle and slide it . The memory module pops up slightly. 3 Gently lift the memory module to work. Checking total memory When you add or remove a memory module, you can check that the ...computer has recognized the change. Sample removing the memory module 4 Replace the memory module slot cover and tighten the ...

User Guide
Page 63
..." on your system configuration, you may be able to copy the Hard Drive Recovery Utilities to the factory-set default without the risk of "Adding memory" starting on page 55. Hard Drive Recovery Utilities Your computer has been configured with your hard disk drive recovery partition without the HDD Recovery partition...
..." on your system configuration, you may be able to copy the Hard Drive Recovery Utilities to the factory-set default without the risk of "Adding memory" starting on page 55. Hard Drive Recovery Utilities Your computer has been configured with your hard disk drive recovery partition without the HDD Recovery partition...
User Guide
Page 76
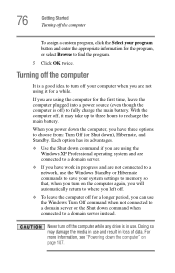
... computer, you have work in progress and are not connected to a network, use the Windows Standby or Hibernate commands to save your system settings to memory so that, when you turn off your computer when you are not using the computer for the first time, leave the computer plugged into a power...
... computer, you have work in progress and are not connected to a network, use the Windows Standby or Hibernate commands to save your system settings to memory so that, when you turn off your computer when you are not using the computer for the first time, leave the computer plugged into a power...

User Guide
Page 86
Your work " on page 96 for details. 86 See "Saving your work stays in the computer's temporary memory until you must restart your computer to the hard disk at preset intervals. If the network you are working, you last saved. HINT: Some programs ...
Your work " on page 96 for details. 86 See "Saving your work stays in the computer's temporary memory until you must restart your computer to the hard disk at preset intervals. If the network you are working, you last saved. HINT: Some programs ...

User Guide
Page 110
...from the hard disk rather than restoring it again by opening the display panel. Restoring information from the hard disk takes longer than from memory. Using Hibernation Hibernation mode shuts the computer down the computer by closing the display panel, you were using. If you shut down completely...of the system is held on /off computer. ❖ Restarting from Hibernation uses a little more time and battery power to start it from memory. ❖ When starting up again, the computer returns to the mode in which you left it. Since Hibernation mode does not require power ...
...from the hard disk rather than restoring it again by opening the display panel. Restoring information from the hard disk takes longer than from memory. Using Hibernation Hibernation mode shuts the computer down the computer by closing the display panel, you were using. If you shut down completely...of the system is held on /off computer. ❖ Restarting from Hibernation uses a little more time and battery power to start it from memory. ❖ When starting up again, the computer returns to the mode in which you left it. Since Hibernation mode does not require power ...

User Guide
Page 112
... screen you can start up the computer from where you left it again by opening the display panel. The computer returns to eight hours in memory so that, when you restart the computer, you were using. Using Standby The Standby command puts the computer into a powersaving mode.
... screen you can start up the computer from where you left it again by opening the display panel. The computer returns to eight hours in memory so that, when you restart the computer, you were using. Using Standby The Standby command puts the computer into a powersaving mode.

User Guide
Page 118
... battery should begin charging after a few minutes. The RTC battery may vary by computer model. The RTC battery powers the System Time Clock and BIOS memory used to store your computer was shipped, resulting in the following error message during startup: BAD RTC BATTERY BAD CHECKSUM (CMOS) CHECK SYSTEM NOTE The...
... battery should begin charging after a few minutes. The RTC battery may vary by computer model. The RTC battery powers the System Time Clock and BIOS memory used to store your computer was shipped, resulting in the following error message during startup: BAD RTC BATTERY BAD CHECKSUM (CMOS) CHECK SYSTEM NOTE The...


