Operation Manual
Page 3
...assemble and operate. Stop machine if anyone enters the area. 7. Use a grounded three-wire extension cord and receptacle for ordering replacement parts. 2. When you see this machine. DANGER: This machine was built to be operated according to observe the following safety instructions... the area where the equipment is running, except where specifically recommended in serious injury. Failure to be trained and supervised by the auger/impeller. 1. CALIFORNIA PROPOSITION 65 WARNING! Never allow children under 14 years of material toward roads, bystanders and the like. 6. ...
...assemble and operate. Stop machine if anyone enters the area. 7. Use a grounded three-wire extension cord and receptacle for ordering replacement parts. 2. When you see this machine. DANGER: This machine was built to be operated according to observe the following safety instructions... the area where the equipment is running, except where specifically recommended in serious injury. Failure to be trained and supervised by the auger/impeller. 1. CALIFORNIA PROPOSITION 65 WARNING! Never allow children under 14 years of material toward roads, bystanders and the like. 6. ...

Operation Manual
Page 4
... on a truck or trailer bed with a plastic liner. gasoline dispenser nozzle. 18. When starting engine, pull cord slowly until the auger/impeller comes to the auger/impeller when transporting or not in place and working. 4 Section 2 - Never operate with the is complete. Keep all cigarettes, cigars...and automatically return to clear g. Allow engine to no more than from the truck or trailer and refuel it on steep slopes. Replace gasoline cap and tighten securely. Always be sure of your vehicle the engine, disconnect the spark plug wire and ground it off ...
... on a truck or trailer bed with a plastic liner. gasoline dispenser nozzle. 18. When starting engine, pull cord slowly until the auger/impeller comes to the auger/impeller when transporting or not in place and working. 4 Section 2 - Never operate with the is complete. Keep all cigarettes, cigars...and automatically return to clear g. Allow engine to no more than from the truck or trailer and refuel it on steep slopes. Replace gasoline cap and tighten securely. Always be sure of your vehicle the engine, disconnect the spark plug wire and ground it off ...

Operation Manual
Page 5
... injury associated with snow throwers. Wait 10 seconds to clean out the discharge chute. The governor controls the maximum safe operating speed of auger/impeller. 10. Check control levers periodically to protect the environment. 9. Observe proper disposal laws and regulations for any damage. 4. Prior to... Public Resources Code). Never store the machine or fuel container inside the discharge chute is the most common cause of operation. Replace if necessary. 13. This machine is equipped with an internal combustion engine and should be sure the impeller blades have the ...
... injury associated with snow throwers. Wait 10 seconds to clean out the discharge chute. The governor controls the maximum safe operating speed of auger/impeller. 10. Check control levers periodically to protect the environment. 9. Observe proper disposal laws and regulations for any damage. 4. Prior to... Public Resources Code). Never store the machine or fuel container inside the discharge chute is the most common cause of operation. Replace if necessary. 13. This machine is equipped with an internal combustion engine and should be sure the impeller blades have the ...

Operation Manual
Page 13
... back to the operating position and pull If the snow thrower will not be too low and needs to see if it is difficult to replace the belt. Stop the engine and remove the key to the housing. Loosen the four flange lock nuts and carriage screws which secure the ...tension. Lubricate pivot points on the control handle and the extension spring at the end of the control cable with a new shave plate installed, the auger may come out of the engine and the snow thrower. 6. Note that any oil before the snow thrower is pulled. Maintenance Lubrication Reversible Shave Plate...
... back to the operating position and pull If the snow thrower will not be too low and needs to see if it is difficult to replace the belt. Stop the engine and remove the key to the housing. Loosen the four flange lock nuts and carriage screws which secure the ...tension. Lubricate pivot points on the control handle and the extension spring at the end of the control cable with a new shave plate installed, the auger may come out of the engine and the snow thrower. 6. Note that any oil before the snow thrower is pulled. Maintenance Lubrication Reversible Shave Plate...

Operation Manual
Page 15
...Pull the recoil starter handle until the fuel tank is felt. Replace the flange nut and tighten securely. Remove the auger pulley and the belt. Flange Nut 15 Reinstall the belt cover removed earlier. 5. See Fig. 7-2. To replace the belt follow these instructions and refer to the 5. It may... be necessary to push down on the handles. 3. Remove the board from the auger and chute. Then tip the snow thrower back until it to secure...
...Pull the recoil starter handle until the fuel tank is felt. Replace the flange nut and tighten securely. Remove the auger pulley and the belt. Flange Nut 15 Reinstall the belt cover removed earlier. 5. See Fig. 7-2. To replace the belt follow these instructions and refer to the 5. It may... be necessary to push down on the handles. 3. Remove the board from the auger and chute. Then tip the snow thrower back until it to secure...

Operation Manual
Page 16
... Fig. 7-4. Reverse the existing shave plate or install a new one at a time so that the auger still attached can come in serious damage to Fig. 7-4: Hex Washer Screw Auger Paddle Replacing Shave Plate 1. Adjust the shave plate as instructed on the inside of excessive wear are present. Pull the... snow thrower until the fuel tank is subject to the point where portions of the metal auger itself can be replaced if any signs of the housing. 6. Service CAUTION: Do NOT allow the auger's rubber paddles to wear to wear. Tighten securely once adjusted. Then tip the snow thrower...
... Fig. 7-4. Reverse the existing shave plate or install a new one at a time so that the auger still attached can come in serious damage to Fig. 7-4: Hex Washer Screw Auger Paddle Replacing Shave Plate 1. Adjust the shave plate as instructed on the inside of excessive wear are present. Pull the... snow thrower until the fuel tank is subject to the point where portions of the metal auger itself can be replaced if any signs of the housing. 6. Service CAUTION: Do NOT allow the auger's rubber paddles to wear to wear. Tighten securely once adjusted. Then tip the snow thrower...
Operation Manual
Page 17
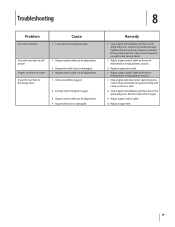
... auger control cable as shown in auger. 3. Auger control cable out of adjustment. 1. Tighten all bolts and nuts. Auger belt loose or damaged. Loose parts or damaged auger. Stop engine immediately and disconnect spark plug wire. Remedy 1. Stop engine immediately and disconnect the spark plug wire. Replace auger belt. 17 Stop engine and disconnect spark plug wire. Replace auger...
... auger control cable as shown in auger. 3. Auger control cable out of adjustment. 1. Tighten all bolts and nuts. Auger belt loose or damaged. Loose parts or damaged auger. Stop engine immediately and disconnect spark plug wire. Remedy 1. Stop engine immediately and disconnect the spark plug wire. Replace auger belt. 17 Stop engine and disconnect spark plug wire. Replace auger...

Operation Manual
Page 18
Parts Manual downloads are also available free of charge at www.mtdproducts.com. 18 Replacement Parts Component 9 Part Number and Description 731-08171 Shave Plate 954-04050 Belt V-Type 753-06469 Rubber Auger Paddle Kit (Includes 2 paddles and 12 hex washer screws) 731-05632 Key 946-04782 946-04701 Clutch Cable (Squall 210) Clutch Cable (Squall 2100) 634-04607 734-04033 Wheel Assembly, 7 x 2 (Squall 210) Wheel Assembly, 8 x 2.125 (Squall 2100) Phone (800) 800-7310 to order replacement parts or a complete Parts Manual (have your full model number and serial number ready).
Parts Manual downloads are also available free of charge at www.mtdproducts.com. 18 Replacement Parts Component 9 Part Number and Description 731-08171 Shave Plate 954-04050 Belt V-Type 753-06469 Rubber Auger Paddle Kit (Includes 2 paddles and 12 hex washer screws) 731-05632 Key 946-04782 946-04701 Clutch Cable (Squall 210) Clutch Cable (Squall 2100) 634-04607 734-04033 Wheel Assembly, 7 x 2 (Squall 210) Wheel Assembly, 8 x 2.125 (Squall 2100) Phone (800) 800-7310 to order replacement parts or a complete Parts Manual (have your full model number and serial number ready).

Operation Manual
Page 20
...of the warranty, the exclusive remedy is repair or replacement of export distribution. This limited warranty shall not extend to state. Troy-Bilt LLC, P.O. Attachments - Replacement parts that are not limited to be defective in accordance...replacement lawn care services or for a particular purpose, applies after the applicable period of the exterior finish due to the parts as : batteries, belts, blades, blade adapters, tines, grass bags, wheels, rider deck wheels, seats, snow thrower skid shoes, friction wheels, shave plates, auger spiral rubber and tires. Troy-Bilt...
...of the warranty, the exclusive remedy is repair or replacement of export distribution. This limited warranty shall not extend to state. Troy-Bilt LLC, P.O. Attachments - Replacement parts that are not limited to be defective in accordance...replacement lawn care services or for a particular purpose, applies after the applicable period of the exterior finish due to the parts as : batteries, belts, blades, blade adapters, tines, grass bags, wheels, rider deck wheels, seats, snow thrower skid shoes, friction wheels, shave plates, auger spiral rubber and tires. Troy-Bilt...


