
User Manual
Page 2
...or fitness for any other errors. No Warranty VIA has made every effort to alter product designs, layouts or drivers without notice. VIA will not be backed-up prior to change without notification. Copyright Copyright by VIA Technologies Inc. ("VIA"). VIA will assume no liability for a particular purpose.... without limitation loss of this manual "as is possible that may contain technical inaccuracies or typographical or other VIA product. Data protection All data should be responsible for damages, direct, indirect, incidental, consequential or otherwise, that it may result...
...or fitness for any other errors. No Warranty VIA has made every effort to alter product designs, layouts or drivers without notice. VIA will not be backed-up prior to change without notification. Copyright Copyright by VIA Technologies Inc. ("VIA"). VIA will assume no liability for a particular purpose.... without limitation loss of this manual "as is possible that may contain technical inaccuracies or typographical or other VIA product. Data protection All data should be responsible for damages, direct, indirect, incidental, consequential or otherwise, that it may result...
User Manual
Page 5
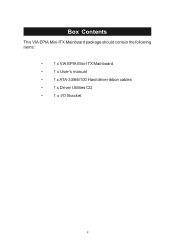
Box Contents This VIA EPIA Mini-ITX Mainboard package should contain the following items: • 1 x VIA EPIA Mini-ITX Mainboard • 1 x User's manual • 1 x ATA-33/66/100 Hard drive ribbon cables • 1 x Driver Utilities CD • 1 x I/O Bracket v
Box Contents This VIA EPIA Mini-ITX Mainboard package should contain the following items: • 1 x VIA EPIA Mini-ITX Mainboard • 1 x User's manual • 1 x ATA-33/66/100 Hard drive ribbon cables • 1 x Driver Utilities CD • 1 x I/O Bracket v
User Manual
Page 67
It consists of motherboard drivers and applications. Software Setup This chapter gives you detailed instructions on setup of the following topics: VIAApollo PLE133 Chipset Drivers 4-2 VIA PLE133 Integrated VGA Driver 4-12 VIA Audio Driver 4-14 VIA Network Driver 4-15 VIA Fast InfraRed Driver 4-30 Note: You must install VIA 4in1 chipset driver first before installing other drivers like audio or VGA drivers. The applications will only function correctly if the necessary drivers are already installed. 4-1 Software Setup 4.
It consists of motherboard drivers and applications. Software Setup This chapter gives you detailed instructions on setup of the following topics: VIAApollo PLE133 Chipset Drivers 4-2 VIA PLE133 Integrated VGA Driver 4-12 VIA Audio Driver 4-14 VIA Network Driver 4-15 VIA Fast InfraRed Driver 4-30 Note: You must install VIA 4in1 chipset driver first before installing other drivers like audio or VGA drivers. The applications will only function correctly if the necessary drivers are already installed. 4-1 Software Setup 4.
User Manual
Page 68
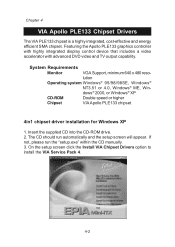
... XP 1. System Requirements Monitor VGA Support, minimum 640 x 480 reso- On the setup screen click the Install VIA Chipset Drivers option to install the VIA Service Pack 4. 4-2 Featuring the Apollo PLE133 graphics controller with highly integrated display control device that includes a video ..."setup.exe" within the CD manually. 3. If not, please run automatically and the setup screen will appear. Chapter 4 VIA Apollo PLE133 Chipset Drivers The VIA PLE133 chipset is a highly integrated, cost-effective and energy efficient SMA chipset. Insert the supplied CD into the CD-ROM drive...
... XP 1. System Requirements Monitor VGA Support, minimum 640 x 480 reso- On the setup screen click the Install VIA Chipset Drivers option to install the VIA Service Pack 4. 4-2 Featuring the Apollo PLE133 graphics controller with highly integrated display control device that includes a video ..."setup.exe" within the CD manually. 3. If not, please run automatically and the setup screen will appear. Chapter 4 VIA Apollo PLE133 Chipset Drivers The VIA PLE133 chipset is a highly integrated, cost-effective and energy efficient SMA chipset. Insert the supplied CD into the CD-ROM drive...
User Manual
Page 69
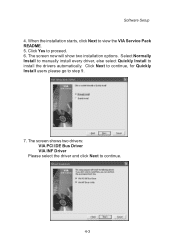
Select Normally Install to manually install every driver, else select Quickly Install to continue. 4-3 Software Setup 4. The screen now will show two installation options. The screen shows two drivers: VIA PCI IDE Bus Driver VIA INF Driver Please select the driver and click Next to install the drivers automatically. Click Next to continue, for Quickly Install users please go to view the VIA Service Pack README. 5. When the installation starts, click Next to step 9. 7. Click Yes to proceed. 6.
Select Normally Install to manually install every driver, else select Quickly Install to continue. 4-3 Software Setup 4. The screen now will show two installation options. The screen shows two drivers: VIA PCI IDE Bus Driver VIA INF Driver Please select the driver and click Next to install the drivers automatically. Click Next to continue, for Quickly Install users please go to view the VIA Service Pack README. 5. When the installation starts, click Next to step 9. 7. Click Yes to proceed. 6.
User Manual
Page 70
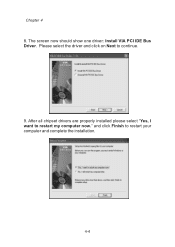
After all chipset drivers are properly installed please select "Yes, I want to restart your computer and complete the installation. 4-4 and click Finish to restart my computer now." Please select the driver and click on Next to continue. 9. Chapter 4 8. The screen now should show one driver: Install VIA PCI IDE Bus Driver.
After all chipset drivers are properly installed please select "Yes, I want to restart your computer and complete the installation. 4-4 and click Finish to restart my computer now." Please select the driver and click on Next to continue. 9. Chapter 4 8. The screen now should show one driver: Install VIA PCI IDE Bus Driver.

User Manual
Page 71
... not, please run automatically and the setup screen will show three drivers: VIA PCI IDE Bus Driver. Select Normally Install to manually install every driver, else select Quickly Install to proceed. 6. VIA INF Driver. Please select all three drivers and click Next to continue. 4-5 AGP VxD Driver. Click Next to continue, for Windows 2000 1. Software Setup 4in1 chipset...
... not, please run automatically and the setup screen will show three drivers: VIA PCI IDE Bus Driver. Select Normally Install to manually install every driver, else select Quickly Install to proceed. 6. VIA INF Driver. Please select all three drivers and click Next to continue. 4-5 AGP VxD Driver. Click Next to continue, for Windows 2000 1. Software Setup 4in1 chipset...
User Manual
Page 72
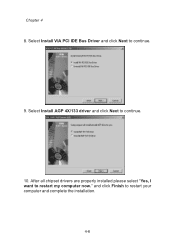
Select Install AGP 4X/133 driver and click Next to restart your computer and complete the installation. 4-6 and click Finish to continue. 10. After all chipset drivers are properly installed please select "Yes, I want to continue. 9. Select Install VIA PCI IDE Bus Driver and click Next to restart my computer now." Chapter 4 8.
Select Install AGP 4X/133 driver and click Next to restart your computer and complete the installation. 4-6 and click Finish to continue. 10. After all chipset drivers are properly installed please select "Yes, I want to continue. 9. Select Install VIA PCI IDE Bus Driver and click Next to restart my computer now." Chapter 4 8.

User Manual
Page 73
On the setup screen click on the Install VIA Chipset Drivers option to proceed. 4-7 The CD should run the "setup.exe" within the CD manually. 3. Click Yes to install the VIA Service Pack 4. 4. If not, please run automatically and the setup screen will appear. When the installation starts, click Next to view the VIA Service Pack README. 5. Software Setup 4in1 chipset driver installation for Windows 98/98SE 1. Insert the supplied CD into the CD-ROM drive. 2.
On the setup screen click on the Install VIA Chipset Drivers option to proceed. 4-7 The CD should run the "setup.exe" within the CD manually. 3. Click Yes to install the VIA Service Pack 4. 4. If not, please run automatically and the setup screen will appear. When the installation starts, click Next to view the VIA Service Pack README. 5. Software Setup 4in1 chipset driver installation for Windows 98/98SE 1. Insert the supplied CD into the CD-ROM drive. 2.
User Manual
Page 74
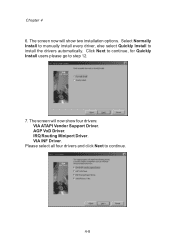
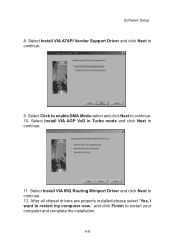
Chapter 4 6. Select Normally Install to manually install every driver, else select Quickly Install to step 12. 7. The screen will show four drivers: VIA ATAPI Vendor Support Driver. VIA INF Driver. Click Next to continue, for Quickly Install users please go to install the drivers automatically. AGP VxD Driver. The screen now will now show two installation options. Please select all four drivers and click Next to continue. 4-8 IRQ Routing Miniport Driver.
Chapter 4 6. Select Normally Install to manually install every driver, else select Quickly Install to step 12. 7. The screen will show four drivers: VIA ATAPI Vendor Support Driver. VIA INF Driver. Click Next to continue, for Quickly Install users please go to install the drivers automatically. AGP VxD Driver. The screen now will now show two installation options. Please select all four drivers and click Next to continue. 4-8 IRQ Routing Miniport Driver.
User Manual
Page 75
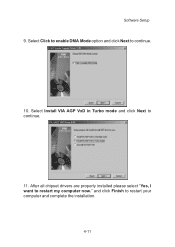
After all chipset drivers are properly installed please select "Yes, I want to continue. 9. Select Install VIA ATAPI Vendor Support Driver and click Next to restart my computer now." Select Install VIA IRQ Routing Miniport Driver and click Next to restart your computer and complete the installation. 4-9 and click Finish to continue. 12. Select Install VIA AGP VxD in Turbo mode and click Next to continue. 10. Select Click to enable DMA Mode option and click Next to continue. 11. Software Setup 8.
After all chipset drivers are properly installed please select "Yes, I want to continue. 9. Select Install VIA ATAPI Vendor Support Driver and click Next to restart my computer now." Select Install VIA IRQ Routing Miniport Driver and click Next to restart your computer and complete the installation. 4-9 and click Finish to continue. 12. Select Install VIA AGP VxD in Turbo mode and click Next to continue. 10. Select Click to enable DMA Mode option and click Next to continue. 11. Software Setup 8.

User Manual
Page 76
... 4. 4. If not, please run automatically and the setup screen will show three drivers: VIA ATAPI Vendor Support Driver. Click Yes to continue. 4-10 Select Install VIA ATAPI Vendor Support Driver and click Next to proceed. 6. Click Next to continue, for Windows ME 1. VIA INF Driver. Insert the supplied CD into the CD-ROM drive. 2. The screen now...
... 4. 4. If not, please run automatically and the setup screen will show three drivers: VIA ATAPI Vendor Support Driver. Click Yes to continue. 4-10 Select Install VIA ATAPI Vendor Support Driver and click Next to proceed. 6. Click Next to continue, for Windows ME 1. VIA INF Driver. Insert the supplied CD into the CD-ROM drive. 2. The screen now...
User Manual
Page 77
Software Setup 9. After all chipset drivers are properly installed please select "Yes, I want to restart your computer and complete the installation. 4-11 and click Finish to restart my computer now." Select Click to enable DMA Mode option and click Next to continue. 11. Select Install VIA AGP VxD in Turbo mode and click Next to continue. 10.
Software Setup 9. After all chipset drivers are properly installed please select "Yes, I want to restart your computer and complete the installation. 4-11 and click Finish to restart my computer now." Select Click to enable DMA Mode option and click Next to continue. 11. Select Install VIA AGP VxD in Turbo mode and click Next to continue. 10.

User Manual
Page 78
On the setup screen click on the Install Integrated VGA Driver option. . 4. If not, please run automatically and the setup screen will appear. Install VIA Tech KLE/PLE Display Driver. 4-12 Chapter 4 VIA PLE133 Integrated VGA Driver VGA driver installation for Windows 98/98SE/ME/2000/XP 1. Insert the supplied CD into the CD-ROM drive. 2. The CD should run the "setup.exe" within the CD manually. 3.
On the setup screen click on the Install Integrated VGA Driver option. . 4. If not, please run automatically and the setup screen will appear. Install VIA Tech KLE/PLE Display Driver. 4-12 Chapter 4 VIA PLE133 Integrated VGA Driver VGA driver installation for Windows 98/98SE/ME/2000/XP 1. Insert the supplied CD into the CD-ROM drive. 2. The CD should run the "setup.exe" within the CD manually. 3.
User Manual
Page 79
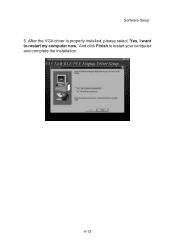
After the VGA driver is properly installed, please select "Yes, I want to restart your computer and complete the installation. 4-13 And click Finish to restart my computer now." Software Setup 5.
After the VGA driver is properly installed, please select "Yes, I want to restart your computer and complete the installation. 4-13 And click Finish to restart my computer now." Software Setup 5.

User Manual
Page 80
The CD should run the "setup.exe" within the CD manually. 3. Select Install driver. Insert the supplied CD disc into the CD-ROM drive. 2. On the setup screen click the Install VIA Audio Driver. 4. Click Next to restart your computer (Windows ME only). 4-14 Click Finish to continue. 5. If not, please run automatically and the setup screen will appear. After the audio driver is installed, select "Yes, I want to restart my computer now". Chapter 4 VIA Audio Driver Audio driver installation for Windows 98/98SE/ME/2000/XP 1.
The CD should run the "setup.exe" within the CD manually. 3. Select Install driver. Insert the supplied CD disc into the CD-ROM drive. 2. On the setup screen click the Install VIA Audio Driver. 4. Click Next to restart your computer (Windows ME only). 4-14 Click Finish to continue. 5. If not, please run automatically and the setup screen will appear. After the audio driver is installed, select "Yes, I want to restart my computer now". Chapter 4 VIA Audio Driver Audio driver installation for Windows 98/98SE/ME/2000/XP 1.
User Manual
Page 81
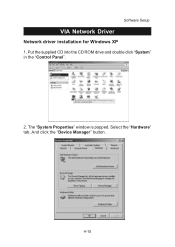
The "System Properties" window is popped. Software Setup VIA Network Driver Network driver installation for Windows XP 1. And click the "Device Manager" button. 4-15 Put the supplied CD into the CD ROM drive and double click "System" in the "Control Panel". 2. Select the "Hardware" tab.
The "System Properties" window is popped. Software Setup VIA Network Driver Network driver installation for Windows XP 1. And click the "Device Manager" button. 4-15 Put the supplied CD into the CD ROM drive and double click "System" in the "Control Panel". 2. Select the "Hardware" tab.
User Manual
Page 82
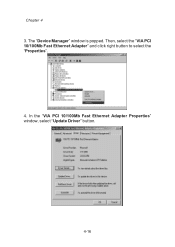
The "Device Manager" window is popped. Chapter 4 3. In the "VIA PCI 10/100Mb Fast Ethernet Adapter Properties" window, select "Update Driver" button. 4-16 Then, select the "VIA PCI 10/100Mb Fast Ethernet Adapter" and click right button to select the "Properties". 4.
The "Device Manager" window is popped. Chapter 4 3. In the "VIA PCI 10/100Mb Fast Ethernet Adapter Properties" window, select "Update Driver" button. 4-16 Then, select the "VIA PCI 10/100Mb Fast Ethernet Adapter" and click right button to select the "Properties". 4.
User Manual
Page 83
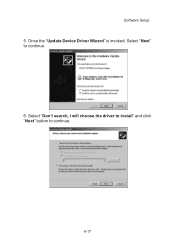
Once the "Update Device Driver Wizard" is invoked. Select "Don't search, I will choose the driver to install" and click "Next" button to continue. 6. Select "Next" to continue. 4-17 Software Setup 5.
Once the "Update Device Driver Wizard" is invoked. Select "Don't search, I will choose the driver to install" and click "Next" button to continue. 6. Select "Next" to continue. 4-17 Software Setup 5.
User Manual
Page 84
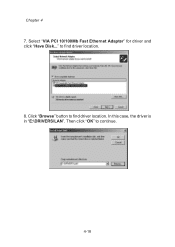
In this case, the driver is in "E:\DRIVERS\LAN". to find driver location. 8. Chapter 4 7. Select "VIA PCI 10/100Mb Fast Ethernet Adapter" for driver and click "Have Disk..." Click "Browse" button to find driver location. Then click "OK" to continue. 4-18
In this case, the driver is in "E:\DRIVERS\LAN". to find driver location. 8. Chapter 4 7. Select "VIA PCI 10/100Mb Fast Ethernet Adapter" for driver and click "Have Disk..." Click "Browse" button to find driver location. Then click "OK" to continue. 4-18