
M2W User Guide English
Page 1
Model No. M2W LED Smart Theater User Guide IMPORTANT: Please read this User Guide will describe your limited coverage from ViewSonic® Corporation, which is also found on installing and using the Regional selection box in a safe manner, as well as registering your product in the upper right corner of our website. Warranty information contained in this User Guide to obtain important information on our web site at http://www.viewsonic.com in English, or in specific languages using your product for future service. VS19063 P/N: M2W
Model No. M2W LED Smart Theater User Guide IMPORTANT: Please read this User Guide will describe your limited coverage from ViewSonic® Corporation, which is also found on installing and using the Regional selection box in a safe manner, as well as registering your product in the upper right corner of our website. Warranty information contained in this User Guide to obtain important information on our web site at http://www.viewsonic.com in English, or in specific languages using your product for future service. VS19063 P/N: M2W

M2W User Guide English
Page 3
... heated air and odor from the power supply and call your eyes. • Do not block the projection lens with live parts. • When moving the projector, be careful not to disassemble the projector. The intense light beam may damage your local service center to fail. Do not place anything . • Do not place any heavy objects on the projector or connection cables...
... heated air and odor from the power supply and call your eyes. • Do not block the projection lens with live parts. • When moving the projector, be careful not to disassemble the projector. The intense light beam may damage your local service center to fail. Do not place anything . • Do not place any heavy objects on the projector or connection cables...

M2W User Guide English
Page 10
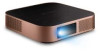
.../NTFS) 8 DC IN Power input socket 1 Supports HDCP 1.4/HDMI 1.4 2 iPhone/iPad users will need to 256 GB - Connection Ports 7 1.5 A 12 3 4 5 68 Number 1 Port Power Button Description Power On/Off 2 LED Indicator LED Indicator 3 Audio Out (3.5 mm jack) 3.5 mm jack audio output socket 4 HDMI¹ HDMI port2 5 USB-C³ USB-C port 6 USB A (5V/1.5A Out) USB 2.0 Type A port (USB Reader - To avoid compatibility issues, please use Apple authorized accessories. 3 Please use the supplied USB-C cable, and ensure your USB-C device can support video transmission as well...
.../NTFS) 8 DC IN Power input socket 1 Supports HDCP 1.4/HDMI 1.4 2 iPhone/iPad users will need to 256 GB - Connection Ports 7 1.5 A 12 3 4 5 68 Number 1 Port Power Button Description Power On/Off 2 LED Indicator LED Indicator 3 Audio Out (3.5 mm jack) 3.5 mm jack audio output socket 4 HDMI¹ HDMI port2 5 USB-C³ USB-C port 6 USB A (5V/1.5A Out) USB 2.0 Type A port (USB Reader - To avoid compatibility issues, please use Apple authorized accessories. 3 Please use the supplied USB-C cable, and ensure your USB-C device can support video transmission as well...

M2W User Guide English
Page 15
... following specifications: • Screw type: M4 x 8 • Maximum Screw Length: 8 mm 3. CAUTION: • Avoid installing the projector near a heat source. • Keep at least a 10 cm (3.9 in.) gap between the ceiling and the bottom of the projector. To access the ceiling mount points, remove the three (3) foot pads on the thickness of the mounting plate. 1. To ensure the most secure installation, please use the correct screw size. Screw size...
... following specifications: • Screw type: M4 x 8 • Maximum Screw Length: 8 mm 3. CAUTION: • Avoid installing the projector near a heat source. • Keep at least a 10 cm (3.9 in.) gap between the ceiling and the bottom of the projector. To access the ceiling mount points, remove the three (3) foot pads on the thickness of the mounting plate. 1. To ensure the most secure installation, please use the correct screw size. Screw size...

M2W User Guide English
Page 16
... power adapter. 2. Connect the power cord plug to a power outlet. 3 2 1 NOTE: When installing the projector, incorporate a readily accessible disconnect device in the fixed wiring, or connect the power plug to connect the projector with other equipment. Connect the power adapter to the DC IN jack at the rear of the projector, use the disconnect device to switch off the power supply, or disconnect the power plug. 16 If a fault should occur during operation...
... power adapter. 2. Connect the power cord plug to a power outlet. 3 2 1 NOTE: When installing the projector, incorporate a readily accessible disconnect device in the fixed wiring, or connect the power plug to connect the projector with other equipment. Connect the power adapter to the DC IN jack at the rear of the projector, use the disconnect device to switch off the power supply, or disconnect the power plug. 16 If a fault should occur during operation...

M2W User Guide English
Page 20
... "Screen Mirroring" icon. 3. Download and install the "Google Home" application and open it . Pull-to the same network as the projector. NOTE: Some Android devices support direct "Casting". Access the drop down control menu. 2. NOTE: Ensure your device is connected to -refresh the app and wait for users to directly cast your device does, go to the Casting feature and choose "ViewSonic PJ...
... "Screen Mirroring" icon. 3. Download and install the "Google Home" application and open it . Pull-to the same network as the projector. NOTE: Some Android devices support direct "Casting". Access the drop down control menu. 2. NOTE: Ensure your device is connected to -refresh the app and wait for users to directly cast your device does, go to the Casting feature and choose "ViewSonic PJ...

M2W User Guide English
Page 27
When the Finish screen appears, this indicates the projector is activated for the first time activation. First Time Activation If the projector is ready to use the Left/Right buttons to focus the projection manually. 27 NOTE: You may use . Using the Projector Starting Up the Projector 1. NOTE: The Status LED will turn on the remote control. Ensure the projector's power cord is properly connected to select your Projection Orientation, Preferred Language, Network Settings, and Source Input. Auto Focus The automatic focus adjustment will run...
When the Finish screen appears, this indicates the projector is activated for the first time activation. First Time Activation If the projector is ready to use the Left/Right buttons to focus the projection manually. 27 NOTE: You may use . Using the Projector Starting Up the Projector 1. NOTE: The Status LED will turn on the remote control. Ensure the projector's power cord is properly connected to select your Projection Orientation, Preferred Language, Network Settings, and Source Input. Auto Focus The automatic focus adjustment will run...

M2W User Guide English
Page 35
... Designed for viewing sports in a darker image. Best for colorful movies, video clips from digital cameras, or DVs through the PC input. Movie Appropriate for low-light environments. NOTE: Only supports HDMI/USB-C signal input. This mode is suitable for environments where extra-high brightness is preset with several predefined picture modes so that you have previously adjusted the Brightness setting to suit your selected input and viewing environment. 35...
... Designed for viewing sports in a darker image. Best for colorful movies, video clips from digital cameras, or DVs through the PC input. Movie Appropriate for low-light environments. NOTE: Only supports HDMI/USB-C signal input. This mode is suitable for environments where extra-high brightness is preset with several predefined picture modes so that you have previously adjusted the Brightness setting to suit your selected input and viewing environment. 35...

M2W User Guide English
Page 36
... a video picture. Lower settings produce less saturated colors; in fact, a setting of that color will be overpowering and unrealistic. The lower the value, the more greenish the picture becomes. If the saturation is too high, that color in a sharper picture; a low value softens the picture. makes the image appear the most bluish-white. • User Color: Adjust red, green, and blue values as desired. Reflects the relationship between input source and picture...
... a video picture. Lower settings produce less saturated colors; in fact, a setting of that color will be overpowering and unrealistic. The lower the value, the more greenish the picture becomes. If the saturation is too high, that color in a sharper picture; a low value softens the picture. makes the image appear the most bluish-white. • User Color: Adjust red, green, and blue values as desired. Reflects the relationship between input source and picture...

M2W User Guide English
Page 48
Data on screen if a video, music, or photo file are selected to be opened. Picture Back Play Next Zoom in Zoom out Video Back Rewind Play Pause Fast Forward Music Back Play Pause Next Shuffle Rotate (left) Next Repeat All Rotate (right) Repeat One Play List Information Tips for Using USB When using USB for reading and/or storage please keep in mind the following: 1. Only...
Data on screen if a video, music, or photo file are selected to be opened. Picture Back Play Next Zoom in Zoom out Video Back Rewind Play Pause Fast Forward Music Back Play Pause Next Shuffle Rotate (left) Next Repeat All Rotate (right) Repeat One Play List Information Tips for Using USB When using USB for reading and/or storage please keep in mind the following: 1. Only...

M2W User Guide English
Page 60
...; If Auto Focus is Enabled, the projector will automatically focus the screen image when turned on the remote control. Manual Focus Adjust the focus with Manual Focus. • In the event Auto Focus fails two times successively, Manual Focus adjustment will be the most accurate when the projected screen size is 50-75''. Focus Auto Focus Choose from the following: • Enable: Automatically adjust the focus instantly without the remote control. • Disable: Manually adjust the focus. Menu Description Adjust the focus of the projector is adjusted. • Auto Focus will...
...; If Auto Focus is Enabled, the projector will automatically focus the screen image when turned on the remote control. Manual Focus Adjust the focus with Manual Focus. • In the event Auto Focus fails two times successively, Manual Focus adjustment will be the most accurate when the projected screen size is 50-75''. Focus Auto Focus Choose from the following: • Enable: Automatically adjust the focus instantly without the remote control. • Disable: Manually adjust the focus. Menu Description Adjust the focus of the projector is adjusted. • Auto Focus will...

M2W User Guide English
Page 63
Firmware Update Online 1. Go to the Internet. 2. Firmware Upgrade Users can update the firmware Online, or by USB, and check the version number. NOTE: Do not unplug the power cord, USB, or disconnect from the Internet during the upgrading process. 1. To enter the menu, select: Home > Setting > Firmware Upgrade. Before entering the Firmware Upgrade menu, ensure the projector is connected to : Home > Setting > Firmware Upgrade > Software Update Online. 63
Firmware Update Online 1. Go to the Internet. 2. Firmware Upgrade Users can update the firmware Online, or by USB, and check the version number. NOTE: Do not unplug the power cord, USB, or disconnect from the Internet during the upgrading process. 1. To enter the menu, select: Home > Setting > Firmware Upgrade. Before entering the Firmware Upgrade menu, ensure the projector is connected to : Home > Setting > Firmware Upgrade > Software Update Online. 63

M2W User Guide English
Page 70
NOTE: Language, High Altitude Mode, Projector Position, Network Settings, All installed Apps in the Apps Center, Add App, Bluetooth, Zoom, H/V Keystone, 4 Corner Adjustment, and Light Source Hours will remain unchanged. 70 NOTE: Light Source Hours will remain unchanged. Menu Reset Settings Reset to Factory Default Description Reset the Settings to default. Factory reset.
NOTE: Language, High Altitude Mode, Projector Position, Network Settings, All installed Apps in the Apps Center, Add App, Bluetooth, Zoom, H/V Keystone, 4 Corner Adjustment, and Light Source Hours will remain unchanged. 70 NOTE: Light Source Hours will remain unchanged. Menu Reset Settings Reset to Factory Default Description Reset the Settings to default. Factory reset.

M2W User Guide English
Page 78
Main Menu Setting Screen Mirroring Add App Add App Add App Add App Sub-menu Advanced Settings Information Menu Option High Altitude Mode Disable Enable Reset Settings Reset Cancel Reset to Factory Default Reset Cancel Light Source Hours System Version Memory Information Wi-Fi Mac Address Serial Number 78
Main Menu Setting Screen Mirroring Add App Add App Add App Add App Sub-menu Advanced Settings Information Menu Option High Altitude Mode Disable Enable Reset Settings Reset Cancel Reset to Factory Default Reset Cancel Light Source Hours System Version Memory Information Wi-Fi Mac Address Serial Number 78

M2W User Guide English
Page 79
... (Typical) Off < 0.5W (Standby) ¹ Please use the power adapter from ViewSonic® or an authorized source only. 79 Appendix Specifications Item Category Specifications Type 0.45" WXGA, LED Projector Display Size Throw Distance Lens Optical Zoom Lamp Type Light Source Life (Normal) 24"~150" 0.50m - 3.87 m (100"@2.58 m) F=1.7, f=11.96 mm Fixed RGB LED up to 256 GB, SDXC) Input USB Type-C 1 (5V/0.5A) USB Type-A 1 USB 2.0 Reader Wi-Fi Input 1 (5G) Audio-Out (3.5 mm) 1 Output Bluetooth...
... (Typical) Off < 0.5W (Standby) ¹ Please use the power adapter from ViewSonic® or an authorized source only. 79 Appendix Specifications Item Category Specifications Type 0.45" WXGA, LED Projector Display Size Throw Distance Lens Optical Zoom Lamp Type Light Source Life (Normal) 24"~150" 0.50m - 3.87 m (100"@2.58 m) F=1.7, f=11.96 mm Fixed RGB LED up to 256 GB, SDXC) Input USB Type-C 1 (5V/0.5A) USB Type-A 1 USB 2.0 Reader Wi-Fi Input 1 (5G) Audio-Out (3.5 mm) 1 Output Bluetooth...

M2W User Guide English
Page 84
... between the remote control and projector; LED Indicators Light Status and Description Red Green Power Stand-by mode (5 sec.) (< 0.5W) Power On 84 Problem or Issue The projector does not turn on the projector again. • If the above does not work, try another power outlet or another electrical device with the remote control will help correctly focus the projection lens. • Ensure the projector and screen are no picture The image is blurred The remote control does not work Possible...
... between the remote control and projector; LED Indicators Light Status and Description Red Green Power Stand-by mode (5 sec.) (< 0.5W) Power On 84 Problem or Issue The projector does not turn on the projector again. • If the above does not work, try another power outlet or another electrical device with the remote control will help correctly focus the projection lens. • Ensure the projector and screen are no picture The image is blurred The remote control does not work Possible...

M2W User Guide English
Page 85
..., mild non-abrasive detergent onto a clean, soft, lint-free cloth, then wipe the surface. Maintenance General Precautions • Make sure the projector is turned off and the power cable is unplugged from the power outlet. • Never remove any ammonia or alcohol-based cleaners. 85 CAUTION: Never use of any parts from the projector. Disclaimer • ViewSonic® does not recommend the...
..., mild non-abrasive detergent onto a clean, soft, lint-free cloth, then wipe the surface. Maintenance General Precautions • Make sure the projector is turned off and the power cable is unplugged from the power outlet. • Never remove any ammonia or alcohol-based cleaners. 85 CAUTION: Never use of any parts from the projector. Disclaimer • ViewSonic® does not recommend the...

M2W User Guide English
Page 94
... failure to follow instructions supplied with the product. ͫ Operation outside of product specifications. ͫ Operation of the nearest ViewSonic® service center, contact ViewSonic®. To obtain warranted service, you will need to a product defect. 3. Damage, deterioration, or malfunction resulting from: ͫ Accident, misuse, neglect, fire, water, lightning, or other cause which the serial number has been defaced, modified, or removed. 2. Removal, installation, and set...
... failure to follow instructions supplied with the product. ͫ Operation outside of product specifications. ͫ Operation of the nearest ViewSonic® service center, contact ViewSonic®. To obtain warranted service, you will need to a product defect. 3. Damage, deterioration, or malfunction resulting from: ͫ Accident, misuse, neglect, fire, water, lightning, or other cause which the serial number has been defaced, modified, or removed. 2. Removal, installation, and set...

M2W User Guide English
Page 96
...'s installed lamp only. Removal, installation, insurance, and set-up service charges. 96 Who the warranty protects: This warranty is effective: 3 years for all parts excluding the lamp, 3 years for labor, 1 year for an extended period of supplies or parts not meeting ViewSonic®'s specifications. ͫ Normal wear and tear. ͫ Any other cause which results when a static image is displayed on which the serial number has...
...'s installed lamp only. Removal, installation, insurance, and set-up service charges. 96 Who the warranty protects: This warranty is effective: 3 years for all parts excluding the lamp, 3 years for labor, 1 year for an extended period of supplies or parts not meeting ViewSonic®'s specifications. ͫ Normal wear and tear. ͫ Any other cause which results when a static image is displayed on which the serial number has...

M2W User Guide Francais
Page 79
Menu principal Setting Screen Mirroring Add App Add App Add App Add App Sous-menu Advanced Settings Information Option de menu High Altitude Mode Disable Enable Reset Settings Reset Cancel Reset to Factory Default Reset Cancel Light Source Hours System Version Memory Information Wi-Fi Mac Address Serial Number 79
Menu principal Setting Screen Mirroring Add App Add App Add App Add App Sous-menu Advanced Settings Information Option de menu High Altitude Mode Disable Enable Reset Settings Reset Cancel Reset to Factory Default Reset Cancel Light Source Hours System Version Memory Information Wi-Fi Mac Address Serial Number 79


