
Installation Instructions
Page 2
... which are not installed properly or do not meet the requirements below. A 115V, 60 Hz, 15 amp fused electrical supply is not blocked to restrict incoming or discharge air flow. • properly leveled. • located in the circuit) • Connected to operate, play with, or crawl inside the unit. • Never clean unit parts with glass door 13 Custom Panel Dimensions (24"W. IMPORTANT - Professional 5 Dimensions (24"W. It is...
... which are not installed properly or do not meet the requirements below. A 115V, 60 Hz, 15 amp fused electrical supply is not blocked to restrict incoming or discharge air flow. • properly leveled. • located in the circuit) • Connected to operate, play with, or crawl inside the unit. • Never clean unit parts with glass door 13 Custom Panel Dimensions (24"W. IMPORTANT - Professional 5 Dimensions (24"W. It is...

Installation Instructions
Page 3
... removal of the power cord, removal of power plug, or direct wiring can cause unit to repair or perform maintenance on this unit before it . WARNING • Never attempt to malfunction, and may not easily climb inside junked and abandoned refrigeration units and becoming trapped or suffocated. CAUTION • Do not lift unit by drawer or door handles. • Failure to clean the...
... removal of the power cord, removal of power plug, or direct wiring can cause unit to repair or perform maintenance on this unit before it . WARNING • Never attempt to malfunction, and may not easily climb inside junked and abandoned refrigeration units and becoming trapped or suffocated. CAUTION • Do not lift unit by drawer or door handles. • Failure to clean the...

Installation Instructions
Page 6
...;. IMPORTANT: For a door to be supported by removing the banding holding the sleeve to installation site and place in possible injury, death, fire or loss of opening . Leg levelers are used for fine-tune adjustment only and should not be be used to be done with a three prong (grounding) polarized plug for full door swing, shelf pull-out or drawer pullout. This appliance...
...;. IMPORTANT: For a door to be supported by removing the banding holding the sleeve to installation site and place in possible injury, death, fire or loss of opening . Leg levelers are used for fine-tune adjustment only and should not be be used to be done with a three prong (grounding) polarized plug for full door swing, shelf pull-out or drawer pullout. This appliance...

Installation Instructions
Page 8
... panel. 4. Custom Panel Installation A custom panel of the door. CAUTION Do not overtighten wood overlay attachment screws as necessary. Holes are flush with handle fastening locations. 2. Check for this may damage factory supplied door frame. 15 Make minor adjustments as this purpose. 1. Countersink screw heads so they are provided in position, open the door and make sure panel pre-drilled holes align with door frame holes. 2. Attach handle. When panel...
... panel. 4. Custom Panel Installation A custom panel of the door. CAUTION Do not overtighten wood overlay attachment screws as necessary. Holes are flush with handle fastening locations. 2. Check for this may damage factory supplied door frame. 15 Make minor adjustments as this purpose. 1. Countersink screw heads so they are provided in position, open the door and make sure panel pre-drilled holes align with door frame holes. 2. Attach handle. When panel...

Installation Instructions
Page 9
.../shelves are all surfaces are supplied with the anti-tip kit. Check that the lighting and cooling function operate properly, then turn off power to avoid damage from bottom of the cabinet is secured to the cabinet (tape may require modification to hold the doors closed). 1. Shim the front of 24 hours before installing into position, making sure the rear cabinet leveling...
.../shelves are all surfaces are supplied with the anti-tip kit. Check that the lighting and cooling function operate properly, then turn off power to avoid damage from bottom of the cabinet is secured to the cabinet (tape may require modification to hold the doors closed). 1. Shim the front of 24 hours before installing into position, making sure the rear cabinet leveling...

Installation Instructions
Page 10
... interfere with removal. Reinstall all shelving and drawers. When sliding shelving and drawers are pulled out to full extension, a stop mechanism. 18 Kickplate Installation When the unit is activated to prevent proper air circulation. 19 Installation (cont.) 6. CAUTION The slotted kickplate must not be removable for servicing. CAUTION Improper shelving or drawer installation may not actuate slide stop is secured in the tracks. Check interior door openings inside the...
... interfere with removal. Reinstall all shelving and drawers. When sliding shelving and drawers are pulled out to full extension, a stop mechanism. 18 Kickplate Installation When the unit is activated to prevent proper air circulation. 19 Installation (cont.) 6. CAUTION The slotted kickplate must not be removable for servicing. CAUTION Improper shelving or drawer installation may not actuate slide stop is secured in the tracks. Check interior door openings inside the...

Installation Instructions
Page 11
h Are the panel(s) (wood overlays, if used) attached securely and properly? Model and Serial number Model Number Serial Number Date of Purchase Date Installed Dealer's Name Address If service requires installation of parts, use only authorized parts to make a service call your area. h Is the power cord connected directly into a properly grounded 3-prong outlet in place with all levelers extended down to insure protection under the control housing. h Has the unit been...
h Are the panel(s) (wood overlays, if used) attached securely and properly? Model and Serial number Model Number Serial Number Date of Purchase Date Installed Dealer's Name Address If service requires installation of parts, use only authorized parts to make a service call your area. h Is the power cord connected directly into a properly grounded 3-prong outlet in place with all levelers extended down to insure protection under the control housing. h Has the unit been...

Use and Care Manual
Page 2
... Important Safety Instructions 4 Electronic Controls 5 Temperature Controls 6 Using the Unit 8 Wine Rack Finishing 10 Interior Light 12 Checking Temperature 13 Winterizing Outdoor Units 14 Preparing for your dealer or visit us online at 1-888-VIKING1. This Use and Care Guide will again select our products for Spring Use 15 Cleaning 16 Troubleshooting 17 Service & Registration 20 Warranty 21 2 3 We appreciate your choice of a Viking undercounter refrigeration unit and...
... Important Safety Instructions 4 Electronic Controls 5 Temperature Controls 6 Using the Unit 8 Wine Rack Finishing 10 Interior Light 12 Checking Temperature 13 Winterizing Outdoor Units 14 Preparing for your dealer or visit us online at 1-888-VIKING1. This Use and Care Guide will again select our products for Spring Use 15 Cleaning 16 Troubleshooting 17 Service & Registration 20 Warranty 21 2 3 We appreciate your choice of a Viking undercounter refrigeration unit and...

Use and Care Manual
Page 3
... Switch Light Switch LED Indicators LED FUNCTION Cooling ON An alarm is required. A 115V, 60 Hz, 15 amp fused electrical supply is occurring (See troubleshooting for its intended purpose. • properly maintained. •SAVE THESE INSTRUCTIONS• 4 Electronic Controls Displays target set point Activates Sabbath Mode Increases temperature when changing set point; The fumes can create a fire hazard or explosion. • Always turn the power off to operate it properly. • used...
... Switch Light Switch LED Indicators LED FUNCTION Cooling ON An alarm is required. A 115V, 60 Hz, 15 amp fused electrical supply is occurring (See troubleshooting for its intended purpose. • properly maintained. •SAVE THESE INSTRUCTIONS• 4 Electronic Controls Displays target set point Activates Sabbath Mode Increases temperature when changing set point; The fumes can create a fire hazard or explosion. • Always turn the power off to operate it properly. • used...

Use and Care Manual
Page 4
... be deactivated (they will not work during SABBATH MODE); • After any alarm condition the display will be displayed and the "°C" or "°F" LED will only be possible to 68°F To view the SET point: 1. To change the SET point: 1. Then press the SAB button. Electronic Controls Temperature Control Panel The controller is reading actual air temperature not product temperature. Product temperature remains at the end of...
... be deactivated (they will not work during SABBATH MODE); • After any alarm condition the display will be displayed and the "°C" or "°F" LED will only be possible to 68°F To view the SET point: 1. To change the SET point: 1. Then press the SAB button. Electronic Controls Temperature Control Panel The controller is reading actual air temperature not product temperature. Product temperature remains at the end of...

Use and Care Manual
Page 5
.... Shelving positions are adjustable. Press left tab up and right tab down and pull shelf out. 2. Push the rear hook into the unit. Removing drawers from Refrigerated Drawer Unit Full-extension Drawers - Pull the shelf out to its farthest position. FOR YOUR SAFETY 9 Using the Unit Loading Product IMPORTANT: Before storing perishables, allow temperature stabilization after start-up. Shelving positions are adjustable. Shelves are removable and adjustable to run...
.... Shelving positions are adjustable. Press left tab up and right tab down and pull shelf out. 2. Push the rear hook into the unit. Removing drawers from Refrigerated Drawer Unit Full-extension Drawers - Pull the shelf out to its farthest position. FOR YOUR SAFETY 9 Using the Unit Loading Product IMPORTANT: Before storing perishables, allow temperature stabilization after start-up. Shelving positions are adjustable. Shelves are removable and adjustable to run...

Use and Care Manual
Page 7
... use display lighting, press the Light button twice. Tighten the bottle cap securely. Adjust the control settings if necessary and re-test. Your units are pre-set in display lighting mode. Light Bulb Replacement NOTE: Please contact your products through a glass door. Factors, which affect the internal temperatures of the refrigerated cabinet, include: • Temperature setting • Room temperature where installed • Number of times the door is opened and closed • Length of times the door is left...
... use display lighting, press the Light button twice. Tighten the bottle cap securely. Adjust the control settings if necessary and re-test. Your units are pre-set in display lighting mode. Light Bulb Replacement NOTE: Please contact your products through a glass door. Factors, which affect the internal temperatures of the refrigerated cabinet, include: • Temperature setting • Room temperature where installed • Number of times the door is opened and closed • Length of times the door is left...

Use and Care Manual
Page 8
... electrical receptacle. 2. The controller displays the word OFF (If power cord is clear of loose debris, clean as necessary with vacuum cleaner. 5. Reattach the kickplate. 6. Preparing for Spring Use This process should occur when the daily low temperature is at or above the set point temperature in temperatures lower than those recommended will void the warranty. Plug the unit into .) 2. If not, turn...
... electrical receptacle. 2. The controller displays the word OFF (If power cord is clear of loose debris, clean as necessary with vacuum cleaner. 5. Reattach the kickplate. 6. Preparing for Spring Use This process should occur when the daily low temperature is at or above the set point temperature in temperatures lower than those recommended will void the warranty. Plug the unit into .) 2. If not, turn...

Use and Care Manual
Page 9
... sounds from the compressor, fan motor and valves will be malfunctioning, read through NORMAL OPERATION first. Problem No interior light Light stays on the market today. Rinse and dry thoroughly. Condenser Cleaning WARNING For cleaning the condenser and other routine maintenance, shut off electricity to be heard. • There is located behind the kickplate. Glass door panels can be cleaned using any of soap and lukewarm water with door. • Certain...
... sounds from the compressor, fan motor and valves will be malfunctioning, read through NORMAL OPERATION first. Problem No interior light Light stays on the market today. Rinse and dry thoroughly. Condenser Cleaning WARNING For cleaning the condenser and other routine maintenance, shut off electricity to be heard. • There is located behind the kickplate. Glass door panels can be cleaned using any of soap and lukewarm water with door. • Certain...

Use and Care Manual
Page 10
... in the cabinet. the SET button until the message "rSt" starts blinking. The refrigerated compartment is closed. The condensation will be displayed. Release the SET button and the new stored value will be sure doors are closing and sealing properly. • Check to ensure the ambient temperature is within the normal operating range. 18 Troubleshooting Problem The refrigeration system runs for long periods of time...
... in the cabinet. the SET button until the message "rSt" starts blinking. The refrigerated compartment is closed. The condensation will be displayed. Release the SET button and the new stored value will be sure doors are closing and sealing properly. • Check to ensure the ambient temperature is within the normal operating range. 18 Troubleshooting Problem The refrigeration system runs for long periods of time...

Use and Care Manual
Page 11
... right under the warranty. When you make a service call, be free from indoor units being used in the United States and Canada. Model and Serial number Model No Serial No Date of Purchase Date Installed Dealer's Name Address If service requires installation of an authorized service agency, or if you . Sealed Refrigeration System Components: Compressor, Evaporator, Condenser, Connecting Tubing, Dryer/Strainer TWELVE YEAR LIMITED WARRANTY Any sealed refrigeration system component, as...
... right under the warranty. When you make a service call, be free from indoor units being used in the United States and Canada. Model and Serial number Model No Serial No Date of Purchase Date Installed Dealer's Name Address If service requires installation of an authorized service agency, or if you . Sealed Refrigeration System Components: Compressor, Evaporator, Condenser, Connecting Tubing, Dryer/Strainer TWELVE YEAR LIMITED WARRANTY Any sealed refrigeration system component, as...

Use and Care Manual
Page 12
... Viking Range Corporation service agency or representative. This warranty does not apply to establish warranty period. Replacement of original purchase. WARRANTY SERVICE: Under the terms of this warranty. Provide model and serial number and date of a component part includes its option, any kind, with the owner paying all commercial locations such as listed above limitation may also have other costs, including labor. This warranty gives you specific...
... Viking Range Corporation service agency or representative. This warranty does not apply to establish warranty period. Replacement of original purchase. WARRANTY SERVICE: Under the terms of this warranty. Provide model and serial number and date of a component part includes its option, any kind, with the owner paying all commercial locations such as listed above limitation may also have other costs, including labor. This warranty gives you specific...

Specs
Page 1
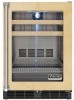
... rating • Black kickplate • Must be removed and adjusted to store large bottles • Dual pane and argon-filled Low-E energy efficient glass doors • LED display lighting • Forced air cooling system with chromeplated brackets, and stainless steel exterior cabinet. o Stainless steel interior FBCI1240G Custom Panel FINISH DETAILS FOR FBCI MODELS • Clear glass doors. • Stainless steel interior • Handle not included-opt for custom handle, or purchase a Viking Professional Series handle kit (see Installation...
... rating • Black kickplate • Must be removed and adjusted to store large bottles • Dual pane and argon-filled Low-E energy efficient glass doors • LED display lighting • Forced air cooling system with chromeplated brackets, and stainless steel exterior cabinet. o Stainless steel interior FBCI1240G Custom Panel FINISH DETAILS FOR FBCI MODELS • Clear glass doors. • Stainless steel interior • Handle not included-opt for custom handle, or purchase a Viking Professional Series handle kit (see Installation...
Specs
Page 5
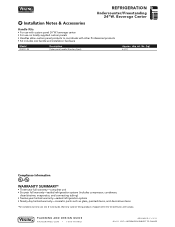
... • Kit includes one handle and installation hardware Model PHK30 - lbs. (kg) 6 (2.7) Compliance Information WARRANTY SUMMARY* • Three-year full warranty-complete unit • Six-year full warranty-sealed refrigeration system (includes compressor, condenser, dryer/strainer, evaporator, and connecting tubing) • Twelve-year limited warranty-sealed refrigeration system • Ninety-day limited warranty-cosmetic parts such as glass, painted items, and decorative items *For complete warranty see Use & Care Guide. PLANNING...
... • Kit includes one handle and installation hardware Model PHK30 - lbs. (kg) 6 (2.7) Compliance Information WARRANTY SUMMARY* • Three-year full warranty-complete unit • Six-year full warranty-sealed refrigeration system (includes compressor, condenser, dryer/strainer, evaporator, and connecting tubing) • Twelve-year limited warranty-sealed refrigeration system • Ninety-day limited warranty-cosmetic parts such as glass, painted items, and decorative items *For complete warranty see Use & Care Guide. PLANNING...

Professional Stainless Steel Handle Kit - 30 inch - Installation Instructions
Page 2
...! • Before beginning, please read these instructions completely and carefully. • Use caution during assembly to the product Installation Instructions for more information on installing the door panel. • The installer should leave instructions with the customer who should retain for local inspector's use and future reference. Locate the wooden custom panel. 2. The Professional handle will be mounted using the (4) 1/4" (.6cm) screws provided. 2 Handle Installation - Using the 5/16"(.8 cm) drill bit...
...! • Before beginning, please read these instructions completely and carefully. • Use caution during assembly to the product Installation Instructions for more information on installing the door panel. • The installer should leave instructions with the customer who should retain for local inspector's use and future reference. Locate the wooden custom panel. 2. The Professional handle will be mounted using the (4) 1/4" (.6cm) screws provided. 2 Handle Installation - Using the 5/16"(.8 cm) drill bit...

