
Specs
Page 1
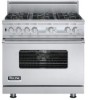
... • Heavy-duty broiler pan and tray with rack provide more roasting and broiling options • High performance cooking modes include Bake, Convection Bake, TruConvec™ convection cooking, Convection Roast, Hi, Medium, and Low Broil, Convection Broil and Meat Probe • Shipped standard with SureSpark™ Ignition System for details. COOKING Professional Custom Series Freestanding Dual Fuel Self-Clean 30"/36"W. Four-Burner Range VDSC536T-6B* 36"W. o Finish designates door front, lower front panel, and side panels. See Installation Notes & Accessories...
... • Heavy-duty broiler pan and tray with rack provide more roasting and broiling options • High performance cooking modes include Bake, Convection Bake, TruConvec™ convection cooking, Convection Roast, Hi, Medium, and Low Broil, Convection Broil and Meat Probe • Shipped standard with SureSpark™ Ignition System for details. COOKING Professional Custom Series Freestanding Dual Fuel Self-Clean 30"/36"W. Four-Burner Range VDSC536T-6B* 36"W. o Finish designates door front, lower front panel, and side panels. See Installation Notes & Accessories...

Specs
Page 2
...-ignition • 12"W. ft. (30-5/16"W. See Installation Notes & Accessories for details. Sealed Burner Electronic Control Range Standard Features & Accessories 30"W. 4B models include • Convection oven capacity: o Overall capacity-4.7 cu. ft. (25-5/16"W. x 16-1⁄2"H. Four-Burner/ Griddle Range VDSC536T-4Q* 36"W. backguard. x 16-1⁄2"H. ft. (25-5/16"W. thermostatically controlled steel griddle/simmer plate • Cast aluminum removable grease trough holds 2-1/2 cups of cooking vessels across entire top surface...
...-ignition • 12"W. ft. (30-5/16"W. See Installation Notes & Accessories for details. Sealed Burner Electronic Control Range Standard Features & Accessories 30"W. 4B models include • Convection oven capacity: o Overall capacity-4.7 cu. ft. (25-5/16"W. x 16-1⁄2"H. Four-Burner/ Griddle Range VDSC536T-4Q* 36"W. backguard. x 16-1⁄2"H. ft. (25-5/16"W. thermostatically controlled steel griddle/simmer plate • Cast aluminum removable grease trough holds 2-1/2 cups of cooking vessels across entire top surface...

Specs
Page 4
... requirement does not apply if a rangehood is installed over the cooking surface. Important: The top grate support must be installed directly adjacent to sidewalls, tall cabinets, tall appliances, or other side vertical surfaces above the 36" (91.4 cm) counter height. 3. PLANNING AND DESIGN GUIDE VIKINGRANGE.COM • 1-888-VIKING1 REVISED 4/27/11 ©2011 VRC-INFORMATION SUBJECT TO CHANGE COOKING Professional Custom Series Freestanding Dual Fuel Self-Clean...
... requirement does not apply if a rangehood is installed over the cooking surface. Important: The top grate support must be installed directly adjacent to sidewalls, tall cabinets, tall appliances, or other side vertical surfaces above the 36" (91.4 cm) counter height. 3. PLANNING AND DESIGN GUIDE VIKINGRANGE.COM • 1-888-VIKING1 REVISED 4/27/11 ©2011 VRC-INFORMATION SUBJECT TO CHANGE COOKING Professional Custom Series Freestanding Dual Fuel Self-Clean...

Specs
Page 5
... Gas or electrical connection in this area Note: Ground plug and electrical wire toward the direction of the electrical outlet. o LP/Propane 10.0" W.C.P. must be agencyapproved for hardwire direct; field convertible with UTILITY REQUIREMENTS locally supplied 3-wire, flexible cord rated or "pigtail" rated 40 amp 125250 VAC min.; connect with conversion kit (purchased separately) • Accepts standard residential 1/2" (1.3 cm) ID gas service line • Gas manifold pressure o Natural gas 5.0" W.C.P. Surface burner rating Surface burners Surface burners (front right) One griddle...
... Gas or electrical connection in this area Note: Ground plug and electrical wire toward the direction of the electrical outlet. o LP/Propane 10.0" W.C.P. must be agencyapproved for hardwire direct; field convertible with UTILITY REQUIREMENTS locally supplied 3-wire, flexible cord rated or "pigtail" rated 40 amp 125250 VAC min.; connect with conversion kit (purchased separately) • Accepts standard residential 1/2" (1.3 cm) ID gas service line • Gas manifold pressure o Natural gas 5.0" W.C.P. Surface burner rating Surface burners Surface burners (front right) One griddle...

Specs
Page 7
.... COOKING Professional Custom Series Freestanding Dual Fuel Self-Clean 30"/36"W. ship wt. curb base front 36"W. lbs. (kg) 9 (4.1) 10 (4.5) LP/Propane Conversion Kit • Allows for field conversion of range from natural gas to LP Model LPKPDR Description Natural to LP/propane conversion kit Approx. lbs. (kg) 2 (0.9) Compliance Information WARRANTY INFORMATION* • Three-year full warranty-complete product • Ten-year limited warranty-porcelain oven and porcelain inner door panel • Five-year limited warranty-surface burners, griddle burners, grill burners...
.... COOKING Professional Custom Series Freestanding Dual Fuel Self-Clean 30"/36"W. ship wt. curb base front 36"W. lbs. (kg) 9 (4.1) 10 (4.5) LP/Propane Conversion Kit • Allows for field conversion of range from natural gas to LP Model LPKPDR Description Natural to LP/propane conversion kit Approx. lbs. (kg) 2 (0.9) Compliance Information WARRANTY INFORMATION* • Three-year full warranty-complete product • Ten-year limited warranty-porcelain oven and porcelain inner door panel • Five-year limited warranty-surface burners, griddle burners, grill burners...

Installation Instructions
Page 2
... of Contents Warnings & Important Safety Instructions 3 Dimensions 6 Specifications 8 Clearance Dimensions (Proximity to Cabinets 10 Clearance Dimensions (Wood/Composite Overlay 11 Electrical & Gas Requirements 12 General Information 14 Installation 15 Door Removal 15 Leg Installation 16 Electrical Connection (3 Wire 17 Electrical Connection (4 Wire 19 Leveling/Adjustments/Alignment 21 Anit-tip Device Installation 22 Connecting Gas & Electrical 23 Standoff Bracket Removal 24 Final Installation 24 Door Replacement and Adjustment 25 Final Preparation 26 Performance Checklist...
... of Contents Warnings & Important Safety Instructions 3 Dimensions 6 Specifications 8 Clearance Dimensions (Proximity to Cabinets 10 Clearance Dimensions (Wood/Composite Overlay 11 Electrical & Gas Requirements 12 General Information 14 Installation 15 Door Removal 15 Leg Installation 16 Electrical Connection (3 Wire 17 Electrical Connection (4 Wire 19 Leveling/Adjustments/Alignment 21 Anit-tip Device Installation 22 Connecting Gas & Electrical 23 Standoff Bracket Removal 24 Final Installation 24 Door Replacement and Adjustment 25 Final Preparation 26 Performance Checklist...

Installation Instructions
Page 5
... minimum 18" (45.7 cm) above cooking surface • Wall cabinets directly above cooking surface • Rear - 0" with 8" backguard or high shelf; 0" with island trim and non-combustible rear wall; • 6" (15.2 cm) with island trim and combustible rear wall 9 ft. accepts standard residential 1/2" (1.3 cm) ID gas service line Natural 5.0" W.C.P./ Liquid Propane L/P 10.0" W.C.P. VDSC models installed against a combustible wall. add 8" (20.3 cm) To top of door handle - 28-11/16" (72...
... minimum 18" (45.7 cm) above cooking surface • Wall cabinets directly above cooking surface • Rear - 0" with 8" backguard or high shelf; 0" with island trim and non-combustible rear wall; • 6" (15.2 cm) with island trim and combustible rear wall 9 ft. accepts standard residential 1/2" (1.3 cm) ID gas service line Natural 5.0" W.C.P./ Liquid Propane L/P 10.0" W.C.P. VDSC models installed against a combustible wall. add 8" (20.3 cm) To top of door handle - 28-11/16" (72...

Installation Instructions
Page 7
... range since service pressure may fluctuate with the intended gas supply. 12 Electrical & Gas Requirements Manual shut-off until the range is installed and ready to the cabinet. Use a 3-wire, agency approved, power supply kit with closed loop terminals rated per UL 943 standard • In good condition and free from any loose-fitting gaskets (if applicable in the gas service line before work begins. Sealant on this manual before the appliance in the gas...
... range since service pressure may fluctuate with the intended gas supply. 12 Electrical & Gas Requirements Manual shut-off until the range is installed and ready to the cabinet. Use a 3-wire, agency approved, power supply kit with closed loop terminals rated per UL 943 standard • In good condition and free from any loose-fitting gaskets (if applicable in the gas service line before work begins. Sealant on this manual before the appliance in the gas...

Installation Instructions
Page 12
Level range to electrical and gas requirements section for gas leaks with soapy water solution. • DO NOT USE AN OPEN FLAME TO CHECK FOR GAS LEAKS. install anti-tipping device provided in accordance with the installation instructions in operation, always check for proper installation information. 1 Connect gas and electrical. Range "X" Width Dimension "Y" Dimension 30" 3-5/8" (9.2 cm) N/A 36" 8" (20.3 cm) N/A 48" 5" (12.7 cm) N/A 60" 5" (12.7 cm) 24-7/8" (63.2 cm) Locate anti-tip bracket on the back of range. Before placing...
Level range to electrical and gas requirements section for gas leaks with soapy water solution. • DO NOT USE AN OPEN FLAME TO CHECK FOR GAS LEAKS. install anti-tipping device provided in accordance with the installation instructions in operation, always check for proper installation information. 1 Connect gas and electrical. Range "X" Width Dimension "Y" Dimension 30" 3-5/8" (9.2 cm) N/A 36" 8" (20.3 cm) N/A 48" 5" (12.7 cm) N/A 60" 5" (12.7 cm) 24-7/8" (63.2 cm) Locate anti-tip bracket on the back of range. Before placing...

Installation Instructions
Page 14
... required. Performance Checklist A qualified installer should be referred to a qualified technician. The low flame should light at every port. 3/8" (0.95 cm) h Check oven bake function-bake element on at full power with convection fan on , then abort self-clean cycle to unlock door. h Check self-clean function-door will lock in approximately 30 seconds, the center and outside broil elements will turn on and the bake element will need it is located on HI. Model number Serial number Date of the range...
... required. Performance Checklist A qualified installer should be referred to a qualified technician. The low flame should light at every port. 3/8" (0.95 cm) h Check oven bake function-bake element on at full power with convection fan on , then abort self-clean cycle to unlock door. h Check self-clean function-door will lock in approximately 30 seconds, the center and outside broil elements will turn on and the bake element will need it is located on HI. Model number Serial number Date of the range...

Use and Care Manual
Page 2
... Controls Range Features 14 Burner Configurations 16 Oven Features 17 Rack Positions 17 Operation Surface Operation 18 Lighting Burners 18 Surface Burners/Automatic Re-Ignition 18 VariSimmer 18 TruPower Plus™ Burner 18 Surface Heat Settings 19 Cooking Vessels 20 Griddle/Simmer Plate Operation 21 Griddle/Simmer Plate Clean Up & Care 21 Grill Operation 23 Grill Clean Up & Care 25 Oven Functions and Settings 28 General Clock Display 30 Programming Clock 30 General Temp Display 31 Using the Oven 32 Set Oven Function and Temperature 32 Preheat 34 Timed Cook 35 Cook Time...
... Controls Range Features 14 Burner Configurations 16 Oven Features 17 Rack Positions 17 Operation Surface Operation 18 Lighting Burners 18 Surface Burners/Automatic Re-Ignition 18 VariSimmer 18 TruPower Plus™ Burner 18 Surface Heat Settings 19 Cooking Vessels 20 Griddle/Simmer Plate Operation 21 Griddle/Simmer Plate Clean Up & Care 21 Grill Operation 23 Grill Clean Up & Care 25 Oven Functions and Settings 28 General Clock Display 30 Programming Clock 30 General Temp Display 31 Using the Oven 32 Set Oven Function and Temperature 32 Preheat 34 Timed Cook 35 Cook Time...

Use and Care Manual
Page 4
...; NEVER leave a surface cooking operation unattended especially when using dry, sturdy potholders. Use baking soda, a dry chemical or foam-type extinguisher to add or remove food. Children climbing to reach items could be limited to items which may cause them to move a flaming pan. • Oven: Smother fire or flame by closing the oven door. Temperatures may be taken to the vent or a lighted surface burner. • Combustible...
...; NEVER leave a surface cooking operation unattended especially when using dry, sturdy potholders. Use baking soda, a dry chemical or foam-type extinguisher to add or remove food. Children climbing to reach items could be limited to items which may cause them to move a flaming pan. • Oven: Smother fire or flame by closing the oven door. Temperatures may be taken to the vent or a lighted surface burner. • Combustible...

Use and Care Manual
Page 5
.... ALWAYS turn on oven convection systems. The use eyelid covers for a good seal. DO NOT use oven cleaners of any kind in the Installation Instructions, it is otherwise damaged during a self-clean cycle. Self-Clean Oven • Clean only parts listed in the production of the self-clean oven. • Before self-cleaning the oven, remove broiler pan, oven racks and other spirits under an exhaust, TURN THE FAN OFF. The food could cause the flames to the sudden change in performance problems...
.... ALWAYS turn on oven convection systems. The use eyelid covers for a good seal. DO NOT use oven cleaners of any kind in the Installation Instructions, it is otherwise damaged during a self-clean cycle. Self-Clean Oven • Clean only parts listed in the production of the self-clean oven. • Before self-cleaning the oven, remove broiler pan, oven racks and other spirits under an exhaust, TURN THE FAN OFF. The food could cause the flames to the sudden change in performance problems...

Use and Care Manual
Page 7
... tooled and porcelainized cooking surface contains spills for easy cleaning. • Split baking and broiling elements-which reduces preheating time and provides greater control and more even heating. • A reversing convection fan which may have remained from the "curing" of the self-clean cycle. CAUTION DO NOT touch the exterior portions of the oven after completion of the binder in the highdensity insulation used , there may...
... tooled and porcelainized cooking surface contains spills for easy cleaning. • Split baking and broiling elements-which reduces preheating time and provides greater control and more even heating. • A reversing convection fan which may have remained from the "curing" of the self-clean cycle. CAUTION DO NOT touch the exterior portions of the oven after completion of the binder in the highdensity insulation used , there may...

Use and Care Manual
Page 8
... trim 5. When probe is connected, use this button to be performed. Range Features Range Features Interior Oven Light Switch Left Rear Burner Control Knob (15,000 BTU) Left Front Burner Left Oven Left Oven Control Knob Selector Control Temperature (15,000 BTU) Knob Control Knob Grill Control Griddle Control Knob Knob Left Display (Clock & Time) Right Display Right Rear Burner Right Front Burner (Function & Temp.) Control Knob Control Knob (15,000 BTU) (15,000 BTU) Product Controls Product Controls SET HR MIN AM PM STOP TIMER NO PROBE COOK TIME ON DELAY CLOCK/ PROBE...
... trim 5. When probe is connected, use this button to be performed. Range Features Range Features Interior Oven Light Switch Left Rear Burner Control Knob (15,000 BTU) Left Front Burner Left Oven Left Oven Control Knob Selector Control Temperature (15,000 BTU) Knob Control Knob Grill Control Griddle Control Knob Knob Left Display (Clock & Time) Right Display Right Rear Burner Right Front Burner (Function & Temp.) Control Knob Control Knob (15,000 BTU) (15,000 BTU) Product Controls Product Controls SET HR MIN AM PM STOP TIMER NO PROBE COOK TIME ON DELAY CLOCK/ PROBE...

Use and Care Manual
Page 25
... part of the inner thigh.) The tip of heated air over existing, single fan convection roast modes. Less tender cuts of heat (mainly from the refrigerator. AUTO ROAST Use this will begin. 49 Operation This transfer of meat are best prepared in order to 15%. • ALWAYS roast meats fat side up . Some noise may require moist cooking techniques. Roasting Tips ALWAYS use pans with each direction...
... part of the inner thigh.) The tip of heated air over existing, single fan convection roast modes. Less tender cuts of heat (mainly from the refrigerator. AUTO ROAST Use this will begin. 49 Operation This transfer of meat are best prepared in order to 15%. • ALWAYS roast meats fat side up . Some noise may require moist cooking techniques. Roasting Tips ALWAYS use pans with each direction...

Use and Care Manual
Page 29
... heating elements remain on a baking sheet. 2. User Settings To adjust settings: 1. WARNING To avoid sickness and food waste, DO NOT allow defrosted food to a 120 volt electrical supply for more than two hours. When done with the Sabbath requirement. Default is ºF. Settings • Fº or Cº • 12/24hr • Sabbath • Brightness • Showroom • Exit Options Select temperature format. Turning the convection fan on drying racks...
... heating elements remain on a baking sheet. 2. User Settings To adjust settings: 1. WARNING To avoid sickness and food waste, DO NOT allow defrosted food to a 120 volt electrical supply for more than two hours. When done with the Sabbath requirement. Default is ºF. Settings • Fº or Cº • 12/24hr • Sabbath • Brightness • Showroom • Exit Options Select temperature format. Turning the convection fan on drying racks...

Use and Care Manual
Page 34
... to electrical power. Power supply polarity is not connected to lock. Igniters are clogged. If you see an error code on the display, please call Viking Customer Service at the main fuse or circuit breaker. Oven does not operate in self-clean mode. Possible Cause and/or Remedy Range is reversed. Range is reached. Door will not function. If oven is hot, door latch will not work . Circuit is blown. Air shutters not properly adjusted. Firmly grasp light bulb and pull out. bulb 4. Fuse...
... to electrical power. Power supply polarity is not connected to lock. Igniters are clogged. If you see an error code on the display, please call Viking Customer Service at the main fuse or circuit breaker. Oven does not operate in self-clean mode. Possible Cause and/or Remedy Range is reversed. Range is reached. Door will not function. If oven is hot, door latch will not work . Circuit is blown. Air shutters not properly adjusted. Firmly grasp light bulb and pull out. bulb 4. Fuse...

Quick Reference Guide
Page 1
... OVEN TEMP OFF CLEAN/ SETTINGS SET HR MIN 88:88 AM PM STOP TIMER NO PROBE COOK TIME ON DELAY CLOCK/ PROBE MIN/SEC TIMER COOK TIME STOP TIME Self-Clean Left Oven Indicator Oven Temperature Light Indicator light Griddle Indicator Light Right Display Right Rear Burner Right Front Burner (Function & Temp.) Control Knob Control Knob (15,000 BTU) (15,000 BTU) OVEN FUNC OVEN TEMP OFF CLEAN/ SETTINGS 00000000 888°8 BAKE (Two- The inner broil element low broil is radiated from the bake element in the top of "OFF" button will COOK TIME OFF auto-accept. When range...
... OVEN TEMP OFF CLEAN/ SETTINGS SET HR MIN 88:88 AM PM STOP TIMER NO PROBE COOK TIME ON DELAY CLOCK/ PROBE MIN/SEC TIMER COOK TIME STOP TIME Self-Clean Left Oven Indicator Oven Temperature Light Indicator light Griddle Indicator Light Right Display Right Rear Burner Right Front Burner (Function & Temp.) Control Knob Control Knob (15,000 BTU) (15,000 BTU) OVEN FUNC OVEN TEMP OFF CLEAN/ SETTINGS 00000000 888°8 BAKE (Two- The inner broil element low broil is radiated from the bake element in the top of "OFF" button will COOK TIME OFF auto-accept. When range...

Quick Reference Guide
Page 2
...; (662) 455-1200 (102909J) Viking Quick Reference Guide Professional Freestanding Electronic Control Dual Fuel Ranges To prevent possible damage to cause burns. WARNING ELECTRICAL SHOCK HAZARD DO NOT touch a hot oven light bulb with your gas supplier from GFI outlets which COULD result in minor personal injury. Turning the convection fan on during an oven self-cleaning cycle may sense an odor characteristic of the gas shutoff valve and how to such...
...; (662) 455-1200 (102909J) Viking Quick Reference Guide Professional Freestanding Electronic Control Dual Fuel Ranges To prevent possible damage to cause burns. WARNING ELECTRICAL SHOCK HAZARD DO NOT touch a hot oven light bulb with your gas supplier from GFI outlets which COULD result in minor personal injury. Turning the convection fan on during an oven self-cleaning cycle may sense an odor characteristic of the gas shutoff valve and how to such...


