(version 1) Camera Manual
Page 3
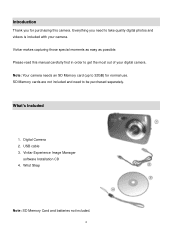
... Manager software Installation CD 4. What's Included 1. Everything you for normal use. Wrist Strap Note: SD Memory Card and batteries not included. 2 Vivitar makes capturing those special moments as easy as possible. USB cable 3. Note: Your camera needs an SD Memory card (up to 32GB) for purchasing this manual carefully first in order to take quality...
... Manager software Installation CD 4. What's Included 1. Everything you for normal use. Wrist Strap Note: SD Memory Card and batteries not included. 2 Vivitar makes capturing those special moments as easy as possible. USB cable 3. Note: Your camera needs an SD Memory card (up to 32GB) for purchasing this manual carefully first in order to take quality...

(version 1) Camera Manual
Page 4
Parts of the Camera 1. ViviLink / Down Button 13. SD Memory Card Slot 19. MACRO Switch 20. Digital Lens 17. LCD Screen 4. Tripod Socket 16. Microphone 3 Power Button 2. Zoom In 7. Scene / Left Button 10. MODE button 8. Self-Timer LED 22. Flash / Up / Slide Show 11. USB Slot 15. Shutter Button 3. Zoom Out 6. Battery Compartment 18. LED 5. Delete / Right Button 12. Flash Light 14. SET button 9. Wrist Strap Connector 21.
Parts of the Camera 1. ViviLink / Down Button 13. SD Memory Card Slot 19. MACRO Switch 20. Digital Lens 17. LCD Screen 4. Tripod Socket 16. Microphone 3 Power Button 2. Zoom In 7. Scene / Left Button 10. MODE button 8. Self-Timer LED 22. Flash / Up / Slide Show 11. USB Slot 15. Shutter Button 3. Zoom Out 6. Battery Compartment 18. LED 5. Delete / Right Button 12. Flash Light 14. SET button 9. Wrist Strap Connector 21.

(version 1) Camera Manual
Page 5
Using the Camera Selecting the modes Accessing the menu 4 Initial Camera Setup Installing the Batteries Installing the Memory Card Insert 3 AAA (1.5V) batteries. Alkaline batteries recommended (not included). Turning On the Camera SD Memory card (up to 32GB) needed for normal use.
Using the Camera Selecting the modes Accessing the menu 4 Initial Camera Setup Installing the Batteries Installing the Memory Card Insert 3 AAA (1.5V) batteries. Alkaline batteries recommended (not included). Turning On the Camera SD Memory card (up to 32GB) needed for normal use.
(version 1) Camera Manual
Page 6
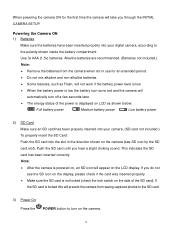
...properly into your camera. (SD card not included.) To properly insert the SD Card: Push the SD card into your digital camera, according to turn off a few seconds later. The energy status of the SD card). Push the SD card until you through the INITIAL CAMERA SETUP. If the SD card is locked this will ... from the camera when not in use for the first time the camera will take you hear a slight clicking sound. This indicates the SD card has been inserted correctly. When powering the camera ON for an extended period. Do not mix alkaline and non-alkaline batteries....
...properly into your camera. (SD card not included.) To properly insert the SD Card: Push the SD card into your digital camera, according to turn off a few seconds later. The energy status of the SD card). Push the SD card until you through the INITIAL CAMERA SETUP. If the SD card is locked this will ... from the camera when not in use for the first time the camera will take you hear a slight clicking sound. This indicates the SD card has been inserted correctly. When powering the camera ON for an extended period. Do not mix alkaline and non-alkaline batteries....
(version 1) Camera Manual
Page 9
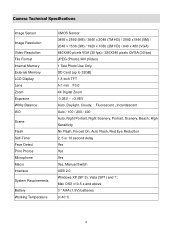
...) / 1920 x 1080 (2M HD) / 640 x 480 (VGA) 640X480 pixels VGA (30 fps) / 320X240 pixels QVGA (30 fps) JPEG (Photo) /AVI (Video) 1 Test Photo Use Only SD Card (up to 32GB) 1.8 Inch TFT f=7 mm F3.0 4X Digital Zoom -3.0EV ~ +3.0EV Auto, Daylight, Cloudy, Fluorescent , Incandescent Auto / 100 / 200 / 400 Auto, Night Portrait, Night...
...) / 1920 x 1080 (2M HD) / 640 x 480 (VGA) 640X480 pixels VGA (30 fps) / 320X240 pixels QVGA (30 fps) JPEG (Photo) /AVI (Video) 1 Test Photo Use Only SD Card (up to 32GB) 1.8 Inch TFT f=7 mm F3.0 4X Digital Zoom -3.0EV ~ +3.0EV Auto, Daylight, Cloudy, Fluorescent , Incandescent Auto / 100 / 200 / 400 Auto, Night Portrait, Night...
(version 1) Camera Manual
Page 11
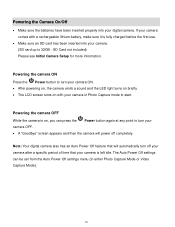
Note: Your digital camera also has an Auto Power Off feature that your camera is fully charged before the first use. Make sure an SD card has been inserted into your digital camera. Powering the camera OFF While the camera is on with a rechargeable lithium battery, make sure it is left ... Photo Capture Mode or Video Capture Mode). 10 Powering the Camera On/Off Make sure the batteries have been inserted properly into your camera. (SD card up to 32GB - SD Card not included) Please see Initial Camera Setup for more information.
Note: Your digital camera also has an Auto Power Off feature that your camera is fully charged before the first use. Make sure an SD card has been inserted into your digital camera. Powering the camera OFF While the camera is on with a rechargeable lithium battery, make sure it is left ... Photo Capture Mode or Video Capture Mode). 10 Powering the Camera On/Off Make sure the batteries have been inserted properly into your camera. (SD card up to 32GB - SD Card not included) Please see Initial Camera Setup for more information.

(version 1) Camera Manual
Page 14
...: 3) Click the Shutter button to take the picture. 4) The picture will automatically be saved to the camera‟s internal memory (limit one photo) or SD memory card. 13 Photo Capture Mode The Photo Capture mode allows you would like to capture. 2) Press the T/Zoom In and W/Zoom Out buttons to zoom in...
...: 3) Click the Shutter button to take the picture. 4) The picture will automatically be saved to the camera‟s internal memory (limit one photo) or SD memory card. 13 Photo Capture Mode The Photo Capture mode allows you would like to capture. 2) Press the T/Zoom In and W/Zoom Out buttons to zoom in...

(version 1) Camera Manual
Page 34
... through the Delete menu. 1) View the photo you would like to proceed with deleting all the images (videos and photos) you have saved on your SD Memory card: Select „Delete All Images‟ and press the SET button. If you do not want to delete the current image, select „...
... through the Delete menu. 1) View the photo you would like to proceed with deleting all the images (videos and photos) you have saved on your SD Memory card: Select „Delete All Images‟ and press the SET button. If you do not want to delete the current image, select „...
(version 1) Camera Manual
Page 35
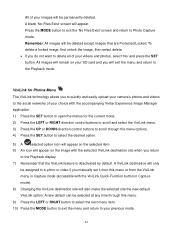
... delete. If you to quickly and easily upload your camera‟s photos and videos to the social networks of your choice with the accompanying Vivitar Experience Image Manager application. 1) Press the SET button to open the menus for the current mode. 2) Press the LEFT or RIGHT direction control buttons ...allows you do not want to select the desired option. 5) A selected option icon will appear on the selected item. 6) An icon will appear on your SD card and you return to a photo or video if you manually set it from this menu. 9) Press the LEFT or RIGHT button to select the next...
... delete. If you to quickly and easily upload your camera‟s photos and videos to the social networks of your choice with the accompanying Vivitar Experience Image Manager application. 1) Press the SET button to open the menus for the current mode. 2) Press the LEFT or RIGHT direction control buttons ...allows you do not want to select the desired option. 5) A selected option icon will appear on the selected item. 6) An icon will appear on your SD card and you return to a photo or video if you manually set it from this menu. 9) Press the LEFT or RIGHT button to select the next...
(version 1) Camera Manual
Page 39
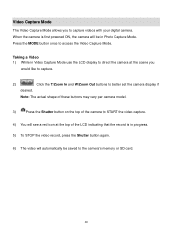
... automatically be in progress. 5) To STOP the video record, press the Shutter button again. 6) The video will be saved to the camera‟s memory or SD card. 38 Note: The actual shape of these buttons may vary per camera model. 3) Press the Shutter button on the top of the camera to START...
... automatically be in progress. 5) To STOP the video record, press the Shutter button again. 6) The video will be saved to the camera‟s memory or SD card. 38 Note: The actual shape of these buttons may vary per camera model. 3) Press the Shutter button on the top of the camera to START...

(version 1) Camera Manual
Page 54
... The following are Protected/Locked. The video will be deleted and you will be deleted except images that are the menus that appear in your SD Memory card: Select „Delete All Images‟ and press the SET button. If you would like to delete. 2) Press the SET button to open...
... The following are Protected/Locked. The video will be deleted and you will be deleted except images that are the menus that appear in your SD Memory card: Select „Delete All Images‟ and press the SET button. If you would like to delete. 2) Press the SET button to open...
(version 1) Camera Manual
Page 55
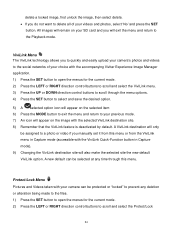
... a locked image, first unlock the image, then select delete. If you do not want to delete all of your choice with the accompanying Vivitar Experience Image Manager application. 1) Press the SET button to open the menus for the current mode. 2) Press the LEFT or RIGHT direction control buttons to...appear on the selected item 6) Press the MODE button to exit the menu and return to your previous mode. 7) An icon will appear on your SD card and you will exit the menu and return to the Playback mode. ViviLink Menu The ViviLink technology allows you manually set it from the ViviLink...
... a locked image, first unlock the image, then select delete. If you do not want to delete all of your choice with the accompanying Vivitar Experience Image Manager application. 1) Press the SET button to open the menus for the current mode. 2) Press the LEFT or RIGHT direction control buttons to...appear on the selected item 6) Press the MODE button to exit the menu and return to your previous mode. 7) An icon will appear on your SD card and you will exit the menu and return to the Playback mode. ViviLink Menu The ViviLink technology allows you manually set it from the ViviLink...
(version 1) Camera Manual
Page 59
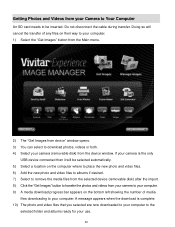
... download photos, videos or both. 4) Select your camera (removable disk) from the device window. Getting Photos and Videos from your Camera to Your Computer An SD card needs to the selected folder and albums ready for your use. 58 Do not disconnect the cable during transfer. Doing so will be inserted. If...
... download photos, videos or both. 4) Select your camera (removable disk) from the device window. Getting Photos and Videos from your Camera to Your Computer An SD card needs to the selected folder and albums ready for your use. 58 Do not disconnect the cable during transfer. Doing so will be inserted. If...
(version 1) Camera Manual
Page 63
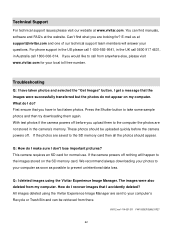
..." button. These photos should appear. This camera requires an SD card for your computer as soon as possible to take some sample photos and then try downloading them to call 1800-006-614. Q: I deleted images using the Vivitar Experience Image Manager are saved to your questions. If the ... I have in fact taken photos. If the photos are sent to the SD memory card then all the photos should be retrieved from there. V9112 ver1-TA-031311 FW1500EFGJMJ31F27 62 All images deleted using the Vivitar Experience Image Manager. With test photos if the camera powers off . Can&#...
..." button. These photos should appear. This camera requires an SD card for your computer as soon as possible to take some sample photos and then try downloading them to call 1800-006-614. Q: I deleted images using the Vivitar Experience Image Manager are saved to your questions. If the ... I have in fact taken photos. If the photos are sent to the SD memory card then all the photos should be retrieved from there. V9112 ver1-TA-031311 FW1500EFGJMJ31F27 62 All images deleted using the Vivitar Experience Image Manager. With test photos if the camera powers off . Can&#...


