
Camera Manual
Page 4
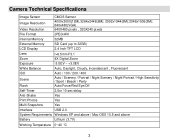
... File Format JPEG/AVI Internal Memory 32MB External Memory SD Card (up to 32GB) LCD Display 2.4 Inch TFT LCD Lens Zoom f=6.5mm F3.1 4X Digital Zoom Exposure -3.0EV ~ +3.0EV White Balance Auto, Daylight, Cloudy, Incandescent , Fluorescent ISO Scene Flash Auto / 100 / 200 / 400 Auto / Scenery / Portrait / Night Scenery / Night Portrait / High Sensitivity / Sport / Beach / Party Auto/Force/Red Eye/Off Self-Timer 2,5or 10 sec delay Anti-Shake Yes Print Photos Yes Multi Snapshots Yes Interface USB 2.0 System Requirements Windows...
... File Format JPEG/AVI Internal Memory 32MB External Memory SD Card (up to 32GB) LCD Display 2.4 Inch TFT LCD Lens Zoom f=6.5mm F3.1 4X Digital Zoom Exposure -3.0EV ~ +3.0EV White Balance Auto, Daylight, Cloudy, Incandescent , Fluorescent ISO Scene Flash Auto / 100 / 200 / 400 Auto / Scenery / Portrait / Night Scenery / Night Portrait / High Sensitivity / Sport / Beach / Party Auto/Force/Red Eye/Off Self-Timer 2,5or 10 sec delay Anti-Shake Yes Print Photos Yes Multi Snapshots Yes Interface USB 2.0 System Requirements Windows...
Camera Manual
Page 9
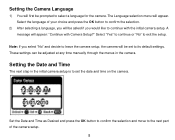
... its default settings. Set the Date and Time as Desired and press the OK button to confirm the selection and move to exit the setup. The Language selection menu will appear: "Continue with the initial camera setup. Setting the Date and Time The next step in the camera. These settings can be adjusted at any time manually through the menus in the initial camera setup is to select a language for the camera. Setting the Camera Language 1) You...
... its default settings. Set the Date and Time as Desired and press the OK button to confirm the selection and move to exit the setup. The Language selection menu will appear: "Continue with the initial camera setup. Setting the Date and Time The next step in the camera. These settings can be adjusted at any time manually through the menus in the initial camera setup is to select a language for the camera. Setting the Camera Language 1) You...
Camera Manual
Page 10
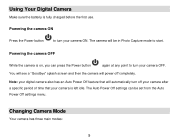
Changing Camera Mode Your camera has three main modes: 9 Using Your Digital Camera Make sure the batteriy is on, you can be in Photo Capture mode to start. You will see a "Goodbye" splash screen and then the camera will automatically turn off your camera after a specific period of time that your digital camera also has an Auto Power Off feature that will power off completely. Powering the camera OFF While the camera is fully charged before the first...
Changing Camera Mode Your camera has three main modes: 9 Using Your Digital Camera Make sure the batteriy is on, you can be in Photo Capture mode to start. You will see a "Goodbye" splash screen and then the camera will automatically turn off your camera after a specific period of time that your digital camera also has an Auto Power Off feature that will power off completely. Powering the camera OFF While the camera is fully charged before the first...
Camera Manual
Page 17
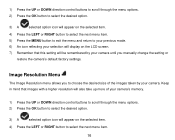
Image Resolution Menu The Image Resolution menu allows you manually change the setting or restore the camera‟s default factory settings. 1) Press the UP or DOWN direction control buttons to scroll through the menu options. 2) Press the OK button to select the desired option. 3) A selected option icon will be remembered by your camera until you to choose the desired size of your camera‟s memory. 1) Press the UP or DOWN direction control buttons to scroll...
Image Resolution Menu The Image Resolution menu allows you manually change the setting or restore the camera‟s default factory settings. 1) Press the UP or DOWN direction control buttons to scroll through the menu options. 2) Press the OK button to select the desired option. 3) A selected option icon will be remembered by your camera until you to choose the desired size of your camera‟s memory. 1) Press the UP or DOWN direction control buttons to scroll...
Camera Manual
Page 18
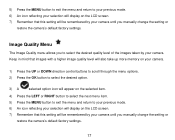
... your camera until you manually change the setting or restore the camera‟s default factory settings. 17 Image Quality Menu The Image Quality menu allows you to your previous mode. 6) An icon reflecting your selection will display on the LCD screen. 7) Remember that images with a higher image quality level will also take up more memory on your camera. 1) Press the UP or DOWN direction control buttons to scroll through the menu options. 2) Press the OK button to...
... your camera until you manually change the setting or restore the camera‟s default factory settings. 17 Image Quality Menu The Image Quality menu allows you to your previous mode. 6) An icon reflecting your selection will display on the LCD screen. 7) Remember that images with a higher image quality level will also take up more memory on your camera. 1) Press the UP or DOWN direction control buttons to scroll through the menu options. 2) Press the OK button to...
Camera Manual
Page 19
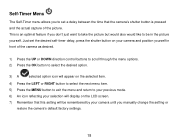
... select the next menu item. 5) Press the MENU button to exit the menu and return to your previous mode. 6) An icon reflecting your camera until you to set the desired self-timer delay, press the shutter button on your camera and position yourself in the picture yourself. Self-Timer Menu The Self-Timer menu allows you manually change the setting or restore the camera‟s default factory settings. 18 Just set a delay between the time that this setting will be...
... select the next menu item. 5) Press the MENU button to exit the menu and return to your previous mode. 6) An icon reflecting your camera until you to set the desired self-timer delay, press the shutter button on your camera and position yourself in the picture yourself. Self-Timer Menu The Self-Timer menu allows you manually change the setting or restore the camera‟s default factory settings. 18 Just set a delay between the time that this setting will be...
Camera Manual
Page 20
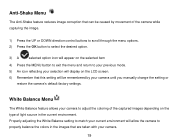
... the MENU button to exit the menu and return to your previous mode. 5) An icon reflecting your selection will display on the type of the captured images depending on the LCD screen. 6) Remember that are taken with your camera. 19 White Balance Menu The White Balance feature allows your camera to adjust the coloring of light source in the images that this setting will allow the camera to properly balance the colors in the...
... the MENU button to exit the menu and return to your previous mode. 5) An icon reflecting your selection will display on the type of the captured images depending on the LCD screen. 6) Remember that are taken with your camera. 19 White Balance Menu The White Balance feature allows your camera to adjust the coloring of light source in the images that this setting will allow the camera to properly balance the colors in the...
Camera Manual
Page 22
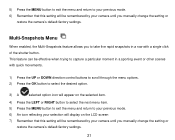
... button to select the next menu item. 5) Press the MENU button to exit the menu and return to your previous mode. 6) An icon reflecting your selection will display on the LCD screen 7) Remember that this setting will be remembered by your camera until you to your previous mode. 6) Remember that this setting will be remembered by your camera until you manually change the setting or restore the camera‟s default factory settings...
... button to select the next menu item. 5) Press the MENU button to exit the menu and return to your previous mode. 6) An icon reflecting your selection will display on the LCD screen 7) Remember that this setting will be remembered by your camera until you to your previous mode. 6) Remember that this setting will be remembered by your camera until you manually change the setting or restore the camera‟s default factory settings...
Camera Manual
Page 23
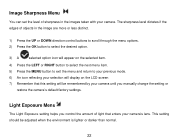
... to your previous mode. 6) An icon reflecting your selection will display on the LCD screen 7) Remember that enters your camera‟s lens. This setting should be remembered by your camera. The sharpness level dictates if the edges of light that this setting will be adjusted when the environment is lighter or darker than normal. 22 Light Exposure Menu The Light Exposure setting helps you manually change the setting or restore the camera‟s default factory settings.
... to your previous mode. 6) An icon reflecting your selection will display on the LCD screen 7) Remember that enters your camera‟s lens. This setting should be remembered by your camera. The sharpness level dictates if the edges of light that this setting will be adjusted when the environment is lighter or darker than normal. 22 Light Exposure Menu The Light Exposure setting helps you manually change the setting or restore the camera‟s default factory settings.
Camera Manual
Page 24
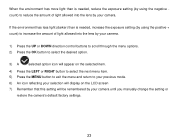
... icon reflecting your selection will display on the LCD screen 7) Remember that this setting will be remembered by your camera until you manually change the setting or restore the camera‟s default factory settings. 23 When the environment has more light than is needed , increase the exposure setting (by using the negative count) to reduce the amount of light allowed into the lens by your camera. 1) Press the UP or DOWN direction control buttons...
... icon reflecting your selection will display on the LCD screen 7) Remember that this setting will be remembered by your camera until you manually change the setting or restore the camera‟s default factory settings. 23 When the environment has more light than is needed , increase the exposure setting (by using the negative count) to reduce the amount of light allowed into the lens by your camera. 1) Press the UP or DOWN direction control buttons...
Camera Manual
Page 25
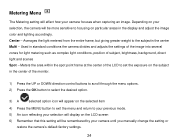
... the MENU button to exit the menu and return to your previous mode. 5) An icon reflecting your selection will affect how your camera until you manually change the setting or restore the camera‟s default factory settings. 24 Center - Depending on your selection, the camera will be more sensitive to focusing on the LCD screen 6) Remember that this setting will be remembered by your camera focuses when capturing an image. Meters...
... the MENU button to exit the menu and return to your previous mode. 5) An icon reflecting your selection will affect how your camera until you manually change the setting or restore the camera‟s default factory settings. 24 Center - Depending on your selection, the camera will be more sensitive to focusing on the LCD screen 6) Remember that this setting will be remembered by your camera focuses when capturing an image. Meters...
Camera Manual
Page 26
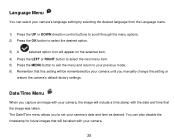
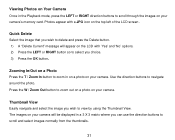
.... 5) Press the MENU button to exit the menu and return to set your camera. 25 Date/Time Menu When you manually change the setting or restore the camera‟s default factory settings. You can select your camera‟s language setting by your camera until you capture an image with your camera, the image will include a time stamp with your camera‟s date and time as desired. Language Menu You can also disable the timestamp for future images that the image was taken.
.... 5) Press the MENU button to exit the menu and return to set your camera. 25 Date/Time Menu When you manually change the setting or restore the camera‟s default factory settings. You can select your camera‟s language setting by your camera until you capture an image with your camera, the image will include a time stamp with your camera‟s date and time as desired. Language Menu You can also disable the timestamp for future images that the image was taken.

Camera Manual
Page 27
... option. 3) A selected option icon now appears to the right of the option name 4) Press the MENU button to exit the menu and return to your camera until you manually change the setting or restore the camera‟s default factory settings. The timestamp will be remembered by your previous screen. 26 On - To Set the Date and Time: 1) Highlight the "Date Setup" menu option. 2) Press the OK button to set the time and date.
... option. 3) A selected option icon now appears to the right of the option name 4) Press the MENU button to exit the menu and return to your camera until you manually change the setting or restore the camera‟s default factory settings. The timestamp will be remembered by your previous screen. 26 On - To Set the Date and Time: 1) Highlight the "Date Setup" menu option. 2) Press the OK button to set the time and date.
Camera Manual
Page 28
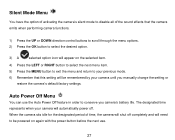
...;s silent mode to disable all of time, the camera will shut off . The designated time represents when your camera will automatically power off completely and will need to be remembered by your previous mode. 6) Remember that this setting will be powered on again with the power button before the next use the Auto Power Off feature in order to conserve you manually change the setting or restore the camera‟s default factory settings.
...;s silent mode to disable all of time, the camera will shut off . The designated time represents when your camera will automatically power off completely and will need to be remembered by your previous mode. 6) Remember that this setting will be powered on again with the power button before the next use the Auto Power Off feature in order to conserve you manually change the setting or restore the camera‟s default factory settings.
Camera Manual
Page 30
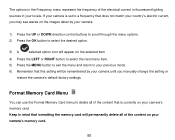
... manually change the setting or restore the camera‟s default factory settings. Format Memory Card Menu You can use the delete menu in mind that formatting the memory card will be remembered by your camera until you would like to delete individual images, use the Format Memory Card menu to delete all of the content that is currently on your camera's memory card. This option will be asked to confirm your wish to format your memory card. 4) Select "No" to exit without formatting...
... manually change the setting or restore the camera‟s default factory settings. Format Memory Card Menu You can use the delete menu in mind that formatting the memory card will be remembered by your camera until you would like to delete individual images, use the Format Memory Card menu to delete all of the content that is currently on your camera's memory card. This option will be asked to confirm your wish to format your memory card. 4) Select "No" to exit without formatting...
Camera Manual
Page 32
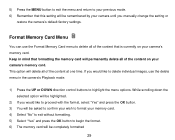
... images on your camera‟s memory card. Quick Delete Select the image that you wish to delete and press the Delete button. 1) A "Delete Current" message will be displayed in a 3 X 3 matrix where you can use the direction buttons to zoom in the Playback mode, press the LEFT or RIGHT direction buttons to select you wish to view by using the Thumbnail View. Viewing Photos on Your Camera Once in on a photo on your camera. Thumbnail View Easily navigate and select the image...
... images on your camera‟s memory card. Quick Delete Select the image that you wish to delete and press the Delete button. 1) A "Delete Current" message will be displayed in a 3 X 3 matrix where you can use the direction buttons to zoom in the Playback mode, press the LEFT or RIGHT direction buttons to select you wish to view by using the Thumbnail View. Viewing Photos on Your Camera Once in on a photo on your camera. Thumbnail View Easily navigate and select the image...
Camera Manual
Page 48
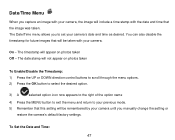
... you manually change the setting or restore the camera‟s default factory settings. The date stamp will not appear on photos taken Off - To Set the Date and Time: 47 Date/Time Menu When you capture an image with your camera, the image will include a time stamp with your camera. The Date/Time menu allows you to your previous mode. 5) Remember that this setting will be taken with the date and time that will appear on photos taken To Enable/Disable...
... you manually change the setting or restore the camera‟s default factory settings. The date stamp will not appear on photos taken Off - To Set the Date and Time: 47 Date/Time Menu When you capture an image with your camera, the image will include a time stamp with your camera. The Date/Time menu allows you to your previous mode. 5) Remember that this setting will be taken with the date and time that will appear on photos taken To Enable/Disable...
Camera Manual
Page 51
... MENU button to exit the menu and return to your previous mode. 6) Remember that this setting will be remembered by your camera until you manually change the setting or restore the camera‟s default factory settings. The options in the Frequency menu represent the frequency of the electrical current in flourescent lighting sources in mind that formatting the memory card will permanently delete all of the content on your camera's memory card...
... MENU button to exit the menu and return to your previous mode. 6) Remember that this setting will be remembered by your camera until you manually change the setting or restore the camera‟s default factory settings. The options in the Frequency menu represent the frequency of the electrical current in flourescent lighting sources in mind that formatting the memory card will permanently delete all of the content on your camera's memory card...
Camera Manual
Page 61
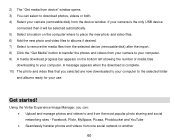
... the new photo and video files. 6) Add the new photo and video files to albums if desired. 7) Select to remove the media files from the selected device (removable disk) after the import. 8) Click the "Get Media" button to transfer the photos and videos from the device window. Get started! Using the Vivitar Experience Image Manager, you selected are now downloaded to your computer to your camera is complete. 10) The photo and video files that...
... the new photo and video files. 6) Add the new photo and video files to albums if desired. 7) Select to remove the media files from the selected device (removable disk) after the import. 8) Click the "Get Media" button to transfer the photos and videos from the device window. Get started! Using the Vivitar Experience Image Manager, you selected are now downloaded to your computer to your camera is complete. 10) The photo and video files that...
Camera Manual
Page 66
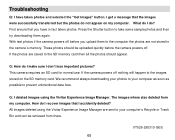
... data loss. Q: I don't lose important pictures? How do I make sure I deleted images using the Vivitar Experience Image Manager are not stored in fact taken photos. VT026-280310-GES 65 I do not appear on the SD memory card. Press the Shutter button to the SD memory card then all the photos should be retrieved from my computer. All images deleted using the Vivitar Experience Image Manager. What do I get a message that the images were successfully transferred...
... data loss. Q: I don't lose important pictures? How do I make sure I deleted images using the Vivitar Experience Image Manager are not stored in fact taken photos. VT026-280310-GES 65 I do not appear on the SD memory card. Press the Shutter button to the SD memory card then all the photos should be retrieved from my computer. All images deleted using the Vivitar Experience Image Manager. What do I get a message that the images were successfully transferred...


