Waring MX1200XTS Support and Manuals
Get Help and Manuals for this Waring item

View All Support Options Below
Free Waring MX1200XTS manuals!
Problems with Waring MX1200XTS?
Ask a Question
Free Waring MX1200XTS manuals!
Problems with Waring MX1200XTS?
Ask a Question
Most Recent Waring MX1200XTS Questions

Popular Waring MX1200XTS Manual Pages
Instruction Manual - Page 2
...is not intended for examination, repair, or electrical or mechanical ...peanut butter for all Waring Blenders. READ ALL INSTRUCTIONS.
2. Always ...parts, and before cleaning.
3. IMPORTANT SAFEGUARDS
When using electrical appliances, basic safety precautions should be taken, including the following:
1. Using carbonated liquids in place.
13. Return appliance to the nearest authorized service...
Instruction Manual - Page 3
... Put ingredients into outlet.
4. To crush ice quickly, use . See Cleaning and Sanitizing instructions.
Do not fill above MAX line.
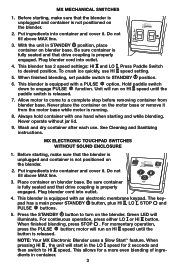
3. Plug blender cord into container and cover it....power STANDBY button, plus HI , LO , STOP and PULSE buttons.
5. When finished blending, set paddle switch to desired position. Be sure container is fully seated and that the blender is unplugged ...
Instruction Manual - Page 4
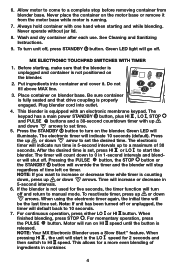
... container with up and down arrows. To turn off and return to manual mode. Press the STANDBY button to set the desired time. The electronic timer will shut off , press STANDBY ...will indicate 10 seconds (default). For momentary operation, press the PULSE button. See Cleaning and Sanitizing Instructions.
9. Allow motor to come to 0 in the LO speed for a more even blending of time...
Instruction Manual - Page 5
... the container on the blender.
2.
Place container on blender base. See Cleaning and Sanitizing Instructions.
10. Do not fill above MAX line.
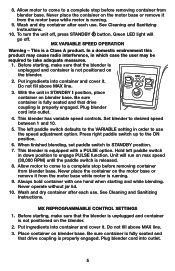
3. Wash and dry container after each use...8. To turn the unit off . See Cleaning and Sanitizing Instructions. Hold left paddle switch defaults to the VARIABLE setting in STANDBY I position, place container on blender base.
Allow ...
Instruction Manual - Page 6
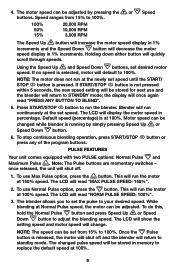
... ranges from 15% to run the motor at Normal Pulse speed, the motor can be set speed.
Motor speed can be adjusted by simply pressing Speed Up or Speed Down button.
6. This will return to replace the default speed at 100%. The LCD will decrease the motor speed display in memory to...
Instruction Manual - Page 7
...= 20 seconds
The program has the following limitations:
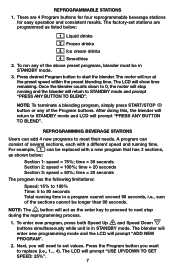
Speed: 15% to 100% Time: 5 to replace (i.e., 1... 4). REPROGRAMMABLE STATIONS
1. NOTE: To terminate a blending program, simply press Start/Stop button ... to proceed to set stations are 4 Program buttons for four reprogrammable beverage stations for easy operation and consistent results. A program can be replaced with a different ...
Instruction Manual - Page 8
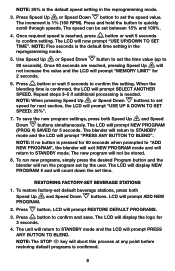
...the LCD will prompt "PRESS ANY BUTTON TO BLEND". NOTE: Five seconds is the default time setting in the reprogramming mode.
3. The LCD will prompt NEW PROGRAM (PROG #) SAVED for 60 .... The blender will return to standby mode.
NOTE: If no button is confirmed.
8 RESTORING FACTORY-SET BEVERAGE STATIONS
1. Press button.
The increment is needed. Use Speed Up or Speed Down button to...
Instruction Manual - Page 9
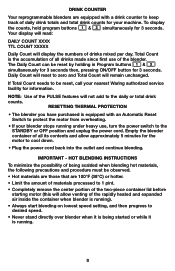
...drink counts for your nearest Waring authorized service facility for 3 seconds. NOTE: Use of the Pulse features will allow approximately 5 minutes for 3 seconds. HOT BLENDING INSTRUCTIONS
To minimize the possibility ... the container when blender is running).
• Always start blending on lowest speed setting, and then progress to desired speed.
• Never stand directly over blender when...
Instruction Manual - Page 10
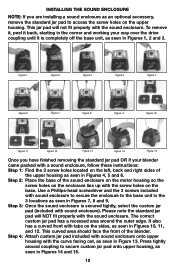
... with the sound enclosure. It also has a curved front with tabs on the base. INSTALLING THE SOUND ENCLOSURE
NOTE: If you have finished removing the standard jar pad OR if your...it back, starting in the corner and working your blender came packed with a sound enclosure, follow these instructions: Step 1: F ind the 3 screw holes located on the upper housing.
Step 4: A ttach custom...
Instruction Manual - Page 11
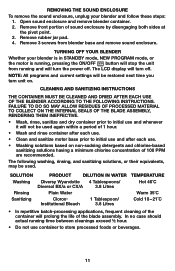
...INSTRUCTIONS
THE CONTAINER MUST BE CLEANED AND DRIED AFTER EACH USE OF THE BLENDER ACCORDING TO THE FOLLOWING INSTRUCTIONS...® Institutional Bleach
1 Tablespoon/ 3.8 Litres
TEMPERATURE Hot 46˚C
Warm 35˚C Cold 10 - 21˚C
• In repetitive batch-processing ...100 PPM are recommended. NOTE: All programs and current settings will stop the unit from blender base and remove sound ...
Instruction Manual - Page 12

... for two (2) minutes. 4.
Sanitize lid and lid insert by an authorized service representative.
12 Allow parts to air-dry before using . Wipe down exterior of washing solution. REMOVE CONTAINER... OR LARGER QUANTITIES ARE USED, OBSERVE ALL PRECAUTIONS GIVEN IN THE OPERATING MANUAL UNDER "HOT BLENDING INSTRUCTIONS". Remove lid. Prevent liquid from running into motor base by wringing all...
Sound Enclosure Installation Guide - Page 1
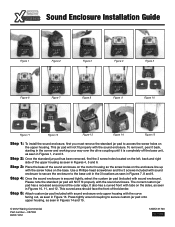
...front of the upper housing as seen in Figures 14 and 15.
© 2012 Waring Commercial Part number - 027306 RV03 1212
12WC131700 IB-11899 Step 3: Place the base of the... 12. Use a Phillips-head screwdriver and the 3 screws included with the sound enclosure.
Sound Enclosure Installation Guide
Figure 1
Figure 2
Figure 3
Figure 4
Figure 5
Figure 6
Figure 7
Figure 8
Figure 9
Figure 10
...
Parts List and Exploded Diagram - Page 1

...copolyester container
8
MX Coupling Wrench
(optional)
MX1200XTS
64 oz. Approved 8/12/11
Page 1 of 2 Weight 15 lbs.
3 HP Motor
RPM's
Variable 1,500-20,000 ...Board
L
Graphic By: Sandra A. 11
VARIABLE PULSE
16
ON OFF
18 21
6
7
MX1200XT
64 oz. BPA-Free copolyester container
503351
MX1200XTP
32-48 oz. Montysko Revised August 11, 2011
N M- stainless steel container
1
9
2...
Parts List and Exploded Diagram - Page 2

...Housing Foam Baffle /rear Housing Foam Baffle /front Motor Housing Washer 3 Req.'d Bottom Housing Foam Baffle Foam Baffle Cord Set Strain Relief Bottom Housing /black Screw 4 Req.'d Corner Post 4 Req.'d Screw 4 Req.'d Washer 4 Req.'d (... Blending Assy. /64 oz. Catalog
Model
MX1200XT MX1200XT11
MX1200XTP MX1200XT21
MX1200XTS MX1200XT31
Waring Factory Service Center 314 Ella T. Grasso Ave.
Parts List and Exploded Diagram - Page 3

...around indicated areas. Grasso Ave. Eastman Container Support Washer 64 oz. Catalog
Model
MX1200XT MX1200XT11
MX1200XTP MX1200XT21
MX1200XTS MX1200XT31
Illustration # Part #
29
503345
30
024271
31
024268
32
029631
33
026423-E
34
029003-E
35
026798
36
026648
37
026649
38
026797
39
026796
40
026795
Waring Factory Service Center 314 Ella T. Notes for 503347 & 503348...
Waring MX1200XTS Reviews
We have not received any reviews for Waring yet.