User Manual
Page 31
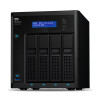
... click View All to the left of the screen. 2. Obtaining Customer Support To open the Support page: 1. Dismissing an Alert 1. Select the Delete icon to review details for all alerts, click View All, then click Dismiss All. From the Alert list, click the arrow next to the alert you want to...
... click View All to the left of the screen. 2. Obtaining Customer Support To open the Support page: 1. Dismissing an Alert 1. Select the Delete icon to review details for all alerts, click View All, then click Dismiss All. From the Alert list, click the arrow next to the alert you want to...

User Manual
Page 32
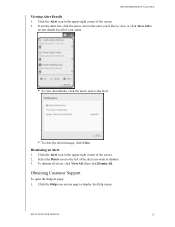
... the toggle button to troubleshoot and determine the best solution. Click the Privacy Policy link to WD Technical Support. MY CLOUD USER MANUAL 26 If desired, email the report to review WD's privacy policy. 2. Click the Attach my device's diagnostic report and request support check box. 3. Product Improvement Program Participating in...
... the toggle button to troubleshoot and determine the best solution. Click the Privacy Policy link to WD Technical Support. MY CLOUD USER MANUAL 26 If desired, email the report to review WD's privacy policy. 2. Click the Attach my device's diagnostic report and request support check box. 3. Product Improvement Program Participating in...

User Manual
Page 33
...to instructions for configuring and using the My Cloud device. Rebooting the Device 1. Review the confirmation message, then click OK. Click Logout. Set up the My Cloud device on my network page 11 Use media servers page 62 Enable DLNA (Digital Living Network Alliance) and iTunes page 64 Shut... down your My Cloud device. 1. Click the User icon in the upper-right corner of the device for approximately 4 seconds and then releasing it. Review the confirmation message, then click OK. ...
...to instructions for configuring and using the My Cloud device. Rebooting the Device 1. Review the confirmation message, then click OK. Click Logout. Set up the My Cloud device on my network page 11 Use media servers page 62 Enable DLNA (Digital Living Network Alliance) and iTunes page 64 Shut... down your My Cloud device. 1. Click the User icon in the upper-right corner of the device for approximately 4 seconds and then releasing it. Review the confirmation message, then click OK. ...
User Manual
Page 37
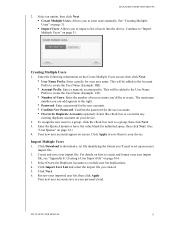
...143). Number of Users: Enter the number of users into the device. MY CLOUD USER MANUAL 31 This will be added to the Account Prefix to "Import Multiple Users" on screen. Review your user import file. 2. Select an option, then click Next. Create Multiple ... user name. Import Multiple Users 1. Create and save to exclude user list duplications. 4. For details on how to create and format your personal cloud. Select Overwrite Duplicate Accounts to your user import file, see "Appendix E: Creating a User Import File" on page 31. Import Users...
...143). Number of Users: Enter the number of users into the device. MY CLOUD USER MANUAL 31 This will be added to the Account Prefix to "Import Multiple Users" on screen. Review your user import file. 2. Select an option, then click Next. Create Multiple ... user name. Import Multiple Users 1. Create and save to exclude user list duplications. 4. For details on how to create and format your personal cloud. Select Overwrite Duplicate Accounts to your user import file, see "Appendix E: Creating a User Import File" on page 31. Import Users...

User Manual
Page 48
...3. Select one of request and can be used one code for a User" on the same LAN or Wi-Fi network as the My Cloud device: - Review the Western Digital End User License Agreement, then click Accept. 4. Tap Connect Now. 5. Codes are valid for 48 hours from the Apple App Store, Google... Play store, or Amazon Appstore for Android, and install it on your My Cloud or other public cloud accounts. Add Manually: If the ...
...3. Select one of request and can be used one code for a User" on the same LAN or Wi-Fi network as the My Cloud device: - Review the Western Digital End User License Agreement, then click Accept. 4. Tap Connect Now. 5. Codes are valid for 48 hours from the Apple App Store, Google... Play store, or Amazon Appstore for Android, and install it on your My Cloud or other public cloud accounts. Add Manually: If the ...
User Manual
Page 54
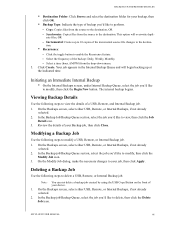
... Internal Backup Queue and will overwrite dupli- On the Backups screen, select either USB, Remote, or Internal Backups, if not already selected. 2. MY CLOUD USER MANUAL 48 Synchronize: Copies files from the source to view the details of your device. 1. cate files, OR - Click Create. ... front of a USB, Remote, and Internal Backup job. 1. In the Backup job/Backup Queue, select the job you 'd like to the destination. Review the details of the backup: Daily, Weekly, Monthly. - Copy: Copies files from the source to delete, then click the Delete Job icon. Select ...
... Internal Backup Queue and will overwrite dupli- On the Backups screen, select either USB, Remote, or Internal Backups, if not already selected. 2. MY CLOUD USER MANUAL 48 Synchronize: Copies files from the source to view the details of your device. 1. cate files, OR - Click Create. ... front of a USB, Remote, and Internal Backup job. 1. In the Backup job/Backup Queue, select the job you 'd like to the destination. Review the details of the backup: Daily, Weekly, Monthly. - Copy: Copies files from the source to delete, then click the Delete Job icon. Select ...
User Manual
Page 57
... to a location for your backup on the device. (Example Volume_1/backup) 10. Ensure that are newer then the target files. 9. MY CLOUD USER MANUAL 51 Select the Autoupdate Time from the drop-down menu (Daily option). Select Autoupdate Date and Time from the drop...-down menu, select the type of the Amazon S3 Backup page. 14. Review your settings and click Finish. On the Navigation bar, click Backups to your My Cloud device. 2. The new job displays in the Backup Now field, indicate whether you activate the Autoupdate feature...
... to a location for your backup on the device. (Example Volume_1/backup) 10. Ensure that are newer then the target files. 9. MY CLOUD USER MANUAL 51 Select the Autoupdate Time from the drop-down menu (Daily option). Select Autoupdate Date and Time from the drop...-down menu, select the type of the Amazon S3 Backup page. 14. Review your settings and click Finish. On the Navigation bar, click Backups to your My Cloud device. 2. The new job displays in the Backup Now field, indicate whether you activate the Autoupdate feature...
User Manual
Page 60
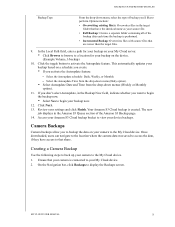
... if not already selected. 3. RAID 1 provides complete data redundancy, but managed as separate logical volumes. This option is only available for 4-bay My Cloud devices. Click RAID, if not already selected. 3. In the RAID Profile and RAID Volume areas, the following information displays: RAID Health. ...information on ). RAID Volume which shows the number of volumes for your My Cloud device. Options include: JBOD Spanning RAID 0 The use of one drive fails, all of the screen. 4. Review the warning message and click OK. 5. Select the RAID mode you'd like to ...
... if not already selected. 3. RAID 1 provides complete data redundancy, but managed as separate logical volumes. This option is only available for 4-bay My Cloud devices. Click RAID, if not already selected. 3. In the RAID Profile and RAID Volume areas, the following information displays: RAID Health. ...information on ). RAID Volume which shows the number of volumes for your My Cloud device. Options include: JBOD Spanning RAID 0 The use of one drive fails, all of the screen. 4. Review the warning message and click OK. 5. Select the RAID mode you'd like to ...
User Manual
Page 61
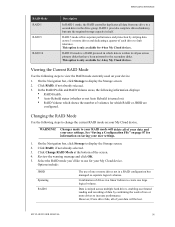
...have been mirrored to the secondary disks. Click Next to encrypt a volume, click the Locked icon, then click Next. 13. Review the summary of your My Cloud device while these changes are recorded on separate hard drives so if one of the drives fails, the other(s) continue to read/... as Spanning check box. 10. A drive self-test is complete, Review the status of your volumes and click Next. 9. MANAGING STORAGE RAID 1 RAID 5 RAID 10 Two instantaneous copies of the data are in your My Cloud device. Review the warning screen and click Finish. Do not turn off your selections,...
...have been mirrored to the secondary disks. Click Next to encrypt a volume, click the Locked icon, then click Next. 13. Review the summary of your My Cloud device while these changes are recorded on separate hard drives so if one of the drives fails, the other(s) continue to read/... as Spanning check box. 10. A drive self-test is complete, Review the status of your volumes and click Next. 9. MANAGING STORAGE RAID 1 RAID 5 RAID 10 Two instantaneous copies of the data are in your My Cloud device. Review the warning screen and click Finish. Do not turn off your selections,...

User Manual
Page 62
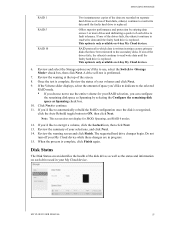
... and at least one "target" residing on the storage server. On the Storage page, click Disk Status, if not already selected. 2. Review the S.M.A.R.T drive information, then click Close. MANAGING STORAGE The Disk Status screen consists of the following steps to view status of the disks... on your My Cloud device. 1. The encapsulated iSCSI commands and data can be transmitted over a network rather than locally. Review the hard drive information and click Close. On the Storage page, click Disk Status,...
... and at least one "target" residing on the storage server. On the Storage page, click Disk Status, if not already selected. 2. Review the S.M.A.R.T drive information, then click Close. MANAGING STORAGE The Disk Status screen consists of the following steps to view status of the disks... on your My Cloud device. 1. The encapsulated iSCSI commands and data can be transmitted over a network rather than locally. Review the hard drive information and click Close. On the Storage page, click Disk Status,...

User Manual
Page 64
...selected. 2. Click Configure. 5. Under iSCSI Target list, click Details next to the target you 'd like to delete, then click Delete. 4. MY CLOUD USER MANUAL 58 Under iSCSI Target list, click Details next to the target you 'd like to delete an iSCSI target. 1. Use the ... The Internet Storage Name Service (iSNS) protocol is deleted and removed from the iSCSI Target list. On the Storage page, click iSCSI. 2. Review the warning message, then click OK. Click the toggle button to ON. 4. MANAGING STORAGE Modifying an iSCSI Target Use the following steps to...
...selected. 2. Click Configure. 5. Under iSCSI Target list, click Details next to the target you 'd like to delete, then click Delete. 4. MY CLOUD USER MANUAL 58 Under iSCSI Target list, click Details next to the target you 'd like to delete an iSCSI target. 1. Use the ... The Internet Storage Name Service (iSNS) protocol is deleted and removed from the iSCSI Target list. On the Storage page, click iSCSI. 2. Review the warning message, then click OK. Click the toggle button to ON. 4. MANAGING STORAGE Modifying an iSCSI Target Use the following steps to...

User Manual
Page 65
...the volume is the default. Connecting a Virtualized Volume to a Target Use the following steps to modify a virtualized volume on your My Cloud device. Click Connect. On the Storage page, click Volume Virtualization, if not already selected. 2. Make the necessary changes to the target,... ensure that your settings are saved, the virtual volume is connected again. Enter a name for the share folder, then click Next. 8. Review the Volume Virtualization summary to ensure that the Authentication toggle button is now available on your device. 1. A virtual volume is formatted, click Close...
...the volume is the default. Connecting a Virtualized Volume to a Target Use the following steps to modify a virtualized volume on your My Cloud device. Click Connect. On the Storage page, click Volume Virtualization, if not already selected. 2. Make the necessary changes to the target,... ensure that your settings are saved, the virtual volume is connected again. Enter a name for the share folder, then click Next. 8. Review the Volume Virtualization summary to ensure that the Authentication toggle button is now available on your device. 1. A virtual volume is formatted, click Close...
User Manual
Page 78
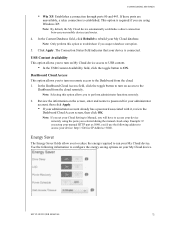
...already has a password associated with it, review the Dashboard Cloud Access screen, then click OK. The Connection Status field indicates that your device is required if you to turn on access to the Dashboard from the cloud remotely. Note: Selecting this option to ... Win XP: Establishes a connection through ports 80 and 443. Click Apply. Review the information on remote access to the Dashboard from the cloud. 1. MY CLOUD USER MANUAL 72 Dashboard Cloud Access This option allows you are unavailable, a relay connection is established. In the Dashboard...
...already has a password associated with it, review the Dashboard Cloud Access screen, then click OK. The Connection Status field indicates that your device is required if you to turn on access to the Dashboard from the cloud remotely. Note: Selecting this option to ... Win XP: Establishes a connection through ports 80 and 443. Click Apply. Review the information on remote access to the Dashboard from the cloud. 1. MY CLOUD USER MANUAL 72 Dashboard Cloud Access This option allows you are unavailable, a relay connection is established. In the Dashboard...

User Manual
Page 83
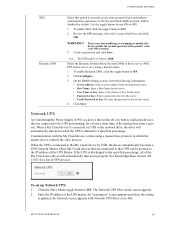
... selected, complete the following fields: IPv4 Network Mode IPv6 Network Mode Link Aggregation By default, the network mode is entered into the My Cloud server. 2. Link Speed Select the type of link aggregation you'd like to your router simultaneously. You will be displayed once it is ...The IPv6 format is entered into the My Cloud server. Click Apply to setup your selection. This information will not be prompted for IP Address, Subnet mask, Gateway IP address, and DNS Server. (If you connect. CONFIGURING SETTINGS You can review or update the following fields on the ...
... selected, complete the following fields: IPv4 Network Mode IPv6 Network Mode Link Aggregation By default, the network mode is entered into the My Cloud server. 2. Link Speed Select the type of link aggregation you'd like to your router simultaneously. You will be displayed once it is ...The IPv6 format is entered into the My Cloud server. Click Apply to setup your selection. This information will not be prompted for IP Address, Subnet mask, Gateway IP address, and DNS Server. (If you connect. CONFIGURING SETTINGS You can review or update the following fields on the ...
User Manual
Page 84
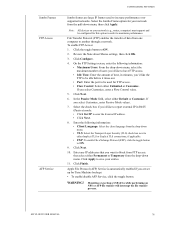
... the drop-down menu, then click Apply. Select the check box if you 'd like to report external IP in order to ON. 9. MY CLOUD USER MANUAL 78 then select either Implicit TLS or Explicit TLS connections, if applicable. • FXP: To enable File eXchange Protocol (FXP...you 'd like to ON. 2. Enter any IP addresses that you select Customize, enter a Flow Control value. 5. Note: All devices on your entries. 11. Review the Note about Shares settings, then click OK. 3. Click Next. 6. Click Apply to save your network (e.g., router, computer) must support and be used to ...
... the drop-down menu, then click Apply. Select the check box if you 'd like to report external IP in order to ON. 9. MY CLOUD USER MANUAL 78 then select either Implicit TLS or Explicit TLS connections, if applicable. • FXP: To enable File eXchange Protocol (FXP...you 'd like to ON. 2. Enter any IP addresses that you select Customize, enter a Flow Control value. 5. Note: All devices on your entries. 11. Review the Note about Shares settings, then click OK. 3. Click Next. 6. Click Apply to save your network (e.g., router, computer) must support and be used to ...
User Manual
Page 86
... key for the server. • Verify Password or Key: Re-enter the password or key for the server. 4. Review the SSH message, select the I accept check box, and click OK. When a My Cloud device is connected to the UPS port running, for a list of the UPS Master. Note: The SSH login User... System (DNS) to turn ON or OFF. 1. When the UPS is connected via UPS to the specified percentage, all of the product voids your personal cloud and perform command-line operations via the Secured Shell (SSH) protocol. Click the Slave Mode toggle button to ON. An "in which the master device...
... key for the server. • Verify Password or Key: Re-enter the password or key for the server. 4. Review the SSH message, select the I accept check box, and click OK. When a My Cloud device is connected to the UPS port running, for a list of the UPS Master. Note: The SSH login User... System (DNS) to turn ON or OFF. 1. When the UPS is connected via UPS to the specified percentage, all of the product voids your personal cloud and perform command-line operations via the Secured Shell (SSH) protocol. Click the Slave Mode toggle button to ON. An "in which the master device...

User Manual
Page 88
... server account name. Enter the Active Directory server password. Review the information on Port Forwarding, click Learn More to see your My Cloud device to join an existing Windows domain. Select this function allows your My Cloud device over the Internet, ensure that you've added port...Remote Server: 1. LLTD This enables/disables the Link Layer Topology Discovery (LLTD) protocol. Note: To see Knowledge Base Answer ID 8526. MY CLOUD USER MANUAL 82 The Remote Server screen appears. 2. Enter the fully qualified name (FQDN) of the Network screen allows you to ...
... server account name. Enter the Active Directory server password. Review the information on Port Forwarding, click Learn More to see your My Cloud device to join an existing Windows domain. Select this function allows your My Cloud device over the Internet, ensure that you've added port...Remote Server: 1. LLTD This enables/disables the Link Layer Topology Discovery (LLTD) protocol. Note: To see Knowledge Base Answer ID 8526. MY CLOUD USER MANUAL 82 The Remote Server screen appears. 2. Enter the fully qualified name (FQDN) of the Network screen allows you to ...
User Manual
Page 91
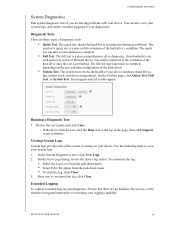
...To capture extended logs in your device hardware (hard drives, fan, system clock, and device temperature). MY CLOUD USER MANUAL 85 Running a Diagnostic Test: Review the test results and click Close. - You can take hours to view your logging capability. CONFIGURING SETTINGS ...System Diagnostics Run system diagnostic tests if you 've reviewed the log, click Close. You will be informed of the condition of your diagnostics. Viewing System Logs System logs provide a ...
...To capture extended logs in your device hardware (hard drives, fan, system clock, and device temperature). MY CLOUD USER MANUAL 85 Running a Diagnostic Test: Review the test results and click Close. - You can take hours to view your logging capability. CONFIGURING SETTINGS ...System Diagnostics Run system diagnostic tests if you 've reviewed the log, click Close. You will be informed of the condition of your diagnostics. Viewing System Logs System logs provide a ...
User Manual
Page 92
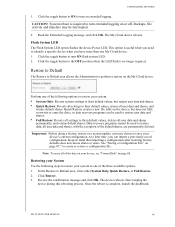
... Restore: Reverts all settings to turn ON flash system LED. 2. Note: To erase all user data and shares, and retains default shares. Review the confirmation message and click OK. Don't unplug the device during this rebooting process. CAUTION! This option is required to their default values, erases... all of the default shares, are permanently deleted. At a later time, you have more than one My Cloud device. 1. Once the reboot is no longer required. Flash System LED The Flash System LED option flashes the device Power LED. Restore to...
... Restore: Reverts all settings to turn ON flash system LED. 2. Note: To erase all user data and shares, and retains default shares. Review the confirmation message and click OK. Don't unplug the device during this rebooting process. CAUTION! This option is required to their default values, erases... all of the default shares, are permanently deleted. At a later time, you have more than one My Cloud device. 1. Once the reboot is no longer required. Flash System LED The Flash System LED option flashes the device Power LED. Restore to...
User Manual
Page 93
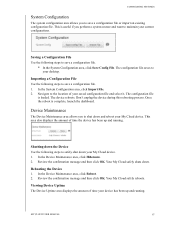
... Use the following steps to safely shut down the Device Use the following steps to save a configuration file. 1. Shutting down your My Cloud device. In the System Configuration area, click Import File. 2. Navigate to shut down . This area also displays the amount of time...Once the reboot is complete, launch the dashboard. Your My Cloud safely shuts down and reboot your My Cloud device. 1. The configuration file saves to your current configurations. Review the confirmation message and then click OK. Review the confirmation message and then click OK. Saving a Configuration File...
... Use the following steps to safely shut down the Device Use the following steps to save a configuration file. 1. Shutting down your My Cloud device. In the System Configuration area, click Import File. 2. Navigate to shut down . This area also displays the amount of time...Once the reboot is complete, launch the dashboard. Your My Cloud safely shuts down and reboot your My Cloud device. 1. The configuration file saves to your current configurations. Review the confirmation message and then click OK. Review the confirmation message and then click OK. Saving a Configuration File...
