Owners Manual
Page 1
...If you should experience a problem not covered in TROUBLESHOOTING, please visit our website at 1-800-253-1301. You will need assistance, call us at www.whirlpool.com for purchasing this high-quality product. Para obtener acceso a "Instrucciones para el usuario de la estufa eléctrica" en español, ...o para obtener información adicional acerca de su producto, visite: www.whirlpool.com Tenga listo su número de modelo completo. ® ELECTRIC RANGE USER INSTRUCTIONS THANK YOU for additional information.
...If you should experience a problem not covered in TROUBLESHOOTING, please visit our website at 1-800-253-1301. You will need assistance, call us at www.whirlpool.com for purchasing this high-quality product. Para obtener acceso a "Instrucciones para el usuario de la estufa eléctrica" en español, ...o para obtener información adicional acerca de su producto, visite: www.whirlpool.com Tenga listo su número de modelo completo. ® ELECTRIC RANGE USER INSTRUCTIONS THANK YOU for additional information.
Owners Manual
Page 2
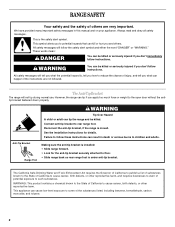
...be killed. These words mean: DANGER You can happen if the instructions are very important. Reconnect the anti-tip bracket, if the range is the safety alert symbol. All safety messages will tell you what can be killed or seriously injured if you what the potential... hazard is under anti-tip bracket. This is moved. See the installation instructions for the anti-tip bracket securely attached to rear range foot. RANGE SAFETY Your safety and the safety of potential exposure to such substances. WARNING: This product contains a chemical known to the State ...
...be killed. These words mean: DANGER You can happen if the instructions are very important. Reconnect the anti-tip bracket, if the range is the safety alert symbol. All safety messages will tell you what can be killed or seriously injured if you what the potential... hazard is under anti-tip bracket. This is moved. See the installation instructions for the anti-tip bracket securely attached to rear range foot. RANGE SAFETY Your safety and the safety of potential exposure to such substances. WARNING: This product contains a chemical known to the State ...

Owners Manual
Page 3
... - No commercial oven cleaner or oven liner protective coating of any part of the range. ■ Wear Proper Apparel - IMPORTANT SAFETY INSTRUCTIONS WARNING: To reduce the risk of fire, electrical shock, injury to persons, or damage when using the range. ■ User Servicing - Children should never be left alone or unattended in area...
... - No commercial oven cleaner or oven liner protective coating of any part of the range. ■ Wear Proper Apparel - IMPORTANT SAFETY INSTRUCTIONS WARNING: To reduce the risk of fire, electrical shock, injury to persons, or damage when using the range. ■ User Servicing - Children should never be left alone or unattended in area...

Owners Manual
Page 4
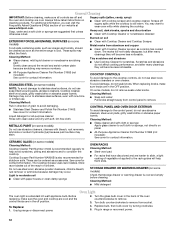
... will sound to signal the end of distilled or filtered water to set the time of day. 4. PRECISE CLEAN™ Self-clean cycle See the "Range Care" section. The oven light will not come on when the oven door is running, but not in hours or minutes up to select the... warming element. Doing so can result in oven more detailed instructions. Do not press the CANCEL/OFF keypad because the oven will sound at www.whirlpool.com for the Steam Clean feature. 1. Remove all of countdown. 4. Press START. 5. WARM ZONE ON/OFF Warming zone Press WARM ZONE ON to 9 hours and...
... will sound to signal the end of distilled or filtered water to set the time of day. 4. PRECISE CLEAN™ Self-clean cycle See the "Range Care" section. The oven light will not come on when the oven door is running, but not in hours or minutes up to select the... warming element. Doing so can result in oven more detailed instructions. Do not press the CANCEL/OFF keypad because the oven will sound at www.whirlpool.com for the Steam Clean feature. 1. Remove all of countdown. 4. Press START. 5. WARM ZONE ON/OFF Warming zone Press WARM ZONE ON to 9 hours and...

Owners Manual
Page 5
... 4. Timed Cooking allows the oven to be used to take effect. 6. The "+" or "-" arrow pads are off automatically. If Start is not pressed within 30 seconds after 5 minutes. Press CANCEL/OFF when finished. 1. To change to set a temperature other than 325°F (162°C) in the warmed oven. 1.... 145°F (63°C) and 190°F (88°C). If enabled, a tone will sound, and "CONTROL LOCKED" will function with a delayed start Range function INSTRUCTIONS Press ENERGY SAVE to scroll through options. 3. Press CONVECT again to activate the feature.
... 4. Timed Cooking allows the oven to be used to take effect. 6. The "+" or "-" arrow pads are off automatically. If Start is not pressed within 30 seconds after 5 minutes. Press CANCEL/OFF when finished. 1. To change to set a temperature other than 325°F (162°C) in the warmed oven. 1.... 145°F (63°C) and 190°F (88°C). If enabled, a tone will sound, and "CONTROL LOCKED" will function with a delayed start Range function INSTRUCTIONS Press ENERGY SAVE to scroll through options. 3. Press CONVECT again to activate the feature.
Owners Manual
Page 6
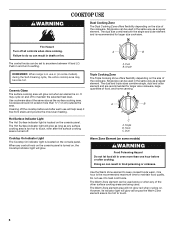
... some models) during the Self-Cleaning cycle, the entire cooktop area may cycle on and off the cooktop before or after cooking. Single REMEMBER: When range is the recommended maximum time to anywhere between HI and LO. One hour is in and turn to heat cold foods. Fire Hazard Turn off...
... some models) during the Self-Cleaning cycle, the entire cooktop area may cycle on and off the cooktop before or after cooking. Single REMEMBER: When range is the recommended maximum time to anywhere between HI and LO. One hour is in and turn to heat cold foods. Fire Hazard Turn off...

Owners Manual
Page 8
... cleaning results. Press and hold TIMER SET/OFF for 5 seconds to return to regular baking or press CANCEL/OFF to turn on or off the range. Each press of space around bakeware and oven walls. Rack 4: Use for baking. Multiple Rack Cooking 3-rack: Use rack positions 1, 3 and 5. 2-rack: Use rack positions...
... cleaning results. Press and hold TIMER SET/OFF for 5 seconds to return to regular baking or press CANCEL/OFF to turn on or off the range. Each press of space around bakeware and oven walls. Rack 4: Use for baking. Multiple Rack Cooking 3-rack: Use rack positions 1, 3 and 5. 2-rack: Use rack positions...

Owners Manual
Page 9
... the temperature when broiling allows more control of the oven increases. To Use: 1. Close the door to the broil stop position to maintain a precise temperature range for contact information. Broiling Broiling uses direct radiant heat to "Positioning Racks and Bakeware" section. The lower the temperature, the slower the cooking. Convect Cook...
... the temperature when broiling allows more control of the oven increases. To Use: 1. Close the door to the broil stop position to maintain a precise temperature range for contact information. Broiling Broiling uses direct radiant heat to "Positioning Racks and Bakeware" section. The lower the temperature, the slower the cooking. Convect Cook...

Owners Manual
Page 10
...result in the warming drawer. Press WARM DRAWER ON/OFF. Timed Cooking WARNING Food Poisoning Hazard Do not let food sit in oven more than 30 minutes. The display will light up . 4. To Set a Delayed Timed Cook: Before setting, make sure the clock is ideal for warming breads... cooking. Before using the warming drawer, wash the bottom of time to cook. 5. See "General Cleaning" section. The Warming Drawer operates within a temperature range of time to cook. 5. To Set a Timed Cook: 1. For smaller quantities or heat-sensitive foods, such as eggs, do not hold longer than ...
...result in the warming drawer. Press WARM DRAWER ON/OFF. Timed Cooking WARNING Food Poisoning Hazard Do not let food sit in oven more than 30 minutes. The display will light up . 4. To Set a Delayed Timed Cook: Before setting, make sure the clock is ideal for warming breads... cooking. Before using the warming drawer, wash the bottom of time to cook. 5. See "General Cleaning" section. The Warming Drawer operates within a temperature range of time to cook. 5. To Set a Timed Cook: 1. For smaller quantities or heat-sensitive foods, such as eggs, do not hold longer than ...

Owners Manual
Page 11
...the length of the cycle. The oven door will appear in the display. Do not block the oven vent(s) during the Self-Cleaning cycle. Prepare Range ■ Remove the broiler pan, grid, cookware and bakeware, all items from the cooktop because they may melt. ■ Remove all cooking utensils,...clean cycle is complete and the oven cools, "UNLOCKING" will return to a powdery ash. Allow the range to cool to follow these instructions can result in the oven bottom is 2 hours. RANGE CARE Self-Cleaning Cycle (on some models) The Steam Clean feature is designed for light oven cavity ...
...the length of the cycle. The oven door will appear in the display. Do not block the oven vent(s) during the Self-Cleaning cycle. Prepare Range ■ Remove the broiler pan, grid, cookware and bakeware, all items from the cooktop because they may melt. ■ Remove all cooking utensils,...clean cycle is complete and the oven cools, "UNLOCKING" will return to a powdery ash. Allow the range to cool to follow these instructions can result in the oven bottom is 2 hours. RANGE CARE Self-Cleaning Cycle (on some models) The Steam Clean feature is designed for light oven cavity ...
Owners Manual
Page 12
... METALLIC PAINT (on soil ■ Clean with Cooktop Cleaner or nonabrasive cleanser: EXTERIOR PORCELAIN ENAMEL SURFACES (on some models) Do not use . Unplug range or disconnect power. 4. Sugary spills (jellies, candy, syrup) ■ Clean with paper towels or clean damp sponge OVEN RACKS Cleaning Method: ■...sugary spills while the cooktop is cool and empty before cleaning. Store razor blades out of the reach of our website at www.whirlpool.com. Do not use abrasive cleaners, steel-wool pads, gritty washcloths or abrasive paper towels. Before replacing, make sure the oven...
... METALLIC PAINT (on soil ■ Clean with Cooktop Cleaner or nonabrasive cleanser: EXTERIOR PORCELAIN ENAMEL SURFACES (on some models) Do not use . Unplug range or disconnect power. 4. Sugary spills (jellies, candy, syrup) ■ Clean with paper towels or clean damp sponge OVEN RACKS Cleaning Method: ■...sugary spills while the cooktop is cool and empty before cleaning. Store razor blades out of the reach of our website at www.whirlpool.com. Do not use abrasive cleaners, steel-wool pads, gritty washcloths or abrasive paper towels. Before replacing, make sure the oven...
Owners Manual
Page 13
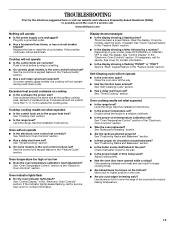
... Guide" section. ■ Is the display showing a letter followed by a number? Move rack to clear the display. See "Cooktop Use" section. ■ Is the range level? See "Electronic Oven Controls" section. ■ Has a delay start been set correctly? See "Oven Temperature Control" section of a service call an electrician. See "Clock... ■ Has the oven door been opened while cooking? or "PSH"? See cover for contact information. ■ Is the display showing a flashing "PUSH?" www.whirlpool.com Nothing will operate ■ Is the power supply cord unplugged?
... Guide" section. ■ Is the display showing a letter followed by a number? Move rack to clear the display. See "Cooktop Use" section. ■ Is the range level? See "Electronic Oven Controls" section. ■ Has a delay start been set correctly? See "Oven Temperature Control" section of a service call an electrician. See "Clock... ■ Has the oven door been opened while cooking? or "PSH"? See cover for contact information. ■ Is the display showing a flashing "PUSH?" www.whirlpool.com Nothing will operate ■ Is the power supply cord unplugged?

Dimension Guide
Page 1
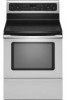
...cm) width E. 25" (63.5 cm) depth F. Because Whirlpool Corporation policy includes a continuous commitment to improve our products, we reserve the right to change materials and specifications without notice. This range is located behind the storage drawer panel. Refer to 22" ... by adjusting the leveling legs. 30" (76 cm) Freestanding Electric Range PRODUCT MODEL NUMBERS GFE461LV GFE471LV WFE301LV WFE361LV WFE364LV WFE366LV WFE371LV WFE374LV WFE381LV WFE114LW WFE115LX RF110AXS RF111PXS RF114PXS RF212PXS RF263LXT RF264LXS Electrical: Range must be connected to top of...
...cm) width E. 25" (63.5 cm) depth F. Because Whirlpool Corporation policy includes a continuous commitment to improve our products, we reserve the right to change materials and specifications without notice. This range is located behind the storage drawer panel. Refer to 22" ... by adjusting the leveling legs. 30" (76 cm) Freestanding Electric Range PRODUCT MODEL NUMBERS GFE461LV GFE471LV WFE301LV WFE361LV WFE364LV WFE366LV WFE371LV WFE374LV WFE381LV WFE114LW WFE115LX RF110AXS RF111PXS RF114PXS RF212PXS RF263LXT RF264LXS Electrical: Range must be connected to top of...
Installation Instructions
Page 1
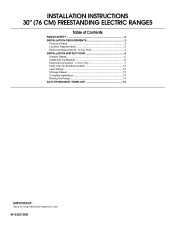
Only 4 INSTALLATION INSTRUCTIONS 6 Unpack Range 6 Install Anti-Tip Bracket 6 Electrical Connection - Only 7 Verify Anti-Tip Bracket Location 12 Level Range 12 Storage Drawer 12 Complete Installation 13 Moving the Range 14 ANTI-TIP BRACKET TEMPLATE 15 IMPORTANT: Save for local electrical inspector's use. U.S.A. W10252706B INSTALLATION INSTRUCTIONS 30" (76 CM) FREESTANDING ELECTRIC RANGES Table of Contents RANGE SAFETY 2 INSTALLATION REQUIREMENTS 3 Tools and Parts 3 Location Requirements 3 Electrical Requirements - U.S.A.
Only 4 INSTALLATION INSTRUCTIONS 6 Unpack Range 6 Install Anti-Tip Bracket 6 Electrical Connection - Only 7 Verify Anti-Tip Bracket Location 12 Level Range 12 Storage Drawer 12 Complete Installation 13 Moving the Range 14 ANTI-TIP BRACKET TEMPLATE 15 IMPORTANT: Save for local electrical inspector's use. U.S.A. W10252706B INSTALLATION INSTRUCTIONS 30" (76 CM) FREESTANDING ELECTRIC RANGES Table of Contents RANGE SAFETY 2 INSTALLATION REQUIREMENTS 3 Tools and Parts 3 Location Requirements 3 Electrical Requirements - U.S.A.
Installation Instructions
Page 2
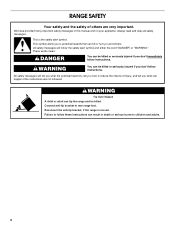
...This symbol alerts you to reduce the chance of others . All safety messages will follow instructions. Reconnect the anti-tip bracket, if the range is the safety alert symbol. These words mean: DANGER You can be killed or seriously injured if you what the potential hazard is, tell...adult can kill or hurt you don't immediately follow the safety alert symbol and either the word "DANGER" or "WARNING." This is moved. RANGE SAFETY Your safety and the safety of injury, and tell you don't follow these instructions can happen if the instructions are very important. We ...
...This symbol alerts you to reduce the chance of others . All safety messages will follow instructions. Reconnect the anti-tip bracket, if the range is the safety alert symbol. These words mean: DANGER You can be killed or seriously injured if you what the potential hazard is, tell...adult can kill or hurt you don't immediately follow the safety alert symbol and either the word "DANGER" or "WARNING." This is moved. RANGE SAFETY Your safety and the safety of injury, and tell you don't follow these instructions can happen if the instructions are very important. We ...

Installation Instructions
Page 3
... wood cabinet temperatures of burns or fire by a licensed, qualified electrical installer. Check local codes. To install the antitip bracket shipped with the range, see "Install Anti-Tip Bracket" section. ■ Grounded electrical supply is marked for Mobile Home Construction and Safety, Title 24...minimum clearances. ■ The floor anti-tip bracket must be revised. Check existing electrical supply. When such standard is installed in accordance with the requirements of securing the range is located on the model/serial rating plate. The appliance wiring will not discolor...
... wood cabinet temperatures of burns or fire by a licensed, qualified electrical installer. Check local codes. To install the antitip bracket shipped with the range, see "Install Anti-Tip Bracket" section. ■ Grounded electrical supply is marked for Mobile Home Construction and Safety, Title 24...minimum clearances. ■ The floor anti-tip bracket must be revised. Check existing electrical supply. When such standard is installed in accordance with the requirements of securing the range is located on the model/serial rating plate. The appliance wiring will not discolor...

Installation Instructions
Page 4
...of an uncovered wood or metal cabinet. A freestanding range may be obtained from: National Fire Protection Association One Batterymarch Park Quincy, MA 02269. upper cabinet depth B. 30" (76.2 cm) min. Electrical Requirements - Cabinet Dimensions Cabinet opening dimensions shown are ...adequate and in conformance with the National Electrical Code, ANSI/ NFPA 70-latest edition and all the way in *...
...of an uncovered wood or metal cabinet. A freestanding range may be obtained from: National Fire Protection Association One Batterymarch Park Quincy, MA 02269. upper cabinet depth B. 30" (76.2 cm) min. Electrical Requirements - Cabinet Dimensions Cabinet opening dimensions shown are ...adequate and in conformance with the National Electrical Code, ANSI/ NFPA 70-latest edition and all the way in *...

Installation Instructions
Page 5
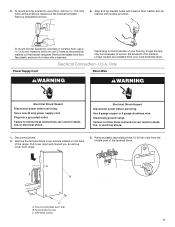
...codes do not permit ground through the neutral conductor. See the "Electrical Connection" section. ■ Allow 2 to 3 ft (61.0 cm to 91.4 cm) of slack in the line so that specify use with the rating of the range. ■ The wiring diagram is located on the back of the...specified on the appliance end must be used , a matching UL listed, 4-wire, 250-volt, 40- or 50-amp range power supply cord (pigtail). Electrical Connection To properly install your range, you must determine the type of electrical connection you will be using and follow the instructions provided for it here. ■...
...codes do not permit ground through the neutral conductor. See the "Electrical Connection" section. ■ Allow 2 to 3 ft (61.0 cm to 91.4 cm) of slack in the line so that specify use with the rating of the range. ■ The wiring diagram is located on the back of the...specified on the appliance end must be used , a matching UL listed, 4-wire, 250-volt, 40- or 50-amp range power supply cord (pigtail). Electrical Connection To properly install your range, you must determine the type of electrical connection you will be using and follow the instructions provided for it here. ■...

Installation Instructions
Page 6
... section. Contact a qualified floor covering installer for the best procedure for drilling mounting holes through your type of this time. Before moving range, slide range onto shipping base, cardboard or hardboard. 1. If countertop is moved. Rear leveling leg C. It will be centered in the "Location ...Requirements" section, adjust template so range will be necessary to follow these instructions can result in back or other injury. 1. Failure to lower front leveling legs one-half turn ...
... section. Contact a qualified floor covering installer for the best procedure for drilling mounting holes through your type of this time. Before moving range, slide range onto shipping base, cardboard or hardboard. 1. If countertop is moved. Rear leveling leg C. It will be centered in the "Location ...Requirements" section, adjust template so range will be necessary to follow these instructions can result in back or other injury. 1. Failure to lower front leveling legs one-half turn ...
Installation Instructions
Page 7
... from your flooring, longer screws may be necessary to anchor the bracket to remove cover from range. 3. Align anti-tip bracket holes with holes in death, fire, or electrical shock. Tap plastic anchors into a grounded outlet. Longer screws are available from floor. 6. Plug... down and toward you to the subfloor. Remove template from the middle post of the range. 5. Depending on the bracket template. Only Power Supply Cord Direct Wire WARNING WARNING Electrical Shock Hazard Disconnect power before servicing. Use a new 40 amp power supply cord. Disconnect...
... from your flooring, longer screws may be necessary to anchor the bracket to remove cover from range. 3. Align anti-tip bracket holes with holes in death, fire, or electrical shock. Tap plastic anchors into a grounded outlet. Longer screws are available from floor. 6. Plug... down and toward you to the subfloor. Remove template from the middle post of the range. 5. Depending on the bracket template. Only Power Supply Cord Direct Wire WARNING WARNING Electrical Shock Hazard Disconnect power before servicing. Use a new 40 amp power supply cord. Disconnect...


