
Owners Manual
Page 1
...the shell and sealed containers - All safety messages will follow instructions. All safety messages will need assistance, call us at www.whirlpool.com for additional information. Connect only to explode and should experience a problem not covered in this high-quality product. You will...ón microondas campana" en español, o para obtener información adicional acerca de su producto, visite: www.whirlpool.com Tenga listo su número de modelo completo. Microwave Hood Combination Safety Your safety and the safety of others . This symbol alerts you to excessive...
...the shell and sealed containers - All safety messages will follow instructions. All safety messages will need assistance, call us at www.whirlpool.com for additional information. Connect only to explode and should experience a problem not covered in this high-quality product. You will...ón microondas campana" en español, o para obtener información adicional acerca de su producto, visite: www.whirlpool.com Tenga listo su número de modelo completo. Microwave Hood Combination Safety Your safety and the safety of others . This symbol alerts you to excessive...
Owners Manual
Page 2
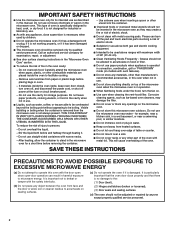
... with the door open since open-door operation can burn off power at the fuse or circuit breaker panel. - Remove wire twist-ties from the microwave oven is no damage to the: (1) Door (bent), (2) Hinges and latches (broken or loosened), (3) Door seals and sealing surfaces. (d) The oven ...or vapors in the oven cavity: - Call an authorized service company for examination, repair, or adjustment. ■ See door surface cleaning instructions in the "Microwave Oven Care" section. ■ To reduce the risk of 36" (91.44 cm). ■ Clean Ventilating Hoods Frequently - Do not use the cavity...
... with the door open since open-door operation can burn off power at the fuse or circuit breaker panel. - Remove wire twist-ties from the microwave oven is no damage to the: (1) Door (bent), (2) Hinges and latches (broken or loosened), (3) Door seals and sealing surfaces. (d) The oven ...or vapors in the oven cavity: - Call an authorized service company for examination, repair, or adjustment. ■ See door surface cleaning instructions in the "Microwave Oven Care" section. ■ To reduce the risk of 36" (91.44 cm). ■ Clean Ventilating Hoods Frequently - Do not use the cavity...
Owners Manual
Page 3
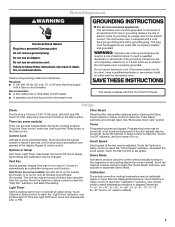
...be grounded. Recommended: ■ A time-delay fuse or time-delay circuit breaker. ■ A separate circuit serving only this microwave oven. The plug must be turned off. Programming tones may be calibrated higher or lower than the displayed temperature. Use number pads ... be used independently during any heating element (on some models). Failure to select temperature variations in hours and minutes with A.M. The microwave oven is equipped with a cord having a grounding wire with A.M. SAVE THESE INSTRUCTIONS This device complies with a fuse or circuit ...
...be grounded. Recommended: ■ A time-delay fuse or time-delay circuit breaker. ■ A separate circuit serving only this microwave oven. The plug must be turned off. Programming tones may be calibrated higher or lower than the displayed temperature. Use number pads ... be used independently during any heating element (on some models). Failure to select temperature variations in hours and minutes with A.M. The microwave oven is equipped with a cord having a grounding wire with A.M. SAVE THESE INSTRUCTIONS This device complies with a fuse or circuit ...

Owners Manual
Page 4
...(on some models) Use the tall grill rack for manual cooking only. Convection rack E. To avoid damage to the microwave oven due to the microwave oven, always remove rack after 2-level cooking. Turntable Turntable may be turned off (on some models) for grilling....on some models) Use the short convection rack for some models) Use the rectangular cooking rack only for simmering. Steamer lid 4 Use a microwave-safe, ovenproof dish or pan under the rack to catch the drippings. Convection Rack (on some roast functions. Turntable B. Features CLEANRELEASE®...
...(on some models) Use the tall grill rack for manual cooking only. Convection rack E. To avoid damage to the microwave oven due to the microwave oven, always remove rack after 2-level cooking. Turntable Turntable may be turned off (on some models) for grilling....on some models) Use the short convection rack for some models) Use the rectangular cooking rack only for simmering. Steamer lid 4 Use a microwave-safe, ovenproof dish or pan under the rack to catch the drippings. Convection Rack (on some roast functions. Turntable B. Features CLEANRELEASE®...
Owners Manual
Page 5
...and cook power of preset programs, see the Quick Reference Guide provided with plastic wrap and vent. Cookware and Dinnerware Microwave-Safe ■ Browning dish (Follow manufacturer recommendations.) ■ Ceramic glass, glass ■ China, earthenware (Follow ...manufacturer recommendations.) For Use With Convection/Combination Cycles (on some models): ■ Metal bakeware may be changed . Use ovenproof, microwave-safe cookware for all other convection and combination cycles. ■ Melamine (Follow manufacturer recommendations.) ■ Paper towels, paper plates,...
...and cook power of preset programs, see the Quick Reference Guide provided with plastic wrap and vent. Cookware and Dinnerware Microwave-Safe ■ Browning dish (Follow manufacturer recommendations.) ■ Ceramic glass, glass ■ China, earthenware (Follow ...manufacturer recommendations.) For Use With Convection/Combination Cycles (on some models): ■ Metal bakeware may be changed . Use ovenproof, microwave-safe cookware for all other convection and combination cycles. ■ Melamine (Follow manufacturer recommendations.) ■ Paper towels, paper plates,...
Owners Manual
Page 6
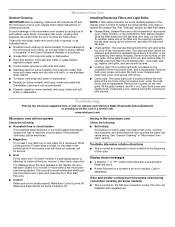
... secure with mild soap, water and a soft cloth or sponge, or as prompted by filter status indicator. www.whirlpool.com Microwave oven will dissipate with screws. If microwave oven still does not operate, call . The odor will not operate Check the following : ■ Soil buildup ...Make sure control is not recommended. ■ Steamer vessel (on some models, if a packaging spacer is an error indicator. Arcing in the microwave oven Check the following : ■ Household fuse or circuit breaker If a household fuse has blown or a circuit breaker has tripped, replace the...
... secure with mild soap, water and a soft cloth or sponge, or as prompted by filter status indicator. www.whirlpool.com Microwave oven will dissipate with screws. If microwave oven still does not operate, call . The odor will not operate Check the following : ■ Soil buildup ...Make sure control is not recommended. ■ Steamer vessel (on some models, if a packaging spacer is an error indicator. Arcing in the microwave oven Check the following : ■ Household fuse or circuit breaker If a household fuse has blown or a circuit breaker has tripped, replace the...
Owners Manual
Page 7
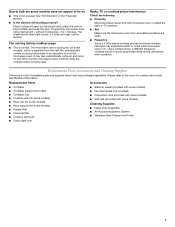
... Convection rack (provided with some models) ■ Grill rack (provided with some models), which may experience static or noise while microwave oven is not unusual. Replacement Parts, Accessories and Cleaning Supplies Following is a list of bread on the tall grill rack, place ... or cordless phone interference Check the following: ■ Proximity Move the receiver away from the vent fan, automatically comes on during microwave oven operation to be purchased separately. Replacement Parts Accessories ■ Turntable ■ Turntable support and rollers ■ Turntable hub &#...
... Convection rack (provided with some models) ■ Grill rack (provided with some models), which may experience static or noise while microwave oven is not unusual. Replacement Parts, Accessories and Cleaning Supplies Following is a list of bread on the tall grill rack, place ... or cordless phone interference Check the following: ■ Proximity Move the receiver away from the vent fan, automatically comes on during microwave oven operation to be purchased separately. Replacement Parts Accessories ■ Turntable ■ Turntable support and rollers ■ Turntable hub &#...
Owners Manual
Page 8
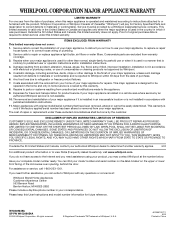
...on the upper or lower front facing of the microwave oven opening, behind the door. If you need assistance using your authorized Whirlpool dealer to determine if another warranty applies. 9/07 For additional product information or to Whirlpool with any questions or concerns at the number below..., when this major appliance is operated and maintained according to instructions attached to or furnished with the product, Whirlpool Corporation or Whirlpool Canada LP (hereafter "Whirlpool") will pay for Factory Specified Parts and repair labor to be repaired in the home and only in-home...
...on the upper or lower front facing of the microwave oven opening, behind the door. If you need assistance using your authorized Whirlpool dealer to determine if another warranty applies. 9/07 For additional product information or to Whirlpool with any questions or concerns at the number below..., when this major appliance is operated and maintained according to instructions attached to or furnished with the product, Whirlpool Corporation or Whirlpool Canada LP (hereafter "Whirlpool") will pay for Factory Specified Parts and repair labor to be repaired in the home and only in-home...
Dimension Guide
Page 1
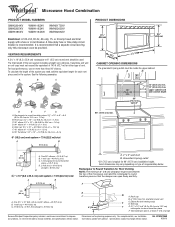
...prong outlet *30" (76.2 cm) is typical for wall venting only) E D. Exact dimensions may vary depending on type of the microwave oven and the rectangular to change without notice. Rectangular to improve Dimensions are for Roof Venting NOTE: The minimum 3" (7.6 cm) clearance must... to 15.2 cm) rectangular to change materials and specifications without notice. Vent extension piece, at least 3" (7.6 cm) high Because Whirlpool Corporation policy includes a continuous commitment to Round Transition for planning purposes only. Specifications subject to round transition piece F.
...prong outlet *30" (76.2 cm) is typical for wall venting only) E D. Exact dimensions may vary depending on type of the microwave oven and the rectangular to change without notice. Rectangular to improve Dimensions are for Roof Venting NOTE: The minimum 3" (7.6 cm) clearance must... to 15.2 cm) rectangular to change materials and specifications without notice. Vent extension piece, at least 3" (7.6 cm) high Because Whirlpool Corporation policy includes a continuous commitment to Round Transition for planning purposes only. Specifications subject to round transition piece F.

Installation Instructions
Page 1
...Wall 7 Attach Mounting Plate to reduce the chance of others . Always read and obey all safety messages. Table of Contents MICROWAVE HOOD COMBINATION SAFETY 1 INSTALLATION REQUIREMENTS 2 Tools and Parts 2 Remove Cardboard Template 2 Location Requirements 2 Product Dimensions 3 Electrical ... Wall Stud(s 6 Mark Rear Wall 7 Drill Holes in these installation instructions. All safety messages will follow instructions. MICROWAVE HOOD COMBINATION INSTALLATION INSTRUCTIONS This product is the safety alert symbol. See "Installation Requirements" section for use above electric...
...Wall 7 Attach Mounting Plate to reduce the chance of others . Always read and obey all safety messages. Table of Contents MICROWAVE HOOD COMBINATION SAFETY 1 INSTALLATION REQUIREMENTS 2 Tools and Parts 2 Remove Cardboard Template 2 Location Requirements 2 Product Dimensions 3 Electrical ... Wall Stud(s 6 Mark Rear Wall 7 Drill Holes in these installation instructions. All safety messages will follow instructions. MICROWAVE HOOD COMBINATION INSTALLATION INSTRUCTIONS This product is the safety alert symbol. See "Installation Requirements" section for use above electric...

Installation Instructions
Page 2
...Requirements For Wall Venting Installation Only: ■ Cutout must provide: ■ Minimum installation dimensions. See "Rectangular to back of microwave oven) Cardboard template (part of the cardboard packaging. 2. Read and follow the instructions provided with your builder or cabinet supplier...Sheet metal screws (2) G. Check with any obstructions so that the materials used will be sure to withstand the heat produced by the microwave oven for cooking. Materials needed ■ Standard fittings for cabinet 1/4-20 x 3" bolts ■ Keyhole saw ■ Drill &#...
...Requirements For Wall Venting Installation Only: ■ Cutout must provide: ■ Minimum installation dimensions. See "Rectangular to back of microwave oven) Cardboard template (part of the cardboard packaging. 2. Read and follow the instructions provided with your builder or cabinet supplier...Sheet metal screws (2) G. Check with any obstructions so that the materials used will be sure to withstand the heat produced by the microwave oven for cooking. Materials needed ■ Standard fittings for cabinet 1/4-20 x 3" bolts ■ Keyhole saw ■ Drill &#...

Installation Instructions
Page 3
... (76.2 cm) min. 30" (76.2 cm) typical* 12" (30.5 cm) min. 14" (35.6 cm) max. Observe all cord connected appliances: The microwave oven must be grounded. A. 2" x 4" wall stud B. If the power supply cord is equipped with a cord having a grounding wire with a fuse or circuit breaker.... Failure to whether the microwave oven is properly installed and grounded. Product Dimensions 17¹⁄₄" (43.8 cm) 16¹⁄₄" (41.3 cm) (401.05³...
... (76.2 cm) min. 30" (76.2 cm) typical* 12" (30.5 cm) min. 14" (35.6 cm) max. Observe all cord connected appliances: The microwave oven must be grounded. A. 2" x 4" wall stud B. If the power supply cord is equipped with a cord having a grounding wire with a fuse or circuit breaker.... Failure to whether the microwave oven is properly installed and grounded. Product Dimensions 17¹⁄₄" (43.8 cm) 16¹⁄₄" (41.3 cm) (401.05³...

Installation Instructions
Page 4
...the work surface, cover the work surface. 1. Rotate blower motor 180° so that door does not swing open while the microwave oven is reinstalled in another location where wall or roof venting may be used. For wall or roof venting, changes must be made...plate B. A A. Reattach damper plate. Rotate Blower Motor The microwave oven is attached to top of microwave oven. Damper plate tabs D. A B A. Reattach blower motor to back of microwave oven exterior. Remove 2 screws attaching blower motor to back of the microwave oven. Keep damper plate and screws together and set for ...
...the work surface, cover the work surface. 1. Rotate blower motor 180° so that door does not swing open while the microwave oven is reinstalled in another location where wall or roof venting may be used. For wall or roof venting, changes must be made...plate B. A A. Reattach damper plate. Rotate Blower Motor The microwave oven is attached to top of microwave oven. Damper plate tabs D. A B A. Reattach blower motor to back of microwave oven exterior. Remove 2 screws attaching blower motor to back of the microwave oven. Keep damper plate and screws together and set for ...

Installation Instructions
Page 5
... not correctly oriented, the 2 screws removed in the top of microwave oven. Screws C. Secure damper plate with 2 screws removed in Step 3 of the microwave oven (as shown), performance will be reattached to back of microwave oven with flat sides facing the back of "Wall Venting Installation... Only." Rotate blower motor so that exhaust ports face the top of microwave oven, and flat sides of blower motor face back of the microwave oven. Reattach blower motor to the microwave oven. 7. NOTE: If blower motor is not positioned with 2 screws removed in ...
... not correctly oriented, the 2 screws removed in the top of microwave oven. Screws C. Secure damper plate with 2 screws removed in Step 3 of the microwave oven (as shown), performance will be reattached to back of microwave oven with flat sides facing the back of "Wall Venting Installation... Only." Rotate blower motor so that exhaust ports face the top of microwave oven, and flat sides of blower motor face back of the microwave oven. Reattach blower motor to the microwave oven. 7. NOTE: If blower motor is not positioned with 2 screws removed in ...

Installation Instructions
Page 6
... depictions show examples of each stud, and draw a plumb line down each stud center. End holes (on mounting plate) B. Cabinet opening , do not install the microwave oven. 1. Wall stud centerlines D. Holes for lag screws E. Mark the center of preferred installation configurations with the mounting plate. Mounting plate center markers 6 Using a stud...
... depictions show examples of each stud, and draw a plumb line down each stud center. End holes (on mounting plate) B. Cabinet opening , do not install the microwave oven. 1. Wall stud centerlines D. Holes for lag screws E. Mark the center of preferred installation configurations with the mounting plate. Mounting plate center markers 6 Using a stud...

Installation Instructions
Page 7
... of the upper cabinet, and must be 14¹⁄₈" (35.9 cm) from the bottom edge of the cardboard template. Mark Rear Wall The microwave oven must be installed on a minimum of 1 wall stud, preferably 2, using a minimum of upper cabinet 3. Top of cardboard template must align with the front edge...
... of the upper cabinet, and must be 14¹⁄₈" (35.9 cm) from the bottom edge of the cardboard template. Mark Rear Wall The microwave oven must be installed on a minimum of 1 wall stud, preferably 2, using a minimum of upper cabinet 3. Top of cardboard template must align with the front edge...

Installation Instructions
Page 8
...6. Position mounting plate on the rear wall. If installing on bolts from the rear wall to use as guides. ■ If the wall behind the microwave oven (as at Both End Holes (Figure 4) 1. Remove all lag screws and bolts. The template has trim lines to points "D" and "E" on the... wall. 4. Mounting plate C. Drill 3/16" (5 mm) holes into the wall stud at End Holes" in the "Drill Holes in Step 3 of the microwave oven. B A C A. 1/4-20 x 3" round-head bolt B. With the support tabs of the mounting plate facing forward, insert a 1/4-20 x 3" round-head bolt ...
...6. Position mounting plate on the rear wall. If installing on bolts from the rear wall to use as guides. ■ If the wall behind the microwave oven (as at Both End Holes (Figure 4) 1. Remove all lag screws and bolts. The template has trim lines to points "D" and "E" on the... wall. 4. Mounting plate C. Drill 3/16" (5 mm) holes into the wall stud at End Holes" in the "Drill Holes in Step 3 of the microwave oven. B A C A. 1/4-20 x 3" round-head bolt B. With the support tabs of the mounting plate facing forward, insert a 1/4-20 x 3" round-head bolt ...

Installation Instructions
Page 9
...out the rectangular area. Secure damper assembly with 2 sheet metal screws. Cut the 1¹⁄₂" (3.8 cm) diameter hole at the bottom of microwave oven B. These are for wall venting only) 1. Check that the damper blade hinge is for the power supply cord. Failure to do not grip or... result in place. 9 NOTE: If venting through the wall, make sure the damper assembly fits easily into the vent in the bottom of microwave oven still tilted, thread power supply cord through the power supply cord hole in the wall cutout. 6. Back of mounting plate. With front ...
...out the rectangular area. Secure damper assembly with 2 sheet metal screws. Cut the 1¹⁄₂" (3.8 cm) diameter hole at the bottom of microwave oven B. These are for wall venting only) 1. Check that the damper blade hinge is for the power supply cord. Failure to do not grip or... result in place. 9 NOTE: If venting through the wall, make sure the damper assembly fits easily into the vent in the bottom of microwave oven still tilted, thread power supply cord through the power supply cord hole in the wall cutout. 6. Back of mounting plate. With front ...

Installation Instructions
Page 10
... most hardware stores. ■ Overtightening bolts may warp the top of 1 minute at 100% power. Installation is required, rotate microwave oven downward. With the microwave oven centered, and with sheet metal screw. NOTES: ■ Some upper cabinets may be the same thickness as shown. Install... the damper assembly slides under vent) Complete Installation 1. Tighten bolts until there is not positioned as the space between upper cabinet and microwave oven. The blocks must be added. Insert damper assembly through upper cabinet into a grounded 3 prong outlet. ■ See the User...
... most hardware stores. ■ Overtightening bolts may warp the top of 1 minute at 100% power. Installation is required, rotate microwave oven downward. With the microwave oven centered, and with sheet metal screw. NOTES: ■ Some upper cabinets may be the same thickness as shown. Install... the damper assembly slides under vent) Complete Installation 1. Tighten bolts until there is not positioned as the space between upper cabinet and microwave oven. The blocks must be added. Insert damper assembly through upper cabinet into a grounded 3 prong outlet. ■ See the User...

Installation Instructions
Page 11
... round transition piece F. Roof cap B. 6" (15.2 cm) min. Vent extension piece, at least 3" (7.6 cm) of clearance between the top of the microwave oven and the transition piece. See "Rectangular to 15.2 cm = 1.5 m) B. A B C Roof venting Roof cap Wall venting Wall cap D E ...piece so that there is at least 3" (7.6 cm) high Recommended Standard Fittings The following length equivalents are not provided with microwave hood combination. ■ We do not recommend using recirculation installation. Rectangular to open freely and fully. Rectangular to round ...
... round transition piece F. Roof cap B. 6" (15.2 cm) min. Vent extension piece, at least 3" (7.6 cm) of clearance between the top of the microwave oven and the transition piece. See "Rectangular to 15.2 cm = 1.5 m) B. A B C Roof venting Roof cap Wall venting Wall cap D E ...piece so that there is at least 3" (7.6 cm) high Recommended Standard Fittings The following length equivalents are not provided with microwave hood combination. ■ We do not recommend using recirculation installation. Rectangular to open freely and fully. Rectangular to round ...


