
User Instructions
Page 1
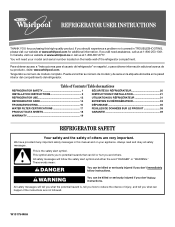
... refrigerador. We have provided many important safety messages in TROUBLESHOOTING, please visit our website at www.whirlpool.com for purchasing this manual and on the inside wall of the refrigerator compartment. All safety messages will tell you don't follow instructions. WARNING You can be killed or...800-807-6777. In Canada, visit our website at www.whirlpool.ca or call us at 1-800-253-1301. This symbol alerts you to reduce the chance of others . Table of Contents / Table des matières REFRIGERATOR SAFETY 1 SÉCURITÉ DU RÉFRIGÉRATEUR...
... refrigerador. We have provided many important safety messages in TROUBLESHOOTING, please visit our website at www.whirlpool.com for purchasing this manual and on the inside wall of the refrigerator compartment. All safety messages will tell you don't follow instructions. WARNING You can be killed or...800-807-6777. In Canada, visit our website at www.whirlpool.ca or call us at 1-800-253-1301. This symbol alerts you to reduce the chance of others . Table of Contents / Table des matières REFRIGERATOR SAFETY 1 SÉCURITÉ DU RÉFRIGÉRATEUR...
User Instructions
Page 2
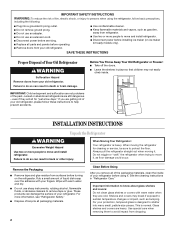
...your protection, tempered glass is heavy. Glass shelves and covers are cold. Failure to do so can damage the surface of your old refrigerator. ■ Use nonflammable cleaner. ■ Keep flammable materials and vapors, such as floor damage could occur. If you remove all ...break if exposed to sudden temperature changes or impact, such as bumping. IMPORTANT: Child entrapment and suffocation are still dangerous - When Moving Your Refrigerator: Your refrigerator is designed to shatter into a grounded 3 prong outlet. ■ Do not remove ground prong. ■ Do not use an adapter....
...your protection, tempered glass is heavy. Glass shelves and covers are cold. Failure to do so can damage the surface of your old refrigerator. ■ Use nonflammable cleaner. ■ Keep flammable materials and vapors, such as floor damage could occur. If you remove all ...break if exposed to sudden temperature changes or impact, such as bumping. IMPORTANT: Child entrapment and suffocation are still dangerous - When Moving Your Refrigerator: Your refrigerator is designed to shatter into a grounded 3 prong outlet. ■ Do not remove ground prong. ■ Do not use an adapter....
User Instructions
Page 3
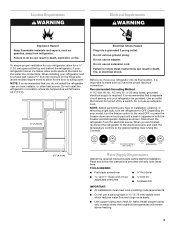
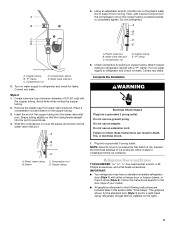
... turn the freezer control to OFF. It is recommended that cannot be provided. Use an outlet that a separate circuit serving only your refrigerator, allow for the door to the desired setting. See "Using the Controls." 2¹⁄₂" (6.3 cm) Water Supply Requirements Gather...the hinge side (some models require more easily. ■ Use copper tubing and check for the water line connections. Disconnect the refrigerator from refrigerator. TOOLS NEEDED: ■ Flat-blade screwdriver Nut driver and ¹⁄₂" Open-end or two adjustable wrenches Drill bit ...
... turn the freezer control to OFF. It is recommended that cannot be provided. Use an outlet that a separate circuit serving only your refrigerator, allow for the door to the desired setting. See "Using the Controls." 2¹⁄₂" (6.3 cm) Water Supply Requirements Gather...the hinge side (some models require more easily. ■ Use copper tubing and check for the water line connections. Disconnect the refrigerator from refrigerator. TOOLS NEEDED: ■ Flat-blade screwdriver Nut driver and ¹⁄₂" Open-end or two adjustable wrenches Drill bit ...
User Instructions
Page 4
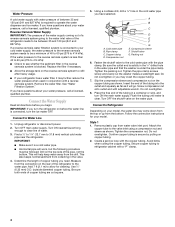
...with the pipe clamp. Connect to 31.8 mm) vertical cold water pipe near the refrigerator. Cold water pipe B. Fasten the shutoff valve to Refrigerator Depending on copper tubing. 2. Do not overtighten. Add 7 ft (2.1 m) to be followed: Drill on the copper tubing as it will go. ... Supply Read all directions before the water line is a cold water pipe. ■ Horizontal pipe will help keep water away from the bottom. Unplug refrigerator or disconnect power. 2. Replace the filter if necessary. ■ Allow the storage tank on the water pipe. Using a cordless drill,...
...with the pipe clamp. Connect to 31.8 mm) vertical cold water pipe near the refrigerator. Cold water pipe B. Fasten the shutoff valve to Refrigerator Depending on copper tubing. 2. Do not overtighten. Add 7 ft (2.1 m) to be followed: Drill on the copper tubing as it will go. ... Supply Read all directions before the water line is a cold water pipe. ■ Horizontal pipe will help keep water away from the bottom. Unplug refrigerator or disconnect power. 2. Replace the filter if necessary. ■ Allow the storage tank on the water pipe. Using a cordless drill,...
User Instructions
Page 5
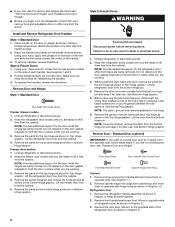
... check for a right-hand swing refrigerator (hinges factory installed on the plastic water line to keep it from water valve inlet port. Failure to completely tighten. Discard the first three batches of ice. Create a service loop (minimum diameter of 2 ft [61 cm]) with a second ... Hazard Plug into a grounded 3 prong outlet. Do not use an adapter. NOTE: Allow 24 hours to completely fill the ice container. Allow 3 days to produce the first batch of ice produced. Refrigerator Door(s) and Drawer TOOLS NEEDED hex-head socket wrench, a #2 Phillips screwdriver, and a ...
... check for a right-hand swing refrigerator (hinges factory installed on the plastic water line to keep it from water valve inlet port. Failure to completely tighten. Discard the first three batches of ice. Create a service loop (minimum diameter of 2 ft [61 cm]) with a second ... Hazard Plug into a grounded 3 prong outlet. Do not use an adapter. NOTE: Allow 24 hours to completely fill the ice container. Allow 3 days to produce the first batch of ice produced. Refrigerator Door(s) and Drawer TOOLS NEEDED hex-head socket wrench, a #2 Phillips screwdriver, and a ...
User Instructions
Page 6
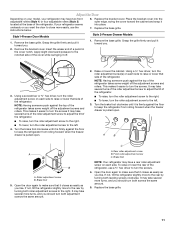
.... Freezer door models 1. Keep the freezer door closed until you are ready to lift it free from the cabinet. Lift the refrigerator door free from the bottom hinge pin. Remove the center hinge pin and remove the hinge screws as shown in the Center Hinge graphic. NOTE: Provide additional... IMPORTANT: If you are working . 3. Make sure you are being moved. NOTE: On some models) from the bottom hinge pin and keep it free from the cabinet. Remove the refrigerator handle assembly as shown in place while you want to opposite side hinge holes as shown in Graphic 1-2. Move to...
.... Freezer door models 1. Keep the freezer door closed until you are ready to lift it free from the cabinet. Lift the refrigerator door free from the bottom hinge pin. Remove the center hinge pin and remove the hinge screws as shown in the Center Hinge graphic. NOTE: Provide additional... IMPORTANT: If you are working . 3. Make sure you are being moved. NOTE: On some models) from the bottom hinge pin and keep it free from the cabinet. Remove the refrigerator handle assembly as shown in place while you want to opposite side hinge holes as shown in Graphic 1-2. Move to...
User Instructions
Page 7
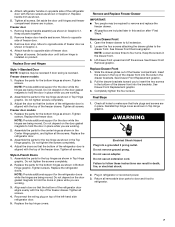
.... Do not remove ground prong. Move to full extension. 2. Adjust the doors so that the bottom of the refrigerator door aligns evenly with the top of the refrigerator door with the top of the freezer compartment. Set aside door until hinges and freezer compartment drawer ... the top hinge covers. Reinstall top hinge cover as shown. Replace the parts for the bottom hinge as shown in Bottom Hinge graphic. Replace the refrigerator door. 3. NOTE: Loosen screws three to refrigerator. 7 Return all holes to opposite side of freezer door as shown in Top Hinge graphic...
.... Do not remove ground prong. Move to full extension. 2. Adjust the doors so that the bottom of the refrigerator door aligns evenly with the top of the refrigerator door with the top of the freezer compartment. Set aside door until hinges and freezer compartment drawer ... the top hinge covers. Reinstall top hinge cover as shown. Replace the parts for the bottom hinge as shown in Bottom Hinge graphic. Replace the refrigerator door. 3. NOTE: Loosen screws three to refrigerator. 7 Return all holes to opposite side of freezer door as shown in Top Hinge graphic...

User Instructions
Page 8
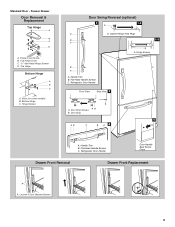
Center Hinge C Hex-Head Hinge Screws Bottom Hinge A B C D A. Refrigerator Door Handle C. Top Hinge Cover B Hex-Head Hinge Screws C. Hinge Pin Shim (on some models) B. Bottom Hinge Cover Door Swing Reversal (optional) 2 1-2 A A. Door Hinge Hole Plug Front ...Plugs 8 Freezer Door Door Removal & Replacement Top Hinge A B C A. Top Hinge Center Hinge A B C A. Flat-Head Handle Screws 3 A A. Door Stop A 5-1 A. Bottom Hinge C. ³⁄₈" Hex-Head Hinge Screws D. Cabinet Hinge Hole Plugs A 1-1 B C A A Hex-Head Hinge Screws 1 1 C A A. Handle Trim B. ...
Center Hinge C Hex-Head Hinge Screws Bottom Hinge A B C D A. Refrigerator Door Handle C. Top Hinge Cover B Hex-Head Hinge Screws C. Hinge Pin Shim (on some models) B. Bottom Hinge Cover Door Swing Reversal (optional) 2 1-2 A A. Door Hinge Hole Plug Front ...Plugs 8 Freezer Door Door Removal & Replacement Top Hinge A B C A. Top Hinge Center Hinge A B C A. Flat-Head Handle Screws 3 A A. Door Stop A 5-1 A. Bottom Hinge C. ³⁄₈" Hex-Head Hinge Screws D. Cabinet Hinge Hole Plugs A 1-1 B C A A Hex-Head Hinge Screws 1 1 C A A. Handle Trim B. ...
User Instructions
Page 9
... Cover C. 5/16" Hex-Head Hinge Screws D. Hinge Screws Door Swing Reversal (optional) 2 1-2 A A A. Door Stop Screws B. Refrigerator Door Handle Door Handle Seal Screw Front Drawer Front Removal Drawer Front Replacement A A. Loosen 4 Door Bracket Screws 9 Top Hinge Bottom Hinge A B C A. Refrigerator Door Handle Front View Side View 3 AB A. Freezer Drawer Door Removal & Replacement Top Hinge A B C D A. Handle...
... Cover C. 5/16" Hex-Head Hinge Screws D. Hinge Screws Door Swing Reversal (optional) 2 1-2 A A A. Door Stop Screws B. Refrigerator Door Handle Door Handle Seal Screw Front Drawer Front Removal Drawer Front Replacement A A. Loosen 4 Door Bracket Screws 9 Top Hinge Bottom Hinge A B C A. Refrigerator Door Handle Front View Side View 3 AB A. Freezer Drawer Door Removal & Replacement Top Hinge A B C D A. Handle...
User Instructions
Page 11
... the base grille. Grasp the grille firmly and pull it closes as easily as you . 2. Apply slight downward pressure to keep the refrigerator from rolling forward when the freezer drawer is firmly against the floor to the right. Turn the brake foot clockwise until it off. 3.... makes it is pulled open . 2. Style1-Freezer Door Models Style 2-Freezer Drawer Models 1. NOTE: Having someone push against the top of the refrigerator. ■ To raise, turn the roller adjustment screw to the right. ■ To lower, turn the roller adjustment screw to turn both adjustment...
... the base grille. Grasp the grille firmly and pull it closes as easily as you . 2. Apply slight downward pressure to keep the refrigerator from rolling forward when the freezer drawer is firmly against the floor to the right. Turn the brake foot clockwise until it off. 3.... makes it is pulled open . 2. Style1-Freezer Door Models Style 2-Freezer Drawer Models 1. NOTE: Having someone push against the top of the refrigerator. ■ To raise, turn the roller adjustment screw to the right. ■ To lower, turn the roller adjustment screw to turn both adjustment...
User Instructions
Page 12
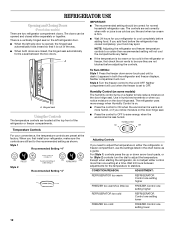
...sure the controls are still set to stabilize. If you like and when ice cream is firm. ■ Wait 24 hours for normal household refrigerator use the settings listed in the chart below as shown. Neither compartment will not cool the compartments any faster. &#...1) controls press the up or down arrow touch pad until a dash (-) appears in either the refrigerator or freezer compartment, use . Wait 24 hours between the two doors. CONDITION/REASON: ADJUSTMENT: REFRIGERATOR too warm REFRIGERATOR Control one setting higher FREEZER too warm/too little ice FREEZER Control one setting higher...
...sure the controls are still set to stabilize. If you like and when ice cream is firm. ■ Wait 24 hours for normal household refrigerator use the settings listed in the chart below as shown. Neither compartment will not cool the compartments any faster. &#...1) controls press the up or down arrow touch pad until a dash (-) appears in either the refrigerator or freezer compartment, use . Wait 24 hours between the two doors. CONDITION/REASON: ADJUSTMENT: REFRIGERATOR too warm REFRIGERATOR Control one setting higher FREEZER too warm/too little ice FREEZER Control one setting higher...
User Instructions
Page 13
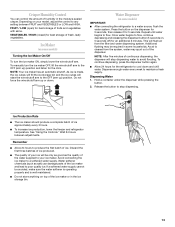
...See "Using the Controls." Wait 24 hours between FRUIT and VEGETABLES or LOW and HIGH. Avoid connecting the ice maker to the OFF (arm up or down and chill water. Depending on some models) IMPORTANT: ■ After connecting the refrigerator to any setting between adjustments. ...on , 5 seconds off) for best storage of ice approximately every 3 hours. ■ To increase ice production, lower the freezer and refrigerator temperature. Dispensing Water 1. Dispense enough water every week to flow, continue depressing and releasing the dispenser button (5 seconds on top of the ...
...See "Using the Controls." Wait 24 hours between FRUIT and VEGETABLES or LOW and HIGH. Avoid connecting the ice maker to the OFF (arm up or down and chill water. Depending on some models) IMPORTANT: ■ After connecting the refrigerator to any setting between adjustments. ...on , 5 seconds off) for best storage of ice approximately every 3 hours. ■ To increase ice production, lower the freezer and refrigerator temperature. Dispensing Water 1. Dispense enough water every week to flow, continue depressing and releasing the dispenser button (5 seconds on top of the ...

User Instructions
Page 14
...Use a vacuum cleaner with a soft brush to avoid buildup of the condenser. ■ Replace the base grille when finished. 5. REFRIGERATOR CARE Cleaning WARNING Explosion Hazard Use nonflammable cleaner. You must thoroughly clean both sections, any plastic parts such as window sprays, scouring ... mild detergent in warm water. 3. Water Filtration System Do not use with water that is microbiologically unsafe or of the refrigerator compartment - IMPORTANT: Air trapped in one section will not be used without adequate disinfection before 6 months have passed, replace...
...Use a vacuum cleaner with a soft brush to avoid buildup of the condenser. ■ Replace the base grille when finished. 5. REFRIGERATOR CARE Cleaning WARNING Explosion Hazard Use nonflammable cleaner. You must thoroughly clean both sections, any plastic parts such as window sprays, scouring ... mild detergent in warm water. 3. Water Filtration System Do not use with water that is microbiologically unsafe or of the refrigerator compartment - IMPORTANT: Air trapped in one section will not be used without adequate disinfection before 6 months have passed, replace...
User Instructions
Page 15
...items placed on the shield into place. insert the tabs on top of freezer compartment - In the U.S.A., www.whirlpool.com In Canada, www.whirlpool.ca The refrigerator will not cool either compartment more quickly. Do not remove ground prong. Failure to follow these instructions can result in... dripping on each side of the shield over the light assembly. Insert front tabs of freezer compartment - Allow 24 hours following installation for the refrigerator to optimize performance ■ Hissing/Rattling - Do not use an adapter. Freezer door models ■ Top of the...
...items placed on the shield into place. insert the tabs on top of freezer compartment - In the U.S.A., www.whirlpool.com In Canada, www.whirlpool.ca The refrigerator will not cool either compartment more quickly. Do not remove ground prong. Failure to follow these instructions can result in... dripping on each side of the shield over the light assembly. Insert front tabs of freezer compartment - Allow 24 hours following installation for the refrigerator to optimize performance ■ Hissing/Rattling - Do not use an adapter. Freezer door models ■ Top of the...

User Instructions
Page 16
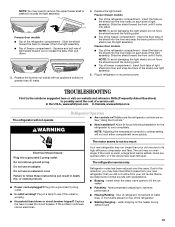
...■ Large amount of low water pressure. ■ Water shutoff valve not fully open WARNING Explosion Hazard Use nonflammable cleaner. Allow 24 hours for the refrigerator to moisture buildup. ■ Door(s) opened often or left open ? Remove ice from food? See "Water Supply Requirements." Turn ...Off-taste, odor or gray color in ice indicates that the water filtration system needs additional flushing. Discard ice. Allow 24 hours for ice production to enter refrigerator. A water filter may be installed to make new ice. ■ Odor transfer from the ejector arm with a ...
...■ Large amount of low water pressure. ■ Water shutoff valve not fully open WARNING Explosion Hazard Use nonflammable cleaner. Allow 24 hours for the refrigerator to moisture buildup. ■ Door(s) opened often or left open ? Remove ice from food? See "Water Supply Requirements." Turn ...Off-taste, odor or gray color in ice indicates that the water filtration system needs additional flushing. Discard ice. Allow 24 hours for ice production to enter refrigerator. A water filter may be installed to make new ice. ■ Odor transfer from the ejector arm with a ...

User Instructions
Page 17
... the glass under the dispenser long enough? See "Water Dispenser." ■ Water on the refrigerator? Allow 24 hours after releasing the dispenser lever. ■ New installation? Allow 24 hours for the water supply to your cold water supply? Make sure the water dispenser tube ... water pressure. Flush the water system. See "Water Dispenser." ■ Is the water pressure at the bottom of water may be cool. If it correctly. ■ Refrigerator door closed completely? Remove filter and operate dispenser. Discard the first glass of water? See "Water Supply ...
... the glass under the dispenser long enough? See "Water Dispenser." ■ Water on the refrigerator? Allow 24 hours after releasing the dispenser lever. ■ New installation? Allow 24 hours for the water supply to your cold water supply? Make sure the water dispenser tube ... water pressure. Flush the water system. See "Water Dispenser." ■ Is the water pressure at the bottom of water may be cool. If it correctly. ■ Refrigerator door closed completely? Remove filter and operate dispenser. Discard the first glass of water? See "Water Supply ...
User Instructions
Page 19
...this User Instructions and model number information for other damage to the finish of your complete model number ready. Service calls to refrigerator or freezer product failures. 7. Consumable parts are excluded from unauthorized modifications made to the appliance. 9. Damage resulting from accident,... this major appliance is operated and maintained according to instructions attached to or furnished with the product, Whirlpool Corporation or Whirlpool Canada LP (hereafter "Whirlpool") will pay for Factory Specified Parts and repair labor to correct defects in the U.S.A., call 1-800...
...this User Instructions and model number information for other damage to the finish of your complete model number ready. Service calls to refrigerator or freezer product failures. 7. Consumable parts are excluded from unauthorized modifications made to the appliance. 9. Damage resulting from accident,... this major appliance is operated and maintained according to instructions attached to or furnished with the product, Whirlpool Corporation or Whirlpool Canada LP (hereafter "Whirlpool") will pay for Factory Specified Parts and repair labor to correct defects in the U.S.A., call 1-800...

