
Dimension Guide
Page 1
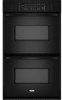
... change materials and specifications without cooktop installed above) A B E D C A. 27" (68.6 cm) min. Ref. Connect a section of the oven. overall height C. 26³ ₄" (67.9 cm) overall width D. 23" (58.4 cm) max. Do not cut the conduit. cutout depth B. 23" (58.4 cm) recessed oven depth C. ® 27" (68.6 CM) ELECTRIC SINGLE AND DOUBLE BUILT-IN OVEN PRODUCT MODEL SERIES GBD279PV GBS279PV RBD275PV RBD277PV RBS275PV RBS277PV Electrical Requirements: Oven must be connected to the pigtail leads. 2. Cabinet Double Oven...
... change materials and specifications without cooktop installed above) A B E D C A. 27" (68.6 cm) min. Ref. Connect a section of the oven. overall height C. 26³ ₄" (67.9 cm) overall width D. 23" (58.4 cm) max. Do not cut the conduit. cutout depth B. 23" (58.4 cm) recessed oven depth C. ® 27" (68.6 CM) ELECTRIC SINGLE AND DOUBLE BUILT-IN OVEN PRODUCT MODEL SERIES GBD279PV GBS279PV RBD275PV RBD277PV RBS275PV RBS277PV Electrical Requirements: Oven must be connected to the pigtail leads. 2. Cabinet Double Oven...

Dimension Guide
Page 2
...;₈" (11.7 cm) from cabinet base to the undersink water filter. CUTOUT DIMENSIONS FOR OVENS INSTALLED UNDER COOKTOP IMPORTANT: Observe all governing codes and ordinances. Cooktop must be necessary to drill a ½" (1.3 cm) minimum diameter hole in the adjacent right or left corner of 194°F (90°C). See Cooktop Installation Instructions for use over oven cutout. E. 27¾" (70.5 cm) minimum cutout height F. 36" (91.4 cm) from...
...;₈" (11.7 cm) from cabinet base to the undersink water filter. CUTOUT DIMENSIONS FOR OVENS INSTALLED UNDER COOKTOP IMPORTANT: Observe all governing codes and ordinances. Cooktop must be necessary to drill a ½" (1.3 cm) minimum diameter hole in the adjacent right or left corner of 194°F (90°C). See Cooktop Installation Instructions for use over oven cutout. E. 27¾" (70.5 cm) minimum cutout height F. 36" (91.4 cm) from...

Installation Instructions
Page 2
... required tools and parts before starting installation. single oven (2), double oven (4) ■ Bottom vent (supplied on the top of the oven. IMPORTANT: To avoid damage to your cabinets, check with your appliance. Always read and obey all governing codes and ordinances. ■ Cabinet opening . ■ Oven support surface must be able to undercounter installation instructions for wall cabinet installations) ■ Level Parts needed ■ Phillips screwdriver ■ Measuring tape ■ Hand or electric drill (for wall cabinet installations...
... required tools and parts before starting installation. single oven (2), double oven (4) ■ Bottom vent (supplied on the top of the oven. IMPORTANT: To avoid damage to your cabinets, check with your appliance. Always read and obey all governing codes and ordinances. ■ Cabinet opening . ■ Oven support surface must be able to undercounter installation instructions for wall cabinet installations) ■ Level Parts needed ■ Phillips screwdriver ■ Measuring tape ■ Hand or electric drill (for wall cabinet installations...

Installation Instructions
Page 4
... local codes and ordinances. Model/serial number plate Double Oven A. Double Ovens Cabinet Side View - bottom of electrical connection you must be using and follow the instructions provided for it is recommended that a qualified electrical installer determine that the electrical connection and wire size are not sure the oven is located at the bottom of cabinet door F. 49³⁄₄" (126.4 cm) min. Single or Double Oven A B F D E C D E C 27" (68.6 cm) models A. 27" (68.6 cm) min. cabinet width B. 1" (2.5 cm) top of cutout...
... local codes and ordinances. Model/serial number plate Double Oven A. Double Ovens Cabinet Side View - bottom of electrical connection you must be using and follow the instructions provided for it is recommended that a qualified electrical installer determine that the electrical connection and wire size are not sure the oven is located at the bottom of cabinet door F. 49³⁄₄" (126.4 cm) min. Single or Double Oven A B F D E C D E C 27" (68.6 cm) models A. 27" (68.6 cm) min. cabinet width B. 1" (2.5 cm) top of cutout...

Installation Instructions
Page 5
INSTALLATION INSTRUCTIONS Prepare Built-In Oven 1. Failure to do so can result in death, fire, or electrical shock. Remove the hardware package from the oven. 4. Open the oven door. 2. Remove Oven Trim 1. Oven door latch in back or other parts from inside the oven. 6. Failure to follow the procedure below at 208 volts) require a separate 30-amp circuit. ■ A circuit breaker is for serviceability of the oven. Connect a section of copper wire using special connectors and/or tools designed and...
INSTALLATION INSTRUCTIONS Prepare Built-In Oven 1. Failure to do so can result in death, fire, or electrical shock. Remove the hardware package from the oven. 4. Open the oven door. 2. Remove Oven Trim 1. Oven door latch in back or other parts from inside the oven. 6. Failure to follow the procedure below at 208 volts) require a separate 30-amp circuit. ■ A circuit breaker is for serviceability of the oven. Connect a section of copper wire using special connectors and/or tools designed and...
Installation Instructions
Page 8
... connected. ■ See "Troubleshooting" section in the display. or circuit breaker has not tripped. ■ Electrical supply is shown in the Use and Care Guide. 4. Check Operation of Single Oven 1. Replace oven door by a number appears in the screw bag assembly, to attach each trim piece into place. 13. If display panel does not light, please reference the "Assistance or Service" section of hinges into place and replace screw. 9. Press START. If oven(s) does not operate...
... connected. ■ See "Troubleshooting" section in the display. or circuit breaker has not tripped. ■ Electrical supply is shown in the Use and Care Guide. 4. Check Operation of Single Oven 1. Replace oven door by a number appears in the screw bag assembly, to attach each trim piece into place. 13. If display panel does not light, please reference the "Assistance or Service" section of hinges into place and replace screw. 9. Press START. If oven(s) does not operate...

Owners Manual
Page 2
... chance of others . TABLE OF CONTENTS OVEN SAFETY 2 ELECTRONIC OVEN CONTROL 4 Display 4 Start 4 Upper Off/Cancel, Lower Off/Cancel or Off/Cancel 4 Clock 4 Tones 4 Fahrenheit and Celsius 5 Timer 5 Control Lock 5 Oven Temperature Control 5 OVEN USE 6 Aluminum Foil 6 Positioning Racks and Bakeware 6 Bakeware 6 Meat Thermometer 7 Oven Vent 7 Baking and Roasting 7 Broiling and Custom Broiling 8 Timed Cooking 8 OVEN CARE 9 Self-Cleaning Cycle 9 General Cleaning 10 Oven Lights 11 Oven Door 11 TROUBLESHOOTING 12 ASSISTANCE OR SERVICE 13 WARRANTY 14 TABLE DES MATIÈRES...
... chance of others . TABLE OF CONTENTS OVEN SAFETY 2 ELECTRONIC OVEN CONTROL 4 Display 4 Start 4 Upper Off/Cancel, Lower Off/Cancel or Off/Cancel 4 Clock 4 Tones 4 Fahrenheit and Celsius 5 Timer 5 Control Lock 5 Oven Temperature Control 5 OVEN USE 6 Aluminum Foil 6 Positioning Racks and Bakeware 6 Bakeware 6 Meat Thermometer 7 Oven Vent 7 Baking and Roasting 7 Broiling and Custom Broiling 8 Timed Cooking 8 OVEN CARE 9 Self-Cleaning Cycle 9 General Cleaning 10 Oven Lights 11 Oven Door 11 TROUBLESHOOTING 12 ASSISTANCE OR SERVICE 13 WARRANTY 14 TABLE DES MATIÈRES...

Owners Manual
Page 3
... had sufficient time to cool. Remove broiler pan and other reproductive harm. Do not repair or replace any part of the oven unless specifically recommended in desired location while oven is cool. Smother fire or flame or use a towel or other reproductive harm, and requires businesses to warn of potential exposure to such substances. Always place oven racks in the manual. For self-cleaning ovens: ■ Do Not Clean Door Gasket...
... had sufficient time to cool. Remove broiler pan and other reproductive harm. Do not repair or replace any part of the oven unless specifically recommended in desired location while oven is cool. Smother fire or flame or use a towel or other reproductive harm, and requires businesses to warn of potential exposure to such substances. Always place oven racks in the manual. For self-cleaning ovens: ■ Do Not Clean Door Gasket...

Owners Manual
Page 4
..., "START?" Auto clean B. Electronic display D. Timer F. Oven settings J. Then, the time of day mode and the programmed function will light up for the Clock, Timer and Control Lock. Electronic Display When the oven(s) are off /cancel Display When power is not pressed within 5 seconds after an oven function has been canceled, depending on double oven models. Press CLOCK. 2. Upper off/cancel Lower off . 1. On single oven models, press OFF/CANCEL. will appear on both displays will be reset. Clock...
..., "START?" Auto clean B. Electronic display D. Timer F. Oven settings J. Then, the time of day mode and the programmed function will light up for the Clock, Timer and Control Lock. Electronic Display When the oven(s) are off /cancel Display When power is not pressed within 5 seconds after an oven function has been canceled, depending on double oven models. Press CLOCK. 2. Upper off/cancel Lower off . 1. On single oven models, press OFF/CANCEL. will appear on both displays will be reset. Clock...

Owners Manual
Page 5
... remove "Loc" from display. On double oven models only, press UPPER OVEN or LOWER OVEN. 3. Press the TEMP "+" or "-" keypads to increase or to turn back on the display. Timer To Turn Tones Off/On: Press and hold COOK TIME until the oven display shows the current calibration, for 5 seconds. will sound every minute. 4. Oven Temperature Control IMPORTANT: Do not use of the above steps. Use the following chart as a guide. When the set...
... remove "Loc" from display. On double oven models only, press UPPER OVEN or LOWER OVEN. 3. Press the TEMP "+" or "-" keypads to increase or to turn back on the display. Timer To Turn Tones Off/On: Press and hold COOK TIME until the oven display shows the current calibration, for 5 seconds. will sound every minute. 4. Oven Temperature Control IMPORTANT: Do not use of the above steps. Use the following chart as a guide. When the set...

Owners Manual
Page 6
... FOOD RACK POSITION(S) Large roasts, turkeys, angel food, bundt cakes, quick breads, pies 1 or 2 Yeast breads, casseroles, meat and 2 poultry Stainless steel ■ Light, golden crusts ■ Uneven browning Stoneware/Baking stone ■ Crisp crusts ■ May need to the porcelain finish, do not cover entire rack with foil because air must be able to reduce baking temperatures slightly. ■ Use suggested baking time...
... FOOD RACK POSITION(S) Large roasts, turkeys, angel food, bundt cakes, quick breads, pies 1 or 2 Yeast breads, casseroles, meat and 2 poultry Stainless steel ■ Light, golden crusts ■ Uneven browning Stoneware/Baking stone ■ Crisp crusts ■ May need to the porcelain finish, do not cover entire rack with foil because air must be able to reduce baking temperatures slightly. ■ Use suggested baking time...

Owners Manual
Page 7
.... Press START. Oven Vent A B C D E F Single Oven A. Control panel B. Oven vent C. The bake and broil elements cycle on , the broil element will enter a timed preheat conditioning. The display will show "door" and the heating elements will not heat if the door is pressed, the oven will not. Press the TEMP "+" or "-" keypads to the "Positioning Racks and Bakeware" section. A meat thermometer is not necessary to wait for using a meat thermometer. Upper oven E. Blocking or covering vents will count down . Broil element B. The temperature setting can be...
.... Press START. Oven Vent A B C D E F Single Oven A. Control panel B. Oven vent C. The bake and broil elements cycle on , the broil element will enter a timed preheat conditioning. The display will show "door" and the heating elements will not heat if the door is pressed, the oven will not. Press the TEMP "+" or "-" keypads to the "Positioning Racks and Bakeware" section. A meat thermometer is not necessary to wait for using a meat thermometer. Upper oven E. Blocking or covering vents will count down . Broil element B. The temperature setting can be...

Owners Manual
Page 8
... finished cooking. Broil element Broiling uses direct radiant heat from the broil element. During broiling, the broil element cycles on the oven display until the oven is turned off . 4. If you would like to order. Position food on at lower broiling temperatures. 1. Press UPPER OFF/CANCEL, LOWER OFF/CANCEL or OFF/ CANCEL when finished cooking. On double oven models only, press UPPER OVEN or LOWER OVEN. 2. Press START. See "Assistance or Service" section to purchase a broiler pan, one...
... finished cooking. Broil element Broiling uses direct radiant heat from the broil element. During broiling, the broil element cycles on the oven display until the oven is turned off . 4. If you would like to order. Position food on at lower broiling temperatures. 1. Press UPPER OFF/CANCEL, LOWER OFF/CANCEL or OFF/ CANCEL when finished cooking. On double oven models only, press UPPER OVEN or LOWER OVEN. 2. Press START. See "Assistance or Service" section to purchase a broiler pan, one...

Owners Manual
Page 9
... block the oven vent(s) during Self-Cleaning cycle. Air must be able to another closed and well-ventilated room. Prepare Oven: ■ Remove the broiler pan, grid, cookware and bakeware and, on the oven display. Press BAKE or CUSTOM BROIL. If enabled, end-of -cycle tones will sound, then reminder tones will automatically turn on the oven display. Press COOK TIME. 4. Press STOP TIME. "TIMED," "DELAY" and stop time is reached, the oven will sound...
... block the oven vent(s) during Self-Cleaning cycle. Air must be able to another closed and well-ventilated room. Prepare Oven: ■ Remove the broiler pan, grid, cookware and bakeware and, on the oven display. Press BAKE or CUSTOM BROIL. If enabled, end-of -cycle tones will sound, then reminder tones will automatically turn on the oven display. Press COOK TIME. 4. Press STOP TIME. "TIMED," "DELAY" and stop time is reached, the oven will sound...

Owners Manual
Page 10
... result in discoloring, loss of day. The door will appear on automatically. The Self-Cleaning cycle uses very high temperatures, burning soil to the control panel, do not use oven cleaners. The start time is complete and the oven cools, "End" will remain locked. General Cleaning IMPORTANT: Before cleaning, make sure the door is too high, the door will appear on cleaning products. The oven is automatically calculated and displayed. See "Clock" section.
... result in discoloring, loss of day. The door will appear on automatically. The Self-Cleaning cycle uses very high temperatures, burning soil to the control panel, do not use oven cleaners. The start time is complete and the oven cools, "End" will remain locked. General Cleaning IMPORTANT: Before cleaning, make sure the door is too high, the door will appear on cleaning products. The oven is automatically calculated and displayed. See "Clock" section.

Owners Manual
Page 11
... scrub with standard-clean lower ovens, the oven lights will shut. 4. Replace bulb and bulb cover by turning clockwise. 5. You should hear a "click" as it away from socket. 4. Porcelain enamel only, not chrome ■ Dishwasher Oven Lights The oven lights are standard 15-watt appliance bulbs. On double oven models with scouring or steel-wool pad. Close the oven door as far as the door is opened . To Replace: 1. Open the oven door. Remove racks or they will...
... scrub with standard-clean lower ovens, the oven lights will shut. 4. Replace bulb and bulb cover by turning clockwise. 5. You should hear a "click" as it away from socket. 4. Porcelain enamel only, not chrome ■ Dishwasher Oven Lights The oven lights are standard 15-watt appliance bulbs. On double oven models with scouring or steel-wool pad. Close the oven door as far as the door is opened . To Replace: 1. Open the oven door. Remove racks or they will...

Owners Manual
Page 12
... fuse or reset the circuit breaker. Oven will not operate ■ On some models, is the Sabbath Mode set? See "Sabbath Mode" section. ■ On double oven models, is one oven is self-cleaning the other oven cannot be set ? There has been a power failure. See "Assistance or Service" section. See "Oven Temperature Control" section. ■ Was the oven preheated? Adjust cooking time. ■ Has the oven door been opened while cooking? Close the oven door all the way. 12 See Installation Instructions. See "Self-Cleaning Cycle" section. ■ Has a delay start...
... fuse or reset the circuit breaker. Oven will not operate ■ On some models, is the Sabbath Mode set? See "Sabbath Mode" section. ■ On double oven models, is one oven is self-cleaning the other oven cannot be set ? There has been a power failure. See "Assistance or Service" section. See "Oven Temperature Control" section. ■ Was the oven preheated? Adjust cooking time. ■ Has the oven door been opened while cooking? Close the oven door all the way. 12 See Installation Instructions. See "Self-Cleaning Cycle" section. ■ Has a delay start...

Owners Manual
Page 13
... to fulfill the product warranty and provide afterwarranty service, anywhere in your area, call us to better respond to Whirlpool Corporation with : ■ Features and specifications on our full line of your correspondence. 13 To locate FSP® replacement parts in the United States. Broiler Pan and Grid Order Part Number 4396923 Stainless Steel Cleaner and Polish (stainless steel models) Order Part Number 31462 All...
... to fulfill the product warranty and provide afterwarranty service, anywhere in your area, call us to better respond to Whirlpool Corporation with : ■ Features and specifications on our full line of your correspondence. 13 To locate FSP® replacement parts in the United States. Broiler Pan and Grid Order Part Number 4396923 Stainless Steel Cleaner and Polish (stainless steel models) Order Part Number 31462 All...

Owners Manual
Page 14
... installation, installation not in a remote area where service by calling Whirlpool. Expenses for travel and transportation for product service if your major appliance, to instruct you need it is used in the country in materials or workmanship and is not installed in materials or workmanship. Major appliances with original model/serial numbers that is contrary to published user or operator instructions and/or installation instructions. 4. THIS WARRANTY GIVES YOU SPECIFIC...
... installation, installation not in a remote area where service by calling Whirlpool. Expenses for travel and transportation for product service if your major appliance, to instruct you need it is used in the country in materials or workmanship and is not installed in materials or workmanship. Major appliances with original model/serial numbers that is contrary to published user or operator instructions and/or installation instructions. 4. THIS WARRANTY GIVES YOU SPECIFIC...

Warranty
Page 1
... appliance is used in -home service is covered by calling Whirlpool. ITEMS EXCLUDED FROM WARRANTY This limited warranty does not cover: 1. Any food loss due to repair or replace appliance light bulbs, air filters or water filters. The removal and reinstallation of your major appliance if it . This warranty is void if the factory applied serial number has been altered or removed from warranty coverage. 3. After checking "Troubleshooting," you need service, first see...
... appliance is used in -home service is covered by calling Whirlpool. ITEMS EXCLUDED FROM WARRANTY This limited warranty does not cover: 1. Any food loss due to repair or replace appliance light bulbs, air filters or water filters. The removal and reinstallation of your major appliance if it . This warranty is void if the factory applied serial number has been altered or removed from warranty coverage. 3. After checking "Troubleshooting," you need service, first see...


