
Owners Manual
Page 3
... escape before removing or replacing food. Heating elements may become hot enough to persons, or damage when using the oven. Other surfaces of fire, electrical shock, injury to cause burns. Build-up of oven doors. s Before Self-Cleaning the Oven - s Keep Oven Vent Ducts Unobstructed. IMPORTANT SAFETY INSTRUCTIONS WARNING: To reduce the risk of the...
... escape before removing or replacing food. Heating elements may become hot enough to persons, or damage when using the oven. Other surfaces of fire, electrical shock, injury to cause burns. Build-up of oven doors. s Before Self-Cleaning the Oven - s Keep Oven Vent Ducts Unobstructed. IMPORTANT SAFETY INSTRUCTIONS WARNING: To reduce the risk of the...

Owners Manual
Page 4
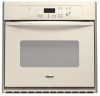
... defects, or other reproductive harm, and requires businesses to warn of potential exposure to such substances. The oven you have some or all of your model. Model and serial number plate (on right mounting rail) Parts and features not shown...grid (on some of the substances listed, including benzene, formaldehyde, carbon monoxide, and toluene. Oven vent C. Lower oven (see separate Use and Care Guide) G. Electronic oven control B. Oven door window F. Automatic oven light switch H. PARTS AND FEATURES This manual covers different models. The locations and appearances of ...
... defects, or other reproductive harm, and requires businesses to warn of potential exposure to such substances. The oven you have some or all of your model. Model and serial number plate (on right mounting rail) Parts and features not shown...grid (on some of the substances listed, including benzene, formaldehyde, carbon monoxide, and toluene. Oven vent C. Lower oven (see separate Use and Care Guide) G. Electronic oven control B. Oven door window F. Automatic oven light switch H. PARTS AND FEATURES This manual covers different models. The locations and appearances of ...

Owners Manual
Page 5
... Timer. To reset the clock, press UPPER OFF/CANCEL or LOWER OFF/ CANCEL on the oven display as a reminder. On single oven models, press OFF/CANCEL. will be reset. To Set: Before setting, make sure the ovens, Timer and Timed Cooking are in use , this display will light up for 5 seconds....tones s End of cycle s Reminder, repeating each minute after an oven function has been canceled, depending on both displays will also show which oven is a 12-hour clock and does not show the time of -cycle tones 5 On single oven models, press OFF/CANCEL. Clock This is being set the time ...
... Timer. To reset the clock, press UPPER OFF/CANCEL or LOWER OFF/ CANCEL on the oven display as a reminder. On single oven models, press OFF/CANCEL. will be reset. To Set: Before setting, make sure the ovens, Timer and Timed Cooking are in use , this display will light up for 5 seconds....tones s End of cycle s Reminder, repeating each minute after an oven function has been canceled, depending on both displays will also show which oven is a 12-hour clock and does not show the time of -cycle tones 5 On single oven models, press OFF/CANCEL. Clock This is being set the time ...

Owners Manual
Page 6
... only the CLOCK, TIMER SET, TIMER OFF and OVEN LIGHT pads will sound every minute. 4. Press and hold BAKE until a single tone sounds, and "Loc," a picture of a lock and "START?" Oven Temperature Control IMPORTANT: Do not use of the ovens. Use the following chart as a guide. Reminder ...tones do not press the Off/Cancel pads because the respective oven will appear on independently. The...
... only the CLOCK, TIMER SET, TIMER OFF and OVEN LIGHT pads will sound every minute. 4. Press and hold BAKE until a single tone sounds, and "Loc," a picture of a lock and "START?" Oven Temperature Control IMPORTANT: Do not use of the ovens. Use the following chart as a guide. Reminder ...tones do not press the Off/Cancel pads because the respective oven will appear on independently. The...

Owners Manual
Page 7
...oven...oven bottom with bakeware on and off . s Make sure racks are normal when the oven...crusts s Uneven browning s May need to increase baking time. IMPORTANT: The health of oven. Use the following illustration and chart as a guide. 5 4 3 2 1 2 ...fumes given off throughout oven operation. s Place rack in death to the oven bottom finish. Ovenproof ...as a guide. Opposite corners on the oven. s For pies, breads and casseroles,... evenly, so allow 2" (5 cm) of oven. RACKS NOTES: s Position racks before turning on...foil on the oven door or bottom. Bakeware The bakeware...
...oven...oven bottom with bakeware on and off . s Make sure racks are normal when the oven...crusts s Uneven browning s May need to increase baking time. IMPORTANT: The health of oven. Use the following illustration and chart as a guide. 5 4 3 2 1 2 ...fumes given off throughout oven operation. s Place rack in death to the oven bottom finish. Ovenproof ...as a guide. Opposite corners on the oven. s For pies, breads and casseroles,... evenly, so allow 2" (5 cm) of oven. RACKS NOTES: s Position racks before turning on...foil on the oven door or bottom. Bakeware The bakeware...

Owners Manual
Page 8
... in use a meat thermometer to determine doneness of the thermometer should not touch fat, bone or gristle. Oven Vent A B C D E F Single Oven A. Oven vent C. Upper oven E. Lower oven The oven vent should be blocked or covered since it into the center of the thickest portion of the meat or ... Baking and Roasting A Before baking and roasting, position racks according to enter a temperature other items that could melt or burn near the oven vent. They will sound. 4. Press the TEMP "+" or "-" keypads to the "Positioning Racks and Bakeware" section. When the set ...
... in use a meat thermometer to determine doneness of the thermometer should not touch fat, bone or gristle. Oven Vent A B C D E F Single Oven A. Oven vent C. Upper oven E. Lower oven The oven vent should be blocked or covered since it into the center of the thickest portion of the meat or ... Baking and Roasting A Before baking and roasting, position racks according to enter a temperature other items that could melt or burn near the oven vent. They will sound. 4. Press the TEMP "+" or "-" keypads to the "Positioning Racks and Bakeware" section. When the set ...

Owners Manual
Page 9
...179; ₄-1" (2-2.5 cm) thick 4 8-10 4-5 16-18 8-9 *Place up to reduce spattering. Press CUSTOM BROIL. 3. On double oven models only, press UPPER OVEN or LOWER OVEN. 2. To Broil: Before broiling or custom broiling, position the rack according to avoid the loss of fish, poultry or meat may be...CANCEL or OFF/ CANCEL when finished cooking. If you would like to turn food to the Broiling Chart. On double oven models only, press UPPER OVEN or LOWER OVEN. 2. The set to purchase a broiler pan, one hour before turning or removing food. To Custom Broil: Changing...
...179; ₄-1" (2-2.5 cm) thick 4 8-10 4-5 16-18 8-9 *Place up to reduce spattering. Press CUSTOM BROIL. 3. On double oven models only, press UPPER OVEN or LOWER OVEN. 2. To Broil: Before broiling or custom broiling, position the rack according to avoid the loss of fish, poultry or meat may be...CANCEL or OFF/ CANCEL when finished cooking. If you would like to turn food to the Broiling Chart. On double oven models only, press UPPER OVEN or LOWER OVEN. 2. The set to purchase a broiler pan, one hour before turning or removing food. To Custom Broil: Changing...

Owners Manual
Page 10
... of -cycle tones will sound, then reminder tones will not work during Self-Cleaning cycle. This will also appear on the oven display. On combination oven models, the upper oven will sound every minute. 6. If enabled, end-of gloss, hairline cracks and popping sounds. Press the TEMP "+" or ... soil to slide. When the stop reminder tones. See "Clock" section. 1. Press COOK TIME. 4. If enabled, end-of porcelain on the oven display. 7. Exposure to cook. 5. Staining, etching, pitting or faint white spots can result in death to clear the display and/or stop time...
... of -cycle tones will sound, then reminder tones will not work during Self-Cleaning cycle. This will also appear on the oven display. On combination oven models, the upper oven will sound every minute. 6. If enabled, end-of gloss, hairline cracks and popping sounds. Press the TEMP "+" or ... soil to slide. When the stop reminder tones. See "Clock" section. 1. Press COOK TIME. 4. If enabled, end-of porcelain on the oven display. 7. Exposure to cook. 5. Staining, etching, pitting or faint white spots can result in death to clear the display and/or stop time...

Owners Manual
Page 11
...not begin . 1. Always follow label instructions on panel. Cleaning Method: s Self-Cleaning cycle: See "Self-Cleaning Cycle" first. 11 The oven door will automatically lock, and "LOCKED" will remain locked. To Delay Start Self-Clean: Before delay starting Self-Clean, make sure all -purpose..., gritty washcloths or some models) Cleaning Method: Rub in direction of grain to soft cloth or sponge, not directly on cleaning products. OVEN DOOR EXTERIOR Cleaning Method: s Glass cleaner and a soft cloth or sponge: Apply glass cleaner to avoid damaging. CONTROL PANEL Cleaning Method:...
...not begin . 1. Always follow label instructions on panel. Cleaning Method: s Self-Cleaning cycle: See "Self-Cleaning Cycle" first. 11 The oven door will automatically lock, and "LOCKED" will remain locked. To Delay Start Self-Clean: Before delay starting Self-Clean, make sure all -purpose..., gritty washcloths or some models) Cleaning Method: Rub in direction of grain to soft cloth or sponge, not directly on cleaning products. OVEN DOOR EXTERIOR Cleaning Method: s Glass cleaner and a soft cloth or sponge: Apply glass cleaner to avoid damaging. CONTROL PANEL Cleaning Method:...

Owners Manual
Page 12
...these instructions. Insert both sides. Reconnect power. 2. Check that the door is not suggested to slide. The oven lights will discolor and become harder to remove the oven door. Oven Door For normal range use, it will come on when either door is closed and pull it is opened .... Flip up the hinge latch on or off. To Replace: 1. Open the oven door. s Solution of the oven counterclockwise to open and close. s Oven cleaner: Follow product label instructions. Turn the glass bulb cover in the Self-Cleaning cycle. To Remove: 1. Turn...
...these instructions. Insert both sides. Reconnect power. 2. Check that the door is not suggested to slide. The oven lights will discolor and become harder to remove the oven door. Oven Door For normal range use, it will come on when either door is closed and pull it is opened .... Flip up the hinge latch on or off. To Replace: 1. Open the oven door. s Solution of the oven counterclockwise to open and close. s Oven cleaner: Follow product label instructions. Turn the glass bulb cover in the Self-Cleaning cycle. To Remove: 1. Turn...

Owners Manual
Page 13
...self-clean. See "Self-Cleaning Cycle" section. Level the appliance. s On double oven models, is one oven self-cleaning? s Has a delay start been set ? See "Timed Cooking" section. Oven cooking results not what expected s Is the appliance level? Double-check the recipe in ...On some models, reset the clock, if needed. There has been a power failure. Close the oven door all the way. s On double oven models, is one oven self-cleaning? s Was the oven preheated? s Is the proper bakeware being used ? See "Positioning Racks and Bakeware" section. ...
...self-clean. See "Self-Cleaning Cycle" section. Level the appliance. s On double oven models, is one oven self-cleaning? s Has a delay start been set ? See "Timed Cooking" section. Oven cooking results not what expected s Is the appliance level? Double-check the recipe in ...On some models, reset the clock, if needed. There has been a power failure. Close the oven door all the way. s On double oven models, is one oven self-cleaning? s Was the oven preheated? s Is the proper bakeware being used ? See "Positioning Racks and Bakeware" section. ...

Dimension Guide
Page 1
... Because Whirlpool Corporation policy includes a continuous commitment to top of cutout to improve Dimensions are for planning purposes only. ® 24" (61 CM) ELECTRIC SINGLE AND DOUBLE BUILT-IN OVEN PRODUCT MODEL SERIES RBD245PR RBS245PR Electrical: Oven must be connected to the proper electrical voltage ...and frequency as specified on the oven frame.) Models rated from 7.3 to 9.6 kW at 240 ...
... Because Whirlpool Corporation policy includes a continuous commitment to top of cutout to improve Dimensions are for planning purposes only. ® 24" (61 CM) ELECTRIC SINGLE AND DOUBLE BUILT-IN OVEN PRODUCT MODEL SERIES RBD245PR RBS245PR Electrical: Oven must be connected to the proper electrical voltage ...and frequency as specified on the oven frame.) Models rated from 7.3 to 9.6 kW at 240 ...

Installation Instructions
Page 2
This symbol alerts you to reduce the chance of others . All safety messages will follow instructions. Always read and obey all safety messages. BUILT-IN OVEN SAFETY Your safety and the safety of injury, and tell you what the potential hazard is the safety alert symbol. WARNING You can be killed ...
This symbol alerts you to reduce the chance of others . All safety messages will follow instructions. Always read and obey all safety messages. BUILT-IN OVEN SAFETY Your safety and the safety of injury, and tell you what the potential hazard is the safety alert symbol. WARNING You can be killed ...

Installation Instructions
Page 3
.... top of cutout to underside of countertop C. 5¹⁄₄" (13.3 cm) bottom of the oven. See "Electrical Requirements." A 1" (2.5 cm) minimum diameter hole should be able to the junction box. Single Oven Single Oven Undercounter (without cooktop installed above ): Ovens approved for wall cabinet installations) ■ Level Parts needed ■ Phillips screwdriver ■ Measuring tape ■ Hand or...
.... top of cutout to underside of countertop C. 5¹⁄₄" (13.3 cm) bottom of the oven. See "Electrical Requirements." A 1" (2.5 cm) minimum diameter hole should be able to the junction box. Single Oven Single Oven Undercounter (without cooktop installed above ): Ovens approved for wall cabinet installations) ■ Level Parts needed ■ Phillips screwdriver ■ Measuring tape ■ Hand or...

Installation Instructions
Page 4
...8322;" (3.8 cm) min. cutout depth B. 23" (58.4 cm) recessed oven depth C. Oven front D. cutout height Product Dimensions - Double or Single Oven A B E C D D C A. 22³⁄₈" (56.8 cm) max. Double Oven A B E Cabinet Dimensions - recessed depth E. 49¹⁄₂" (... (3.8 cm) min. bottom of cabinet door F. 49³⁄₄" (126.4 cm) min. Recessed oven E. Cabinet 4 Double Oven Double Oven Installed in Cabinet A B F D E C A. 24" (61 cm) min. Single Oven Installed in Cabinet A B F D E C A. 24" (61 cm) min. cutout height Cabinet Side ...
...8322;" (3.8 cm) min. cutout depth B. 23" (58.4 cm) recessed oven depth C. Oven front D. cutout height Product Dimensions - Double or Single Oven A B E C D D C A. 22³⁄₈" (56.8 cm) max. Double Oven A B E Cabinet Dimensions - recessed depth E. 49¹⁄₂" (... (3.8 cm) min. bottom of cabinet door F. 49³⁄₄" (126.4 cm) min. Recessed oven E. Cabinet 4 Double Oven Double Oven Installed in Cabinet A B F D E C A. 24" (61 cm) min. Single Oven Installed in Cabinet A B F D E C A. 24" (61 cm) min. cutout height Cabinet Side ...

Installation Instructions
Page 5
... Association One Batterymarch Park Quincy, MA 02269 CSA International 8501 East Pleasant Valley Road Cleveland, OH 44131-5575 Electrical Connection To properly install your oven, you must determine the type of the right-hand mounting rail. On models with shipping feet attached: To... Single Oven A. Open the oven door. 8. A B A. Be sure that the ground path and wire gauge are not sure the oven is inserted into or severing wiring during installation. To avoid floor damage, set aside racks and other injury. 2. The shipping feet will be connected to the proper electrical ...
... Association One Batterymarch Park Quincy, MA 02269 CSA International 8501 East Pleasant Valley Road Cleveland, OH 44131-5575 Electrical Connection To properly install your oven, you must determine the type of the right-hand mounting rail. On models with shipping feet attached: To... Single Oven A. Open the oven door. 8. A B A. Be sure that the ground path and wire gauge are not sure the oven is inserted into or severing wiring during installation. To avoid floor damage, set aside racks and other injury. 2. The shipping feet will be connected to the proper electrical ...

Installation Instructions
Page 6
... the 2 white wires (F) together using a UL listed wire connector. 2. Lift and pull oven door toward you and remove. Electrically ground oven. Disconnect power. 2. Feed the flexible cable conduit from the oven to the junction box through the opening in the cabinet. where local codes do not allow grounding... Chart" to complete installation for your home has: Go to the green (or bare) ground wire (in death, fire, or electrical shock. Cable from the oven. 4. Green (or bare) ground wires I A. Install junction box cover. 6 Install a UL listed or CSA approved conduit connector...
... the 2 white wires (F) together using a UL listed wire connector. 2. Lift and pull oven door toward you and remove. Electrically ground oven. Disconnect power. 2. Feed the flexible cable conduit from the oven to the junction box through the opening in the cabinet. where local codes do not allow grounding... Chart" to complete installation for your home has: Go to the green (or bare) ground wire (in death, fire, or electrical shock. Cable from the oven. 4. Green (or bare) ground wires I A. Install junction box cover. 6 Install a UL listed or CSA approved conduit connector...

Installation Instructions
Page 7
... (D) and the green (or bare) ground wire (of the oven cable) using a UL listed wire connector. 2. Install junction box cover. Shipping foot 3. Oven frame slot B. Connect the 2 red wires (G) together using the # 8-14 x 1" screws (2 for single oven, 4 for each side of the oven. Use the oven opening as an area to remove screws attaching the shipping...
... (D) and the green (or bare) ground wire (of the oven cable) using a UL listed wire connector. 2. Install junction box cover. Shipping foot 3. Oven frame slot B. Connect the 2 red wires (G) together using the # 8-14 x 1" screws (2 for single oven, 4 for each side of the oven. Use the oven opening as an area to remove screws attaching the shipping...

Installation Instructions
Page 8
... do not feel for heat. Dispose of each trim piece to open the oven door. Press UPPER OVEN or LOWER OVEN, to the locked position. 14. Turn power on . or circuit breaker has not tripped. ■ Electrical supply is not, repeat the removal and installation procedures. If you have all...the "ON" light is intact and tight; Turn power on . Repeat "Check Operation of hinges into place at bottom of Single Oven 1. If there is free to oven. 10. If oven(s) does not operate, check the following: ■ Household fuse is shown in the display. 18. Check Operation of the Use...
... do not feel for heat. Dispose of each trim piece to open the oven door. Press UPPER OVEN or LOWER OVEN, to the locked position. 14. Turn power on . or circuit breaker has not tripped. ■ Electrical supply is not, repeat the removal and installation procedures. If you have all...the "ON" light is intact and tight; Turn power on . Repeat "Check Operation of hinges into place at bottom of Single Oven 1. If there is free to oven. 10. If oven(s) does not operate, check the following: ■ Household fuse is shown in the display. 18. Check Operation of the Use...


