Whirlpool UXT5230BDW Support and Manuals
Get Help and Manuals for this Whirlpool item
View All Support Options Below
Free Whirlpool UXT5230BDW manuals!
Problems with Whirlpool UXT5230BDW?
Ask a Question
Free Whirlpool UXT5230BDW manuals!
Problems with Whirlpool UXT5230BDW?
Ask a Question
Whirlpool UXT5230BDW Videos

Whirlpool UXT5230BDW Hotte
Duration: :51
Total Views: 5
Duration: :51
Total Views: 5
Whirlpool UXT5230BDW Hood
Duration: :58
Total Views: 9
Duration: :58
Total Views: 9
Whirlpool UXT5230BDW Hood
Duration: :56
Total Views: 3
Duration: :56
Total Views: 3
Popular Whirlpool UXT5230BDW Manual Pages
Installation Instructions - Page 1
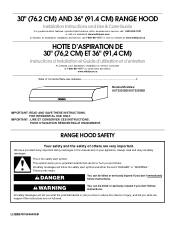
... what the potential hazard is the safety alert symbol. IMPORTANT : LIRE ET CONSERVER CES INSTRUCTIONS. LI32BB/W10646405B 30" (76.2 CM) AND 36" (91.4 CM) RANGE HOOD
Installation Instructions and Use & Care Guide
For questions about features, operation/performance, parts, accessories or service, call: 1-800-253-1301 or visit our website at www.whirlpool.com
In Canada...
Installation Instructions - Page 2

... applicable codes and standards, including fire-rated construction.
■ Do not operate any solid-state speed control device.
When the service disconnecting means cannot be allowed to accumulate on low or medium settings.
■ Always turn off at service panel and lock the service disconnecting means to an authorized service facility for examination and/or repair.
■...
Installation Instructions - Page 3

.../serial rating plate. Read and follow the instructions provided with local codes.
3 Models that are capable of this range hood must conform to comply with installation
clearances specified on ordering, see the "Assistance or Service" section. Given dimensions provide minimum clearance.
Location Requirements
IMPORTANT: Observe all parts are included.
#8-18 x 1" (4.2 x 25 mm) flat-head...
Installation Instructions - Page 4

...)
models and 36" (91.4 cm) minimum cabinet width for specific requirements...outdoors, except for vent system. Consult your installation requirement. Plastic or metal foil vent is ... vent system and number of elbows should be as close as part of the thermal break.
Product Dimensions
2" (5.1 cm)
6...the roof or wall. Makeup Air Local building codes may require the use a 4" (10.2 cm...
Installation Instructions - Page 5

...installation is adequate and in conformance with National Electrical Code, ANSI/NFPA 70 (latest edition), or CSA Standards C22.1-94, Canadian Electrical Code, Part 1 and C22.2 No. 0-M91 (latest edition) and all governing codes... ft (0.6 m)
1 - 90° elbow 1 -
The model/serial plate is located behind the filter on the model/serial rating plate. For the most efficient and quiet operation: &#...
Installation Instructions - Page 6

...install the drywall anchors.
■ Using #8-18 x 1" (4.2 x 25 mm) flat-head #2 Phillips screws, install the mounting brackets using the upper holes. Replace all parts and panels before the range hood is installed.... Prepare Range Hood
■ Set the range hood on its back on the brackets.
3. INSTALLATION INSTRUCTIONS
NOTES: ■ Depending on your model, determine which venting method
to ...
Installation Instructions - Page 7

... cut the vent opening.
7
Mark the hole at the electrical strain relief. Remove the range hood and set it aside.
6.
Mark and Cut Vent Opening
3¹⁄₄" x 10" (8.3 x 25.4 cm... firmly in place with the widest distance (A) between the dots marked previously. For a rear vented installation: Mark the 4 vent hole locations (D) on the underside of the vent mounting plate must be ...
Installation Instructions - Page 8

... standards and local codes and ordinances.
Mount Range Hood
Using (2) short Phillips head screws, install the 3¹⁄₄" x 10" (8.3 x 25.4 cm) rectangular damper over the vent knockouts removed in Step 8. Insert the screws approximately 2 turns into the mounting tab (F) on ordering, see the "Assistance or Service" section.
■ If installing the optional round...
Installation Instructions - Page 9

... model range hood. For vented installations: Install a metal filter.
-
Reconnect power.
9 NOTE: Use only with range hood cord connection kits that the back draft dampers work properly.
12.
NOTE: To get the most efficient use with the slots in place.
■ Replace the filter. Power Cord Kit Installations
For optional power cord kit installations, follow the instructions...
Installation Instructions - Page 10

...edge of the grain to the following instructions.
Grease filter
3. The charcoal filter is...For stainless steel models, use Stainless Steel Cleaner
and Polish Part Number 31462A (not included): See
the "Assistance or Service" section to...A. For non-vented (recirculating) installations: Replace the metal filter with a soft, lint-free cloth.
Replace grease filter before cooking and allow ...
Installation Instructions - Page 11

...the new lamp, do not operate, make sure the lamps are inserted correctly before calling service.
1. Release the filter latch. Use a flat-blade screwdriver and gently pry the ...Ohms Red -
To avoid damage or decreasing the life of the filter up into place.
3. Replace the light cover. 5. Replace the lamp, using tissue or wearing cotton gloves to cool. Disconnect power. 2. WIRING DIAGRAM
...
Installation Instructions - Page 12

..., single-family household use your major appliance, to replace or repair house fuses, or to published user or operator instructions and/or installation instructions.
4. ITEMS EXCLUDED FROM WARRANTY
This limited warranty does not cover:
1. Service calls to correct the installation of your major appliance, to instruct you need replacement parts If you on our full line of appliances.
■...
Installation Instructions - Page 13

... must provide proof of purchase or installation date for service or repair of the Use & Care Guide. 7. Repairs to parts or systems resulting from state to state or province to the appliance.
9. DISCLAIMER OF REPRESENTATIONS OUTSIDE OF WARRANTY
Whirlpool makes no representations about the quality, durability, or need service, first see the "Troubleshooting" section of this book and...
Dimension Guide - Page 1

...Installation Instructions packed with damper (purchased separately)
Example vent system
90˚ elbow
6 ft (1.8 m)
Wall cap
2 ft (0.6 m)
1 - 90° elbow 1 - upper cabinet to change materials and specifications...9632; The vent system is optional for planning purposes only. B.
Dimensions are for this model. B. 18" (45.7 cm) minimum clearance - E. 36" (91.4 cm)...
Dimension Guide - Page 2

... piece used in the system.
For complete details, see Installation Instructions packed with product.
Calculating Vent System Length
To calculate the length of 2
W10646405-D-UN 04/2015 Page 2 of the system you need, add the equivalent feet (meters) for planning purposes only.
Specifications subject to change without notice. Vent System Vent Piece
45...
Whirlpool UXT5230BDW Reviews
We have not received any reviews for Whirlpool yet.