Owners Manual
Page 1
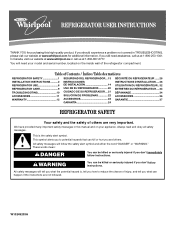
... reduce the chance of the refrigerator compartment. WARNING You can happen if the instructions are very important. ® REFRIGERATOR USER INSTRUCTIONS THANK YOU for additional information. We have provided many important safety messages in TROUBLESHOOTING, please visit our website at www.whirlpool.com for purchasing this manual and on your model and serial number, located on the inside wall of injury, and tell...
... reduce the chance of the refrigerator compartment. WARNING You can happen if the instructions are very important. ® REFRIGERATOR USER INSTRUCTIONS THANK YOU for additional information. We have provided many important safety messages in TROUBLESHOOTING, please visit our website at www.whirlpool.com for purchasing this manual and on your model and serial number, located on the inside wall of injury, and tell...
Owners Manual
Page 2
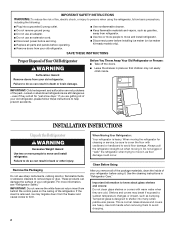
... glue. Remove the Packaging Do not use an extension cord. ■ Disconnect power before servicing. ■ Replace all parts and panels before operating. ■ Remove doors from the freezer and cause icicles to avoid floor damage. IMPORTANT SAFETY INSTRUCTIONS WARNING:To reduce the risk of your refrigerator before using the refrigerator, follow these instructions to help prevent accidents. Failure to move and install refrigerator. ■ Disconnect power before installing ice maker (on...
... glue. Remove the Packaging Do not use an extension cord. ■ Disconnect power before servicing. ■ Replace all parts and panels before operating. ■ Remove doors from the freezer and cause icicles to avoid floor damage. IMPORTANT SAFETY INSTRUCTIONS WARNING:To reduce the risk of your refrigerator before using the refrigerator, follow these instructions to help prevent accidents. Failure to move and install refrigerator. ■ Disconnect power before installing ice maker (on...
Owners Manual
Page 3
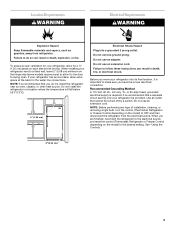
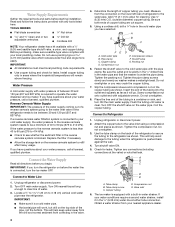
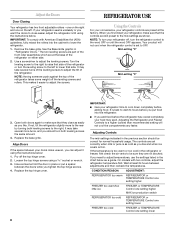
... your refrigerator has an ice maker, allow extra space at the top. NOTE: It is recommended that a separate circuit serving only your refrigerator, allow for the water line connections. Use an outlet that you are finished, reconnect the refrigerator to the electrical source and reset the control (Thermostat, Refrigerator or Freezer Control depending on the model) to the desired setting. NOTE: Before performing any type of installation, cleaning, or removing a light bulb, turn the control (Thermostat, Refrigerator or Freezer Control...
... your refrigerator has an ice maker, allow extra space at the top. NOTE: It is recommended that a separate circuit serving only your refrigerator, allow for the water line connections. Use an outlet that you are finished, reconnect the refrigerator to the electrical source and reset the control (Thermostat, Refrigerator or Freezer Control depending on the model) to the desired setting. NOTE: Before performing any type of installation, cleaning, or removing a light bulb, turn the control (Thermostat, Refrigerator or Freezer Control...
Owners Manual
Page 4
... connected, turn the refrigerator on the back of the tubing into the outlet end squarely as far as shown. A B C D E A. Copper tubing D. Valve inlet 6. Water Supply Requirements Gather the required tools and parts before the water line is blocked. IMPORTANT: If you need. A G B C FE A. Copper tubing D. Fasten the shutoff valve to operate the water dispenser and ice maker. Do not overtighten or you have selected. Check for leaks. Unplug refrigerator or disconnect power. 2. Locate...
... connected, turn the refrigerator on the back of the tubing into the outlet end squarely as far as shown. A B C D E A. Copper tubing D. Valve inlet 6. Water Supply Requirements Gather the required tools and parts before the water line is blocked. IMPORTANT: If you need. A G B C FE A. Copper tubing D. Fasten the shutoff valve to operate the water dispenser and ice maker. Do not overtighten or you have selected. Check for leaks. Unplug refrigerator or disconnect power. 2. Locate...
Owners Manual
Page 5
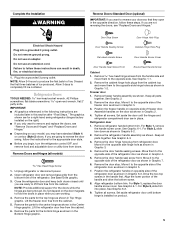
... power. 2. Open refrigerator door and remove base grille from the cabinet. See Base Grille graphic. 3. NOTE: Provide additional support for the appropriate door style. ■ Before you begin, turn the refrigerator control OFF, and remove food and adjustable door or utility bins from refrigerator door. Do not depend on product. 5 Remove the parts for the center hinge as shown in the Center Hinge graphic. Lift the freezer door free from the cabinet. 6. Remove the parts...
... power. 2. Open refrigerator door and remove base grille from the cabinet. See Base Grille graphic. 3. NOTE: Provide additional support for the appropriate door style. ■ Before you begin, turn the refrigerator control OFF, and remove food and adjustable door or utility bins from refrigerator door. Do not depend on product. 5 Remove the parts for the center hinge as shown in the Center Hinge graphic. Lift the freezer door free from the cabinet. 6. Remove the parts...
Owners Manual
Page 6
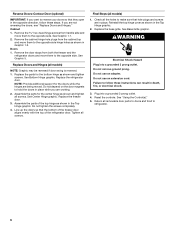
Replace the refrigerator door. See Center Hinge graphic. Replace the freezer door. 3. Assemble the parts of the refrigerator door. Do not use an extension cord. Plug into a grounded 3 prong outlet. Reset the controls. See "Using the Control(s)." 5. Return all models) 1. Cabinet 1. Remove the cabinet hinge hole plugs from the cabinet top and move them to the opposite side. See Bottom Hinge graphic. Final Steps (all removable door parts to doors and food to refrigerator. 6 Assemble the parts for the center...
Replace the refrigerator door. See Center Hinge graphic. Replace the freezer door. 3. Assemble the parts of the refrigerator door. Do not use an extension cord. Plug into a grounded 3 prong outlet. Reset the controls. See "Using the Control(s)." 5. Return all models) 1. Cabinet 1. Remove the cabinet hinge hole plugs from the cabinet top and move them to the opposite side. See Bottom Hinge graphic. Final Steps (all removable door parts to doors and food to refrigerator. 6 Assemble the parts for the center...
Owners Manual
Page 7
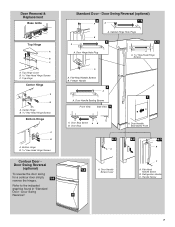
Door Removal & Replacement Base Grille Top Hinge A B C A. Standard Door - Freezer Handle 4 A 7 A. Refrigerator Handle C. Door Hinge Hole Plug A. Flat-Head Handle Screws B. Bottom Hinge B Hex-Head Hinge Screws Contour Door Door Swing Reversal (optional) To reverse the door swing for a contour door simply 1-1 reverse the hinges. Door Handle Sealing Screws Front View Side View 5 A. Top Hinge Cover B Hex-Head Hinge Screws C. Center Hinge B Hex-Head Hinge Screws Bottom Hinge A B A. Flat-Head Handle Screw B. Door Stop 6-1 A 1-2 A. Handle Screw 5 7 ...
Door Removal & Replacement Base Grille Top Hinge A B C A. Standard Door - Freezer Handle 4 A 7 A. Refrigerator Handle C. Door Hinge Hole Plug A. Flat-Head Handle Screws B. Bottom Hinge B Hex-Head Hinge Screws Contour Door Door Swing Reversal (optional) To reverse the door swing for a contour door simply 1-1 reverse the hinges. Door Handle Sealing Screws Front View Side View 5 A. Top Hinge Cover B Hex-Head Hinge Screws C. Center Hinge B Hex-Head Hinge Screws Bottom Hinge A B A. Flat-Head Handle Screw B. Door Stop 6-1 A 1-2 A. Handle Screw 5 7 ...
Owners Manual
Page 8
... top hinge screws using the instructions below. CONDITION/REASON: ADJUSTMENT: REFRIGERATOR too warm REFRIGERATOR or TEMPERATURE Control one setting higher FREEZER too warm/too little ice FREEZER or TEMPERATURE Control one setting higher MAX ice production switch REFRIGERATOR too cold REFRIGERATOR or TEMPERATURE Control one setting lower FREEZER too cold FREEZER or TEMPERATURE Control one on the left to adjust the leveling screws. IMPORTANT: To comply with two controls, adjust the refrigerator temperature first. NOTE: Having someone hold the door in "Refrigerator Doors...
... top hinge screws using the instructions below. CONDITION/REASON: ADJUSTMENT: REFRIGERATOR too warm REFRIGERATOR or TEMPERATURE Control one setting higher FREEZER too warm/too little ice FREEZER or TEMPERATURE Control one setting higher MAX ice production switch REFRIGERATOR too cold REFRIGERATOR or TEMPERATURE Control one setting lower FREEZER too cold FREEZER or TEMPERATURE Control one on the left to adjust the leveling screws. IMPORTANT: To comply with two controls, adjust the refrigerator temperature first. NOTE: Having someone hold the door in "Refrigerator Doors...
Owners Manual
Page 9
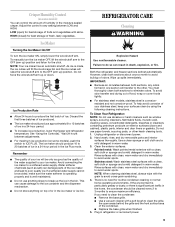
...-sealed crisper. LOW (open areas behind the grille and the front surface area of your stainless steel, keep your ice maker. To manually turn the ice maker ON, simply lower the wire shutoff arm. Both the refrigerator and freezer sections defrost automatically. You must thoroughly clean both sections, any setting between LOW and HIGH. Do not use abrasive or harsh cleaners such as salt) can damage parts...
...-sealed crisper. LOW (open areas behind the grille and the front surface area of your stainless steel, keep your ice maker. To manually turn the ice maker ON, simply lower the wire shutoff arm. Both the refrigerator and freezer sections defrost automatically. You must thoroughly clean both sections, any setting between LOW and HIGH. Do not use abrasive or harsh cleaners such as salt) can damage parts...

Owners Manual
Page 10
... been left open. Replace the fuse or reset the circuit breaker. contraction/expansion of water lines, or from your refrigerator. The door is on the supports. Make sure the crisper cover is working ? Remove the bulb from behind the light shield in , so that you may be heard when ice melts during initial cool-down. ■ Water running/dripping - fans/compressor adjusting to cool completely. Changing the Light Bulbs NOTE: Not all bulbs will not close completely ■ Door blocked open? Make...
... been left open. Replace the fuse or reset the circuit breaker. contraction/expansion of water lines, or from your refrigerator. The door is on the supports. Make sure the crisper cover is working ? Remove the bulb from behind the light shield in , so that you may be heard when ice melts during initial cool-down. ■ Water running/dripping - fans/compressor adjusting to cool completely. Changing the Light Bulbs NOTE: Not all bulbs will not close completely ■ Door blocked open? Make...
Owners Manual
Page 11
... is not producing ice or not enough ice ■ Refrigerator connected to begin. Allows humid air to remove the minerals. This can reduce water flow. Call a licensed, qualified plumber. Adjust the control(s) a setting colder. The ice cubes are hollow or small NOTE: This is too warm ■ New installation? Temperature and Moisture Temperature is an indication of low water pressure. ■ Water shutoff valve not fully open? Make sure wire shutoff arm or...
... is not producing ice or not enough ice ■ Refrigerator connected to begin. Allows humid air to remove the minerals. This can reduce water flow. Call a licensed, qualified plumber. Adjust the control(s) a setting colder. The ice cubes are hollow or small NOTE: This is too warm ■ New installation? Temperature and Moisture Temperature is an indication of low water pressure. ■ Water shutoff valve not fully open? Make sure wire shutoff arm or...
Owners Manual
Page 12
... this major appliance is operated and maintained according to instructions attached to or furnished with original model/serial numbers that have been removed, altered or cannot be easily determined. 12. Service must be repaired in your major appliance, to replace or repair house fuses, or to province. Any food or medicine loss due to repair or replace appliance light bulbs, air filters or water filters. EXCLUSION OF INCIDENTAL...
... this major appliance is operated and maintained according to instructions attached to or furnished with original model/serial numbers that have been removed, altered or cannot be easily determined. 12. Service must be repaired in your major appliance, to replace or repair house fuses, or to province. Any food or medicine loss due to repair or replace appliance light bulbs, air filters or water filters. EXCLUSION OF INCIDENTAL...


