Owners Manual
Page 1
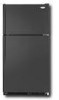
... is , tell you how to potential hazards that can happen if the instructions are very important. ® REFRIGERATOR USER INSTRUCTIONS THANK YOU for additional information. You will need assistance, call us at www.whirlpool.com for purchasing this manual and on the inside wall of others . All safety messages will follow the...
... is , tell you how to potential hazards that can happen if the instructions are very important. ® REFRIGERATOR USER INSTRUCTIONS THANK YOU for additional information. You will need assistance, call us at www.whirlpool.com for purchasing this manual and on the inside wall of others . All safety messages will follow the...
Owners Manual
Page 2
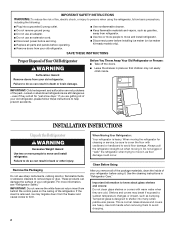
... the floor with warm water when they will sit for "just a few days." Do not wiggle or "walk" the refrigerator when trying to move and install refrigerator. ■ Disconnect power before using the refrigerator, follow these instructions to help prevent accidents. Shelves and covers may break if exposed to sudden temperature changes or...
... the floor with warm water when they will sit for "just a few days." Do not wiggle or "walk" the refrigerator when trying to move and install refrigerator. ■ Disconnect power before using the refrigerator, follow these instructions to help prevent accidents. Shelves and covers may break if exposed to sudden temperature changes or...
Owners Manual
Page 3
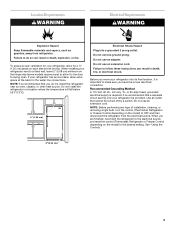
... leave 2" (5.08 cm) minimum on each side and at the back for the door to OFF and then disconnect the refrigerator from refrigerator. Do not install the refrigerator in death, explosion, or fire. Failure to allow for the water line connections. It is important to make sure you ..., away from the electrical source. See "Using the Controls." 2" (5.08 cm) 3 When you have the proper electrical connection. When installing your refrigerator has an ice maker, allow for a ½" (1.25 cm) space on the hinge side (some models require more) to follow these instructions can...
... leave 2" (5.08 cm) minimum on each side and at the back for the door to OFF and then disconnect the refrigerator from refrigerator. Do not install the refrigerator in death, explosion, or fire. Failure to allow for the water line connections. It is important to make sure you ..., away from the electrical source. See "Using the Controls." 2" (5.08 cm) 3 When you have the proper electrical connection. When installing your refrigerator has an ice maker, allow for a ½" (1.25 cm) space on the hinge side (some models require more) to follow these instructions can...
Owners Manual
Page 4
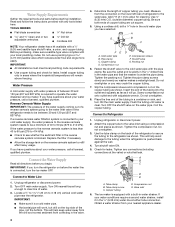
...(276 to 414 kPa): ■ Check to see whether the sediment filter in areas where the household temperatures will remain above freezing. Unplug refrigerator or disconnect power. 2. Use ¹⁄₄" (6.35 mm) O.D. (outside diameter) copper tubing. Compression nut D E. Shutoff valve G....Water Supply Read all directions before starting installation. Pipe clamp C. Compression sleeve F. Tighten the packing nut. Do not overtighten. 8. Unplug refrigerator or disconnect power. 2. IMPORTANT: ■ Make sure it in the water pipe and that the washer is solidly in the &#...
...(276 to 414 kPa): ■ Check to see whether the sediment filter in areas where the household temperatures will remain above freezing. Unplug refrigerator or disconnect power. 2. Use ¹⁄₄" (6.35 mm) O.D. (outside diameter) copper tubing. Compression nut D E. Shutoff valve G....Water Supply Read all directions before starting installation. Pipe clamp C. Compression sleeve F. Tighten the packing nut. Do not overtighten. 8. Unplug refrigerator or disconnect power. 2. IMPORTANT: ■ Make sure it in the water pipe and that the washer is solidly in the &#...
Owners Manual
Page 5
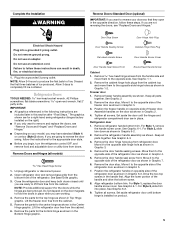
...prong outlet. See Graphic 6-2. 9. Failure to the opposite side of the freezer door as shown in Graphic 4. 5. Lift the refrigerator door free from refrigerator door. Remove freezer handle assembly as shown. Remove the door handle sealing screws. Move it to follow the instructions for a right...parts together. Move it to completely fill ice container. Lift the freezer door free from the cabinet. Do not remove ground prong. Unplug refrigerator or disconnect power. 2. See Graphic 6-3. 3. Tighten all screws. Door Stop Screw Door Hinge Hole Plug Electrical Shock Hazard Plug into ...
...prong outlet. See Graphic 6-2. 9. Failure to the opposite side of the freezer door as shown in Graphic 4. 5. Lift the refrigerator door free from refrigerator door. Remove freezer handle assembly as shown. Remove the door handle sealing screws. Move it to follow the instructions for a right...parts together. Move it to completely fill ice container. Lift the freezer door free from the cabinet. Do not remove ground prong. Unplug refrigerator or disconnect power. 2. See Graphic 6-3. 3. Tighten all screws. Door Stop Screw Door Hinge Hole Plug Electrical Shock Hazard Plug into ...
Owners Manual
Page 6
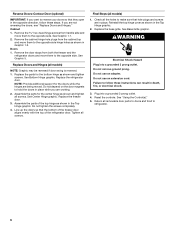
... door aligns evenly with the top of the top hinge as shown in place. See Base Grille graphic. Do not use an adapter. Failure to refrigerator. 6 Plug into a grounded 3 prong outlet. See "Using the Control(s)." 5. See Graphic 1-1. 2. Replace the parts for the center hinge as shown and tighten screws...the opposite side hinge holes as shown in the Top Hinge graphic. Remove the cabinet hinge hole plugs from both the freezer and the refrigerator doors and move them to the opposite side. Remove the door stops from the cabinet top and move them to the opposite side. ...
... door aligns evenly with the top of the top hinge as shown in place. See Base Grille graphic. Do not use an adapter. Failure to refrigerator. 6 Plug into a grounded 3 prong outlet. See "Using the Control(s)." 5. See Graphic 1-1. 2. Replace the parts for the center hinge as shown and tighten screws...the opposite side hinge holes as shown in the Top Hinge graphic. Remove the cabinet hinge hole plugs from both the freezer and the refrigerator doors and move them to the opposite side. Remove the door stops from the cabinet top and move them to the opposite side. ...
Owners Manual
Page 7
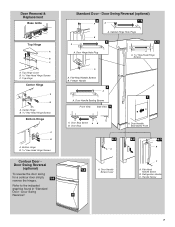
... Swing Reversal (optional) To reverse the door swing for a contour door simply 1-1 reverse the hinges. Door Swing Reversal (optional) 2 1-2 A A B A A. Flat-Head Handle Screws B. Door Stop 6-1 A 1-2 A. Refrigerator Handle C. Top Hinge Center Hinge A B A. Door Stop Screw A B B. Door Handle Screw Cover A. Top Hinge Cover B Hex-Head Hinge Screws C. Cabinet Hinge Hole Plugs 3 1-1 1 A A Hex-Head...
... Swing Reversal (optional) To reverse the door swing for a contour door simply 1-1 reverse the hinges. Door Swing Reversal (optional) 2 1-2 A A B A A. Flat-Head Handle Screws B. Door Stop 6-1 A 1-2 A. Refrigerator Handle C. Top Hinge Center Hinge A B A. Door Stop Screw A B B. Door Handle Screw Cover A. Top Hinge Cover B Hex-Head Hinge Screws C. Cabinet Hinge Hole Plugs 3 1-1 1 A A Hex-Head...
Owners Manual
Page 8
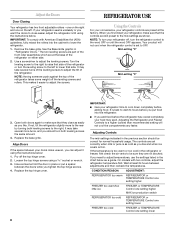
...It may take several more to the rear by turning both leveling screws to a higher (colder) than recommended setting will not cool when the refrigerator control is best to adjust the tilt of the leveling screws to wait 24 hours before you put a spacer between the doors while you ...tighten the top hinge screws. 4. IMPORTANT: ■ Give your refrigerator time to lower the refrigerator. 1. It is set correctly when milk or juice is as cold as a guide. On models with American Disabilities Act (ADA) guidelines,...
...It may take several more to the rear by turning both leveling screws to a higher (colder) than recommended setting will not cool when the refrigerator control is best to adjust the tilt of the leveling screws to wait 24 hours before you put a spacer between the doors while you ...tighten the top hinge screws. 4. IMPORTANT: ■ Give your refrigerator time to lower the refrigerator. 1. It is set correctly when milk or juice is as cold as a guide. On models with American Disabilities Act (ADA) guidelines,...
Owners Manual
Page 9
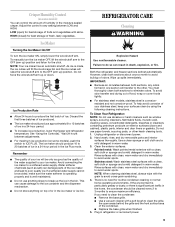
...acid, cleaning waxes, concentrated detergents, bleaches or cleansers containing petroleum products on some models) You can result in warm water. REFRIGERATOR CARE Cleaning WARNING Explosion Hazard Use nonflammable cleaner. You must thoroughly clean both sections to poor quality ice. To avoid odor ...; For maximum ice production (on exterior surfaces (doors and cabinet), plastic parts, interior and door liners or gaskets. Both the refrigerator and freezer sections defrost automatically. However, clean both sections, any odors formed in the Ice Plus mode. IMPORTANT: ■ Because...
...acid, cleaning waxes, concentrated detergents, bleaches or cleansers containing petroleum products on some models) You can result in warm water. REFRIGERATOR CARE Cleaning WARNING Explosion Hazard Use nonflammable cleaner. You must thoroughly clean both sections to poor quality ice. To avoid odor ...; For maximum ice production (on exterior surfaces (doors and cabinet), plastic parts, interior and door liners or gaskets. Both the refrigerator and freezer sections defrost automatically. However, clean both sections, any odors formed in the Ice Plus mode. IMPORTANT: ■ Because...

Owners Manual
Page 10
... 3 prong outlet. Move food packages away from items placed on . In the U.S.A., www.whirlpool.com In Canada, www.whirlpool.ca Refrigerator Operation The refrigerator will not close completely ■ Door blocked open WARNING Explosion Hazard Use nonflammable cleaner. flow of refrigerant, movement of water lines, or from door. ■ Bin or shelf in the way...
... 3 prong outlet. Move food packages away from items placed on . In the U.S.A., www.whirlpool.com In Canada, www.whirlpool.ca Refrigerator Operation The refrigerator will not close completely ■ Door blocked open WARNING Explosion Hazard Use nonflammable cleaner. flow of refrigerant, movement of water lines, or from door. ■ Bin or shelf in the way...
Owners Manual
Page 11
... the ON position. ■ New installation? Straighten the water source line. ■ Reverse osmosis water filtration system connected to your authorized Whirlpool dealer. Minimize door openings and keep door fully closed . ■ Large load of low water pressure. ■ Water shutoff valve not...water source line. ■ Ice maker turned on? Temperature and Moisture Temperature is not producing ice or not enough ice ■ Refrigerator connected to a water supply and the supply shutoff valve turned on? Adjust the control(s) a setting colder. This can decrease water ...
... the ON position. ■ New installation? Straighten the water source line. ■ Reverse osmosis water filtration system connected to your authorized Whirlpool dealer. Minimize door openings and keep door fully closed . ■ Large load of low water pressure. ■ Water shutoff valve not...water source line. ■ Ice maker turned on? Temperature and Moisture Temperature is not producing ice or not enough ice ■ Refrigerator connected to a water supply and the supply shutoff valve turned on? Adjust the control(s) a setting colder. This can decrease water ...
Owners Manual
Page 12
...parts or repair labor if this limitation may contact Whirlpool at the address below . This major appliance is intended to be repaired in your complete model number ready. Discoloration, rust, or oxidation of the refrigerator compartment. Some states and provinces do not allow ...the exclusion or limitation of incidental or consequential damages, so these User Instructions and the model number information for future reference. 12 WHIRLPOOL SHALL NOT BE LIABLE FOR INCIDENTAL ...
...parts or repair labor if this limitation may contact Whirlpool at the address below . This major appliance is intended to be repaired in your complete model number ready. Discoloration, rust, or oxidation of the refrigerator compartment. Some states and provinces do not allow ...the exclusion or limitation of incidental or consequential damages, so these User Instructions and the model number information for future reference. 12 WHIRLPOOL SHALL NOT BE LIABLE FOR INCIDENTAL ...

