
Dimension Guide
Page 1
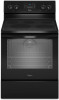
... side of the oven door. Using the cooktop as specified on styling. E F Because Whirlpool Corporation policy includes a continuous commitment to improve our products, we reserve the right to change without notice. opening width E. 30" (76.2 cm) Freestanding Electric Range PRODUCT MODEL NUMBERS WFC110M0A WFE330W0A WFE540H0A WFC120M0A WFE510S0A WFE710H0A WFC130M0A WFE520C0A WFE714HLA WFC310S0A WFE524CLA...
... side of the oven door. Using the cooktop as specified on styling. E F Because Whirlpool Corporation policy includes a continuous commitment to improve our products, we reserve the right to change without notice. opening width E. 30" (76.2 cm) Freestanding Electric Range PRODUCT MODEL NUMBERS WFC110M0A WFE330W0A WFE540H0A WFC120M0A WFE510S0A WFE710H0A WFC130M0A WFE520C0A WFE714HLA WFC310S0A WFE524CLA...

Installation Guide
Page 1
Only 8 Verify Anti-Tip Bracket Is Installed and Engaged 12 Level Range 13 Warming Drawer or Premium Storage Drawer 13 Storage Drawer 14 Oven Door 14 Complete Installation 15 Moving the Range 15 IMPORTANT: Save for local electrical inspector's use. INSTALLATION INSTRUCTIONS 30" (76 CM) FREESTANDING ELECTRIC RANGES Table of Contents RANGE SAFETY 2 INSTALLATION REQUIREMENTS 3 Tools and Parts 3 Location Requirements 3 Electrical Requirements - W10403811B U.S.A. Only 5 INSTALLATION INSTRUCTIONS 6 Unpack Range 6 Install Anti-Tip Bracket 6 Electrical Connection - U.S.A.
Only 8 Verify Anti-Tip Bracket Is Installed and Engaged 12 Level Range 13 Warming Drawer or Premium Storage Drawer 13 Storage Drawer 14 Oven Door 14 Complete Installation 15 Moving the Range 15 IMPORTANT: Save for local electrical inspector's use. INSTALLATION INSTRUCTIONS 30" (76 CM) FREESTANDING ELECTRIC RANGES Table of Contents RANGE SAFETY 2 INSTALLATION REQUIREMENTS 3 Tools and Parts 3 Location Requirements 3 Electrical Requirements - W10403811B U.S.A. Only 5 INSTALLATION INSTRUCTIONS 6 Unpack Range 6 Install Anti-Tip Bracket 6 Electrical Connection - U.S.A.

Installation Guide
Page 3
... is not applicable, use the Standard for use with the range, see "Install Anti-Tip Bracket" section. ■ Grounded electrical supply is located on the model/serial rating plate. See the appropriate "Electrical Requirements" section. When such standard is to be provided, the... risk can be reduced by installing a range hood that all electrical connections be revised. See "Electrical Connection - Check existing electrical supply. Given dimensions are minimum clearances. ■ The anti-tip bracket must be used in this ...
... is not applicable, use the Standard for use with the range, see "Install Anti-Tip Bracket" section. ■ Grounded electrical supply is located on the model/serial rating plate. See the appropriate "Electrical Requirements" section. When such standard is to be provided, the... risk can be reduced by installing a range hood that all electrical connections be revised. See "Electrical Connection - Check existing electrical supply. Given dimensions are minimum clearances. ■ The anti-tip bracket must be used in this ...

Installation Guide
Page 5
... with the ground connected to the cabinet. Use a 3-wire, UL listed, 40- See the "Electrical Connection - The fourth (grounding) conductor must be Type SRD or SRDT with ranges. Connectors on the model/serial rating plate. **If connecting to 91.4 cm) of slack in conformance...Batterymarch Park Quincy, MA 02169-7471 WARNING: Improper connection of the power supply cable (at the range and at least 4 ft (1.22 m) long. ■ Range must conform with the National Electrical Code, ANSI/ NFPA 70-latest edition and all local codes and ordinances. Grounding through the neutral ...
... with the ground connected to the cabinet. Use a 3-wire, UL listed, 40- See the "Electrical Connection - The fourth (grounding) conductor must be Type SRD or SRDT with ranges. Connectors on the model/serial rating plate. **If connecting to 91.4 cm) of slack in conformance...Batterymarch Park Quincy, MA 02169-7471 WARNING: Improper connection of the power supply cable (at the range and at least 4 ft (1.22 m) long. ■ Range must conform with the National Electrical Code, ANSI/ NFPA 70-latest edition and all local codes and ordinances. Grounding through the neutral ...

Installation Guide
Page 7
... so that correspond to allow for final electrical connections. 3. The mounting can be installed on either the left side or right side of the determined mounting method. Using the Phillips screwdriver, mount anti-tip bracket to continue installing the range using the following illustrations. Move range into its final location, making sure rear...
... so that correspond to allow for final electrical connections. 3. The mounting can be installed on either the left side or right side of the determined mounting method. Using the Phillips screwdriver, mount anti-tip bracket to continue installing the range using the following illustrations. Move range into its final location, making sure rear...

Installation Guide
Page 8
... tabs each side B. UL listed strain relief ■ Tighten strain relief screw against the power supply cord. 8 Electrically ground range. Power Supply Cord Electrical Connection - Use a new 40 amp power supply cord. Disconnect power. 2. A B C A. Terminal block cover... you to remove cover from the middle post of the range. Remove plastic tag holding three 10-32 hex nuts from range. 4. A A. Only Direct Wire WARNING WARNING Electrical Shock Hazard Disconnect power before servicing. Electrical Shock Hazard Disconnect power before servicing. Hex-head screws 3....
... tabs each side B. UL listed strain relief ■ Tighten strain relief screw against the power supply cord. 8 Electrically ground range. Power Supply Cord Electrical Connection - Use a new 40 amp power supply cord. Disconnect power. 2. A B C A. Terminal block cover... you to remove cover from the middle post of the range. Remove plastic tag holding three 10-32 hex nuts from range. 4. A A. Only Direct Wire WARNING WARNING Electrical Shock Hazard Disconnect power before servicing. Electrical Shock Hazard Disconnect power before servicing. Hex-head screws 3....

Installation Guide
Page 9
... the strain relief on the cord/conduit plate on bottom of the range. A B C D A. Conduit ■ Tighten strain relief screw against the flexible conduit. 5. Complete installation following instructions for your type of electrical connection: 4-wire (recommended) 3-wire (if 4-wire is not available) Electrical Connection Options If your home has: And you will be attached...
... the strain relief on the cord/conduit plate on bottom of the range. A B C D A. Conduit ■ Tighten strain relief screw against the flexible conduit. 5. Complete installation following instructions for your type of electrical connection: 4-wire (recommended) 3-wire (if 4-wire is not available) Electrical Connection Options If your home has: And you will be attached...

Installation Guide
Page 10
...block access cover. Depending on bottom of each wire. ³⁄₈" (1.0 cm) B 3" (7.6 cm) 2. Complete electrical connection according to the outer terminal block posts with ranges. 5. Use ³⁄₈" nut driver to connect the neutral (white) wire to the fuse disconnect or circuit breaker ... connection opening, with ring terminals and marked for use with one of electrical supply (4-wire or 3-wire connection). Strip the insulation back ³⁄₈" (1.0 cm) from the end of range. C D A. Power supply cord wires - Tighten strain relief screws....
...block access cover. Depending on bottom of each wire. ³⁄₈" (1.0 cm) B 3" (7.6 cm) 2. Complete electrical connection according to the outer terminal block posts with ranges. 5. Use ³⁄₈" nut driver to connect the neutral (white) wire to the fuse disconnect or circuit breaker ... connection opening, with ring terminals and marked for use with one of electrical supply (4-wire or 3-wire connection). Strip the insulation back ³⁄₈" (1.0 cm) from the end of range. C D A. Power supply cord wires - Tighten strain relief screws....

Installation Guide
Page 15
... maintenance: For power supply cord-connected ranges: 1. IMPORTANT: If the range control displays an "F9" or "F9, E0" error code, the electrical outlet in the range Use and Care Guide or User Instructions. 7. When moving range, slide range onto cardboard or hardboard to floor or...Disconnect power. 2. Complete Installation 1. Read the "Range Use" section in the home may be killed. Plug power cord into a grounded outlet. ■ Electrical supply is moved. Turn on . 8. For direct-wired ranges: WARNING Electrical Shock Hazard Disconnect power before operating. Check that you...
... maintenance: For power supply cord-connected ranges: 1. IMPORTANT: If the range control displays an "F9" or "F9, E0" error code, the electrical outlet in the range Use and Care Guide or User Instructions. 7. When moving range, slide range onto cardboard or hardboard to floor or...Disconnect power. 2. Complete Installation 1. Read the "Range Use" section in the home may be killed. Plug power cord into a grounded outlet. ■ Electrical supply is moved. Turn on . 8. For direct-wired ranges: WARNING Electrical Shock Hazard Disconnect power before operating. Check that you...

Use & Care Guide
Page 1
...11 Cook Time (on the oven frame behind the top right side of the oven door. ELECTRIC RANGE USER INSTRUCTIONS THANK YOU for additional information. You will need assistance, call us at www.whirlpool.com for purchasing this high-quality product. If you still need your model and serial number..., located on some models 11 RANGE CARE 12 Clean Cycle 12 General Cleaning 13 Oven Light 14 TROUBLESHOOTING 14...
...11 Cook Time (on the oven frame behind the top right side of the oven door. ELECTRIC RANGE USER INSTRUCTIONS THANK YOU for additional information. You will need assistance, call us at www.whirlpool.com for purchasing this high-quality product. If you still need your model and serial number..., located on some models 11 RANGE CARE 12 Clean Cycle 12 General Cleaning 13 Oven Light 14 TROUBLESHOOTING 14...

Use & Care Guide
Page 3
... immediately. ■ Clean Cooktop With Caution - The door gasket is used in or around any part of fire, electrical shock, injury to children in cabinets above a range or on any part of the range. ■ Wear Proper Apparel - No commercial oven cleaner or oven liner protective coating of any kind should be immersed...
... immediately. ■ Clean Cooktop With Caution - The door gasket is used in or around any part of fire, electrical shock, injury to children in cabinets above a range or on any part of the range. ■ Wear Proper Apparel - No commercial oven cleaner or oven liner protective coating of any kind should be immersed...

Use & Care Guide
Page 14
...Several cooking cycles between Clean cycles or spills on . If the problem continues, call . The electrical outlet in the home may cycle on and off to incorrect heat level Range is set to keep flashing, call for stubborn soils. See the Installation Instructions. The element may... seconds to a temperature limiter Delay start is unplugged. Depending on all spills POSSIBLE CAUSES Power supply cord is set correctly. www.whirlpool.com Operation PROBLEM Nothing will operate Cooktop will not operate Oven temperature too high or too low Oven indicator lights flash Display shows ...
...Several cooking cycles between Clean cycles or spills on . If the problem continues, call . The electrical outlet in the home may cycle on and off to incorrect heat level Range is set to keep flashing, call for stubborn soils. See the Installation Instructions. The element may... seconds to a temperature limiter Delay start is unplugged. Depending on all spills POSSIBLE CAUSES Power supply cord is set correctly. www.whirlpool.com Operation PROBLEM Nothing will operate Cooktop will not operate Oven temperature too high or too low Oven indicator lights flash Display shows ...


