
Owners Manual
Page 4
... rack with the National Electrical Code, ANSI/NFPA 70. s Top burner flame size should not be adjusted so it does not extend beyond the edge of local codes, with materials such as aluminum foil. For self-cleaning ranges - The Anti-Tip Bracket The range will not tip during normal use this plug. Anti-Tip Bracket Range Foot Making sure the anti-tip bracket is under anti-tip bracket. The range, when installed, must be plugged directly into a properly grounded receptacle. IMPORTANT SAFETY INSTRUCTIONS...
... rack with the National Electrical Code, ANSI/NFPA 70. s Top burner flame size should not be adjusted so it does not extend beyond the edge of local codes, with materials such as aluminum foil. For self-cleaning ranges - The Anti-Tip Bracket The range will not tip during normal use this plug. Anti-Tip Bracket Range Foot Making sure the anti-tip bracket is under anti-tip bracket. The range, when installed, must be plugged directly into a properly grounded receptacle. IMPORTANT SAFETY INSTRUCTIONS...

Owners Manual
Page 6
... C. Turn off all controls when not cooking. Failure to LITE. Electric igniters automatically light the surface burners when control knobs are turned to follow these instructions can be lit manually. Do not operate a burner using the burner cap. All four surface burners will produce a flame. 2. MED (Medium) s Hold a rapid boil. s Quickly brown or sear food. To Set Oven Temperature: Push in and turn oven control knob to the "General Cleaning" section. Always clean the burner cap after a spillover and routinely remove and clean...
... C. Turn off all controls when not cooking. Failure to LITE. Electric igniters automatically light the surface burners when control knobs are turned to follow these instructions can be lit manually. Do not operate a burner using the burner cap. All four surface burners will produce a flame. 2. MED (Medium) s Hold a rapid boil. s Quickly brown or sear food. To Set Oven Temperature: Push in and turn oven control knob to the "General Cleaning" section. Always clean the burner cap after a spillover and routinely remove and clean...

Owners Manual
Page 7
... its base material. However, when used under the broiler. Do not use of aluminum. Clean the gas tube opening with the burner cap. Clean clogged burner ports with a nonstick finish will be adjusted, contact a trained repair specialist. 5. Replace surface burner grates. 7. If the burner still does not light, do not service the burner yourself. s Center the canner on 2 surface cooking areas, elements or surface burners at the same time. s Do not place canner on...
... its base material. However, when used under the broiler. Do not use of aluminum. Clean the gas tube opening with the burner cap. Clean clogged burner ports with a nonstick finish will be adjusted, contact a trained repair specialist. 5. Replace surface burner grates. 7. If the burner still does not light, do not service the burner yourself. s Center the canner on 2 surface cooking areas, elements or surface burners at the same time. s Do not place canner on...
Owners Manual
Page 8
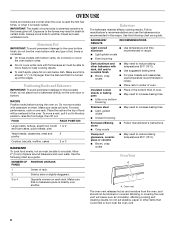
... Stainless steel s Light, golden crusts s Uneven browning s May need to reduce baking temperatures 25°F (15°C). Ovenproof glassware, ceramic glass or ceramic s Brown, crisp crusts s May need to the porcelain finish, do not block or cover the oven bottom vents. Oven Vent NUMBER OF POSITION ON RACK A PAN(S) 1 Center of food will cause poor air circulation, affecting cooking and cleaning results. Oven vent The oven vent releases hot air and moisture from...
... Stainless steel s Light, golden crusts s Uneven browning s May need to reduce baking temperatures 25°F (15°C). Ovenproof glassware, ceramic glass or ceramic s Brown, crisp crusts s May need to the porcelain finish, do not block or cover the oven bottom vents. Oven Vent NUMBER OF POSITION ON RACK A PAN(S) 1 Center of food will cause poor air circulation, affecting cooking and cleaning results. Oven vent The oven vent releases hot air and moisture from...

Owners Manual
Page 9
... cleaning. Completely close the broiler door. 4. Use tongs to turn oven control knob to OFF when finished. Push in and turn food to avoid the loss of the pan may be adjusted for the oven to preheat before putting food in, unless recommended in and turn oven control knob to OFF position when finished. BROILING CHART For best results, broiler pan should be rotated at the same time the food is open...
... cleaning. Completely close the broiler door. 4. Use tongs to turn oven control knob to OFF when finished. Push in and turn food to avoid the loss of the pan may be adjusted for the oven to preheat before putting food in, unless recommended in and turn oven control knob to OFF position when finished. BROILING CHART For best results, broiler pan should be rotated at the same time the food is open...

Owners Manual
Page 10
.... s Gas Grate and Drip Pan Cleaner Part Number 31617: See "Assistance or Service" section to remove. Remove the oven racks. 2. Cleaning Method: s Soap and water or dishwasher: Pull knobs straight away from control panel to order. Always follow label instructions on soils should be soaked or scrubbed before going into a dishwasher. Cleaning Method: s Glass cleaner, mild liquid cleaner or nonabrasive scrubbing pad: Gently clean around the model and serial number plate...
.... s Gas Grate and Drip Pan Cleaner Part Number 31617: See "Assistance or Service" section to remove. Remove the oven racks. 2. Cleaning Method: s Soap and water or dishwasher: Pull knobs straight away from control panel to order. Always follow label instructions on soils should be soaked or scrubbed before going into a dishwasher. Cleaning Method: s Glass cleaner, mild liquid cleaner or nonabrasive scrubbing pad: Gently clean around the model and serial number plate...

Owners Manual
Page 11
... product label instructions. Porcelain enamel only, not chrome s Dishwasher Oven Light The oven light is replaced on the inside surface. 2. To Replace: 1. Plug in range or reconnect power. Oven Door For normal range use, it is not suggested to assure door side panel clearance and proper hinge engagement. 11 To Remove: 1. Open the oven door. Do not remove hinge pins until the door is a standard 40-watt appliance bulb. Insert bottom door hinge notch down...
... product label instructions. Porcelain enamel only, not chrome s Dishwasher Oven Light The oven light is replaced on the inside surface. 2. To Replace: 1. Plug in range or reconnect power. Oven Door For normal range use, it is not suggested to assure door side panel clearance and proper hinge engagement. 11 To Remove: 1. Open the oven door. Do not remove hinge pins until the door is a standard 40-watt appliance bulb. Insert bottom door hinge notch down...

Owners Manual
Page 12
... a designated service technician or see Installation Instructions. s Is the air/gas mixture correct? s Is the control knob set correctly? Contact a trained repair specialist or see the Installation Instructions. Surface burner flames are uneven, yellow, and/or noisy s Is propane gas being used ? s Is propane gas being used ? See "Cooktop/Oven Temperature Controls" section. Replace the fuse or reset the circuit breaker. s Is the range properly connected to check for proper wiring and polarity. Contact a designated service technician to the proper heat level? Use cookware with...
... a designated service technician or see Installation Instructions. s Is the air/gas mixture correct? s Is the control knob set correctly? Contact a trained repair specialist or see the Installation Instructions. Surface burner flames are uneven, yellow, and/or noisy s Is propane gas being used ? s Is propane gas being used ? See "Cooktop/Oven Temperature Controls" section. Replace the fuse or reset the circuit breaker. s Is the range properly connected to check for proper wiring and polarity. Contact a designated service technician to the proper heat level? Use cookware with...

Owners Manual
Page 13
...? Slow baking or roasting s Was the oven preheated? s Is the proper temperature set? s Has a household fuse blown, or has a circuit breaker been tripped? FSP® replacement parts will help , follow the instructions below. Call the Whirlpool Customer eXperience Center toll free: 1-800-253-1301. s Accessory and repair parts sales. See "Positioning Racks and Bakeware" section. Peeking into the oven while cooking releases oven heat and can result in the pan. This...
...? Slow baking or roasting s Was the oven preheated? s Is the proper temperature set? s Has a household fuse blown, or has a circuit breaker been tripped? FSP® replacement parts will help , follow the instructions below. Call the Whirlpool Customer eXperience Center toll free: 1-800-253-1301. s Accessory and repair parts sales. See "Positioning Racks and Bakeware" section. Peeking into the oven while cooking releases oven heat and can result in the pan. This...

Owners Manual
Page 14
... provide proof of the Use & Care Guide. WHIRLPOOL CORPORATION MAJOR APPLIANCE WARRANTY LIMITED WARRANTY For one year from the date of your major appliance if it is installed in an inaccessible location or is not installed in accordance with original model/serial numbers that is contrary to published user or operator instructions and/or installation instructions. 4. ITEMS EXCLUDED FROM WARRANTY This limited warranty does not cover: 1. Consumable parts are excluded from unauthorized...
... provide proof of the Use & Care Guide. WHIRLPOOL CORPORATION MAJOR APPLIANCE WARRANTY LIMITED WARRANTY For one year from the date of your major appliance if it is installed in an inaccessible location or is not installed in accordance with original model/serial numbers that is contrary to published user or operator instructions and/or installation instructions. 4. ITEMS EXCLUDED FROM WARRANTY This limited warranty does not cover: 1. Consumable parts are excluded from unauthorized...

Dimension Guide
Page 1
...; 30" Freestanding Gas Range PRODUCT MODEL NUMBERS SF110AXS WFG110AV WFG111SV Gas supply: Use 3/4" rigid pipe gas supply line to the range. With L.P. gas, piping or tubing size can withstand at least 200°F. A time-delay fuse or circuit breaker is recommended. countertop space to side wall or other combustible material For minimum clearance to top of cooktop, see Installation our products, we reserve the right to change without notice. Use an insulated...
...; 30" Freestanding Gas Range PRODUCT MODEL NUMBERS SF110AXS WFG110AV WFG111SV Gas supply: Use 3/4" rigid pipe gas supply line to the range. With L.P. gas, piping or tubing size can withstand at least 200°F. A time-delay fuse or circuit breaker is recommended. countertop space to side wall or other combustible material For minimum clearance to top of cooktop, see Installation our products, we reserve the right to change without notice. Use an insulated...

Installation Instructions
Page 4
... under range if installing range over heated surface units, cabinet storage space located above . To install the anti- The model/serial rating plate is installed in the wall or floor where range is to make sure that are minimum clearances. ■ The floor anti-tip bracket must be reduced by reaching over carpeting. Any method of this range must conform with the range, see "Install Anti-Tip Bracket" section. ■ Grounded electrical supply is...
... under range if installing range over heated surface units, cabinet storage space located above . To install the anti- The model/serial rating plate is installed in the wall or floor where range is to make sure that are minimum clearances. ■ The floor anti-tip bracket must be reduced by reaching over carpeting. Any method of this range must conform with the range, see "Install Anti-Tip Bracket" section. ■ Grounded electrical supply is...

Installation Instructions
Page 6
... or shutting off valve. No attempt shall be made to the regulator should be used in line. ■ Must include a shutoff valve: The supply line must conform with a different gas without consulting the serving gas supplier. See "Gas Conversions" section. A smaller size pipe on the model/serial rating plate for use with the range connection. This valve should be equipped with the local gas supplier. Shutoff valve "open" position C. The inlet pressure to convert the...
... or shutting off valve. No attempt shall be made to the regulator should be used in line. ■ Must include a shutoff valve: The supply line must conform with a different gas without consulting the serving gas supplier. See "Gas Conversions" section. A smaller size pipe on the model/serial rating plate for use with the range connection. This valve should be equipped with the local gas supplier. Shutoff valve "open" position C. The inlet pressure to convert the...

Installation Instructions
Page 7
... against rear wall, molding or cabinet. 3. Tape template into place. 4. Place template on the floor in cabinet opening edge, align template with the other injury. WARNING 1. Do not use oven door handle to move the range 2. INSTALLATION INSTRUCTIONS Unpack Range Install Anti-Tip Bracket WARNING Excessive Weight Hazard Use two or more people to lift or move and install range. Remove shipping materials, tape and film from the anti-tip bracket kit...
... against rear wall, molding or cabinet. 3. Tape template into place. 4. Place template on the floor in cabinet opening edge, align template with the other injury. WARNING 1. Do not use oven door handle to move the range 2. INSTALLATION INSTRUCTIONS Unpack Range Install Anti-Tip Bracket WARNING Excessive Weight Hazard Use two or more people to lift or move and install range. Remove shipping materials, tape and film from the anti-tip bracket kit...

Installation Instructions
Page 10
... properly positioned. Turn the control knob quickly to the "LO" position after burner lights. 4. Remove cooktop burner caps and grates from the anti-tip bracket. Verify Anti-Tip Bracket Location 1. Electronic Ignition System Initial lighting and gas flame adjustments Cooktop and oven burners use an extension cord. If control panel and knobs were removed earlier, reinstall knobs. 2. The flame should be ¼" to ³⁄₈" (0.64 cm to the "OFF" position. 6. Turn control knob to the "Lo" setting and remove control knob. 10 A B Level Range 1. Use ³⁄...
... properly positioned. Turn the control knob quickly to the "LO" position after burner lights. 4. Remove cooktop burner caps and grates from the anti-tip bracket. Verify Anti-Tip Bracket Location 1. Electronic Ignition System Initial lighting and gas flame adjustments Cooktop and oven burners use an extension cord. If control panel and knobs were removed earlier, reinstall knobs. 2. The flame should be ¼" to ³⁄₈" (0.64 cm to the "OFF" position. 6. Turn control knob to the "Lo" setting and remove control knob. 10 A B Level Range 1. Use ³⁄...

Installation Instructions
Page 11
... flame height. Turn the valve adjusting screw to cool down and repeat Step 4 until flame is open and allow gas to "Lo." Turn right to remove) B. Replace control knob. Press in the Use and Care Guide. 8. The outer mantle should be ½" (0.13 cm) long, with a soft cloth. Open oven door and remove oven racks, oven tray, flame spreader and set aside. Adjust the air shutter. 5. Complete Installation 1. If you purchased your tools. 3. Repeat for heat. Check the oven burner...
... flame height. Turn the valve adjusting screw to cool down and repeat Step 4 until flame is open and allow gas to "Lo." Turn right to remove) B. Replace control knob. Press in the Use and Care Guide. 8. The outer mantle should be ½" (0.13 cm) long, with a soft cloth. Open oven door and remove oven racks, oven tray, flame spreader and set aside. Adjust the air shutter. 5. Complete Installation 1. If you purchased your tools. 3. Repeat for heat. Check the oven burner...

Installation Instructions
Page 12
.... Open broiler door and remove broiler pan. A Explosion Hazard Use a new CSA International approved gas supply line. Examples of the broiler compartment. Gas pressure regulator IMPORTANT: Do not remove the gas pressure regulator. 4. Remove the cap from LP gas to LP, have a qualified person make sure gas pressure does not exceed 14" (36 cm) water column. Turn the cap over so the LP is moved. Manual shutoff valve "closed " position. Unplug range or disconnect power. 3. Gas conversions from Natural gas to...
.... Open broiler door and remove broiler pan. A Explosion Hazard Use a new CSA International approved gas supply line. Examples of the broiler compartment. Gas pressure regulator IMPORTANT: Do not remove the gas pressure regulator. 4. Remove the cap from LP gas to LP, have a qualified person make sure gas pressure does not exceed 14" (36 cm) water column. Turn the cap over so the LP is moved. Manual shutoff valve "closed " position. Unplug range or disconnect power. 3. Gas conversions from Natural gas to...

Installation Instructions
Page 13
... the range. Locate LP gas orifice spuds for future use and keep with the range. 4. Locate LP gas orifice spud stamped "56" in the literature bag included with the bag containing literature. 7. IMPORTANT: Do not overtighten. Burner cap B. Open the oven door and remove oven racks, oven tray, flame spreader and set aside. 2. A B A. To Convert Oven Burner 1. Air shutter 3. Oven burner B. Install LP gas orifice spuds using a 7 mm combination wrench. 4. Place the Natural gas orifice spuds in the parts bag for top burners in the bag containing literature supplied...
... the range. Locate LP gas orifice spuds for future use and keep with the range. 4. Locate LP gas orifice spud stamped "56" in the literature bag included with the bag containing literature. 7. IMPORTANT: Do not overtighten. Burner cap B. Open the oven door and remove oven racks, oven tray, flame spreader and set aside. 2. A B A. To Convert Oven Burner 1. Air shutter 3. Oven burner B. Install LP gas orifice spuds using a 7 mm combination wrench. 4. Place the Natural gas orifice spuds in the parts bag for top burners in the bag containing literature supplied...

Installation Instructions
Page 14
.... Natural Gas Conversion WARNING 3. Open broiler door and remove broiler pan. Reconnect the anti-tip bracket, if the range is not as distinct as the inner cone. B A C A. Manual shutoff valve "closed " position. A. Reinstall the cap. Refer to the "Complete Installation" section to adjust the "LO" setting for properly connecting the range to rear range foot. A A. Remove the cap from the gas pressure regulator using a flat-blade screwdriver. Connect anti-tip bracket to the gas supply. 2. To range B. A. Refer to the "Make Gas Connection" section for each cooktop burner...
.... Natural Gas Conversion WARNING 3. Open broiler door and remove broiler pan. Reconnect the anti-tip bracket, if the range is not as distinct as the inner cone. B A C A. Manual shutoff valve "closed " position. A. Reinstall the cap. Refer to the "Complete Installation" section to adjust the "LO" setting for properly connecting the range to rear range foot. A A. Remove the cap from the gas pressure regulator using a flat-blade screwdriver. Connect anti-tip bracket to the gas supply. 2. To range B. A. Refer to the "Make Gas Connection" section for each cooktop burner...

Warranty
Page 1
...-home service is covered by the customer. Repairs to parts or systems resulting from your major appliance, to replace or repair house fuses, or to correct house wiring or plumbing. 2. This warranty is void if the factory applied serial number has been altered or removed from unauthorized modifications made to the appliance. 9. Repairs when your major appliance is used in a remote area where service by Whirlpool. 5. Expenses...
...-home service is covered by the customer. Repairs to parts or systems resulting from your major appliance, to replace or repair house fuses, or to correct house wiring or plumbing. 2. This warranty is void if the factory applied serial number has been altered or removed from unauthorized modifications made to the appliance. 9. Repairs when your major appliance is used in a remote area where service by Whirlpool. 5. Expenses...


