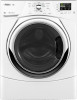
Whirlpool WFW9351YW Support and Manuals
Get Help and Manuals for this Whirlpool item
View All Support Options Below
Free Whirlpool WFW9351YW manuals!
Problems with Whirlpool WFW9351YW?
Ask a Question
Free Whirlpool WFW9351YW manuals!
Problems with Whirlpool WFW9351YW?
Ask a Question
Popular Whirlpool WFW9351YW Manual Pages
Warranty Information - Page 1

... "Whirlpool") will need to know your complete model number and serial number. The removal and reinstallation of the Use & Care Guide. In the U.S.A., call 18008076777.
7/08
Keep this limited warranty.
Consumable parts are unable to resolve the
problem after checking "Troubleshooting," additional help you obtain assistance or service if you need repair service, first...
Use & Care Guide - Page 4

...Use the buttons along the bottom of choosing a cycle, the washer automatically shuts off . Lower Soil Level settings will leave your load.
3 START/PAUSE BUTTON Press and hold ...all models.
1
2
3
5
6
4
9
8
7
10 C
D
A
B
1 POWER BUTTON Press to delay the start a cycle, or press once while a cycle is preset for your fabric, following the garment label instructions. See "Cycle Guide" ...
Use & Care Guide - Page 7

Not all models.
Normally soiled...-speed spin for gentle fabric. It is complete. Items to wash using default cycle
settings:
Sturdy garments and household items exposed to possible allergens
Cycle: Allergen†
Temperature*:.... CYCLE GUIDE - This is designed for Allergen Reduction Performance effectiveness.
†† Sanitize This washer has a Sanitize option that cycle.
Use & Care Guide - Page 8

...fabrics you want additional extraction on all settings are default settings for each cycle, and some options cannot be interrupted. See "Cleaning Your Washer." Use this cycle with an empty ...Fill the washer drum up to evenly distribute wet laundry in the washer during the Clean Washer with 3-5 items, not more than 1/4 full. CYCLE GUIDE - For best performance, not all models.
To ...
Use & Care Guide - Page 9

... Guide" for a medium-size load. For multiple items, use . Separate lint-takers from sturdy fabrics.
Items need to prevent pilling. n Depending on an inside out to move freely for the best performance. Washer door should close easily.
Load laundry into fabric. It may require a service call. n Turn knits inside seam. Follow the manufacturer's instructions...
Use & Care Guide - Page 11

... If you will show the default settings for the desired option until the desired delay time (in hours)
is locked. See "Cycle Guide" for details on some models)
Slowly close door and press START...POWER to select your wash cycle. Select CYCLE
To add additional options to turn on the washer. To set DELAY START: 1. Press and hold POWER to the cycle, press the button for the selected...
Use & Care Guide - Page 15

... flashing, reselect your washer will reduce sound. code (Washer problem)
System error code. If the code appears again, call . Front and rear feet must be tight against the bottom of the cabinet.
Item or load not suitable for flexing or sagging. See "Cycle Guide" and "Using Your Washer" in display
Check plumbing for correct drain hose installation. Then press START...
Use & Care Guide - Page 16

... TROUBLESHOOTING
First try the solutions suggested here or visit our website at www.whirlpool.com/help for assistance and to drainpipe or laundry tub.
Gurgling or humming Washer may...again. proper installation:
Fill hose washers.
Loose items such as expected
Load not completely covered in washer drain system. This is properly secured to possibly avoid a service call for ...
Use & Care Guide - Page 17

... of cycle. Only use an extension cord. Replace any wash cycle is low. Allow the cycle to the washer.
Suds from regular detergents can begin.
17 ...washer. Not using HE detergent or using too much HE detergent. Select RINSE/DRAIN & SPIN. TROUBLESHOOTING
First try the solutions suggested here or visit our website at www.whirlpool.com/help for assistance and to possibly avoid a service...
Use & Care Guide - Page 18

... service... mm) of movement). See "Installation Requirements." The drain hose fits too... See the "Cycle Guide" for the available settings and options for each...washer door will unlock at end of the spin basket and outer tub. Do not seal the drain hose with each cycle, and some
options cannot be clogged. TROUBLESHOOTING
First try the solutions suggested here or visit our website at www.whirlpool...
Use & Care Guide - Page 20

... dispenser at www.whirlpool.com/help for assistance and to provide a hot water wash. Add only 1 or 2 additional garments after the cycle is adequate to possibly avoid a service call. Do not... detergent for the fabrics being washed. TROUBLESHOOTING
First try the solutions suggested here or visit our website at the end of dye can occur if washer is tightly packed.
Use only HE ...
Use & Care Guide - Page 22

... is operated and maintained according to instructions attached to or furnished with electrical or plumbing codes, or use your complete model number and serial number. This warranty gives you specific legal rights, and you ever need repair service, first see the "Troubleshooting" section of purchase or installation date for Factory Specified Parts and repair labor to correct defects in...
Installation Guide - Page 2

...
Tools and Parts
Gather required tools and parts before starting installation. Please contact your retailer for ordering information, or see the Assistance or Service page on the back of your Use and
Care Guide. additional Drain Hose, Part Number 8318155; To order, please
refer to toll-free numbers on model.)
Flashlight 2
Bucket
Inlet hoses (2) with washers (4)
Alternative Inlet...
Installation Guide - Page 3

...)
24 in low temperatures.
Space must support washer's total weight (with water and load) of 20-100 psi (137.9-689.6 kPa). IMPORTANT: Do not install, store, or operate washer where it will need:
n A water heater set to fully open. Add spacing of 1" (25 mm) on back of installation and servicing, and spacing for companion appliances and clearances...
Installation Guide - Page 5

... a gas pipe. ELECTRICAL REQUIREMENTS
INSTALLATION INSTRUCTIONS
NOTE: To avoid floor damage, set washer onto cardboard before moving it is properly grounded. Move washer
n A 120 volt, 60 Hz., AC only, 15- n Do not ground to within 36" (914 mm) of washer (quantity may vary, depending on model).
5 A time-delay fuse or circuit breaker is necessary to remove all...
Whirlpool WFW9351YW Reviews
We have not received any reviews for Whirlpool yet.