User Instructions
Page 1
...cu. side swing door only 49971 Compact dryer stand - Dealer name Serial number Address Phone number Model number Purchase date Accessories Enhance your complete model number and serial number. Part Number Accessory 20-48KITRC 4 ft (1.2 m) gas line dryer connector installation kit PT220L 4 ft (1.2 m) dryer cord, 3-wire, 30 amp PT400L 4 ft (1.2 m) dryer cord, 4-wire, 30 amp PT600L 6 ft (1.8 m) dryer...visit us at 1-800-253-1301 from anywhere in the U.S.A., or write: Whirlpool Corporation Customer eXperience Center 553 Benson Road Benton Harbor, MI 49022-2692 Please ...
...cu. side swing door only 49971 Compact dryer stand - Dealer name Serial number Address Phone number Model number Purchase date Accessories Enhance your complete model number and serial number. Part Number Accessory 20-48KITRC 4 ft (1.2 m) gas line dryer connector installation kit PT220L 4 ft (1.2 m) dryer cord, 3-wire, 30 amp PT400L 4 ft (1.2 m) dryer cord, 4-wire, 30 amp PT600L 6 ft (1.8 m) dryer...visit us at 1-800-253-1301 from anywhere in the U.S.A., or write: Whirlpool Corporation Customer eXperience Center 553 Benson Road Benton Harbor, MI 49022-2692 Please ...
User Instructions
Page 3
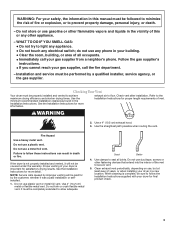
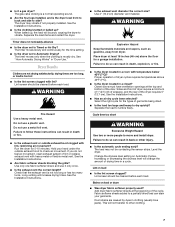
.... Do not use , but at least every 2 years, or when installing your dryer is important for more detail. When cleaning is not properly installed and vented, it was a paid for more information. WHAT TO DO IF YOU SMELL GAS: • Do not try to flow. Check vent after installation. Do not use...
.... Do not use , but at least every 2 years, or when installing your dryer is important for more detail. When cleaning is not properly installed and vented, it was a paid for more information. WHAT TO DO IF YOU SMELL GAS: • Do not try to flow. Check vent after installation. Do not use...
User Instructions
Page 6
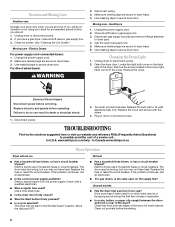
...and rear edges of a service call... Clean lint screen. Gas Dryers 1. Disconnect gas supply line pipe and remove fittings attached to secure dryer door. Replace the cover and secure with a 10-watt appliance bulb only. Electric dryers require 240 volt power supply. The drum may be on... breaker. The drum may be turning, but you may not have a gas dryer, close shutoff valve in dryer base. 4. If the dryer hasn't been used ? Make sure leveling legs are at home. Open the dryer door. www.whirlpool.com/help - Unplug the power supply cord. 2. Remove the cover....
...and rear edges of a service call... Clean lint screen. Gas Dryers 1. Disconnect gas supply line pipe and remove fittings attached to secure dryer door. Replace the cover and secure with a 10-watt appliance bulb only. Electric dryers require 240 volt power supply. The drum may be on... breaker. The drum may be turning, but you may not have a gas dryer, close shutoff valve in dryer base. 4. If the dryer hasn't been used ? Make sure leveling legs are at home. Open the dryer door. www.whirlpool.com/help - Unplug the power supply cord. 2. Remove the cover....
User Instructions
Page 7
... vent. Do not use a plastic vent. Failure to vibrate. Run the dryer for a garage installation. Hold your garments. Use only one fabric softener sheet, and use it a gas dryer? Long venting will bounce, causing the dryer to follow these instructions can result in "Dryer Use." Use 4" (10.2 cm) diameter vent material. Proper operation of the...
... vent. Do not use a plastic vent. Failure to vibrate. Run the dryer for a garage installation. Hold your garments. Use only one fabric softener sheet, and use it a gas dryer? Long venting will bounce, causing the dryer to follow these instructions can result in "Dryer Use." Use 4" (10.2 cm) diameter vent material. Proper operation of the...

Installation Instructions
Page 1
29" (73.7 CM) GAS DRYER INSTALLATION INSTRUCTIONS INSTRUCTIONS D'INSTALLATION DE LA SÉCHEUSE À GAZ DE 29" (73,7 CM) Table of Contents / Table des matières DRYER SAFETY ...1 INSTALLATION INSTRUCTIONS...2 Tools and Parts ...2 Location Requirements...3 Electrical Requirements ...4 Gas Supply Requirements ...4 Venting Requirements...5 Plan Vent System ...6 Install Vent System...7 Install Leveling Legs...7 Make Gas Connection ...8 Connect...
29" (73.7 CM) GAS DRYER INSTALLATION INSTRUCTIONS INSTRUCTIONS D'INSTALLATION DE LA SÉCHEUSE À GAZ DE 29" (73,7 CM) Table of Contents / Table des matières DRYER SAFETY ...1 INSTALLATION INSTRUCTIONS...2 Tools and Parts ...2 Location Requirements...3 Electrical Requirements ...4 Gas Supply Requirements ...4 Venting Requirements...5 Plan Vent System ...6 Install Vent System...7 Install Leveling Legs...7 Make Gas Connection ...8 Connect...

Installation Instructions
Page 5
... six (6) feet (1.8 m) of the dryer in accordance with the B149.1, Natural Gas and Propane Installation Code. In Canada: An individual manual shutoff valve must not be easy to flare adapter fitting C. ¹⁄₈" NPT minimum plugged tapping D. ½" NPT gas supply line E. Do not use a .... The location should be connected into any gas vent, chimney, wall, ceiling or a concealed space of fire, this dryer MUST BE EXHAUSTED OUTDOORS. The dryer exhaust must be installed within six (6) feet (1.8 m) of the dryer. IMPORTANT: Observe all governing codes and ordinances...
... six (6) feet (1.8 m) of the dryer in accordance with the B149.1, Natural Gas and Propane Installation Code. In Canada: An individual manual shutoff valve must not be easy to flare adapter fitting C. ¹⁄₈" NPT minimum plugged tapping D. ½" NPT gas supply line E. Do not use a .... The location should be connected into any gas vent, chimney, wall, ceiling or a concealed space of fire, this dryer MUST BE EXHAUSTED OUTDOORS. The dryer exhaust must be installed within six (6) feet (1.8 m) of the dryer. IMPORTANT: Observe all governing codes and ordinances...
Installation Instructions
Page 8
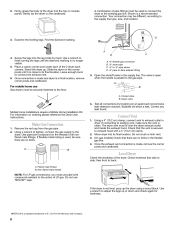
... is no kinks. Remove the red cap from the gas pipe. 2. Firmly grasp the body of the 2 dryer back corners. Once connection is made , remove the corner posts and cardboard. The dryer vent must be securely fastened to the gas pipe. Do not use Gas dryers must use pipe-joint compound resistant to existing vent, make...
... is no kinks. Remove the red cap from the gas pipe. 2. Firmly grasp the body of the 2 dryer back corners. Once connection is made , remove the corner posts and cardboard. The dryer vent must be securely fastened to the gas pipe. Do not use Gas dryers must use pipe-joint compound resistant to existing vent, make...

Installation Instructions
Page 10
... and start , check the following: WARNING Dryer is level. If the dryer will not start the dryer. Failure to see which step was skipped. 2. Turn on the dryer. When the dryer has been running for heat. Complete Installation 1. Check that the gas supply line shutoff valve is an extra part,... go back through the steps to follow these instructions can result in the Dryer User Instructions. Check that all ...
... and start , check the following: WARNING Dryer is level. If the dryer will not start the dryer. Failure to see which step was skipped. 2. Turn on the dryer. When the dryer has been running for heat. Complete Installation 1. Check that the gas supply line shutoff valve is an extra part,... go back through the steps to follow these instructions can result in the Dryer User Instructions. Check that all ...


