

Use and Care Guide
Page 4
..., with controls. ■ Do not repair or replace any part of the dryer or attempt any tools listed here. Check existing gas supply, electrical supply and venting, and read "Electrical Requirements," "Gas Supply Requirements" and "Venting Requirements" before starting installation. For ...exposed to play on or in the dryer. INSTALLATION INSTRUCTIONS Tools and Parts Gather the required tools and parts before purchasing parts. Items contaminated with local codes, or in your dryer. SAVE THESE INSTRUCTIONS IMPORTANT: The gas installation must be electrically grounded in ...
..., with controls. ■ Do not repair or replace any part of the dryer or attempt any tools listed here. Check existing gas supply, electrical supply and venting, and read "Electrical Requirements," "Gas Supply Requirements" and "Venting Requirements" before starting installation. For ...exposed to play on or in the dryer. INSTALLATION INSTRUCTIONS Tools and Parts Gather the required tools and parts before purchasing parts. Items contaminated with local codes, or in your dryer. SAVE THESE INSTRUCTIONS IMPORTANT: The gas installation must be electrically grounded in ...

Use and Care Guide
Page 5
... either the right or left side. 18"* (45.7 cm) 14" max.* (35.6cm) 48 in. 2* (310 cm2) 3"* (7.6 cm) 24 in.2* (155 cm2) 1" (2.5 cm) 29" 1" 1"* 29¼" 5" (73.7 cm) (2.5 cm) (2.5 cm) (74.3 cm) (12.7 cm) A B C A. See "Venting Requirements." ■ A separate 30-amp circuit. ■ A ...considered on the sides and rear. Louvered doors with equivalent ventilation openings are required. This dryer has been tested for Mobile Home Construction and Safety, Title 24, HUD Part 280) or Standard CAN/CSA-Z240 MH. Location Requirements WARNING Explosion Hazard Keep flammable ...
... either the right or left side. 18"* (45.7 cm) 14" max.* (35.6cm) 48 in. 2* (310 cm2) 3"* (7.6 cm) 24 in.2* (155 cm2) 1" (2.5 cm) 29" 1" 1"* 29¼" 5" (73.7 cm) (2.5 cm) (2.5 cm) (74.3 cm) (12.7 cm) A B C A. See "Venting Requirements." ■ A separate 30-amp circuit. ■ A ...considered on the sides and rear. Louvered doors with equivalent ventilation openings are required. This dryer has been tested for Mobile Home Construction and Safety, Title 24, HUD Part 280) or Standard CAN/CSA-Z240 MH. Location Requirements WARNING Explosion Hazard Keep flammable ...

Use and Care Guide
Page 8
...; Flexible metal vents are shown here. Clamps ■ Use clamps to seal all joints. ■ Exhaust vent must be fully extended and supported when the dryer is recommended to avoid sagging and kinking that may result in reduced airflow and poor performance. ■ Do not install flexible metal vent in the... styles are acceptable only if accessible for cleaning. ■ Flexible metal vent must be at least 12" (30.5 cm) from your dealer or by calling Whirlpool Parts and Accessories.
...; Flexible metal vents are shown here. Clamps ■ Use clamps to seal all joints. ■ Exhaust vent must be fully extended and supported when the dryer is recommended to avoid sagging and kinking that may result in reduced airflow and poor performance. ■ Do not install flexible metal vent in the... styles are acceptable only if accessible for cleaning. ■ Flexible metal vent must be at least 12" (30.5 cm) from your dealer or by calling Whirlpool Parts and Accessories.

Use and Care Guide
Page 9
... Exhaust outlet Special provisions for close -clearance installations are available for your exhaust installation type Recommended exhaust installations Typical installations vent the dryer from the rear of elbows and turns. ■ When using elbows or making turns, allow as much room as possible. ... B C NOTE: The following Vent system chart to use with dryer vent to wall vent mismatch): Part Number 4396037 - 0" (0 cm) to 18" (45.72 cm) mismatch D Part Number 4396011 - 18" (45.72 cm) to 29" (73.66 cm) A E mismatch Part Number 4396014 - 29" (73.66 cm) to 50" (127 cm) F mismatch...
... Exhaust outlet Special provisions for close -clearance installations are available for your exhaust installation type Recommended exhaust installations Typical installations vent the dryer from the rear of elbows and turns. ■ When using elbows or making turns, allow as much room as possible. ... B C NOTE: The following Vent system chart to use with dryer vent to wall vent mismatch): Part Number 4396037 - 0" (0 cm) to 18" (45.72 cm) mismatch D Part Number 4396011 - 18" (45.72 cm) to 29" (73.66 cm) A E mismatch Part Number 4396014 - 29" (73.66 cm) to 50" (127 cm) F mismatch...

Use and Care Guide
Page 10
... ft (9.4 m) 23 ft (7 m) 2 Rigid metal 44 ft (13.4 m) 38 ft (11.6 m) Flexible metal 27 ft (8.2 m) 19 ft (5.8 m) 3 Rigid metal 35 ft (10.7 m) 29 ft (8.8 m) Flexible metal 25 ft (7.6 m) 17 ft (5.2 m) 4 Rigid metal 27 ft (8.2 m) 21 ft (6.4 m) Flexible metal 23 ft (7 m) 15 ft (4.6 m) Install Vent System 1. ... it is close to its final location. See "Tools and Parts" section for information on the cardboard. Remove the red cap from dryer packaging under the entire back edge of the dryer. 2. Using a wrench to tighten, connect the gas supply to exhaust hood with 4" (10.2 cm) clamp....
... ft (9.4 m) 23 ft (7 m) 2 Rigid metal 44 ft (13.4 m) 38 ft (11.6 m) Flexible metal 27 ft (8.2 m) 19 ft (5.8 m) 3 Rigid metal 35 ft (10.7 m) 29 ft (8.8 m) Flexible metal 25 ft (7.6 m) 17 ft (5.2 m) 4 Rigid metal 27 ft (8.2 m) 21 ft (6.4 m) Flexible metal 23 ft (7 m) 15 ft (4.6 m) Install Vent System 1. ... it is close to its final location. See "Tools and Parts" section for information on the cardboard. Remove the red cap from dryer packaging under the entire back edge of the dryer. 2. Using a wrench to tighten, connect the gas supply to exhaust hood with 4" (10.2 cm) clamp....

Use and Care Guide
Page 13
...exposed. Be sure the vent is closed , open it, then repeat the 5-minute test as outlined above. ■ If the gas supply line shutoff valve is an extra part, go back through the steps to the front panel. 5. Check that should be removed. 8. WARNING A A. Align bottom screw ... location. Tighten all of hinges and slide door down. Do not remove ground prong. Wipe the dryer drum interior thoroughly with a damp cloth to follow these screws first. 6. Test dryer operation by placing screw heads into a grounded 3 prong outlet. ■ Electrical supply is connected. ■ Household fuse ...
...exposed. Be sure the vent is closed , open it, then repeat the 5-minute test as outlined above. ■ If the gas supply line shutoff valve is an extra part, go back through the steps to the front panel. 5. Check that should be removed. 8. WARNING A A. Align bottom screw ... location. Tighten all of hinges and slide door down. Do not remove ground prong. Wipe the dryer drum interior thoroughly with a damp cloth to follow these screws first. 6. Test dryer operation by placing screw heads into a grounded 3 prong outlet. ■ Electrical supply is connected. ■ Household fuse ...
Use and Care Guide
Page 16
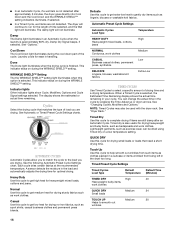
...a Timed Cycle, wet items are drying. See Automatic or Timed Preset Cycle Settings charts. Casual Use this option is finished. See "Dryer Rack." The dryer will not illuminate. Damp Dry Signal beeps, if selected. Cool Down The Cool Down light illuminates during the WRINKLE SHIELD™ setting.... in the load and automatically adjusts the drying time for ease in the cycle by pressing the Time Adjust up or down part of drying time and a drying temperature. Automatic Preset Cycle Settings Automatic Cycles Load Type Temperature HEAVY DUTY Heavyweight mixed loads, cottons...
...a Timed Cycle, wet items are drying. See Automatic or Timed Preset Cycle Settings charts. Casual Use this option is finished. See "Dryer Rack." The dryer will not illuminate. Damp Dry Signal beeps, if selected. Cool Down The Cool Down light illuminates during the WRINKLE SHIELD™ setting.... in the load and automatically adjusts the drying time for ease in the cycle by pressing the Time Adjust up or down part of drying time and a drying temperature. Automatic Preset Cycle Settings Automatic Cycles Load Type Temperature HEAVY DUTY Heavyweight mixed loads, cottons...

Use and Care Guide
Page 22
... you need further assistance, you still need help us to better respond to local dealers, repair parts distributors, and service companies. If you can write to Whirlpool Corporation with : ■ Features and specifications on our full line of your nearest designated service... below. To locate FSP® replacement parts in your request. Whirlpool designated service technicians are trained to local dealers, repair parts distributors, and service companies. In Canada, call the Customer eXperience Center at : Whirlpool Brand Home Appliances Customer eXperience Center 553 ...
... you need further assistance, you still need help us to better respond to local dealers, repair parts distributors, and service companies. If you can write to Whirlpool Corporation with : ■ Features and specifications on our full line of your nearest designated service... below. To locate FSP® replacement parts in your request. Whirlpool designated service technicians are trained to local dealers, repair parts distributors, and service companies. In Canada, call the Customer eXperience Center at : Whirlpool Brand Home Appliances Customer eXperience Center 553 ...

Use and Care Guide
Page 23
... light bulbs, air filters or water filters. Replacement parts or repair labor costs for future reference. Repairs to or furnished with the product, Whirlpool Corporation or Whirlpool Canada LP (hereafter "Whirlpool") will need it was purchased. Replacement parts or repair labor costs when the major appliance is ...number. In the U.S.A., call 1-800-807-6777. 12/05 Keep this major appliance is used for Factory Specified Parts and repair labor to be provided by a Whirlpool designated service company. You can be found by checking the "Assistance or Service" section or by calling...
... light bulbs, air filters or water filters. Replacement parts or repair labor costs for future reference. Repairs to or furnished with the product, Whirlpool Corporation or Whirlpool Canada LP (hereafter "Whirlpool") will need it was purchased. Replacement parts or repair labor costs when the major appliance is ...number. In the U.S.A., call 1-800-807-6777. 12/05 Keep this major appliance is used for Factory Specified Parts and repair labor to be provided by a Whirlpool designated service company. You can be found by checking the "Assistance or Service" section or by calling...


