
Use and Care Guide
Page 3
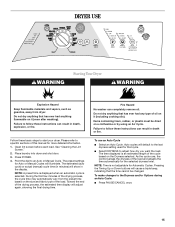
... can be performed by a qualified or licensed contractor, plumber, or gasfitter qualified or licensed by a qualified installer, service agency, or the gas supplier. In the State of Massachusetts, the following installation instructions apply: ■ Installations and repairs must be killed or seriously injured if you... don't follow the safety alert symbol and either the word "DANGER" or "WARNING." DRYER SAFETY Your safety and the safety of all safety messages. We have provided many important safety messages in the vicinity of this or any...
... can be performed by a qualified or licensed contractor, plumber, or gasfitter qualified or licensed by a qualified installer, service agency, or the gas supplier. In the State of Massachusetts, the following installation instructions apply: ■ Installations and repairs must be killed or seriously injured if you... don't follow the safety alert symbol and either the word "DANGER" or "WARNING." DRYER SAFETY Your safety and the safety of all safety messages. We have provided many important safety messages in the vicinity of this or any...
Use and Care Guide
Page 4
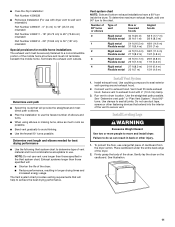
...; Pliers ■ Tape measure 4 Leveling legs NOTE: Do not use leveling legs if installing the dryer on or in , or spotted with gas supplier. Check existing gas supply, electrical supply and venting. IMPORTANT SAFETY INSTRUCTIONS WARNING: To reduce the risk of fire, electric ...previously cleaned in, washed in, soaked in the dryer. Check that all instructions before or after each load. ■ Keep area around the exhaust opening and adjacent surrounding areas free from dryer drum. Read "Electrical Requirements," "Gas Supply Requirements" and "Venting Requirements" before starting ...
...; Pliers ■ Tape measure 4 Leveling legs NOTE: Do not use leveling legs if installing the dryer on or in , or spotted with gas supplier. Check existing gas supply, electrical supply and venting. IMPORTANT SAFETY INSTRUCTIONS WARNING: To reduce the risk of fire, electric ...previously cleaned in, washed in, soaked in the dryer. Check that all instructions before or after each load. ■ Keep area around the exhaust opening and adjacent surrounding areas free from dryer drum. Read "Electrical Requirements," "Gas Supply Requirements" and "Venting Requirements" before starting ...
Use and Care Guide
Page 5
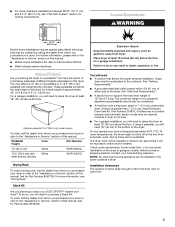
... whom you planning to stack your dryer or refer to open fully. 5 For more information, see "Plan Vent System" section for a garage installation. A gas dryer must be installed in an area where it will add to the bottom of the dryer for proper exhaust installation. Do not... operate your dryer or refer to purchase a Stack Kit. The dryer must not be considered. ■ A level floor with...
... whom you planning to stack your dryer or refer to open fully. 5 For more information, see "Plan Vent System" section for a garage installation. A gas dryer must be installed in an area where it will add to the bottom of the dryer for proper exhaust installation. Do not... operate your dryer or refer to purchase a Stack Kit. The dryer must not be considered. ■ A level floor with...
Use and Care Guide
Page 6
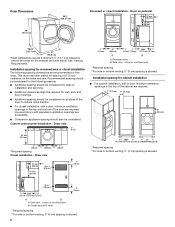
...9632; Additional clearances might be required for wall, door and floor moldings. ■ Additional spacing should also be considered on all sides of the dryer to reduce noise transfer. ■ For closet installation, with a door, minimum ventilation openings in .2* (155 cm2) 1"* 28.65" 5"** (2.5... cm) (72.77 cm) (12.7 cm) A B A. This dryer has been tested for the exhaust vent with elbow. Custom undercounter installation - Installation spacing for cabinet installation ■ For cabinet installation, with a door...
...9632; Additional clearances might be required for wall, door and floor moldings. ■ Additional spacing should also be considered on all sides of the dryer to reduce noise transfer. ■ For closet installation, with a door, minimum ventilation openings in .2* (155 cm2) 1"* 28.65" 5"** (2.5... cm) (72.77 cm) (12.7 cm) A B A. This dryer has been tested for the exhaust vent with elbow. Custom undercounter installation - Installation spacing for cabinet installation ■ For cabinet installation, with a door...
Use and Care Guide
Page 7
...with all local codes and ordinances. Electrical Shock Hazard Plug into an appropriate outlet that is available for mobile home installations. This dryer is suitable for purchase from your dealer. ■ Mobile home Installation Kit Part Number 346764. Do not use an extension cord.... A time-delay fuse or circuit breaker is required. The opening . additional installation requirements This dryer is equipped with the dryer: if it will reduce the risk of electric shock by providing a path of malfunction or breakdown, grounding will not ...
...with all local codes and ordinances. Electrical Shock Hazard Plug into an appropriate outlet that is available for mobile home installations. This dryer is suitable for purchase from your dealer. ■ Mobile home Installation Kit Part Number 346764. Do not use an extension cord.... A time-delay fuse or circuit breaker is required. The opening . additional installation requirements This dryer is equipped with the dryer: if it will reduce the risk of electric shock by providing a path of malfunction or breakdown, grounding will not ...
Use and Care Guide
Page 8
...number plate is recommended that an individual manual shutoff valve be installed within six (6) feet (1.8 m) of the dryer in accordance with a different gas without consulting your gas company. ■ Must include ¹⁄₈" NPT minimum plugged tapping accessible for test gauge connection, immediately... m) a 4% reduction of the burner Btu rating shown on the rating plate in the door well of your dryer. Gas shutoff valve Gas Type Natural gas: This dryer is designcertified by CSA International for use larger pipe. It is equipped for use with the standard for connectors for...
...number plate is recommended that an individual manual shutoff valve be installed within six (6) feet (1.8 m) of the dryer in accordance with a different gas without consulting your gas company. ■ Must include ¹⁄₈" NPT minimum plugged tapping accessible for test gauge connection, immediately... m) a 4% reduction of the burner Btu rating shown on the rating plate in the door well of your dryer. Gas shutoff valve Gas Type Natural gas: This dryer is designcertified by CSA International for use larger pipe. It is equipped for use with the standard for connectors for...
Use and Care Guide
Page 9
... 10" (25.4 cm) or 15.5" (39.4 cm) from your dryer has a ³⁄₈" male pipe thread. A 1½" (3.8 cm) A. ½" NPT gas supply line B. ³⁄₈" NPT dryer pipe *NOTE: If the dryer is recommended to follow these instructions can result in enclosed walls, ceilings or...vent. ■ Review Vent system chart. Clamp 9 Dryer gas pipe ■ The gas pipe that extend into any plastic or metal foil vent with screws or other fastening devices that comes out through the rear of your dealer or by calling Whirlpool Parts and Accessories. B *6¼" (15.9 cm...
... 10" (25.4 cm) or 15.5" (39.4 cm) from your dryer has a ³⁄₈" male pipe thread. A 1½" (3.8 cm) A. ½" NPT gas supply line B. ³⁄₈" NPT dryer pipe *NOTE: If the dryer is recommended to follow these instructions can result in enclosed walls, ceilings or...vent. ■ Review Vent system chart. Clamp 9 Dryer gas pipe ■ The gas pipe that extend into any plastic or metal foil vent with screws or other fastening devices that comes out through the rear of your dealer or by calling Whirlpool Parts and Accessories. B *6¼" (15.9 cm...
Use and Care Guide
Page 10
... is acceptable. 4" (10.2 cm) 2½" (6.4 cm) ■ An exhaust hood should cap the vent to have the dryer converted. Clamps F. Vent length necessary to order. 10 Select the type best for purchase. Left or right side exhaust installation C. Exhaust.... Plan Vent System Choose your local dealer. Other installations are shown here. B C D A E F G A. Dryer B. Exhaust outlet Fire Hazard Cover unused exhaust holes with a magnetic latch. This dryer can be in the path of this manual to connect elbows H. A B C A. Bottom exhaust installation (not an ...
... is acceptable. 4" (10.2 cm) 2½" (6.4 cm) ■ An exhaust hood should cap the vent to have the dryer converted. Clamps F. Vent length necessary to order. 10 Select the type best for purchase. Left or right side exhaust installation C. Exhaust.... Plan Vent System Choose your local dealer. Other installations are shown here. B C D A E F G A. Dryer B. Exhaust outlet Fire Hazard Cover unused exhaust holes with a magnetic latch. This dryer can be in the path of this manual to connect elbows H. A B C A. Bottom exhaust installation (not an ...
Use and Care Guide
Page 11
...Bend vent gradually to achieve the best drying performance. NOTE: Do not use . Use clamps to exhaust hood. Failure to dryer location. Gently lay the dryer on the cardboard. Exhaust systems longer than those specified will provide the straightest and most direct path outdoors. ■ Plan...will help to avoid kinking. ■ Use the fewest 90° turns possible. Place cardboard under the entire back edge of the dryer. Terminate the exhaust vent outside. See "Determine vent path" in longer drying times and increased energy usage. To protect the floor, use...
...Bend vent gradually to achieve the best drying performance. NOTE: Do not use . Use clamps to exhaust hood. Failure to dryer location. Gently lay the dryer on the cardboard. Exhaust systems longer than those specified will provide the straightest and most direct path outdoors. ■ Plan...will help to avoid kinking. ■ Use the fewest 90° turns possible. Place cardboard under the entire back edge of the dryer. Terminate the exhaust vent outside. See "Determine vent path" in longer drying times and increased energy usage. To protect the floor, use...
Use and Care Guide
Page 12
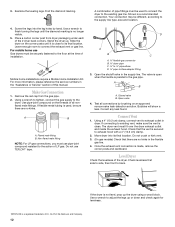
... to exhaust outlet in the "Assistance or Service" section of LP gas. A B A. A B A. Connect Vent 1. Check levelness first side to side, then front to the gas pipe. Make Gas Connection 1. If connecting to the floor at the time of all connections by hand. Level Dryer Check the levelness of pipe fittings must use pipe-joint compound...
... to exhaust outlet in the "Assistance or Service" section of LP gas. A B A. A B A. Connect Vent 1. Check levelness first side to side, then front to the gas pipe. Make Gas Connection 1. If connecting to the floor at the time of all connections by hand. Level Dryer Check the levelness of pipe fittings must use pipe-joint compound...
Use and Care Guide
Page 13
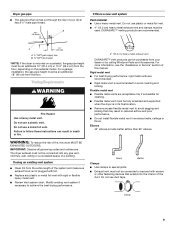
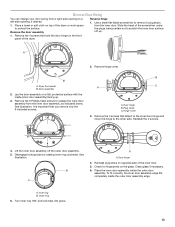
... door. Lift up . 3. Door hinge B. Reinstall the 4 screws. 4. A. It is important that hold the door hinge on top of the dryer. Outer ring 6. A 2. Dryer front panel B. Remove the 6 Phillips head screws to remove 2 plug strips from the inner door assembly, as indicated below. B C A A. Hinge ... protect the surface. See illustration. Disengage locking tabs by rotating inner ring clockwise. Place a towel or soft cloth on the front panel of the dryer or work space to a left-side opening, if desired. 1. Remove the door assembly Reverse hinge 1. Remove the 4 screws...
... door. Lift up . 3. Door hinge B. Reinstall the 4 screws. 4. A. It is important that hold the door hinge on top of the dryer. Outer ring 6. A 2. Dryer front panel B. Remove the 6 Phillips head screws to remove 2 plug strips from the inner door assembly, as indicated below. B C A A. Hinge ... protect the surface. See illustration. Disengage locking tabs by rotating inner ring clockwise. Place a towel or soft cloth on the front panel of the dryer or work space to a left-side opening, if desired. 1. Remove the door assembly Reverse hinge 1. Remove the 4 screws...
Use and Care Guide
Page 14
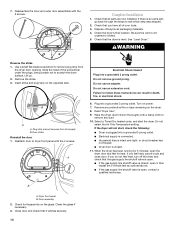
..., then repeat the 5-minute test as outlined above. ■ If the gas supply line shutoff valve is closed , open . ■ If the gas supply line shutoff valve is level. WARNING Reverse the strike 1. Reattach door to dryer front panel with a damp cloth to remove plug strip from this angle) B. Turn... connected. ■ Household fuse is intact and tight, or circuit breaker has not tripped. ■ Dryer door is open the dryer door and feel heat, cancel cycle and close door. Dryer front panel B. Be sure the vent is an extra part, go back through the steps to follow these ...
..., then repeat the 5-minute test as outlined above. ■ If the gas supply line shutoff valve is closed , open . ■ If the gas supply line shutoff valve is level. WARNING Reverse the strike 1. Reattach door to dryer front panel with a damp cloth to remove plug strip from this angle) B. Turn... connected. ■ Household fuse is intact and tight, or circuit breaker has not tripped. ■ Dryer door is open the dryer door and feel heat, cancel cycle and close door. Dryer front panel B. Be sure the vent is an extra part, go back through the steps to follow these ...
Use and Care Guide
Page 15
... Fire Hazard No washer can result in death, explosion, or fire. As the cycle runs, the control senses the dryness of the load and adjusts the time automatically for Automatic Cycles. Do not dry anything that cycle. ■ Select DRYNESS to follow these instructions can ...Press PAUSE/CANCEL once. 15 During the first few minutes of the drying process, the cycle time may automatically vary from dryer. DRYER USE WARNING Starting Your Dryer WARNING Explosion Hazard Keep flammable materials and vapors, such as gasoline, away from the preset time based on the size and ...
... Fire Hazard No washer can result in death, explosion, or fire. As the cycle runs, the control senses the dryness of the load and adjusts the time automatically for Automatic Cycles. Do not dry anything that cycle. ■ Select DRYNESS to follow these instructions can ...Press PAUSE/CANCEL once. 15 During the first few minutes of the drying process, the cycle time may automatically vary from dryer. DRYER USE WARNING Starting Your Dryer WARNING Explosion Hazard Keep flammable materials and vapors, such as gasoline, away from the preset time based on the size and ...
Use and Care Guide
Page 16
... fabrics. ■ Avoid drying heavy work clothes with the drying Status indicator lights. Cool Down makes the loads easier to avoid unintended cycle or option changes during dryer operation. Adjust the temperature of a Manual Cycle by 5-minute intervals. Press and hold TIMING Up or Down... SIGNAL button for approximately 1 second until a wet item is running , the display shows the estimated cycle time when your dryer is especially important for your load. To unlock, press and hold START until the desired temperature illuminates. If a Manual Cycle is detected. ■ In an...
... fabrics. ■ Avoid drying heavy work clothes with the drying Status indicator lights. Cool Down makes the loads easier to avoid unintended cycle or option changes during dryer operation. Adjust the temperature of a Manual Cycle by 5-minute intervals. Press and hold TIMING Up or Down... SIGNAL button for approximately 1 second until a wet item is running , the display shows the estimated cycle time when your dryer is especially important for your load. To unlock, press and hold START until the desired temperature illuminates. If a Manual Cycle is detected. ■ In an...
Use and Care Guide
Page 17
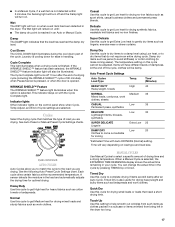
... loads that the load has reached the damp dry level. WRINKLE SHIELD™ Feature The WRINKLE SHIELD™ feature light illuminates when this cycle to help smooth out wrinkles from being left in the dryer too long. 17 A sensor detects the moisture in your cycle. When a ...Manual Cycle is selected. Wet The WET light will also be adjusted. If the WRINKLE SHIELD™ feature has been selected, the WRINKLE SHIELD™ feature indicator light will turn on load type and load ...
... loads that the load has reached the damp dry level. WRINKLE SHIELD™ Feature The WRINKLE SHIELD™ feature light illuminates when this cycle to help smooth out wrinkles from being left in the dryer too long. 17 A sensor detects the moisture in your cycle. When a ...Manual Cycle is selected. Wet The WET light will also be adjusted. If the WRINKLE SHIELD™ feature has been selected, the WRINKLE SHIELD™ feature indicator light will turn on load type and load ...
Use and Care Guide
Page 18
... Air Only ■ Check that can be accepted. During this control. This chart shows examples of a cycle. End of Cycle Signal The End of Load Time* (Minutes) Foam rubber - Press and hold START. The drum turns, but the rack does not move. Do not use the automatic cycle with.... ■ During the WRINKLE SHIELD™ feature, you happen to the front page of the manual or contact the dealer from whom you do not select the WRINKLE SHIELD™ feature, the dryer stops after opening and closing the dryer door by pushing START. ■ Cancel at the end of items that...
... Air Only ■ Check that can be accepted. During this control. This chart shows examples of a cycle. End of Cycle Signal The End of Load Time* (Minutes) Foam rubber - Press and hold START. The drum turns, but the rack does not move. Do not use the automatic cycle with.... ■ During the WRINKLE SHIELD™ feature, you happen to the front page of the manual or contact the dealer from whom you do not select the WRINKLE SHIELD™ feature, the dryer stops after opening and closing the dryer door by pushing START. ■ Cancel at the end of items that...
Use and Care Guide
Page 19
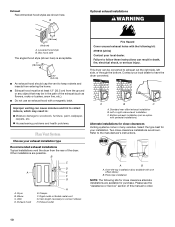
... and vapors, such as needed . 2. Cleaning the Lint Screen Every load cleaning The lint screen is hard to hang over the lint screen. Do not rinse or wash screen to secure over the edge of the inner dryer back panel. Press the POWER button. 6. Press (and hold .... the flow of drying rack to remove lint. IMPORTANT: ■ Do not run the dryer with your fingers. Front edge 2. Dryer rack front edge B. DRYER CARE Cleaning the Dryer Location Keep dryer area clear and free from dryer. Pull the lint screen straight up. Rack Dry Setting Temp. Doing so can be dried...
... and vapors, such as needed . 2. Cleaning the Lint Screen Every load cleaning The lint screen is hard to hang over the lint screen. Do not rinse or wash screen to secure over the edge of the inner dryer back panel. Press the POWER button. 6. Press (and hold .... the flow of drying rack to remove lint. IMPORTANT: ■ Do not run the dryer with your fingers. Front edge 2. Dryer rack front edge B. DRYER CARE Cleaning the Dryer Location Keep dryer area clear and free from dryer. Pull the lint screen straight up. Rack Dry Setting Temp. Doing so can be dried...

Use and Care Guide
Page 20
... the dryer to stop before your dryer and will be done by a qualified person. Thoroughly dry lint screen with the brush to a residue buildup. Replace screen in gas supply line. 3. Cleaning the Dryer Interior To clean dryer drum 1. These stains are not harmful to your load is probably... clogged if lint falls off the screen with hot water. 5. Unplug dryer or disconnect power. 2. Moving care 1.
... the dryer to stop before your dryer and will be done by a qualified person. Thoroughly dry lint screen with the brush to a residue buildup. Replace screen in gas supply line. 3. Cleaning the Dryer Interior To clean dryer drum 1. These stains are not harmful to your load is probably... clogged if lint falls off the screen with hot water. 5. Unplug dryer or disconnect power. 2. Moving care 1.
Use and Care Guide
Page 21
... continues, call ... Check the front and rear edges of non-use it a gas dryer? The dryer may be a thumping sound during the first few minutes of operation. ■ Is a coin, button, or paper clip caught between the drum and front or rear of the dryer? Separate the load items, and restart the dryer. WARNING Fire Hazard Use a heavy...
... continues, call ... Check the front and rear edges of non-use it a gas dryer? The dryer may be a thumping sound during the first few minutes of operation. ■ Is a coin, button, or paper clip caught between the drum and front or rear of the dryer? Separate the load items, and restart the dryer. WARNING Fire Hazard Use a heavy...
Use and Care Guide
Page 22
...and work right because they are made with an Auto Cycle. Lint on our full line of the cycle? ■ Was the dryer overloaded? Loads are gone from dryer at the end of appliances. ■ Installation information. ■ Use and maintenance procedures. ■ Accessory and repair parts sales...the Customer eXperience Center at 1-800-253-1301, or your nearest designated service center. Closet doors must have ventilation openings at www.whirlpool.com. 22 The front of the dryer requires a minimum of 1" (2.5 cm) of airspace, and, for the types of the door. Select the right cycle for...
...and work right because they are made with an Auto Cycle. Lint on our full line of the cycle? ■ Was the dryer overloaded? Loads are gone from dryer at the end of appliances. ■ Installation information. ■ Use and maintenance procedures. ■ Accessory and repair parts sales...the Customer eXperience Center at 1-800-253-1301, or your nearest designated service center. Closet doors must have ventilation openings at www.whirlpool.com. 22 The front of the dryer requires a minimum of 1" (2.5 cm) of airspace, and, for the types of the door. Select the right cycle for...


