
Installation Guide
Page 1
...;lectriques ou gaz, jusqu'à 30" (76,2 cm) de largeur Table of Contents / Table des matières MICROWAVE OVEN SAFETY 1 INSTALLATION INSTRUCTIONS 2 Tools and Parts 2 Location Requirements 2 Required Cutout Dimensions 2 Trim Kit Frame Dimensions 2 Electrical Requirements 3 Prepare Microwave Oven 3 Prepare Cutout/Cabinet Opening 3 Install the Microwave Oven 4 Install Trim Kit...
...;lectriques ou gaz, jusqu'à 30" (76,2 cm) de largeur Table of Contents / Table des matières MICROWAVE OVEN SAFETY 1 INSTALLATION INSTRUCTIONS 2 Tools and Parts 2 Location Requirements 2 Required Cutout Dimensions 2 Trim Kit Frame Dimensions 2 Electrical Requirements 3 Prepare Microwave Oven 3 Prepare Cutout/Cabinet Opening 3 Install the Microwave Oven 4 Install Trim Kit...

Installation Guide
Page 2
... *27" (68.6 cm) trim kit **30" (76.2 cm) trim kit 1 3.0 cm) 2 INSTALLATION INSTRUCTIONS Tools and Parts Tools Needed Gather the required tools and parts before starting installation. Upper cabinet B. Lower oven cutout D. Cutout for installation above a built-in oven below the cutout floor (3" ... provided with any tools listed here. ■ Measuring tape ■ Pencil ■ Phillips screwdriver ■ Drill ■ 7/64" drill bit Parts Supplied (not shown to open and close freely. Floor Required Cutout Dimensions 22 ³⁄₄" (57.8 cm) 1 2.7 cm) 17" ...
... *27" (68.6 cm) trim kit **30" (76.2 cm) trim kit 1 3.0 cm) 2 INSTALLATION INSTRUCTIONS Tools and Parts Tools Needed Gather the required tools and parts before starting installation. Upper cabinet B. Lower oven cutout D. Cutout for installation above a built-in oven below the cutout floor (3" ... provided with any tools listed here. ■ Measuring tape ■ Pencil ■ Phillips screwdriver ■ Drill ■ 7/64" drill bit Parts Supplied (not shown to open and close freely. Floor Required Cutout Dimensions 22 ³⁄₄" (57.8 cm) 1 2.7 cm) 17" ...

Warranty Information
Page 1
See service instructions below. Service must be borne by calling Whirlpool. Proof of original purchase date is used in the country in a manner contrary to know your appliance. Repairs to parts or systems resulting from unauthorized modifications made to determine if another ...warranty applies. If you reside in the United States and your authorized Whirlpool dealer to the appliance. 9. This warranty gives you specific...
See service instructions below. Service must be borne by calling Whirlpool. Proof of original purchase date is used in the country in a manner contrary to know your appliance. Repairs to parts or systems resulting from unauthorized modifications made to determine if another ...warranty applies. If you reside in the United States and your authorized Whirlpool dealer to the appliance. 9. This warranty gives you specific...
Use & Care Guide
Page 1
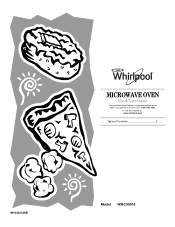
MICROWAVE OVEN Use & Care Guide For questions about features, operation/performance, parts, accessories or service, call: 1-800-253-1301. www.whirlpool.com Table of Contents 2 W10434129B Model WMC30516 or visit our website at...
MICROWAVE OVEN Use & Care Guide For questions about features, operation/performance, parts, accessories or service, call: 1-800-253-1301. www.whirlpool.com Table of Contents 2 W10434129B Model WMC30516 or visit our website at...
Use & Care Guide
Page 2
TABLE OF CONTENTS MICROWAVE OVEN SAFETY 3 INSTALLATION INSTRUCTIONS 5 Unpacking 5 Location Requirements 5 Electrical Requirements 5 PARTS AND FEATURES 6 Turntable 6 MICROWAVE OVEN CONTROL 6 Display 7 Start 7 Add 30 Seconds 7 Cancel 7 Tones 7 Clock 7 Timer 7 Control Lock 7 MICROWAVE OVEN USE 8 Food Characteristics 8 Cooking Guidelines 8 Cookware ... Menu (sensor and non-sensor 11 Weight Defrost / Time Defrost 12 MICROWAVE OVEN CARE 13 General Cleaning 13 TROUBLESHOOTING 14 ASSISTANCE OR SERVICE 15 Replacement Parts 15 Built-In Kits 15 WARRANTY 16 2
TABLE OF CONTENTS MICROWAVE OVEN SAFETY 3 INSTALLATION INSTRUCTIONS 5 Unpacking 5 Location Requirements 5 Electrical Requirements 5 PARTS AND FEATURES 6 Turntable 6 MICROWAVE OVEN CONTROL 6 Display 7 Start 7 Add 30 Seconds 7 Cancel 7 Tones 7 Clock 7 Timer 7 Control Lock 7 MICROWAVE OVEN USE 8 Food Characteristics 8 Cooking Guidelines 8 Cookware ... Menu (sensor and non-sensor 11 Weight Defrost / Time Defrost 12 MICROWAVE OVEN CARE 13 General Cleaning 13 TROUBLESHOOTING 14 ASSISTANCE OR SERVICE 15 Replacement Parts 15 Built-In Kits 15 WARRANTY 16 2

Use & Care Guide
Page 3
... overcook food. It is not designed for example, closed , turn oven off, and disconnect the power cord, or shut off the pad and touch electrical parts involving a risk of oven is not working properly, or if it . - Always read and obey all instructions before and halfway through heating it has been...
... overcook food. It is not designed for example, closed , turn oven off, and disconnect the power cord, or shut off the pad and touch electrical parts involving a risk of oven is not working properly, or if it . - Always read and obey all instructions before and halfway through heating it has been...

Use & Care Guide
Page 4
... operation can result in convection, combination, grill or "PAN BROWN" mode (on models with such features). ■ Do not store any materials, other part of the microwave oven with Part 18 of a heating or cooking appliance. ■ Do not use . ■ Do not store anything directly on sealing surfaces. (c) Do not operate...
... operation can result in convection, combination, grill or "PAN BROWN" mode (on models with such features). ■ Do not store any materials, other part of the microwave oven with Part 18 of a heating or cooking appliance. ■ Do not use . ■ Do not store anything directly on sealing surfaces. (c) Do not operate...
Use & Care Guide
Page 5
... Hazard Use two or more people to ensure proper airflow. or 20-amp electrical supply with a soft, damp cloth. 3. Check for the electric current. See "Parts and Features." The weight of space at a temperature above 50°F (10°C) for proper operation. Electrical Requirements WARNING Electrical Shock Hazard Plug into an...
... Hazard Use two or more people to ensure proper airflow. or 20-amp electrical supply with a soft, damp cloth. 3. Check for the electric current. See "Parts and Features." The weight of space at a temperature above 50°F (10°C) for proper operation. Electrical Requirements WARNING Electrical Shock Hazard Plug into an...

Use & Care Guide
Page 6
...rotate in either direction to reorder any of the hub. To Install: 1. Door handle (on the microwave oven cavity bottom. 2. Display I . Microwave inlet cover H. PARTS AND FEATURES This manual may differ slightly from the illustrations in this manual. A B C D E MICROWAVE OVEN CONTROL Oz lbs K J A. For best cooking results... guide label D. Fit the raised, curved wedges in the center of the turntable bottom between the three spokes of the parts. Control panel G. Model and serial number plate K. See "Assistance or Service" to help cook food more evenly.
...rotate in either direction to reorder any of the hub. To Install: 1. Door handle (on the microwave oven cavity bottom. 2. Display I . Microwave inlet cover H. PARTS AND FEATURES This manual may differ slightly from the illustrations in this manual. A B C D E MICROWAVE OVEN CONTROL Oz lbs K J A. For best cooking results... guide label D. Fit the raised, curved wedges in the center of the turntable bottom between the three spokes of the parts. Control panel G. Model and serial number plate K. See "Assistance or Service" to help cook food more evenly.

Use & Care Guide
Page 8
... microwave cooking cycle ends. Stir from microwave oven. ■ Do not overcook potatoes. Arranging If heating irregularly shaped or different sized foods, arrange the thinner parts and smaller sized items toward the center. Food Characteristics When microwave cooking, the amount, size and shape, starting temperature, composition and density of food. Check...
... microwave cooking cycle ends. Stir from microwave oven. ■ Do not overcook potatoes. Arranging If heating irregularly shaped or different sized foods, arrange the thinner parts and smaller sized items toward the center. Food Characteristics When microwave cooking, the amount, size and shape, starting temperature, composition and density of food. Check...

Use & Care Guide
Page 11
... 1 L)) Place in microwave-safe container. When the cycle ends, "End" will appear in the following menu items are included on the Cooking Guide label (see "Parts and Features" for its location). Stir and let stand 2-3 minutes after cooking. FROZEN VEGETABLE (sensor) 1 to 4 cups (250 mL to 3 slices, 3 oz (85 g) Place pizza...
... 1 L)) Place in microwave-safe container. When the cycle ends, "End" will appear in the following menu items are included on the Cooking Guide label (see "Parts and Features" for its location). Stir and let stand 2-3 minutes after cooking. FROZEN VEGETABLE (sensor) 1 to 4 cups (250 mL to 3 slices, 3 oz (85 g) Place pizza...
Use & Care Guide
Page 12
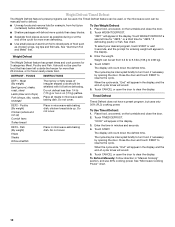
... can be used for food that has been left outside the freezer for more even defrosting. ■ Use small pieces of aluminum foil to shield parts of food such as possible during or at the end of the cycle for more than 20 minutes, or for frozen ready-made food. To...
... can be used for food that has been left outside the freezer for more even defrosting. ■ Use small pieces of aluminum foil to shield parts of food such as possible during or at the end of the cycle for more than 20 minutes, or for frozen ready-made food. To...
Use & Care Guide
Page 13
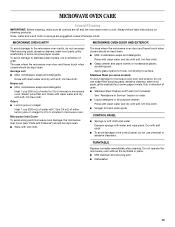
... cleaners, steel-wool pads, gritty washcloths or some paper towels. Microwave Inlet Cover To avoid arcing and microwave oven damage, the microwave inlet cover (see "Parts and Features") should be kept clean. ■ Wipe with soft, lint-free cloth. Rub in direction of either lemon juice or vinegar for 2 to 5 minutes...
... cleaners, steel-wool pads, gritty washcloths or some paper towels. Microwave Inlet Cover To avoid arcing and microwave oven damage, the microwave inlet cover (see "Parts and Features") should be kept clean. ■ Wipe with soft, lint-free cloth. Rub in direction of either lemon juice or vinegar for 2 to 5 minutes...

Use & Care Guide
Page 15
... date and the complete model and serial number of a service call us to better respond to build every new WHIRLPOOL® appliance. FSP® replacement parts will help , follow the instructions below. Our consultants provide assistance with the same precision used to your area, ...call . To locate FSP® replacement parts in the United States. These kits are trained to order replacement parts, we recommend that you the cost of your nearest Whirlpool designated service center. See "Assistance or Service" section for assistance or...
... date and the complete model and serial number of a service call us to better respond to build every new WHIRLPOOL® appliance. FSP® replacement parts will help , follow the instructions below. Our consultants provide assistance with the same precision used to your area, ...call . To locate FSP® replacement parts in the United States. These kits are trained to order replacement parts, we recommend that you the cost of your nearest Whirlpool designated service center. See "Assistance or Service" section for assistance or...

Use & Care Guide
Page 16
...operated and maintained according to instructions attached to or furnished with the product, Whirlpool Corporation or Whirlpool Canada LP (hereafter "Whirlpool") will, at its sole option, either pay for factory specified parts and repair labor to correct defects in materials or workmanship or replace the product... 1. Repairs or replacement when your product, to replace or repair house fuses, reset circuit breakers or to a Whirlpool designated service center. Repairs to parts or systems resulting from your model, serial number and shipping address. 3. This limited warranty is valid in the ...
...operated and maintained according to instructions attached to or furnished with the product, Whirlpool Corporation or Whirlpool Canada LP (hereafter "Whirlpool") will, at its sole option, either pay for factory specified parts and repair labor to correct defects in materials or workmanship or replace the product... 1. Repairs or replacement when your product, to replace or repair house fuses, reset circuit breakers or to a Whirlpool designated service center. Repairs to parts or systems resulting from your model, serial number and shipping address. 3. This limited warranty is valid in the ...


