
Installation Instructions
Page 1
... differ slightly from the illustration in this manual and on your appliance. These installation instructions cover different models. Table of Contents MICROWAVE HOOD COMBINATION SAFETY 1 INSTALLATION REQUIREMENTS 2 Tools and Parts 2 Remove Cardboard Template 2 Location Requirements 2 Product Dimensions 3 Electrical Requirements 3 INSTALLATION INSTRUCTIONS 4 Remove Mounting Plate 4 Rotate Blower Motor 4 ...
... differ slightly from the illustration in this manual and on your appliance. These installation instructions cover different models. Table of Contents MICROWAVE HOOD COMBINATION SAFETY 1 INSTALLATION REQUIREMENTS 2 Tools and Parts 2 Remove Cardboard Template 2 Location Requirements 2 Product Dimensions 3 Electrical Requirements 3 INSTALLATION INSTRUCTIONS 4 Remove Mounting Plate 4 Rotate Blower Motor 4 ...

Installation Instructions
Page 2
... cabinet template Mounting plate (attached to separate the template from the top of the microwave oven packaging is at least 6" (15.2 cm) of packaging) Aluminum grease filters Charcoal filters (Depending on model, aluminum grease filter and charcoal filter may not be included. NOTES: ■ ...If installing the microwave oven near a left sidewall, make sure that the damper blade can open freely and fully...
... cabinet template Mounting plate (attached to separate the template from the top of the microwave oven packaging is at least 6" (15.2 cm) of packaging) Aluminum grease filters Charcoal filters (Depending on model, aluminum grease filter and charcoal filter may not be included. NOTES: ■ ...If installing the microwave oven near a left sidewall, make sure that the damper blade can open freely and fully...

Installation Instructions
Page 4
...plate B. If the mounting plate is set aside. 3. Rotate Blower Motor The microwave oven is attached to the back of the microwave oven, remove it and set it may be attached to the back of microwave oven. Rotate blower motor 180° so that door does not swing open ...the work surface, cover the work surface. 1. Secure damper plate with 2 screws removed in Step 3. 7. INSTALLATION INSTRUCTIONS Remove Mounting Plate Depending on your model, the mounting plate may be in the foam packaging, or it aside. 3. Reattach damper plate. Damper plate 2. NOTE: To avoid possible damage to ...
...plate B. If the mounting plate is set aside. 3. Rotate Blower Motor The microwave oven is attached to the back of the microwave oven, remove it and set it may be attached to the back of microwave oven. Rotate blower motor 180° so that door does not swing open ...the work surface, cover the work surface. 1. Secure damper plate with 2 screws removed in Step 3. 7. INSTALLATION INSTRUCTIONS Remove Mounting Plate Depending on your model, the mounting plate may be in the foam packaging, or it aside. 3. Reattach damper plate. Damper plate 2. NOTE: To avoid possible damage to ...

Installation Instructions
Page 12
... center for equivalent lengths. W10247296B SP PN W10345003B © 2010. For best performance, use when installing this microwave oven in a 36" (91.4 cm) or 42" (106.7 cm) wide opening , behind the microwave oven door on the model and serial number plate, which is round, a rectangular to round transition piece = 5 ft (1.5 m) D. 2 ft (0.6 m) + 6 ft (1.8 m) straight...
... center for equivalent lengths. W10247296B SP PN W10345003B © 2010. For best performance, use when installing this microwave oven in a 36" (91.4 cm) or 42" (106.7 cm) wide opening , behind the microwave oven door on the model and serial number plate, which is round, a rectangular to round transition piece = 5 ft (1.5 m) D. 2 ft (0.6 m) + 6 ft (1.8 m) straight...

Dimension Guide
Page 1
... or 6" (15.2 cm) round vent should be inside the upper cabinet. Vent extension piece, at least 3" (7.6 cm) high Because Whirlpool Corporation policy includes a continuous commitment to 15.2 cm = 1.5 m) B. Instructions packed with a fuse or circuit breaker. Two 90°... min. W10247296B 3/28/12 For best performance, use no more than three 90° elbows. Microwave Hood Combination PRODUCT MODEL NUMBERS GMH3204XV GMH5205XV GMH6185XV WMH1162XV WMH1163XV WMH1164XW WMH2175XV WMH2205XV WMH3205XV WMH31017A WMH32517A WMH53520A WMH32L19A WMH73L20A Electrical: A ...
... or 6" (15.2 cm) round vent should be inside the upper cabinet. Vent extension piece, at least 3" (7.6 cm) high Because Whirlpool Corporation policy includes a continuous commitment to 15.2 cm = 1.5 m) B. Instructions packed with a fuse or circuit breaker. Two 90°... min. W10247296B 3/28/12 For best performance, use no more than three 90° elbows. Microwave Hood Combination PRODUCT MODEL NUMBERS GMH3204XV GMH5205XV GMH6185XV WMH1162XV WMH1163XV WMH1164XW WMH2175XV WMH2205XV WMH3205XV WMH31017A WMH32517A WMH53520A WMH32L19A WMH73L20A Electrical: A ...
Warranty Information
Page 1
...access to the Internet and you need further assistance, you on the upper or lower front facing of the microwave oven opening, behind the door. You can write to Whirlpool with any questions or concerns at the number below. ITEMS EXCLUDED FROM WARRANTY This limited warranty does not cover:...of your major appliance for product service if your major appliance is located in a remote area where service by this User Instructions and model number information for future reference. Service calls to correct the installation of your major appliance, to instruct you can find your major appliance,...
...access to the Internet and you need further assistance, you on the upper or lower front facing of the microwave oven opening, behind the door. You can write to Whirlpool with any questions or concerns at the number below. ITEMS EXCLUDED FROM WARRANTY This limited warranty does not cover:...of your major appliance for product service if your major appliance is located in a remote area where service by this User Instructions and model number information for future reference. Service calls to correct the installation of your major appliance, to instruct you can find your major appliance,...
Use & Care Guide
Page 1
You will need assistance, call us at www.whirlpool.com for additional information. for purchasing this manual and on your model and serial number located on the front facing of injury, and tell you don't follow instructions. Connect only to explode ... TROUBLESHOOTING, please visit our website at 1-800-253-1301. All safety messages will follow the specific "PRECAUTIONS TO AVOID POSSIBLE EXPOSURE TO EXCESSIVE MICROWAVE ENERGY" found in this section. ■ Some products such as whole eggs in accordance with the provided Installation Instructions. ■ Read all...
You will need assistance, call us at www.whirlpool.com for additional information. for purchasing this manual and on your model and serial number located on the front facing of injury, and tell you don't follow instructions. Connect only to explode ... TROUBLESHOOTING, please visit our website at 1-800-253-1301. All safety messages will follow the specific "PRECAUTIONS TO AVOID POSSIBLE EXPOSURE TO EXCESSIVE MICROWAVE ENERGY" found in this section. ■ Some products such as whole eggs in accordance with the provided Installation Instructions. ■ Read all...
Use & Care Guide
Page 2
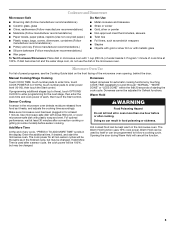
... tea are placed inside the oven ignite, keep oven door closed, turn the fan on models with such features). ■ Do not store any other than manufacturer's recommended accessories, in this microwave oven outdoors. This will cause overheating of injury to accumulate on hood or filter. ■... metal utensils should not be adjusted or repaired by qualified service personnel. Visible bubbling or boiling when the container is removed from the microwave oven is specifically designed to defeat or tamper with maximum width of 36" (91.44 cm). ■ Clean Ventilating Hoods Frequently ...
... tea are placed inside the oven ignite, keep oven door closed, turn the fan on models with such features). ■ Do not store any other than manufacturer's recommended accessories, in this microwave oven outdoors. This will cause overheating of injury to accumulate on hood or filter. ■... metal utensils should not be adjusted or repaired by qualified service personnel. Visible bubbling or boiling when the container is removed from the microwave oven is specifically designed to defeat or tamper with maximum width of 36" (91.44 cm). ■ Clean Ventilating Hoods Frequently ...
Use & Care Guide
Page 4
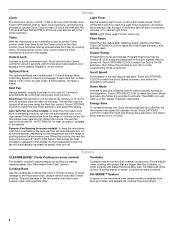
.../settings may also be turned off time in the display. Touch OPTIONS/ CLOCK to unlock control. Auto Vent Fan (on some models): To keep the microwave oven from overheating, the auto vent fan will automatically turn on at various speeds, depending on at high speed if the temperature ...from the range or cooktop below the microwave oven gets too hot. Dynamic Fan Sensing (on some models): To keep the microwave oven from overheating, the auto vent fan will automatically turn on the temperature from the range or ...
.../settings may also be turned off time in the display. Touch OPTIONS/ CLOCK to unlock control. Auto Vent Fan (on some models): To keep the microwave oven from overheating, the auto vent fan will automatically turn on at various speeds, depending on at high speed if the temperature ...from the range or cooktop below the microwave oven gets too hot. Dynamic Fan Sensing (on some models): To keep the microwave oven from overheating, the auto vent fan will automatically turn on the temperature from the range or ...
Use & Care Guide
Page 5
... dish becomes hot and the water stays cool, do not use the dish in food poisoning or sickness. Microwave Oven Use For list of preset programs, see the Cooking Guide label on some models) before or after a sensor cycle, the cook power will cancel the function. 5 Adjust doneness for Defrost functions. Doneness...
... dish becomes hot and the water stays cool, do not use the dish in food poisoning or sickness. Microwave Oven Use For list of preset programs, see the Cooking Guide label on some models) before or after a sensor cycle, the cook power will cancel the function. 5 Adjust doneness for Defrost functions. Doneness...
Use & Care Guide
Page 6
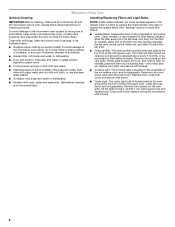
Clean with mild soap, water and a soft cloth or sponge, or as indicated below. ■ Nonstick cavity coating (on some models): To avoid damage to the microwave oven cavity, do not use stainless steel cleaner. ■ Turntable: mild soap and water or dishwasher. ■ Rack(s): mild soap, ... Care General Cleaning IMPORTANT: Before cleaning, make sure all controls are on the underside of microwave oven. Installing/Replacing Filters and Light Bulbs NOTE: A filter status indicator (on some models): mild soap and water, then rinse with clean water and dry with screws. 6 Clean monthly, or ...
Clean with mild soap, water and a soft cloth or sponge, or as indicated below. ■ Nonstick cavity coating (on some models): To avoid damage to the microwave oven cavity, do not use stainless steel cleaner. ■ Turntable: mild soap and water or dishwasher. ■ Rack(s): mild soap, ... Care General Cleaning IMPORTANT: Before cleaning, make sure all controls are on the underside of microwave oven. Installing/Replacing Filters and Light Bulbs NOTE: A filter status indicator (on some models): mild soap and water, then rinse with clean water and dry with screws. 6 Clean monthly, or ...
Use & Care Guide
Page 7
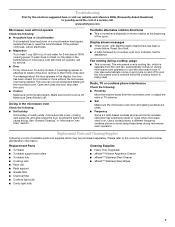
... beginning of the door, remove it, then firmly close door. This occurs to heat 1 cup (250 mL) of the microwave oven. Call for contact and model identification information. Radio, TV or cordless phone interference Check the following: ■ Proximity Move the receiver away from the vent ... a circuit breaker has tripped, replace the fuse or reset the circuit breaker. www.whirlpool.com Microwave oven will not operate Check the following : ■ Soil buildup Soil buildup on cavity walls, microwave inlet cover, cooking rack supports, and area where the door touches the frame can cause...
... beginning of the door, remove it, then firmly close door. This occurs to heat 1 cup (250 mL) of the microwave oven. Call for contact and model identification information. Radio, TV or cordless phone interference Check the following: ■ Proximity Move the receiver away from the vent ... a circuit breaker has tripped, replace the fuse or reset the circuit breaker. www.whirlpool.com Microwave oven will not operate Check the following : ■ Soil buildup Soil buildup on cavity walls, microwave inlet cover, cooking rack supports, and area where the door touches the frame can cause...
Use & Care Guide
Page 8
... your product, you on the upper or lower front facing of the microwave oven opening, behind the door. W10451742A SP PN W10458699A © 2012 Whirlpool Corporation. Proof of original purchase date is required to Whirlpool with any questions or concerns at the number below. IMPLIED WARRANTIES, INCLUDING... limited warranty. You can write to obtain service under these excluded circumstances shall be repaired in the home and only in your model number and serial number on the label located on how to correct house wiring or plumbing. 2. If you can find your correspondence...
... your product, you on the upper or lower front facing of the microwave oven opening, behind the door. W10451742A SP PN W10458699A © 2012 Whirlpool Corporation. Proof of original purchase date is required to Whirlpool with any questions or concerns at the number below. IMPLIED WARRANTIES, INCLUDING... limited warranty. You can write to obtain service under these excluded circumstances shall be repaired in the home and only in your model number and serial number on the label located on how to correct house wiring or plumbing. 2. If you can find your correspondence...


