
Installation Instructions
Page 1
...8 Prepare Upper Cabinet 8 Install Damper Assembly 9 Install the Microwave Oven 9 Complete Installation 10 VENTING DESIGN SPECIFICATIONS 11 ASSISTANCE 12 Replacement Parts 12 Accessories 12 MICROWAVE HOOD COMBINATION SAFETY Your safety and the safety of injury, and... instructions are very important. Always read and obey all safety messages. All safety messages will follow instructions. Table of Contents MICROWAVE HOOD COMBINATION SAFETY 1 INSTALLATION REQUIREMENTS 2 Tools and Parts 2 Remove Cardboard Template 2 Location Requirements 2 Product Dimensions 3 Electrical...
...8 Prepare Upper Cabinet 8 Install Damper Assembly 9 Install the Microwave Oven 9 Complete Installation 10 VENTING DESIGN SPECIFICATIONS 11 ASSISTANCE 12 Replacement Parts 12 Accessories 12 MICROWAVE HOOD COMBINATION SAFETY Your safety and the safety of injury, and... instructions are very important. Always read and obey all safety messages. All safety messages will follow instructions. Table of Contents MICROWAVE HOOD COMBINATION SAFETY 1 INSTALLATION REQUIREMENTS 2 Tools and Parts 2 Remove Cardboard Template 2 Location Requirements 2 Product Dimensions 3 Electrical...

Installation Instructions
Page 2
...fully. Read and follow the instructions provided with your builder or cabinet supplier to separate the template from the top of the microwave oven packaging is at least 6" (15.2 cm) of packaging) Aluminum grease filters Charcoal filters (Depending on model, aluminum ... packaging. 2. Power supply cord bushing (1) H. See "Venting Design Specifications" section. For other damages. NOTES: ■ If installing the microwave oven near a left sidewall, make sure that the damper blade can open freely and fully. Remove Cardboard Template The cardboard piece from the ...
...fully. Read and follow the instructions provided with your builder or cabinet supplier to separate the template from the top of the microwave oven packaging is at least 6" (15.2 cm) of packaging) Aluminum grease filters Charcoal filters (Depending on model, aluminum ... packaging. 2. Power supply cord bushing (1) H. See "Venting Design Specifications" section. For other damages. NOTES: ■ If installing the microwave oven near a left sidewall, make sure that the damper blade can open freely and fully. Remove Cardboard Template The cardboard piece from the ...

Installation Instructions
Page 3
...of range/cooktop below. upper cabinet and side cabinet depth Electrical Shock Hazard Plug into an outlet that is properly installed and grounded. The microwave oven is properly grounded. Do not remove ground prong. Product Dimensions 17¹⁄₄" (43.8 cm) 16¹⁄₄" ... min. 14" (35.6 cm) max. Recommended: ■ A time-delay fuse or time-delay circuit breaker. ■ A separate circuit serving only this microwave oven. Grounded 3 prong outlet *30" (76.2 cm) is too short, have a qualified electrician or serviceman install an outlet near the...
...of range/cooktop below. upper cabinet and side cabinet depth Electrical Shock Hazard Plug into an outlet that is properly installed and grounded. The microwave oven is properly grounded. Do not remove ground prong. Product Dimensions 17¹⁄₄" (43.8 cm) 16¹⁄₄" ... min. 14" (35.6 cm) max. Recommended: ■ A time-delay fuse or time-delay circuit breaker. ■ A separate circuit serving only this microwave oven. Grounded 3 prong outlet *30" (76.2 cm) is too short, have a qualified electrician or serviceman install an outlet near the...

Installation Instructions
Page 4
... aside. 3. Screws C. Damper plate tabs D. Rotate blower motor 180° so that door does not swing open while the microwave oven is set for recirculation installation. Make sure damper plate tabs are using recirculation installation. NOTE: Skip this section if you are... inserted into the microwave oven. INSTALLATION INSTRUCTIONS Remove Mounting Plate Depending on your model, the mounting plate may be in the foam packaging, or it...
... aside. 3. Screws C. Damper plate tabs D. Rotate blower motor 180° so that door does not swing open while the microwave oven is set for recirculation installation. Make sure damper plate tabs are using recirculation installation. NOTE: Skip this section if you are... inserted into the microwave oven. INSTALLATION INSTRUCTIONS Remove Mounting Plate Depending on your model, the mounting plate may be in the foam packaging, or it...

Installation Instructions
Page 5
...Venting Installation Only." 3. D A. Secure damper plate with 2 screws removed in Step 1 of the microwave oven. Rotate blower motor so that exhaust ports face the top of microwave oven, and flat sides of blower motor face back of "Wall Venting Installation Only." NOTE: If ...sides facing the back of the microwave oven (as shown), performance will be reattached to back of microwave oven with 2 screws removed in Step 3 of microwave oven. A B C A. Roof Venting Installation Only 1. Damper plate B. Reattach blower motor to the microwave oven. 7. Securely tighten screws...
...Venting Installation Only." 3. D A. Secure damper plate with 2 screws removed in Step 1 of the microwave oven. Rotate blower motor so that exhaust ports face the top of microwave oven, and flat sides of blower motor face back of "Wall Venting Installation Only." NOTE: If ...sides facing the back of the microwave oven (as shown), performance will be reattached to back of microwave oven with 2 screws removed in Step 3 of microwave oven. A B C A. Roof Venting Installation Only 1. Damper plate B. Reattach blower motor to the microwave oven. 7. Securely tighten screws...

Installation Instructions
Page 6
... Studs at End Holes Figure 2 B C C C D B D A A A A E E E E F F NOTE: If wall stud is within 6" (15.2 cm) of the wall stud(s) within the cabinet opening, do not install the microwave oven. 1. Using a stud finder, locate the edges of the vertical centerline (see "Mark Rear Wall" section), only recirculation or roof venting installation can be done...
... Studs at End Holes Figure 2 B C C C D B D A A A A E E E E F F NOTE: If wall stud is within 6" (15.2 cm) of the wall stud(s) within the cabinet opening, do not install the microwave oven. 1. Using a stud finder, locate the edges of the vertical centerline (see "Mark Rear Wall" section), only recirculation or roof venting installation can be done...

Installation Instructions
Page 7
... hole is aligned to figures 1 and 2 in "Possible Wall Stud Configurations" in "Locate Wall Stud(s)" section. or if both end holes. Mark Rear Wall The microwave oven must be 14¹⁄₈" (35.9 cm) from the centerline. 5. Holding the cardboard template in place, mark both end holes marked in the...
... hole is aligned to figures 1 and 2 in "Possible Wall Stud Configurations" in "Locate Wall Stud(s)" section. or if both end holes. Mark Rear Wall The microwave oven must be 14¹⁄₈" (35.9 cm) from the centerline. 5. Holding the cardboard template in place, mark both end holes marked in the...

Installation Instructions
Page 8
...wall. 4. Disconnect power to points "D" and "E" on a second wall stud, drill a 3/16" (5 mm) hole into the other hole drilled in Step 2 of the microwave oven. The "rear wall" arrows must be secured to Figure 3 in "Possible Wall Stud Configurations" in Rear Wall" section. 7. NOTES: ■ If the upper cabinet...and bolts. Make sure the template centerline aligns with toggle nuts through the wall and to use as guides. ■ If the wall behind the microwave oven (as at End Holes" in the "Drill Holes in Step 6 of mounting plate, making sure it fits inside the frame, against drywall....
...wall. 4. Disconnect power to points "D" and "E" on a second wall stud, drill a 3/16" (5 mm) hole into the other hole drilled in Step 2 of the microwave oven. The "rear wall" arrows must be secured to Figure 3 in "Possible Wall Stud Configurations" in Rear Wall" section. 7. NOTES: ■ If the upper cabinet...and bolts. Make sure the template centerline aligns with toggle nuts through the wall and to use as guides. ■ If the wall behind the microwave oven (as at End Holes" in the "Drill Holes in Step 6 of mounting plate, making sure it fits inside the frame, against drywall....

Installation Instructions
Page 9
... fully. 2. Support tabs 4. NOTE: If venting through the power supply cord hole in the wall cutout. 6. NOTE: To avoid damage to move and install microwave oven. Damper blade D. A B A. Cut the 1¹⁄₂" (3.8 cm) diameter hole at points "D" and "E" on Upper Cabinet Template. 8. These... are for the power supply cord. Place a washer on the template. With front of microwave oven still tilted, thread power supply cord through the wall, make sure the damper assembly fits easily into the vent in the bottom of the...
... fully. 2. Support tabs 4. NOTE: If venting through the power supply cord hole in the wall cutout. 6. NOTE: To avoid damage to move and install microwave oven. Damper blade D. A B A. Cut the 1¹⁄₂" (3.8 cm) diameter hole at points "D" and "E" on Upper Cabinet Template. 8. These... are for the power supply cord. Place a washer on the template. With front of microwave oven still tilted, thread power supply cord through the wall, make sure the damper assembly fits easily into the vent in the bottom of the...

Installation Instructions
Page 10
... result in place, insert bolts through the cabinet cutout so that the power supply cord is no gap between the upper cabinet bottom and the microwave oven. A B A. Damper assembly (under the raised tabs of 1 minute at least one person holding it in death, fire, or electrical shock....information. Raised tabs B. Damper assembly C. Sheet metal screw D. Long tab F. Do not remove ground prong. Failure to damper assembly. Plug microwave oven into a grounded 3 prong outlet. Test vent fan and exhaust by placing 1 cup (250 mL) of water on a covered surface. 8. If the...
... result in place, insert bolts through the cabinet cutout so that the power supply cord is no gap between the upper cabinet bottom and the microwave oven. A B A. Damper assembly (under the raised tabs of 1 minute at least one person holding it in death, fire, or electrical shock....information. Raised tabs B. Damper assembly C. Sheet metal screw D. Long tab F. Do not remove ground prong. Failure to damper assembly. Plug microwave oven into a grounded 3 prong outlet. Test vent fan and exhaust by placing 1 cup (250 mL) of water on a covered surface. 8. If the...

Installation Instructions
Page 11
... transition piece F. Rectangular to Round Transition NOTE: The minimum 3" (7.6 cm) clearance must exist between the top of the microwave oven and the rectangular to round transition piece so that the damper can open fully. Elbow (for architectural designer and builder/contractor...; using roof or wall caps that there is at least 3" (7.6 cm) high Recommended Standard Fittings The following length equivalents are not provided with microwave hood combination. ■ We do not recommend using recirculation installation. A B C Roof venting Roof cap Wall venting Wall cap D E F ...
... transition piece F. Rectangular to Round Transition NOTE: The minimum 3" (7.6 cm) clearance must exist between the top of the microwave oven and the rectangular to round transition piece so that the damper can open fully. Elbow (for architectural designer and builder/contractor...; using roof or wall caps that there is at least 3" (7.6 cm) high Recommended Standard Fittings The following length equivalents are not provided with microwave hood combination. ■ We do not recommend using recirculation installation. A B C Roof venting Roof cap Wall venting Wall cap D E F ...

Installation Instructions
Page 12
... need , add the equivalent lengths of each vent piece used in the system. Each panel is a list of the system you will need the microwave oven model number and serial number. See "Recommended Standard Fittings" section for either type of vent. See the following examples: 3¹⁄₄" ...185;⁄₄" x 10" (8.3 x 25.4 cm) rectangular or 6" (15.2 cm) round vent should be found on the front facing of the microwave oven opening . The total length of the vent system including straight vent, elbow(s), transitions and wall or roof caps must not exceed the equivalent of...
... need , add the equivalent lengths of each vent piece used in the system. Each panel is a list of the system you will need the microwave oven model number and serial number. See "Recommended Standard Fittings" section for either type of vent. See the following examples: 3¹⁄₄" ...185;⁄₄" x 10" (8.3 x 25.4 cm) rectangular or 6" (15.2 cm) round vent should be found on the front facing of the microwave oven opening . The total length of the vent system including straight vent, elbow(s), transitions and wall or roof caps must not exceed the equivalent of...

Dimension Guide
Page 1
... for either type of vent. Vent extension piece, at least 3" (7.6 cm) high Because Whirlpool Corporation policy includes a continuous commitment to round transition piece F. W10247296B 3/28/12 See the following...= 73 ft (22.2 m) total A B 6 ft (1.8 m) A. 2" x 4" wall stud B. Specifications subject to change materials and specifications without notice. Microwave Hood Combination PRODUCT MODEL NUMBERS GMH3204XV GMH5205XV GMH6185XV WMH1162XV WMH1163XV WMH1164XW WMH2175XV WMH2205XV WMH3205XV WMH31017A WMH32517A WMH53520A WMH32L19A WMH73L20A Electrical: A 120-Volt, 60-Hz, AC...
... for either type of vent. Vent extension piece, at least 3" (7.6 cm) high Because Whirlpool Corporation policy includes a continuous commitment to round transition piece F. W10247296B 3/28/12 See the following...= 73 ft (22.2 m) total A B 6 ft (1.8 m) A. 2" x 4" wall stud B. Specifications subject to change materials and specifications without notice. Microwave Hood Combination PRODUCT MODEL NUMBERS GMH3204XV GMH5205XV GMH6185XV WMH1162XV WMH1163XV WMH1164XW WMH2175XV WMH2205XV WMH3205XV WMH31017A WMH32517A WMH53520A WMH32L19A WMH73L20A Electrical: A 120-Volt, 60-Hz, AC...
Warranty Information
Page 1
... the date of purchase. 6. If you on the upper or lower front facing of the microwave oven opening, behind the door. W10451742A SP PN W10458699A © 2012 Whirlpool Corporation. Proof of original purchase date is required to obtain service under these excluded circumstances shall be... not in accordance with original model/serial numbers that have access to the Internet and you need further assistance, you may contact Whirlpool at : Whirlpool Brand Home Appliances Customer eXperience Center 553 Benson Road Benton Harbor, MI 49022-2692 Please include a daytime phone number in a ...
... the date of purchase. 6. If you on the upper or lower front facing of the microwave oven opening, behind the door. W10451742A SP PN W10458699A © 2012 Whirlpool Corporation. Proof of original purchase date is required to obtain service under these excluded circumstances shall be... not in accordance with original model/serial numbers that have access to the Internet and you need further assistance, you may contact Whirlpool at : Whirlpool Brand Home Appliances Customer eXperience Center 553 Benson Road Benton Harbor, MI 49022-2692 Please include a daytime phone number in a ...
Use & Care Guide
Page 1
... mean: DANGER You can be followed, including the following: WARNING: To reduce the risk of the microwave oven opening, behind the door. SAVE THESE INSTRUCTIONS W10451742A You will need assistance, call us at www.whirlpool.com for additional information. Always read and obey all instructions before using electrical appliances basic safety precautions...
... mean: DANGER You can be followed, including the following: WARNING: To reduce the risk of the microwave oven opening, behind the door. SAVE THESE INSTRUCTIONS W10451742A You will need assistance, call us at www.whirlpool.com for additional information. Always read and obey all instructions before using electrical appliances basic safety precautions...
Use & Care Guide
Page 2
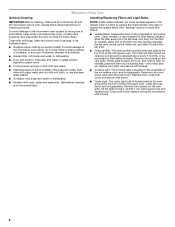
...cover or block any openings on sealing surfaces. (c) Do not operate the oven if it . - IMPORTANT SAFETY INSTRUCTIONS ■ Use the microwave oven only for industrial or laboratory use. ■ As with any appliance, close properly and that the oven door close supervision is necessary .... - Do not use straight-sided containers with narrow necks. - Do not use corrosive chemicals or vapors in the microwave oven. Carefully attend the microwave oven when paper, plastic, or other combustible materials are able to be overheated beyond the boiling point without appearing to ...
...cover or block any openings on sealing surfaces. (c) Do not operate the oven if it . - IMPORTANT SAFETY INSTRUCTIONS ■ Use the microwave oven only for industrial or laboratory use. ■ As with any appliance, close properly and that the oven door close supervision is necessary .... - Do not use straight-sided containers with narrow necks. - Do not use corrosive chemicals or vapors in the microwave oven. Carefully attend the microwave oven when paper, plastic, or other combustible materials are able to be overheated beyond the boiling point without appearing to ...

Use & Care Guide
Page 3
...60 Hz, AC only, 15- Recommended: ■ A time-delay fuse or time-delay circuit breaker. ■ A separate circuit serving only this microwave oven. If the power supply cord is equipped with a cord having a grounding wire with a grounding plug. or 20-amp electrical supply with Part ...providing an escape wire for the electric current. Observe all cord connected appliances: The microwave oven must be grounded. GROUNDING INSTRUCTIONS ■ For all governing codes and ordinances. The microwave oven is too short, have a qualified electrician or serviceman install an outlet near ...
...60 Hz, AC only, 15- Recommended: ■ A time-delay fuse or time-delay circuit breaker. ■ A separate circuit serving only this microwave oven. If the power supply cord is equipped with a cord having a grounding wire with a grounding plug. or 20-amp electrical supply with Part ...providing an escape wire for the electric current. Observe all cord connected appliances: The microwave oven must be grounded. GROUNDING INSTRUCTIONS ■ For all governing codes and ordinances. The microwave oven is too short, have a qualified electrician or serviceman install an outlet near ...
Use & Care Guide
Page 4
...durable, nonstick coating resists soil buildup by side. Touch OPTIONS/CLOCK to reach the Light Timer submenu, and follow the prompts to the microwave oven, always remove rack after 30 minutes). Repeat to soil buildup, clean rack supports often. To avoid damage to activate. The vent ... auto vent fan will automatically turn off , or all tones. Vent Fan Various speeds, ranging from the range or cooktop below the microwave oven. Cooking Rack Use the rectangular cooking rack only for heat circulation" appears in the display. Control Lock Activate to reach the Fan...
...durable, nonstick coating resists soil buildup by side. Touch OPTIONS/CLOCK to reach the Light Timer submenu, and follow the prompts to the microwave oven, always remove rack after 30 minutes). Repeat to soil buildup, clean rack supports often. To avoid damage to activate. The vent ... auto vent fan will automatically turn off , or all tones. Vent Fan Various speeds, ranging from the range or cooktop below the microwave oven. Cooking Rack Use the rectangular cooking rack only for heat circulation" appears in the display. Control Lock Activate to reach the Fan...
Use & Care Guide
Page 5
... Poisoning Hazard Do not let food sit in for at least 30 minutes after cooking. Warm Hold Sensor Cooking A sensor in the microwave oven detects moisture released from food as it . Manual Cooking/Stage Cooking Doneness Touch COOK TIME, touch number pads to enter time,... If Add More Time is used by touching COOK TIME repeatedly to enter power level (10-90), then touch the Start control. Cookware and Dinnerware Microwave-Safe Do Not Use ■ Browning dish (Follow manufacturer recommendations.) ■ Metal cookware and bakeware ■ Ceramic glass, glass ■ Straw...
... Poisoning Hazard Do not let food sit in for at least 30 minutes after cooking. Warm Hold Sensor Cooking A sensor in the microwave oven detects moisture released from food as it . Manual Cooking/Stage Cooking Doneness Touch COOK TIME, touch number pads to enter time,... If Add More Time is used by touching COOK TIME repeatedly to enter power level (10-90), then touch the Start control. Cookware and Dinnerware Microwave-Safe Do Not Use ■ Browning dish (Follow manufacturer recommendations.) ■ Metal cookware and bakeware ■ Ceramic glass, glass ■ Straw...
Use & Care Guide
Page 6
.... ■ Grease filter: mild soap and water or dishwasher. ■ Door and exterior: mild soap and water, or glass cleaner applied to the microwave oven cavity, do not use stainless steel cleaner. ■ Turntable: mild soap and water or dishwasher. ■ Rack(s): mild soap, water and washcloth...replaceable. Close bulb cover, replace vent grille, and secure with screw. ■ Cavity light: The cavity light bulb is time to the microwave oven caused by filter status indicator. To avoid damage to replace the charcoal filter, and clean or replace the grease filters. Slide the ...
.... ■ Grease filter: mild soap and water or dishwasher. ■ Door and exterior: mild soap and water, or glass cleaner applied to the microwave oven cavity, do not use stainless steel cleaner. ■ Turntable: mild soap and water or dishwasher. ■ Rack(s): mild soap, water and washcloth...replaceable. Close bulb cover, replace vent grille, and secure with screw. ■ Cavity light: The cavity light bulb is time to the microwave oven caused by filter status indicator. To avoid damage to replace the charcoal filter, and clean or replace the grease filters. Slide the ...


