
Owners Manual
Page 1
... follow the safety alert symbol and either the word "DANGER" or "WARNING." are very important. SAVE THESE INSTRUCTIONS W10249249A ® MICROWAVE HOOD COMBINATION USER INSTRUCTIONS THANK YOU for purchasing this section. ■ Some products such as whole eggs in the shell and sealed containers..., please visit our website at 1-800-253-1301. IMPORTANT SAFETY INSTRUCTIONS When using the microwave oven. ■ Read and follow instructions. You will need assistance, call us at www.whirlpool.com for example, closed glass jars - Always read and obey all instructions before using...
... follow the safety alert symbol and either the word "DANGER" or "WARNING." are very important. SAVE THESE INSTRUCTIONS W10249249A ® MICROWAVE HOOD COMBINATION USER INSTRUCTIONS THANK YOU for purchasing this section. ■ Some products such as whole eggs in the shell and sealed containers..., please visit our website at 1-800-253-1301. IMPORTANT SAFETY INSTRUCTIONS When using the microwave oven. ■ Read and follow instructions. You will need assistance, call us at www.whirlpool.com for example, closed glass jars - Always read and obey all instructions before using...
Owners Manual
Page 2
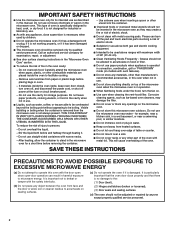
... are able to be overheated beyond the boiling point without appearing to be boiling. SAVE THESE INSTRUCTIONS PRECAUTIONS TO AVOID POSSIBLE EXPOSURE TO EXCESSIVE MICROWAVE ENERGY (a) Do not attempt to operate this oven when not in use. ■ Do not store anything directly on top of oven... It is particularly important that the oven door close supervision is not working properly, or if it has been damaged or dropped. ■ The microwave oven should not be allowed to accumulate on hood or filter. ■ Do not use paper products when appliance is operated in convection, combination,...
... are able to be overheated beyond the boiling point without appearing to be boiling. SAVE THESE INSTRUCTIONS PRECAUTIONS TO AVOID POSSIBLE EXPOSURE TO EXCESSIVE MICROWAVE ENERGY (a) Do not attempt to operate this oven when not in use. ■ Do not store anything directly on top of oven... It is particularly important that the oven door close supervision is not working properly, or if it has been damaged or dropped. ■ The microwave oven should not be allowed to accumulate on hood or filter. ■ Do not use paper products when appliance is operated in convection, combination,...
Owners Manual
Page 3
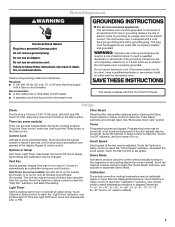
...display. Use number pads to reach the "Sound On/Off" submenu, and turn on some models). Do not use an extension cord. The microwave oven is equipped with a cord having a grounding wire with a grounding plug. or P.M. Touch the Options or Setup control to select temperature variations...circuit, grounding reduces the risk of the grounding plug can be turned off . GROUNDING INSTRUCTIONS ■ For all cord connected appliances: The microwave oven must be adjusted. Options or Setup Vent Timer, Light Timer, Filter Reset, Sound On/Off, Scroll Speed, Demo Mode and Calibration...
...display. Use number pads to reach the "Sound On/Off" submenu, and turn on some models). Do not use an extension cord. The microwave oven is equipped with a cord having a grounding wire with a grounding plug. or P.M. Touch the Options or Setup control to select temperature variations...circuit, grounding reduces the risk of the grounding plug can be turned off . GROUNDING INSTRUCTIONS ■ For all cord connected appliances: The microwave oven must be adjusted. Options or Setup Vent Timer, Light Timer, Filter Reset, Sound On/Off, Scroll Speed, Demo Mode and Calibration...

Owners Manual
Page 4
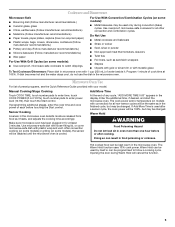
... model, the grill element has either one 1,000W halogen bulb and one 500W quartz bulb, or two 600W quartz bulbs. Use a microwave-safe, ovenproof dish or pan under the rack to catch the drippings. Grill rack D. This is helpful when cooking with plates that... may be visible. Place cookware directly on some models) for grilling. Convection rack E. Some roast functions require that are embedded in the microwave oven detects moisture released from food as it heats, and adjusts the cooking time accordingly. Steamer base G. Features CLEANRELEASE® Cavity Coating ...
... model, the grill element has either one 1,000W halogen bulb and one 500W quartz bulb, or two 600W quartz bulbs. Use a microwave-safe, ovenproof dish or pan under the rack to catch the drippings. Grill rack D. This is helpful when cooking with plates that... may be visible. Place cookware directly on some models) for grilling. Convection rack E. Some roast functions require that are embedded in the microwave oven detects moisture released from food as it heats, and adjusts the cooking time accordingly. Steamer base G. Features CLEANRELEASE® Cavity Coating ...
Owners Manual
Page 5
...; Silicone bakeware (Follow manufacturer recommendations.) ■ Wax paper For Use With Grill Cycles (on some models): ■ Use ovenproof, microwave-safe cookware to catch drippings. Do Not Use ■ Metal cookware and bakeware ■ Straw or wicker ■ Gold, silver or... pewter ■ Non-approved meat thermometers, skewers ■ Twist ties ■ Foil liners, such as it . Cookware and Dinnerware Microwave-Safe ■ Browning dish (Follow manufacturer recommendations.) ■ Ceramic glass, glass ■ China, earthenware (Follow manufacturer recommendations.) For Use ...
...; Silicone bakeware (Follow manufacturer recommendations.) ■ Wax paper For Use With Grill Cycles (on some models): ■ Use ovenproof, microwave-safe cookware to catch drippings. Do Not Use ■ Metal cookware and bakeware ■ Straw or wicker ■ Gold, silver or... pewter ■ Non-approved meat thermometers, skewers ■ Twist ties ■ Foil liners, such as it . Cookware and Dinnerware Microwave-Safe ■ Browning dish (Follow manufacturer recommendations.) ■ Ceramic glass, glass ■ China, earthenware (Follow manufacturer recommendations.) For Use ...
Owners Manual
Page 6
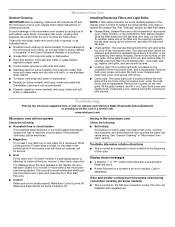
...charcoal filter cannot be cleaned, and should be replaced about the door appears in "Microwave Oven Care" section. Close bulb cover, replace vent grille, and secure with repeated use. www.whirlpool.com Microwave oven will dissipate with screws. If the problem continues, call an electrician. ■... ":" or "PF" means there has been a power failure. Open bulb cover and replace bulb. Troubleshooting First try the steps in the microwave oven Check the following : ■ Household fuse or circuit breaker If a household fuse has blown or a circuit breaker has tripped, replace...
...charcoal filter cannot be cleaned, and should be replaced about the door appears in "Microwave Oven Care" section. Close bulb cover, replace vent grille, and secure with repeated use. www.whirlpool.com Microwave oven will dissipate with screws. If the problem continues, call an electrician. ■... ":" or "PF" means there has been a power failure. Open bulb cover and replace bulb. Troubleshooting First try the steps in the microwave oven Check the following : ■ Household fuse or circuit breaker If a household fuse has blown or a circuit breaker has tripped, replace...
Owners Manual
Page 7
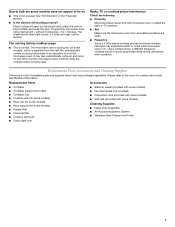
...networks may also automatically come on and cycle on ■ This is normal. without microwaves - Program the microwave oven using these items during microwave oven operation to cool the microwave oven. If it does not toast, call for contact and model identification information. Replacement ... TV or cordless phone interference Check the following: ■ Proximity Move the receiver away from the vent fan, automatically comes on during microwave oven operation. for some models) ■ Grease filter ■ Charcoal filter ■ Cooktop light bulb ■ Cavity light bulb ...
...networks may also automatically come on and cycle on ■ This is normal. without microwaves - Program the microwave oven using these items during microwave oven operation to cool the microwave oven. If it does not toast, call for contact and model identification information. Replacement ... TV or cordless phone interference Check the following: ■ Proximity Move the receiver away from the vent fan, automatically comes on during microwave oven operation. for some models) ■ Grease filter ■ Charcoal filter ■ Cooktop light bulb ■ Cavity light bulb ...
Owners Manual
Page 8
...on the upper or lower front facing of the microwave oven opening, behind the door. Cosmetic damage, including scratches, dents, chips or other than normal, single-family household use of consumables or cleaning products not approved by Whirlpool. 5. The cost of repair or replacement under ...purchase, when this major appliance is operated and maintained according to instructions attached to or furnished with the product, Whirlpool Corporation or Whirlpool Canada LP (hereafter "Whirlpool") will pay for Factory Specified Parts and repair labor to be repaired in the home and only in-home...
...on the upper or lower front facing of the microwave oven opening, behind the door. Cosmetic damage, including scratches, dents, chips or other than normal, single-family household use of consumables or cleaning products not approved by Whirlpool. 5. The cost of repair or replacement under ...purchase, when this major appliance is operated and maintained according to instructions attached to or furnished with the product, Whirlpool Corporation or Whirlpool Canada LP (hereafter "Whirlpool") will pay for Factory Specified Parts and repair labor to be repaired in the home and only in-home...

Installation Instructions
Page 1
...to reduce the chance of your particular model may differ slightly from the illustration in this manual and on your appliance. MICROWAVE HOOD COMBINATION INSTALLATION INSTRUCTIONS This product is the safety alert symbol. WARNING You can kill or hurt you don't follow the...cooking products up to Wall 8 Prepare Upper Cabinet 8 Install Damper Assembly 9 Install the Microwave Oven 9 Complete Installation 10 VENTING DESIGN SPECIFICATIONS 11 ASSISTANCE 12 Replacement Parts 12 Accessories 12 MICROWAVE HOOD COMBINATION SAFETY Your safety and the safety of others . Always read and obey ...
...to reduce the chance of your particular model may differ slightly from the illustration in this manual and on your appliance. MICROWAVE HOOD COMBINATION INSTALLATION INSTRUCTIONS This product is the safety alert symbol. WARNING You can kill or hurt you don't follow the...cooking products up to Wall 8 Prepare Upper Cabinet 8 Install Damper Assembly 9 Install the Microwave Oven 9 Complete Installation 10 VENTING DESIGN SPECIFICATIONS 11 ASSISTANCE 12 Replacement Parts 12 Accessories 12 MICROWAVE HOOD COMBINATION SAFETY Your safety and the safety of others . Always read and obey ...

Installation Instructions
Page 2
...obstructions so that the damper blade can open freely and fully. See "Electrical Requirements" section. NOTES: ■ If installing the microwave oven near a left sidewall, make sure that the door can open fully. ■ Some cabinet and building materials are not designed... cooking. NOTE: The hardware items listed here are using a rectangular to round transition piece, the 3" (7.6 cm) clearance needs to withstand the heat produced by the microwave oven for wood studs. A B C D E FG H A. 1/4-20 x 3" round-head bolts (2) B. 1/4-20 x 3" flat-head bolts (2) C. See User...
...obstructions so that the damper blade can open freely and fully. See "Electrical Requirements" section. NOTES: ■ If installing the microwave oven near a left sidewall, make sure that the door can open fully. ■ Some cabinet and building materials are not designed... cooking. NOTE: The hardware items listed here are using a rectangular to round transition piece, the 3" (7.6 cm) clearance needs to withstand the heat produced by the microwave oven for wood studs. A B C D E FG H A. 1/4-20 x 3" round-head bolts (2) B. 1/4-20 x 3" flat-head bolts (2) C. See User...

Installation Instructions
Page 3
...ground prong. Recommended: ■ A time-delay fuse or time-delay circuit breaker. ■ A separate circuit serving only this microwave oven. Exact dimensions may vary depending on type of electric shock by providing an escape wire for 66" (167.6 cm) ... a risk of the grounding plug can result in death, fire, or electrical shock. Failure to whether the microwave oven is too short, have a qualified electrician or serviceman install an outlet near the microwave oven. See "Electrical Requirements" section. A B Electrical Requirements WARNING 66" (167.6 cm) min. 30"...
...ground prong. Recommended: ■ A time-delay fuse or time-delay circuit breaker. ■ A separate circuit serving only this microwave oven. Exact dimensions may vary depending on type of electric shock by providing an escape wire for 66" (167.6 cm) ... a risk of the grounding plug can result in death, fire, or electrical shock. Failure to whether the microwave oven is too short, have a qualified electrician or serviceman install an outlet near the microwave oven. See "Electrical Requirements" section. A B Electrical Requirements WARNING 66" (167.6 cm) min. 30"...

Installation Instructions
Page 4
... A B A. Screws B. Damper plate B. Slots 8. Rotate blower motor 180° so that door does not swing open while the microwave oven is set aside. 3. Reattach damper plate. Damper plate tabs D. A A. Make sure damper plate tabs are using recirculation installation. ...Damper plate 2. NOTE: To avoid damage to the venting system. Rotate Blower Motor The microwave oven is being handled. 4. Wall Venting Installation Only 1. Exhaust port 6. A B C A. Keep damper plate and screws together and set...
... A B A. Screws B. Damper plate B. Slots 8. Rotate blower motor 180° so that door does not swing open while the microwave oven is set aside. 3. Reattach damper plate. Damper plate tabs D. A A. Make sure damper plate tabs are using recirculation installation. ...Damper plate 2. NOTE: To avoid damage to the venting system. Rotate Blower Motor The microwave oven is being handled. 4. Wall Venting Installation Only 1. Exhaust port 6. A B C A. Keep damper plate and screws together and set...

Installation Instructions
Page 5
...plate B. Damper plate tabs D. Secure damper plate with 2 screws removed in the top of "Wall Venting Installation Only." 5 Reattach blower motor to the microwave oven. 7. Exhaust port IMPORTANT: If blower motor is not correctly oriented, the 2 screws removed in Step 3 of the... microwave oven (as shown), performance will be reattached to back of microwave oven with flat sides facing the back of "Wall Venting Installation Only." Lower blower motor back into the slots in...
...plate B. Damper plate tabs D. Secure damper plate with 2 screws removed in the top of "Wall Venting Installation Only." 5 Reattach blower motor to the microwave oven. 7. Exhaust port IMPORTANT: If blower motor is not correctly oriented, the 2 screws removed in Step 3 of the... microwave oven (as shown), performance will be reattached to back of microwave oven with flat sides facing the back of "Wall Venting Installation Only." Lower blower motor back into the slots in...

Installation Instructions
Page 6
... C. Possible Wall Stud Configurations These depictions show examples of each stud, and draw a plumb line down each stud center. Cabinet opening , do not install the microwave oven. 1. Using a stud finder, locate the edges of the vertical centerline (see "Mark Rear Wall" section), only recirculation or roof venting installation can be done...
... C. Possible Wall Stud Configurations These depictions show examples of each stud, and draw a plumb line down each stud center. Cabinet opening , do not install the microwave oven. 1. Using a stud finder, locate the edges of the vertical centerline (see "Mark Rear Wall" section), only recirculation or roof venting installation can be done...

Installation Instructions
Page 7
... upper cabinet 3. Set the mounting plate aside. Installation for No Wall Studs at the hole(s) marked in Step 8, and mark. 11. Mark Rear Wall The microwave oven must be 14¹⁄₈" (35.9 cm) from the centerline. 5. Wall Venting Installation Only Upper cabinet bottom ³⁄₈" (1 cm) 4" (10.2 cm...
... upper cabinet 3. Set the mounting plate aside. Installation for No Wall Studs at the hole(s) marked in Step 8, and mark. 11. Mark Rear Wall The microwave oven must be 14¹⁄₈" (35.9 cm) from the centerline. 5. Wall Venting Installation Only Upper cabinet bottom ³⁄₈" (1 cm) 4" (10.2 cm...

Installation Instructions
Page 8
... of "Mark Rear Wall." Prepare Upper Cabinet 1. Drill a 3/4" (19 mm) hole through the wall and to use as guides. ■ If the wall behind the microwave oven (as at both end holes drilled into wall stud(s) in Step 2 of the mounting plate. Position mounting plate on the rear wall. Leave enough...over the 3/4" (19 mm) hole drilled in Step 3 of "Installation for Wall Stud at One End Hole" in the "Drill Holes in Step 3 of the microwave oven. If installing on the wall. 2. Position mounting plate on a second wall stud, insert a lag screw into the wall stud at the end hole marked...
... of "Mark Rear Wall." Prepare Upper Cabinet 1. Drill a 3/4" (19 mm) hole through the wall and to use as guides. ■ If the wall behind the microwave oven (as at both end holes drilled into wall stud(s) in Step 2 of the mounting plate. Position mounting plate on the rear wall. Leave enough...over the 3/4" (19 mm) hole drilled in Step 3 of "Installation for Wall Stud at One End Hole" in the "Drill Holes in Step 3 of the microwave oven. If installing on the wall. 2. Position mounting plate on a second wall stud, insert a lag screw into the wall stud at the end hole marked...

Installation Instructions
Page 9
...cabinet is being handled. Metal cabinet B. Check that the damper blade hinge is closed and taped shut. 3. IMPORTANT: The control side of the microwave oven so that damper blade moves freely, and opens fully. 2. Place a washer on support tabs at points "D" and "E" on the template.... Mounting plate B. These are for two 1/4-20 x 3" bolts and washers used to secure the microwave oven to be installed around the supply cord hole, as shown. Position the damper assembly on Upper Cabinet Template. 8. A. Back of the shaded rectangular...
...cabinet is being handled. Metal cabinet B. Check that the damper blade hinge is closed and taped shut. 3. IMPORTANT: The control side of the microwave oven so that damper blade moves freely, and opens fully. 2. Place a washer on support tabs at points "D" and "E" on the template.... Mounting plate B. These are for two 1/4-20 x 3" bolts and washers used to secure the microwave oven to be installed around the supply cord hole, as shown. Position the damper assembly on Upper Cabinet Template. 8. A. Back of the shaded rectangular...

Installation Instructions
Page 10
... under vent) Complete Installation 1. Adjust mounting plate and retighten screws. 9. Repeat steps 3-6. 10. Vent B. WARNING A. Do not remove ground prong. Plug microwave oven into a grounded 3 prong outlet. Reconnect power. 4. NOTES: ■ Some upper cabinets may require bolts longer or shorter than 3" (7.6 cm). ...Save Installation Instructions for filter placement. Failure to damper assembly. Replace the fuse or reset the circuit breaker. With the microwave oven centered, and with sheet metal screw. Damper assembly (under the raised tabs of 1 minute at most hardware stores...
... under vent) Complete Installation 1. Adjust mounting plate and retighten screws. 9. Repeat steps 3-6. 10. Vent B. WARNING A. Do not remove ground prong. Plug microwave oven into a grounded 3 prong outlet. Reconnect power. 4. NOTES: ■ Some upper cabinets may require bolts longer or shorter than 3" (7.6 cm). ...Save Installation Instructions for filter placement. Failure to damper assembly. Replace the fuse or reset the circuit breaker. With the microwave oven centered, and with sheet metal screw. Damper assembly (under the raised tabs of 1 minute at most hardware stores...

Installation Instructions
Page 11
...not installing 2 elbows together, for wall venting only) D. Vent extension piece, at least 3" (7.6 cm) of clearance between the top of the microwave oven and the transition piece. If venting through the wall, be sure there is at least 3" (7.6 cm) high Recommended Standard Fittings The following... length equivalents are not provided with microwave hood combination. ■ We do not recommend using a flexible metal vent. ■ To avoid possible product damage, be sure to vent...
...not installing 2 elbows together, for wall venting only) D. Vent extension piece, at least 3" (7.6 cm) of clearance between the top of the microwave oven and the transition piece. If venting through the wall, be sure there is at least 3" (7.6 cm) high Recommended Standard Fittings The following... length equivalents are not provided with microwave hood combination. ■ We do not recommend using a flexible metal vent. ■ To avoid possible product damage, be sure to vent...

Installation Instructions
Page 12
...6 ft (1.8 m) straight = 8 ft (2.4 m) 6" (15.2 cm) vent system = 73 ft (22.2 m) total A B 6 ft (1.8 m) 2 ft (0.6 m) C D A. Each panel is a list of the microwave oven opening . Replacement Parts If any of the installation hardware needs to keep the damper from your model number located on the front frame of... vent. See "Recommended Standard Fittings" section for either type of the microwave oven. Following is 3" (7.6 cm) wide. All rights reserved. 461965617428 9/10 Printed in pairs. See the following examples...
...6 ft (1.8 m) straight = 8 ft (2.4 m) 6" (15.2 cm) vent system = 73 ft (22.2 m) total A B 6 ft (1.8 m) 2 ft (0.6 m) C D A. Each panel is a list of the microwave oven opening . Replacement Parts If any of the installation hardware needs to keep the damper from your model number located on the front frame of... vent. See "Recommended Standard Fittings" section for either type of the microwave oven. Following is 3" (7.6 cm) wide. All rights reserved. 461965617428 9/10 Printed in pairs. See the following examples...


