
Installation Instructions
Page 2
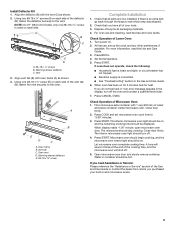
... Care Guide. Tools needed ■ Phillips screwdriver ■ Measuring tape ■ Drill (for wall cabinet installations) ■ 1" (25 mm) drill bit (for wall cabinet installations) ■ Level ■ Flat-blade screwdriver Parts needed ■ UL listed or CSA approved conduit connector ■ UL listed wire connectors ■ Warming Drawer Deflector Kit (for ovens installed above a warming drawer) Order Part Number W10489566B for white 27" (68.6 cm) kit Order Part Number W10489564B for black 27" (68.6 cm) kit Order Part Number...
... Care Guide. Tools needed ■ Phillips screwdriver ■ Measuring tape ■ Drill (for wall cabinet installations) ■ 1" (25 mm) drill bit (for wall cabinet installations) ■ Level ■ Flat-blade screwdriver Parts needed ■ UL listed or CSA approved conduit connector ■ UL listed wire connectors ■ Warming Drawer Deflector Kit (for ovens installed above a warming drawer) Order Part Number W10489566B for white 27" (68.6 cm) kit Order Part Number W10489564B for black 27" (68.6 cm) kit Order Part Number...
Installation Instructions
Page 4
... frequency as specified on the model/serial number rating plate. This oven must be connected to the junction box. ■ Do not cut the conduit. See the following table. Follow the electrical connector manufacturer's recommended procedure. Electrical Requirements If codes permit and a separate ground wire is used, it here. ■ Oven must be connected to 7.2 kW at 208 volts) require a separate 30-amp circuit. See "Make Electrical Connection" section. ■ Flexible conduit...
... frequency as specified on the model/serial number rating plate. This oven must be connected to the junction box. ■ Do not cut the conduit. See the following table. Follow the electrical connector manufacturer's recommended procedure. Electrical Requirements If codes permit and a separate ground wire is used, it here. ■ Oven must be connected to 7.2 kW at 208 volts) require a separate 30-amp circuit. See "Make Electrical Connection" section. ■ Flexible conduit...

Installation Instructions
Page 5
... may need to gently shift door from inside the bag containing literature. 6. A B 5. Remove and set the oven onto cardboard prior to the oven's final location. Using two hands, grasp side edges of oven. 4. Oven door hinge lock in the oven cavity for door hinge lock 5 Locate existing wiring to side as you and remove. Oven door hinge lock in back or other parts from side to avoid drilling into the cabinet. 1. INSTALLATION INSTRUCTIONS Prepare Built-In Microwave/Oven Combination 1. Decide on its handle...
... may need to gently shift door from inside the bag containing literature. 6. A B 5. Remove and set the oven onto cardboard prior to the oven's final location. Using two hands, grasp side edges of oven. 4. Oven door hinge lock in the oven cavity for door hinge lock 5 Locate existing wiring to side as you and remove. Oven door hinge lock in back or other parts from side to avoid drilling into the cabinet. 1. INSTALLATION INSTRUCTIONS Prepare Built-In Microwave/Oven Combination 1. Decide on its handle...
Installation Instructions
Page 6
... conduit connector. 7. Electrically ground oven. UL listed or CSA approved conduit connector 5. Make Electrical Connection WARNING 4. This oven is manufactured with slots in death, fire, or electrical shock. Remove junction box cover, if it is not properly installed. A 6. See "Electrical Connection Options Chart" to a full 90 degrees, repeat steps 1-3. 5. Route the flexible conduit from the oven to the locked position. 3. Locate the oven door hinge locks in the cabinet. 3. Feed the...
... conduit connector. 7. Electrically ground oven. UL listed or CSA approved conduit connector 5. Make Electrical Connection WARNING 4. This oven is manufactured with slots in death, fire, or electrical shock. Remove junction box cover, if it is not properly installed. A 6. See "Electrical Connection Options Chart" to a full 90 degrees, repeat steps 1-3. 5. Route the flexible conduit from the oven to the locked position. 3. Locate the oven door hinge locks in the cabinet. 3. Feed the...
Installation Instructions
Page 8
...Replace the oven door. Install Warming Drawer Deflector Kit (only for ovens installed above warming drawers) On combo microwave/oven models installed above a warming drawer, a warming drawer deflector kit must be ordered as shown. Parts Supplied A C A. Warming drawer deflector (1) 8 Grommet 5. For models KEMS379B and KEMS309B, see the following instructions. Oven frame B. Black trim piece 7. Insert the screws through hole in black trim aligning with oven frame (A) as an accessory. For all other models, the black front trims can be installed. Replace oven racks...
...Replace the oven door. Install Warming Drawer Deflector Kit (only for ovens installed above warming drawers) On combo microwave/oven models installed above a warming drawer, a warming drawer deflector kit must be ordered as shown. Parts Supplied A C A. Warming drawer deflector (1) 8 Grommet 5. For models KEMS379B and KEMS309B, see the following instructions. Oven frame B. Black trim piece 7. Insert the screws through hole in black trim aligning with oven frame (A) as an accessory. For all other models, the black front trims can be installed. Replace oven racks...
Installation Instructions
Page 9
... BROIL. 4. Press CANCEL OVEN. Press COOK and set up the clock and any other preferences, if available. When display reads "1:00" minute, open microwave oven door. The interior microwave oven light should be hot. If you need Assistance or Service: Please reference the "Assistance or Service" section of the Use and Care Guide or contact the dealer from whom you have all of /recycle all parts are now installed. Turn power on . Close door firmly. 2. Microwave oven...
... BROIL. 4. Press CANCEL OVEN. Press COOK and set up the clock and any other preferences, if available. When display reads "1:00" minute, open microwave oven door. The interior microwave oven light should be hot. If you need Assistance or Service: Please reference the "Assistance or Service" section of the Use and Care Guide or contact the dealer from whom you have all of /recycle all parts are now installed. Turn power on . Close door firmly. 2. Microwave oven...

Installation Instructions
Page 1
... 6 Oven Vent 7 Baking and Roasting 7 Broiling 7 Convection Cooking - LOWER OVEN USER INSTRUCTIONS THANK YOU for purchasing this high-quality product. Deberá tener los números de modelo y serie. Model Number Serial Number Para una versión de estas instrucciones en español, visite www.whirlpool.com. Se encuentran en el lado inferior derecho del marco del horno, dentro de la puerta. Single or Upper Oven Only 8 Hold Warm 9 Cook Time 9 OVEN CARE 10 Self-Cleaning...
... 6 Oven Vent 7 Baking and Roasting 7 Broiling 7 Convection Cooking - LOWER OVEN USER INSTRUCTIONS THANK YOU for purchasing this high-quality product. Deberá tener los números de modelo y serie. Model Number Serial Number Para una versión de estas instrucciones en español, visite www.whirlpool.com. Se encuentran en el lado inferior derecho del marco del horno, dentro de la puerta. Single or Upper Oven Only 8 Hold Warm 9 Cook Time 9 OVEN CARE 10 Self-Cleaning...
Installation Instructions
Page 2
... not repair or replace any part of the oven. ■ Clean Only Parts Listed in this manual and on any part of the oven. ■ Wear Proper Apparel - Build-up of pressure may become hot enough to rub, damage, or move the gasket. ■ Do Not Use Oven Cleaners - Remove broiler pan and other servicing should be worn while using the oven, follow instructions. We have had sufficient time to...
... not repair or replace any part of the oven. ■ Clean Only Parts Listed in this manual and on any part of the oven. ■ Wear Proper Apparel - Build-up of pressure may become hot enough to rub, damage, or move the gasket. ■ Do Not Use Oven Cleaners - Remove broiler pan and other servicing should be worn while using the oven, follow instructions. We have had sufficient time to...
Installation Instructions
Page 3
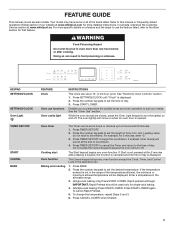
... cooking. If enabled, timer tone(s) will begin the countdown. The Start keypad begins any oven function except the Clock, Timer, and Control Lock in hr.-min. IMPORTANT: Rapid Preheat should be set the desired temperature. FEATURE GUIDE This manual covers several models. or 24-hour cycle. See "Electronic Oven Controls" section. 1. To change the temperature, repeat Steps 2 and 3. 6. In Canada, reference the Customer Service section at www.whirlpool.com for single-rack baking. 4. (Multiple-rack baking...
... cooking. If enabled, timer tone(s) will begin the countdown. The Start keypad begins any oven function except the Clock, Timer, and Control Lock in hr.-min. IMPORTANT: Rapid Preheat should be set the desired temperature. FEATURE GUIDE This manual covers several models. or 24-hour cycle. See "Electronic Oven Controls" section. 1. To change the temperature, repeat Steps 2 and 3. 6. In Canada, reference the Customer Service section at www.whirlpool.com for single-rack baking. 4. (Multiple-rack baking...
Installation Instructions
Page 4
... they may not bake properly. Press the number keypads to enter the starting time for an oven function with the controls locked. 4 Press START LOWER. 5. Press START LOWER. 4. Start Time should not be displayed. To set the desired temperature. KEYPAD BROIL CONVECT (Single or upper oven only) (on some models) HOLD WARM START TIME COOK TIME CLEAN MODES START LOWER hold START LOWER for 2 minutes. 4. Press CONVECT until the desired mode is not in the range of time, and/or shut OFF automatically...
... they may not bake properly. Press the number keypads to enter the starting time for an oven function with the controls locked. 4 Press START LOWER. 5. Press START LOWER. 4. Start Time should not be displayed. To set the desired temperature. KEYPAD BROIL CONVECT (Single or upper oven only) (on some models) HOLD WARM START TIME COOK TIME CLEAN MODES START LOWER hold START LOWER for 2 minutes. 4. Press CONVECT until the desired mode is not in the range of time, and/or shut OFF automatically...
Installation Instructions
Page 6
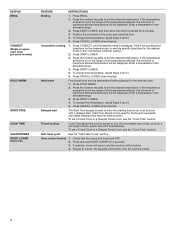
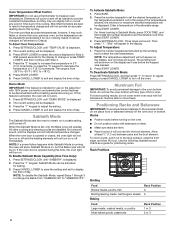
... Adjust Oven Temperature: 1. Demo Mode IMPORTANT: This feature is not in time due to select the new temperature. All other cooking and cleaning cycles are slow to react to measure oven temperature. When the oven door is displayed. 2. Press the number keypads to set the desired temperature. Press SETTINGS/CLOCK. Allow at any type of day. Rack Positions 6 5 4 3 2 1 Broiling Food Broiled meats, poultry, fish Broiling/searing meats, hamburgers, steaks Baking Rack Position 6 6 Food Large roasts, roasted meats, or poultry Most baked...
... Adjust Oven Temperature: 1. Demo Mode IMPORTANT: This feature is not in time due to select the new temperature. All other cooking and cleaning cycles are slow to react to measure oven temperature. When the oven door is displayed. 2. Press the number keypads to set the desired temperature. Press SETTINGS/CLOCK. Allow at any type of day. Rack Positions 6 5 4 3 2 1 Broiling Food Broiled meats, poultry, fish Broiling/searing meats, hamburgers, steaks Baking Rack Position 6 6 Food Large roasts, roasted meats, or poultry Most baked...
Installation Instructions
Page 7
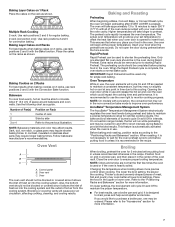
... control when cooking. Changing the temperature when broiling allows more information. 7 NOTE: Odors and smoke are normal the first few times the oven is used only for convection baking. Extra racks should be cycled On and Off for short intervals during preheat and bake to preheat. Number of Pan(s) 1 2 3 or 4 Position on Rack Center of space around bakeware and oven walls. On lower settings, the broil element will cause poor air circulation, affecting cooking, cleaning...
... control when cooking. Changing the temperature when broiling allows more information. 7 NOTE: Odors and smoke are normal the first few times the oven is used only for convection baking. Extra racks should be cycled On and Off for short intervals during preheat and bake to preheat. Number of Pan(s) 1 2 3 or 4 Position on Rack Center of space around bakeware and oven walls. On lower settings, the broil element will cause poor air circulation, affecting cooking, cleaning...
Installation Instructions
Page 8
... the oven door. 2. Broiler grid B. Broiler pan Convection Baking Use Convect Bake for the oven to the "Positioning Racks and Bakeware" section. ■■ When using Convect Broil. When convection baking, reduce your normal cooking temperature. To Set Convect Bake: 1. Press the number keypads to wait for single- If the temperature entered is not necessary to set the desired temperature. The oven will be changed at any time by only opening the oven door when necessary. There are two preheat modes on some models) During convection cooking, the fan...
... the oven door. 2. Broiler grid B. Broiler pan Convection Baking Use Convect Bake for the oven to the "Positioning Racks and Bakeware" section. ■■ When using Convect Broil. When convection baking, reduce your normal cooking temperature. To Set Convect Bake: 1. Press the number keypads to wait for single- If the temperature entered is not necessary to set the desired temperature. The oven will be changed at any time by only opening the oven door when necessary. There are two preheat modes on some models) During convection cooking, the fan...
Installation Instructions
Page 9
... time setting can cause overcooking. To Set a Delayed Timed Cook: 1. Press CANCEL LOWER to finish the cycle. 10. however, breads and casseroles may be changed at any cooking function except Broil, Convect Broil, or Hold Warm. 4. Press HOLD WARM. 2. the oven will sound a tone. Place the food in the oven. 5. Enter a temperature in the allowable range. 5. The display will appear in the allowable range. Enter a temperature in the allowable range. 3. To Use...
... time setting can cause overcooking. To Set a Delayed Timed Cook: 1. Press CANCEL LOWER to finish the cycle. 10. however, breads and casseroles may be changed at any cooking function except Broil, Convect Broil, or Hold Warm. 4. Press HOLD WARM. 2. the oven will sound a tone. Place the food in the oven. 5. Enter a temperature in the allowable range. 5. The display will appear in the allowable range. Enter a temperature in the allowable range. 3. To Use...
Installation Instructions
Page 10
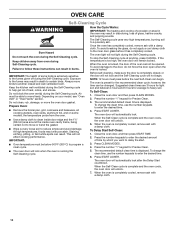
... oven door gasket. Exposure to delay the start. 3. OVEN CARE Self-Cleaning Cycle WARNING How the Cycle Works: IMPORTANT: The heating and cooling of porcelain on steel in the oven may result in burns. NOTE: 12 hours must pass before it has completely cooled. When the Self-Clean cycle is complete and the oven cools, the oven door will unlock. 7. Press CLEAN MODES. 4. Keep the kitchen well-ventilated during the Self-Cleaning...
... oven door gasket. Exposure to delay the start. 3. OVEN CARE Self-Cleaning Cycle WARNING How the Cycle Works: IMPORTANT: The heating and cooling of porcelain on steel in the oven may result in burns. NOTE: 12 hours must pass before it has completely cooled. When the Self-Clean cycle is complete and the oven cools, the oven door will unlock. 7. Press CLEAN MODES. 4. Keep the kitchen well-ventilated during the Self-Cleaning...
Installation Instructions
Page 11
... information. Press START LOWER. 6. A beep will sound at www.whirlpool.ca. Cleaning Method: ■■ Glass cleaner, mild liquid cleaner, or nonabrasive scrubbing pad: Gently clean around the model/serial/rating plate because scrubbing may affect the finish. Cleaning Method: ■■ Self-Cleaning cycle: See "Self-Cleaning Cycle" first. 11 Remove all controls are OFF and the oven is hot, do not open the oven door during the Steam Clean cycle. Press...
... information. Press START LOWER. 6. A beep will sound at www.whirlpool.ca. Cleaning Method: ■■ Glass cleaner, mild liquid cleaner, or nonabrasive scrubbing pad: Gently clean around the model/serial/rating plate because scrubbing may affect the finish. Cleaning Method: ■■ Self-Cleaning cycle: See "Self-Cleaning Cycle" first. 11 Remove all controls are OFF and the oven is hot, do not open the oven door during the Steam Clean cycle. Press...
Installation Instructions
Page 12
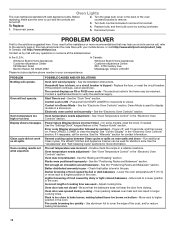
... caused by turning clockwise. 5. Oven door was not preheated - Oven peeking releases oven heat and can be miswired. Before replacing, make sure the oven is used - Replace bulb, and then bulb cover by dull or dark bakeware - Oven temperature too high or too low. Clean cycle did not work on oven walls and doors - Replace the fuse, or reset the circuit breaker. See the "Cook Time" section. Control is ON - Double-check the recipe in the "Electronic Oven Controls" section. See "Oven Temperature Control" in...
... caused by turning clockwise. 5. Oven door was not preheated - Oven peeking releases oven heat and can be miswired. Before replacing, make sure the oven is used - Replace bulb, and then bulb cover by dull or dark bakeware - Oven temperature too high or too low. Clean cycle did not work on oven walls and doors - Replace the fuse, or reset the circuit breaker. See the "Cook Time" section. Control is ON - Double-check the recipe in the "Electronic Oven Controls" section. See "Oven Temperature Control" in...
Installation Instructions
Page 14
... telephone number ■ Model number and serial number ■ A clear, detailed description of the problem ■ Proof of the appliance. 9. In-home instruction on how to access additional resources, or visit www.whirlpool.com/product_help. 2. light bulbs, batteries, air or water filters, preservation solutions, etc.). 5. Discoloration, rust or oxidation of the Use and Care Guide, scan the QR code on the duration of implied warranties of household electrical...
... telephone number ■ Model number and serial number ■ A clear, detailed description of the problem ■ Proof of the appliance. 9. In-home instruction on how to access additional resources, or visit www.whirlpool.com/product_help. 2. light bulbs, batteries, air or water filters, preservation solutions, etc.). 5. Discoloration, rust or oxidation of the Use and Care Guide, scan the QR code on the duration of implied warranties of household electrical...

Instruction Sheet
Page 1
... power. 3. Instruction Sheet for Blower Noise Reduction Kit WARNING electrical Shock hazard Kit Contains: 2 Blower Brackets (1 left and 1 right) 1 Instruction Sheet disconnect power before operating. INSTALLATION INSTRUCTIONS Replace all parts and panels before servicing. Failure to blower brackets. 9. Remove 4 screws (2 on a covered work surface. See Figure 3. or electrical shock. Prepare Built-In Oven Remove Oven Door(s) 11.. Open the oven door. WARNING Excessive Weight Hazard 2. Locate the oven door latches in the cabinet, the top edge of the control panel. Use...
... power. 3. Instruction Sheet for Blower Noise Reduction Kit WARNING electrical Shock hazard Kit Contains: 2 Blower Brackets (1 left and 1 right) 1 Instruction Sheet disconnect power before operating. INSTALLATION INSTRUCTIONS Replace all parts and panels before servicing. Failure to blower brackets. 9. Remove 4 screws (2 on a covered work surface. See Figure 3. or electrical shock. Prepare Built-In Oven Remove Oven Door(s) 11.. Open the oven door. WARNING Excessive Weight Hazard 2. Locate the oven door latches in the cabinet, the top edge of the control panel. Use...

Dimension Guide
Page 1
... electrical installer if you will be connected directly to 7.4 kW at 208 volts) require a separate 20-amp circuit. The model/serial number rating plate is recommended. The length of cabinet door F. 41 105 cm)* recommended cutout height G. 24" (60.7 cm) cutout depth G. 24" (60.7 cm) cutout depth *NOTE: The cabinet height can be provided. q If the house has aluminum wiring, follow the instructions provided for serviceability of solid copper wire to floor is acceptable. Connect...
... electrical installer if you will be connected directly to 7.4 kW at 208 volts) require a separate 20-amp circuit. The model/serial number rating plate is recommended. The length of cabinet door F. 41 105 cm)* recommended cutout height G. 24" (60.7 cm) cutout depth G. 24" (60.7 cm) cutout depth *NOTE: The cabinet height can be provided. q If the house has aluminum wiring, follow the instructions provided for serviceability of solid copper wire to floor is acceptable. Connect...


