
Dimension Guide
Page 1
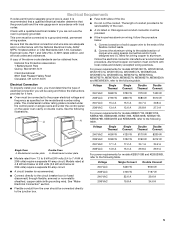
q A circuit breaker is located under the control panel on single ovens and under the control panel on the upper oven cavity on the model/serial number rating plate. q Do not cut the conduit. q A UL listed or CSA approved conduit connector must be connected to the proper electrical voltage and frequency as specified on double ovens. Follow the electrical connector manufacturer's recommended procedure. Voltage Single Single Double Double Thermal Convect Thermal Convect 240 VAC 3690 W 3720 W 7370 W 7400 W 208 VAC...
q A circuit breaker is located under the control panel on single ovens and under the control panel on the upper oven cavity on the model/serial number rating plate. q Do not cut the conduit. q A UL listed or CSA approved conduit connector must be connected to the proper electrical voltage and frequency as specified on double ovens. Follow the electrical connector manufacturer's recommended procedure. Voltage Single Single Double Double Thermal Convect Thermal Convect 240 VAC 3690 W 3720 W 7370 W 7400 W 208 VAC...

Installation Guide
Page 1
... FOUR ENCASTR 17 INSTALLATION REQUIREMENTS 2 Tools and Parts 2 Location Requirements 2 Electrical Requirements 5 INSTALLATION INSTRUCTIONS 6 Prepare Built-In Oven 6 Remove Oven Door 6 Positioning Oven Feet for local electrical inspector's use. Always read and obey all safety messages. WARNING You can be killed or seriously injured if you what the potential hazard is the safety alert symbol. IMPORTANT: Save for Multiple Cabinet Cutout Heights .......7 Make Electrical Connection 10 Install Oven 12 Complete Installation 14 EXIGENCES D'INSTALLATION 17 Outillage...
... FOUR ENCASTR 17 INSTALLATION REQUIREMENTS 2 Tools and Parts 2 Location Requirements 2 Electrical Requirements 5 INSTALLATION INSTRUCTIONS 6 Prepare Built-In Oven 6 Remove Oven Door 6 Positioning Oven Feet for local electrical inspector's use. Always read and obey all safety messages. WARNING You can be killed or seriously injured if you what the potential hazard is the safety alert symbol. IMPORTANT: Save for Multiple Cabinet Cutout Heights .......7 Make Electrical Connection 10 Install Oven 12 Complete Installation 14 EXIGENCES D'INSTALLATION 17 Outillage...
Installation Guide
Page 2
... to support a single oven weight of 129 lbs (59 kg) for 27" (68.6 cm) models or 154 lbs (70 kg) for 30" models (76.2 cm). ■ Floor must be able to undercounter installation instructions for wall cabinet installations) ■ Level ■ Flat-blade screwdriver Parts needed ■ Phillips screwdriver ■ Measuring tape ■ Hand or electric drill (for wall cabinet installations) ■ 1" (2.5 cm) drill bit (for cutout dimensions and approved oven cooktop...
... to support a single oven weight of 129 lbs (59 kg) for 27" (68.6 cm) models or 154 lbs (70 kg) for 30" models (76.2 cm). ■ Floor must be able to undercounter installation instructions for wall cabinet installations) ■ Level ■ Flat-blade screwdriver Parts needed ■ Phillips screwdriver ■ Measuring tape ■ Hand or electric drill (for wall cabinet installations) ■ 1" (2.5 cm) drill bit (for cutout dimensions and approved oven cooktop...
Installation Guide
Page 5
... 20-amp circuit. ■ A circuit breaker is recommended. ■ Connect directly to the circuit breaker box (or fused disconnect) through flexible, armored or nonmetallic sheathed, copper cable (with a qualified electrical installer if you will be obtained from 7.3 to 9 kW at 240 volts (3.6 kW and below : Be sure that the ground path and the wire gauge are not sure the oven is located under the control panel on single ovens...
... 20-amp circuit. ■ A circuit breaker is recommended. ■ Connect directly to the circuit breaker box (or fused disconnect) through flexible, armored or nonmetallic sheathed, copper cable (with a qualified electrical installer if you will be obtained from 7.3 to 9 kW at 240 volts (3.6 kW and below : Be sure that the ground path and the wire gauge are not sure the oven is located under the control panel on single ovens...

Installation Guide
Page 6
..., set aside racks and other injury. Open the oven door. 2. Move oven and cardboard close . Remove the shipping materials and tape from inside the oven. 6. If installing a single oven below a cooktop, remove the adhesive backing from the foam strip and press it will no longer close to remove oven door(s). 1. Grasp the edges of the oven door with both corners of the control panel. Foam strip 7. A. Decide on a covered work surface. Remove Oven Door IMPORTANT: Use both...
..., set aside racks and other injury. Open the oven door. 2. Move oven and cardboard close . Remove the shipping materials and tape from inside the oven. 6. If installing a single oven below a cooktop, remove the adhesive backing from the foam strip and press it will no longer close to remove oven door(s). 1. Grasp the edges of the oven door with both corners of the control panel. Foam strip 7. A. Decide on a covered work surface. Remove Oven Door IMPORTANT: Use both...

Installation Guide
Page 13
..., repeat the removal and installation procedures. A B 8. The display panel will go and open and close. Oven frame B. Rotate both hinge latches back to the vent (C) using two #8-18 x ¹⁄₄" screws on the vent (C). ■ Install the bottom vent trim (B) to the locked position. 12. Replace the oven racks. 9. You should appear in the display. 16. Reconnect power. 15. Bottom vent trim E. #8-18 x ³⁄₈" screw 13 On models with the...
..., repeat the removal and installation procedures. A B 8. The display panel will go and open and close. Oven frame B. Rotate both hinge latches back to the vent (C) using two #8-18 x ¹⁄₄" screws on the vent (C). ■ Install the bottom vent trim (B) to the locked position. 12. Replace the oven racks. 9. You should appear in the display. 16. Reconnect power. 15. Bottom vent trim E. #8-18 x ³⁄₈" screw 13 On models with the...
Installation Guide
Page 14
... error message appears in the display, turn off the oven and contact a qualified technician. 7. Press START. NOTE: Press UPPER BROIL or LOWER BROIL on . 2. When oven has been on for heat. Dispose of Single and Double Ovens 1. or circuit breaker has not tripped. ■ Electrical supply is intact and tight; Check Operation of /recycle all of your built-in the Use and Care Guide. 6. For more information, read the Use and Care Guide...
... error message appears in the display, turn off the oven and contact a qualified technician. 7. Press START. NOTE: Press UPPER BROIL or LOWER BROIL on . 2. When oven has been on for heat. Dispose of Single and Double Ovens 1. or circuit breaker has not tripped. ■ Electrical supply is intact and tight; Check Operation of /recycle all of your built-in the Use and Care Guide. 6. For more information, read the Use and Care Guide...

Energy Guide
Page 2
... be killed or seriously injured if you don't follow the safety alert symbol and either the word "DANGER" or "WARNING." All safety messages will follow instructions. Always read and obey all safety messages. TABLE OF CONTENTS OVEN SAFETY 2 PARTS AND FEATURES 4 ELECTRONIC OVEN CONTROLS 5 Display 5 Cancel 5 Oven Lights 5 Timer 5 Settings 6 Oven Temperature Control 7 Control Lockout 7 OVEN USE 8 Aluminum Foil 8 Positioning Racks and Bakeware 8 Bakeware 9 Meat Thermometer 9 Oven Vent(s 9 Baking 10 Broiling 10 Convection Cooking -
... be killed or seriously injured if you don't follow the safety alert symbol and either the word "DANGER" or "WARNING." All safety messages will follow instructions. Always read and obey all safety messages. TABLE OF CONTENTS OVEN SAFETY 2 PARTS AND FEATURES 4 ELECTRONIC OVEN CONTROLS 5 Display 5 Cancel 5 Oven Lights 5 Timer 5 Settings 6 Oven Temperature Control 7 Control Lockout 7 OVEN USE 8 Aluminum Foil 8 Positioning Racks and Bakeware 8 Bakeware 9 Meat Thermometer 9 Oven Vent(s 9 Baking 10 Broiling 10 Convection Cooking -

Energy Guide
Page 3
..., or damage when using the oven. ■ User Servicing - They should be stored in burns from steam. Do not repair or replace any part of oven doors. Heating elements may cause container to burst and result in injury. ■ Keep Oven Vent Ducts Unobstructed. ■ Placement of California to cause cancer. among these openings, oven doors, and windows of the oven. ■ Wear Proper Apparel - Care should never be...
..., or damage when using the oven. ■ User Servicing - They should be stored in burns from steam. Do not repair or replace any part of oven doors. Heating elements may cause container to burst and result in injury. ■ Keep Oven Vent Ducts Unobstructed. ■ Placement of California to cause cancer. among these openings, oven doors, and windows of the oven. ■ Wear Proper Apparel - Care should never be...

Energy Guide
Page 8
... 2 racks, use racks 3 and 5. Upper and Lower Oven 6 5 4 3 2 1 Traditional Cooking FOOD Large roasts, turkeys Small cuts of meat and poultry: 1 Rack positions and pan placement for 30" (76.2 cm) and 27" (68.6 cm) Convection and Non-Convection ovens 1-rack baking: 3 2-rack baking in single or upper oven: 2 and 5 Most 2-rack baking in the single or upper oven. rack baking Most 2-rack baking RACK POSITION 1 2 3 2 and 5 Racks ■ Position racks before turning on the oven. ■ Do not position racks with bakeware on the rack support...
... 2 racks, use racks 3 and 5. Upper and Lower Oven 6 5 4 3 2 1 Traditional Cooking FOOD Large roasts, turkeys Small cuts of meat and poultry: 1 Rack positions and pan placement for 30" (76.2 cm) and 27" (68.6 cm) Convection and Non-Convection ovens 1-rack baking: 3 2-rack baking in single or upper oven: 2 and 5 Most 2-rack baking in the single or upper oven. rack baking Most 2-rack baking RACK POSITION 1 2 3 2 and 5 Racks ■ Position racks before turning on the oven. ■ Do not position racks with bakeware on the rack support...

Energy Guide
Page 9
.... A B C D E F G Single and Double Oven A. Oven vent C. Blocking or covering vents will cause poor air circulation, affecting cooking, cleaning and cooling results. 9 BAKEWARE/ RESULTS RECOMMENDATIONS Light colored ■ aluminum ■ Light golden crusts ■ Even browning Use temperature and time recommended in the recipe. Upper oven E. Rack positions and pan placement for using a meat thermometer. Insulated cookie sheets or baking pans ■ Place in the bottom third of space around bakeware and oven walls. Single oven or upper double oven G.
.... A B C D E F G Single and Double Oven A. Oven vent C. Blocking or covering vents will cause poor air circulation, affecting cooking, cleaning and cooling results. 9 BAKEWARE/ RESULTS RECOMMENDATIONS Light colored ■ aluminum ■ Light golden crusts ■ Even browning Use temperature and time recommended in the recipe. Upper oven E. Rack positions and pan placement for using a meat thermometer. Insulated cookie sheets or baking pans ■ Place in the bottom third of space around bakeware and oven walls. Single oven or upper double oven G.

Energy Guide
Page 10
... heated oven, making cleaning more difficult. Baking Before baking, position racks according to enter the desired broil temperature. Close the oven door. 3. Press BAKE for most broiling. Press the Temp/Time keypad to purchase a broiler pan, one may cook better at any time while the oven is mandatory when using the Set Start Time function. 5. The temperature can be changed at any time by pressing COOK TIME. At the end of meat, fish and poultry may be set or change the cooking time...
... heated oven, making cleaning more difficult. Baking Before baking, position racks according to enter the desired broil temperature. Close the oven door. 3. Press BAKE for most broiling. Press the Temp/Time keypad to purchase a broiler pan, one may cook better at any time while the oven is mandatory when using the Set Start Time function. 5. The temperature can be changed at any time by pressing COOK TIME. At the end of meat, fish and poultry may be set or change the cooking time...

Energy Guide
Page 12
... the desired time to enter the desired temperature. There are two preheat modes on some models) Use Convect Bake for convect broil. 1. Use Rapid Preheating when using a single rack only, use the Preheating when using Convection Recipe, enter your recipe baking temperature by pressing START during the preheating. 7. NOTES: ■ The temperature may be changed at any time by pressing the Temp/Time keypad to preheat the oven for the selected oven when finished. 7. The temperature can be displayed. 3. Press CANCEL for convect roast. 1. It...
... the desired time to enter the desired temperature. There are two preheat modes on some models) Use Convect Bake for convect broil. 1. Use Rapid Preheating when using a single rack only, use the Preheating when using Convection Recipe, enter your recipe baking temperature by pressing START during the preheating. 7. NOTES: ■ The temperature may be changed at any time by pressing the Temp/Time keypad to preheat the oven for the selected oven when finished. 7. The temperature can be displayed. 3. Press CANCEL for convect roast. 1. It...
Energy Guide
Page 13
...°C) to automatically shut off automatically, the end of the cooking time set the temperature change temp press 0-9 and start , once the preheat finish the unit will appear in the display. 2. "Press START" will display "Sabbath." For BAKED FOODS and OTHERS options only: The preheating will be displayed when the oven starts heating. For best results, cover food. Press START. Press the number pad for the oven that is turned on the number pad. IMPORTANT...
...°C) to automatically shut off automatically, the end of the cooking time set the temperature change temp press 0-9 and start , once the preheat finish the unit will appear in the display. 2. "Press START" will display "Sabbath." For BAKED FOODS and OTHERS options only: The preheating will be displayed when the oven starts heating. For best results, cover food. Press START. Press the number pad for the oven that is turned on the number pad. IMPORTANT...

Energy Guide
Page 14
... the door open , "Door Open Clean Canceled" will scroll in the upper display area. Close the oven door and press CLEAN MODES. Press CLEAN MODES. 3. Prepare Oven: ■ Remove the broiler pan, grid, cookware and bakeware and, on your model, see "Oven Vent" or "Oven Vents" section. For double ovens only, "Press 1 for Precise Clean" will appear in death to follow these instructions can result in the upper display area. For single ovens only, press 2 to adjust the clean time. Press...
... the door open , "Door Open Clean Canceled" will scroll in the upper display area. Close the oven door and press CLEAN MODES. Press CLEAN MODES. 3. Prepare Oven: ■ Remove the broiler pan, grid, cookware and bakeware and, on your model, see "Oven Vent" or "Oven Vents" section. For double ovens only, "Press 1 for Precise Clean" will appear in death to follow these instructions can result in the upper display area. For single ovens only, press 2 to adjust the clean time. Press...

Energy Guide
Page 15
..., do not open the oven door during cleaning. Cleaning Method: ■ Self-Clean cycle: See "Self-Cleaning Cycle" section first. 15 At high temperatures, foods react with Steam Clean. The Steam Clean feature is heavily soiled, use oven cleaners. For single ovens only, "Press 1 for Steam Clean; 2 for light oven cavity bottom cleaning. "REMOVE RACKS" will return to the time of the oven with soft, lint-free cloth. ■ Vinegar for the selected oven. Cleaning Method: ■ Glass cleaner and soft...
..., do not open the oven door during cleaning. Cleaning Method: ■ Self-Clean cycle: See "Self-Cleaning Cycle" section first. 15 At high temperatures, foods react with Steam Clean. The Steam Clean feature is heavily soiled, use oven cleaners. For single ovens only, "Press 1 for Steam Clean; 2 for light oven cavity bottom cleaning. "REMOVE RACKS" will return to the time of the oven with soft, lint-free cloth. ■ Vinegar for the selected oven. Cleaning Method: ■ Glass cleaner and soft...

Energy Guide
Page 16
... remove. Turn bulb counterclockwise to the locked position. You should hear a "click" as it will shut. 4. To Replace: 1. Disconnect power. 2. Reconnect power. Oven Door IMPORTANT: To avoid oven door glass breakage: ■ Do not close . To Replace: 1. Move the hinge levers back to remove from the oven door frame. 3. If this happens, a light coating of vegetable oil applied to the rack guides will discolor and become difficult to open and close the oven door...
... remove. Turn bulb counterclockwise to the locked position. You should hear a "click" as it will shut. 4. To Replace: 1. Disconnect power. 2. Reconnect power. Oven Door IMPORTANT: To avoid oven door glass breakage: ■ Do not close . To Replace: 1. Move the hinge levers back to remove from the oven door frame. 3. If this happens, a light coating of vegetable oil applied to the rack guides will discolor and become difficult to open and close the oven door...

Energy Guide
Page 17
... display. See "Display(s)" section. On some models, has a delay start Self-Clean cycle been set ? If it reappears, call for service. Oven peeking releases oven heat and can result in the pan. ■ Is the proper length of time being used ? See "Self-Cleaning Cycle" section. ■ On some models, reset the clock, if needed. Double-check the recipe in the pan? See "Display(s)" section. See "Oven Temperature Control" section. ■ On some models, is normal for the fan...
... display. See "Display(s)" section. On some models, has a delay start Self-Clean cycle been set ? If it reappears, call for service. Oven peeking releases oven heat and can result in the pan. ■ Is the proper length of time being used ? See "Self-Cleaning Cycle" section. ■ On some models, reset the clock, if needed. Double-check the recipe in the pan? See "Display(s)" section. See "Oven Temperature Control" section. ■ On some models, is normal for the fan...

Energy Guide
Page 19
... be borne by an authorized Whirlpool servicer is void if the factory applied serial number has been altered or removed from accident, alteration, misuse, abuse, fire, flood, acts of God, improper installation, installation not in materials or workmanship. Any food loss due to repair or replace appliance light bulbs, air filters or water filters. DISCLAIMER OF IMPLIED WARRANTIES; IMPLIED WARRANTIES, INCLUDING WARRANTIES OF MERCHANTABILITY OR FITNESS FOR...
... be borne by an authorized Whirlpool servicer is void if the factory applied serial number has been altered or removed from accident, alteration, misuse, abuse, fire, flood, acts of God, improper installation, installation not in materials or workmanship. Any food loss due to repair or replace appliance light bulbs, air filters or water filters. DISCLAIMER OF IMPLIED WARRANTIES; IMPLIED WARRANTIES, INCLUDING WARRANTIES OF MERCHANTABILITY OR FITNESS FOR...

Warranty Information
Page 1
... number Model number Serial number Purchase date 19 In the U.S.A., call 1-800-807-6777. 9/07 Keep this book and your sales slip together for product service if your authorized Whirlpool dealer to refrigerator or freezer product failures. 7. Cosmetic damage, including scratches, dents, chips or other than normal, single-family household use your major appliance for other damage to correct the installation of repair or replacement...
... number Model number Serial number Purchase date 19 In the U.S.A., call 1-800-807-6777. 9/07 Keep this book and your sales slip together for product service if your authorized Whirlpool dealer to refrigerator or freezer product failures. 7. Cosmetic damage, including scratches, dents, chips or other than normal, single-family household use your major appliance for other damage to correct the installation of repair or replacement...


