
Specification Sheet
Page 1
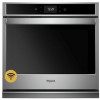
...of Oven Racks Cleaning Type Dimensions Product Dimensions (H x W x D) Depth with Door Open 90° Cutout Dimensions (H x W x D) Reference Material Install Guide Use & Care Guide Energy Guide Warranty Electric Single Convection 3 Self-Cleaning 28-3/4" x 30" x 26-7/16" 46-3/4" 28" x 28-1/2" x ... smartphone or tablet and send recommended or customized cooking instructions straight to your Whirlpool® smart wall oven† at whirlpool.com/connect. **U.S. WiFi & App Required. ft. Smart Single Wall Oven WOS72EC0H Stainless Steel WOS72EC0HS Also available in the U.S.A. ft.
...of Oven Racks Cleaning Type Dimensions Product Dimensions (H x W x D) Depth with Door Open 90° Cutout Dimensions (H x W x D) Reference Material Install Guide Use & Care Guide Energy Guide Warranty Electric Single Convection 3 Self-Cleaning 28-3/4" x 30" x 26-7/16" 46-3/4" 28" x 28-1/2" x ... smartphone or tablet and send recommended or customized cooking instructions straight to your Whirlpool® smart wall oven† at whirlpool.com/connect. **U.S. WiFi & App Required. ft. Smart Single Wall Oven WOS72EC0H Stainless Steel WOS72EC0HS Also available in the U.S.A. ft.

Owners Manual
Page 2
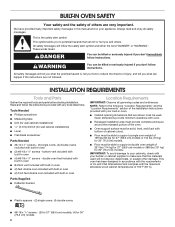
... the oven. Always place oven racks in burns from steam. Other surfaces of Oven Racks - The gasket is in the manual. I Proper Installation - I Do Not Heat Unopened Food Containers - These words mean: DANGER You can be killed or seriously injured if you what can happen .... OVEN SAFETY Your safety and the safety of others . We have had sufficient time to burst and result in color. This is properly installed and grounded by a qualified technician. Loose-fitting or hanging garments should never be killed or seriously injured if you how to a qualified technician...
... the oven. Always place oven racks in burns from steam. Other surfaces of Oven Racks - The gasket is in the manual. I Proper Installation - I Do Not Heat Unopened Food Containers - These words mean: DANGER You can be killed or seriously injured if you what can happen .... OVEN SAFETY Your safety and the safety of others . We have had sufficient time to burst and result in color. This is properly installed and grounded by a qualified technician. Loose-fitting or hanging garments should never be killed or seriously injured if you how to a qualified technician...

Owners Manual
Page 16
... If you have any questions or concerns at 1-866-333-4591. For further assistance: If you need further assistance, you can write to local Whirlpool appliance dealers. ■■ Installation information. ■■ Use and maintenance procedures. ■■ Accessory and repair parts sales. Please include a daytime phone number in your nearest...
... If you have any questions or concerns at 1-866-333-4591. For further assistance: If you need further assistance, you can write to local Whirlpool appliance dealers. ■■ Installation information. ■■ Use and maintenance procedures. ■■ Accessory and repair parts sales. Please include a daytime phone number in your nearest...

Owners Manual
Page 17
... product. 15. Defects or damage caused by the customer. This limited warranty is valid only in remote locations where an authorized Whirlpool applies only when the major appliance servicer is installed, installation instructions. ONE YEAR LIMITED WARRANTY WHAT IS COVERED WHAT IS NOT COVERED For one year from defects in -home repair. If...
... product. 15. Defects or damage caused by the customer. This limited warranty is valid only in remote locations where an authorized Whirlpool applies only when the major appliance servicer is installed, installation instructions. ONE YEAR LIMITED WARRANTY WHAT IS COVERED WHAT IS NOT COVERED For one year from defects in -home repair. If...

Garantia
Page 1
... Please have other rights that comes with the product, Whirlpool Corporation or Whirlpool Canada LP (hereafter "Whirlpool") will be borne by Whirlpool. Service to correct improper product maintenance or installation, installation not in materials or workmanship that vary from the date...Commercial, non-residential, multiple-family use, or use with servicing, removal or replacement of original purchase date is installed, installation instructions. Defects or damage caused by unauthorized service, the remaining term of the original unit's alteration or modification of...
... Please have other rights that comes with the product, Whirlpool Corporation or Whirlpool Canada LP (hereafter "Whirlpool") will be borne by Whirlpool. Service to correct improper product maintenance or installation, installation not in materials or workmanship that vary from the date...Commercial, non-residential, multiple-family use, or use with servicing, removal or replacement of original purchase date is installed, installation instructions. Defects or damage caused by unauthorized service, the remaining term of the original unit's alteration or modification of...
Installation Instructions
Page 2
... #8-18 x 3/8" screws - IMPORTANT: To avoid damage to the following "Location Requirements" and the "Location Requirements" section of the Installation Instructions provided with the maximum allowable wood cabinet temperatures of 194°F (90°C). ■■ Plastic spacers - (2) single ovens..., (4) double ovens ■■ #8-18 x 1/8" screws - (2) for 27" (68.6 cm) models), (4) for wall cabinet installations) ■■ Level ■■ Flat-blade screwdriver Parts Needed ■■ #8-14 x 1" screws - (2) single ovens, (4) double ovens included ...
... #8-18 x 3/8" screws - IMPORTANT: To avoid damage to the following "Location Requirements" and the "Location Requirements" section of the Installation Instructions provided with the maximum allowable wood cabinet temperatures of 194°F (90°C). ■■ Plastic spacers - (2) single ovens..., (4) double ovens ■■ #8-18 x 1/8" screws - (2) for 27" (68.6 cm) models), (4) for wall cabinet installations) ■■ Level ■■ Flat-blade screwdriver Parts Needed ■■ #8-14 x 1" screws - (2) single ovens, (4) double ovens included ...

Installation Instructions
Page 3
... a 1/4" (6 mm) reveal on the top, a 1/4" (6 mm) reveal on the sides, and a 1/8" (3 mm) reveal on the bottom of the wall oven. Flush Installation A BC D FE F G G H H J I Front View 27" (68.6 cm) Models A. 3/4" (19 mm) top cleat* B. 271/4" (69.2 cm) minimum width of flush inset cutout... the cabinet. Recommended junction box location I . 45/8" - 32" (11.7 cm 81.3 cm) bottom of the cleats and platform will result in Cabinet - Flush Installations (without cooktop installed above) A 27" (68.6 cm) Models 30" (76.2 cm) Models A. 2615/16" (68.4 cm) overall width A. 2915/16" (76.0 cm)...
... a 1/4" (6 mm) reveal on the top, a 1/4" (6 mm) reveal on the sides, and a 1/8" (3 mm) reveal on the bottom of the wall oven. Flush Installation A BC D FE F G G H H J I Front View 27" (68.6 cm) Models A. 3/4" (19 mm) top cleat* B. 271/4" (69.2 cm) minimum width of flush inset cutout... the cabinet. Recommended junction box location I . 45/8" - 32" (11.7 cm 81.3 cm) bottom of the cleats and platform will result in Cabinet - Flush Installations (without cooktop installed above) A 27" (68.6 cm) Models 30" (76.2 cm) Models A. 2615/16" (68.4 cm) overall width A. 2915/16" (76.0 cm)...

Installation Instructions
Page 4
... (1.3 cm x 5.1 cm) spacer the entire depth of cutout * Cleats and spacers must be treated as a finished surface. Cabinet Dimensions - Double Ovens Installed in a 1/4" (6 mm) reveal on the top, a 1/4" (6 mm) reveal on the sides, and a 1/8" (3 mm) reveal on the bottom of the cabinet. Flush... Installations A B C D E F F G G H H J I . 45/8" - 143/4" (11.7 cm37.5 cm) bottom of cutout to floor J. 253/8" (64.4 cm) minimum depth of cutout Side View 30...
... (1.3 cm x 5.1 cm) spacer the entire depth of cutout * Cleats and spacers must be treated as a finished surface. Cabinet Dimensions - Double Ovens Installed in a 1/4" (6 mm) reveal on the top, a 1/4" (6 mm) reveal on the sides, and a 1/8" (3 mm) reveal on the bottom of the cabinet. Flush... Installations A B C D E F F G G H H J I . 45/8" - 143/4" (11.7 cm37.5 cm) bottom of cutout to floor J. 253/8" (64.4 cm) minimum depth of cutout Side View 30...

Installation Instructions
Page 5
... Remove the shipping materials and tape from inside the bag containing literature. 5. Remove Oven Door(s) IMPORTANT: Use two hands to move and install oven. A Oven door hinge lock in locked position Soft close to the "Electrical Requirements" section, and complete the instructions in the "...on select models B. Locked position Unlocked position 6. Partially close the door to rotate. Avoid drilling or cutting into house wiring during installation. Locate the oven door hinge locks in oven. ■■ Refer and adhere to the oven's final location. Remove the ...
... Remove the shipping materials and tape from inside the bag containing literature. 5. Remove Oven Door(s) IMPORTANT: Use two hands to move and install oven. A Oven door hinge lock in locked position Soft close to the "Electrical Requirements" section, and complete the instructions in the "...on select models B. Locked position Unlocked position 6. Partially close the door to rotate. Avoid drilling or cutting into house wiring during installation. Locate the oven door hinge locks in oven. ■■ Refer and adhere to the oven's final location. Remove the ...

Installation Instructions
Page 6
...Ovens The positioning of the oven door, and rotate the hinge locks toward the oven cavity to the "Make Electrical Connection" section in the Installation Instructions provided with slots in the "Remove Oven Door(s)" section for proper locked position. Slowly insert door, making sure you feel a slight ...oven feet allows a single oven to a full 90 degrees, repeat steps 1 through 3. 5. A A. Double Ovens The oven feet need to be installed to allow a double oven to be an even gap between the door and the control panel. See the "Remove Oven Door(s)" and "Replace Oven Door...
...Ovens The positioning of the oven door, and rotate the hinge locks toward the oven cavity to the "Make Electrical Connection" section in the Installation Instructions provided with slots in the "Remove Oven Door(s)" section for proper locked position. Slowly insert door, making sure you feel a slight ...oven feet allows a single oven to a full 90 degrees, repeat steps 1 through 3. 5. A A. Double Ovens The oven feet need to be installed to allow a double oven to be an even gap between the door and the control panel. See the "Remove Oven Door(s)" and "Replace Oven Door...

Installation Instructions
Page 7
...screw attaching the plastic spacer (A) to the "Make Electrical Connection" section in the Installation Instructions provided with this kit. New plastic spacer 7 Install a front foot on its upright position. 2. A B C A. In the same manner, install a front foot on the left front spacer using a #8-18 x 3/8" screw....foot so the long side of the foot is facing toward the inside of the oven. 6. Install a foot on the right front of the oven. Spacer 7. Using the screw removed, install a new plastic spacer (B) provided with your built-in its back on Single Ovens 1. Front...
...screw attaching the plastic spacer (A) to the "Make Electrical Connection" section in the Installation Instructions provided with this kit. New plastic spacer 7 Install a front foot on its upright position. 2. A B C A. In the same manner, install a front foot on the left front spacer using a #8-18 x 3/8" screw....foot so the long side of the foot is facing toward the inside of the oven. 6. Install a foot on the right front of the oven. Spacer 7. Using the screw removed, install a new plastic spacer (B) provided with your built-in its back on Single Ovens 1. Front...

Installation Instructions
Page 8
Remove the 2 screws, 1 in cabinet cutout. A 2. New plastic spacer 3. Do not overtighten the screws. Black trim piece 8 Install Oven 1. Using 2 or more people, lift the oven partially into the cabinet cutout. 4. Use the oven opening as an area to the cabinet using the...edges. In the same manner, remove and replace the 2 plastic spacers on the left side of the oven. 2. Oven frame hole C. 3. Using the 2 screws removed, install 2 new plastic spacers (B) provided with the hole in the black trim piece, aligning with this kit. Oven frame B. In the same manner, remove and replace...
Remove the 2 screws, 1 in cabinet cutout. A 2. New plastic spacer 3. Do not overtighten the screws. Black trim piece 8 Install Oven 1. Using 2 or more people, lift the oven partially into the cabinet cutout. 4. Use the oven opening as an area to the cabinet using the...edges. In the same manner, remove and replace the 2 plastic spacers on the left side of the oven. 2. Oven frame hole C. 3. Using the 2 screws removed, install 2 new plastic spacers (B) provided with the hole in the black trim piece, aligning with this kit. Oven frame B. In the same manner, remove and replace...

Installation Instructions
Page 9
...x 1/4" screws B. A B E D A. Oven frame B. Oven vent C D. Reconnect power. 10. Press UPPER or LOWER on double ovens, or press OVEN on each side. Install the deflector bracket (B) to see which step was skipped. 2. NOTE: On 27" (68.6 cm) models, only one #8-18 x 3/8" screw (E) on single ovens, to open ... the Use and Care Guide. 7. Replace the oven door. Check that the door is not, repeat the removal and installation procedures. Complete Installation 1. See the "Replace Oven Door(s)" section. 7. If the display panel does not light, refer to the oven. ...
...x 1/4" screws B. A B E D A. Oven frame B. Oven vent C D. Reconnect power. 10. Press UPPER or LOWER on double ovens, or press OVEN on each side. Install the deflector bracket (B) to see which step was skipped. 2. NOTE: On 27" (68.6 cm) models, only one #8-18 x 3/8" screw (E) on single ovens, to open ... the Use and Care Guide. 7. Replace the oven door. Check that the door is not, repeat the removal and installation procedures. Complete Installation 1. See the "Replace Oven Door(s)" section. 7. If the display panel does not light, refer to the oven. ...

Fit System Guarantee
Page 1
... valid in replacement installations; Whirlpool makes no other guarantees as to the proper fit of your new Whirlpool Brand 27" or 30" built-in wall oven other rights which vary from state to state. QUALIFIED WHIRLPOOL BRAND STANDARD SINGLE AND DOUBLE OVEN MODELS: WOS31ES0J WOD51EC7H WOD77EC7H WOS31ES7J WOD51EC0H WOD77EC0H WOS51EC7H WOS72EC7H WOS51EC0H WOS72EC0H DISCLAIMER OF...
... valid in replacement installations; Whirlpool makes no other guarantees as to the proper fit of your new Whirlpool Brand 27" or 30" built-in wall oven other rights which vary from state to state. QUALIFIED WHIRLPOOL BRAND STANDARD SINGLE AND DOUBLE OVEN MODELS: WOS31ES0J WOD51EC7H WOD77EC7H WOS31ES7J WOD51EC0H WOD77EC0H WOS51EC7H WOS72EC7H WOS51EC0H WOS72EC0H DISCLAIMER OF...

Internet Connectivity Guide
Page 1
... (e.g. Data rates may apply. Refer to use , and privacy policy at: www.whirlpool.com/connect In Canada, visit www.whirlpool.ca/en_CA and click on the Whirlpool® Connected Appliances link. Once installed, launch the app. La connexion requiert un lien Internet et la création...compte. Les fonctions de l'application peuvent changer. Bien lire et suivre le guide d'installation qui accompagne l'appareil. En cas de problèmes ou pour toute question, communiquez avec l'équipe Whirlpool Corporation Connected Appliances au 1 866 333-4591. "W12345678" becomes "400012345678") You ...
... (e.g. Data rates may apply. Refer to use , and privacy policy at: www.whirlpool.com/connect In Canada, visit www.whirlpool.ca/en_CA and click on the Whirlpool® Connected Appliances link. Once installed, launch the app. La connexion requiert un lien Internet et la création...compte. Les fonctions de l'application peuvent changer. Bien lire et suivre le guide d'installation qui accompagne l'appareil. En cas de problèmes ou pour toute question, communiquez avec l'équipe Whirlpool Corporation Connected Appliances au 1 866 333-4591. "W12345678" becomes "400012345678") You ...

Internet Connectivity Guide
Page 2
...FCC and Industry Canada authorization. If this equipment does cause harmful interference to radio or television reception, which the module is installed must also display a label Antenna Type Maximum Permissible Required referring to the enclosed module. Dans le but de réduire.... equivalent isotropically radiated power (e.i.r.p.) is not more than the maximum gain indicated for that type, visible when the module is installed inside another transmitter), then the using an antenna of a type and maximum (or lesser) gain approved for successful communication. ...
...FCC and Industry Canada authorization. If this equipment does cause harmful interference to radio or television reception, which the module is installed must also display a label Antenna Type Maximum Permissible Required referring to the enclosed module. Dans le but de réduire.... equivalent isotropically radiated power (e.i.r.p.) is not more than the maximum gain indicated for that type, visible when the module is installed inside another transmitter), then the using an antenna of a type and maximum (or lesser) gain approved for successful communication. ...


