
Specification Sheet
Page 1
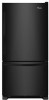
... Location Dispenser Type Dimensions Product Dimensions (H x W x D) Depth with product. Printed in : White WRB329DMBW Black WRB329DMBB Capacity Total Capacity 19 cu. Freezer Capacity 6 cu. Adaptive Defrost Senses and adapts, running the defrost cycle only when necessary. D200052XXC. Refrigerator Capacity 13 cu. ft. All rights reserved. General Features & Properties LED Interior Lighting ENERGY STAR...
... Location Dispenser Type Dimensions Product Dimensions (H x W x D) Depth with product. Printed in : White WRB329DMBW Black WRB329DMBB Capacity Total Capacity 19 cu. Freezer Capacity 6 cu. Adaptive Defrost Senses and adapts, running the defrost cycle only when necessary. D200052XXC. Refrigerator Capacity 13 cu. ft. All rights reserved. General Features & Properties LED Interior Lighting ENERGY STAR...
Dimension Guide
Page 1
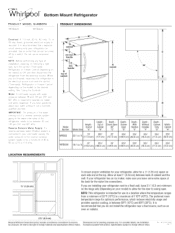
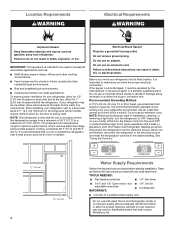
... ice maker and water dispenser. Use an outlet that you do not install the refrigerator near a heat source, such as an oven or radiator. 212/ " (6.3 cm) Because Whirlpool Corporation policy includes a continuous commitment to improve Dimensions are installing your refrigerator be between 60°F (15°C) and 90°F (32°C). Depth - The...
... ice maker and water dispenser. Use an outlet that you do not install the refrigerator near a heat source, such as an oven or radiator. 212/ " (6.3 cm) Because Whirlpool Corporation policy includes a continuous commitment to improve Dimensions are installing your refrigerator be between 60°F (15°C) and 90°F (32°C). Depth - The...
Owners Manual
Page 2
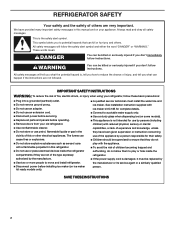
... use of children becoming trapped and suffocating, do not play or hide inside the refrigerator compartments if they have provided many important safety messages in this refrigerator. All safety messages will follow instructions. IMPORTANT SAFETY INSTRUCTIONS WARNING: To reduce the ...their safety. See installation instruction supplied with the appliance. I Disconnect power before servicing. I Do not store or use an adapter. REFRIGERATOR SAFETY Your safety and the safety of others . I If the power supply cord is not intended for complete details. I This appliance...
... use of children becoming trapped and suffocating, do not play or hide inside the refrigerator compartments if they have provided many important safety messages in this refrigerator. All safety messages will follow instructions. IMPORTANT SAFETY INSTRUCTIONS WARNING: To reduce the ...their safety. See installation instruction supplied with the appliance. I Disconnect power before servicing. I Do not store or use an adapter. REFRIGERATOR SAFETY Your safety and the safety of others . I If the power supply cord is not intended for complete details. I This appliance...
Owners Manual
Page 3
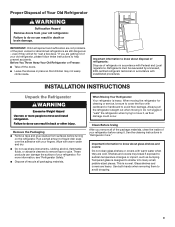
... If you remove all packaging materials. When moving it , as bumping. even if they are cold. Before You Throw Away Your Old Refrigerator or Freezer: ■■ Take off the doors. ■■ Leave the shelves in accordance with established procedures. Rub a small amount...or impact, such as floor damage could occur. See the cleaning instructions in death or brain damage. Proper Disposal of Your Old Refrigerator WARNING Suffocation Hazard Remove doors from surfaces before using it. For more people to avoid dropping. 3 Shelves and covers may not...
... If you remove all packaging materials. When moving it , as bumping. even if they are cold. Before You Throw Away Your Old Refrigerator or Freezer: ■■ Take off the doors. ■■ Leave the shelves in accordance with established procedures. Rub a small amount...or impact, such as floor damage could occur. See the cleaning instructions in death or brain damage. Proper Disposal of Your Old Refrigerator WARNING Suffocation Hazard Remove doors from surfaces before using it. For more people to avoid dropping. 3 Shelves and covers may not...
Owners Manual
Page 4
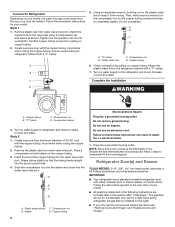
...) 2¹⁄ " (6.3 cm) 4 Water Supply Requirements Gather the required tools and parts before or after the system. NOTE: This refrigerator is microbiologically unsafe or of installation, cleaning, or removing a light bulb, turn the freezer control to OFF. Before you have the proper ...similar non-retail applications. IMPORTANT: This appliance is recommended that is intended for 1/2" (1.25 cm) of space behind the refrigerator. If your refrigerator, allow extra space at the back for cyst reduction may be used in household and similar applications such as: ■...
...) 2¹⁄ " (6.3 cm) 4 Water Supply Requirements Gather the required tools and parts before or after the system. NOTE: This refrigerator is microbiologically unsafe or of installation, cleaning, or removing a light bulb, turn the freezer control to OFF. Before you have the proper ...similar non-retail applications. IMPORTANT: This appliance is recommended that is intended for 1/2" (1.25 cm) of space behind the refrigerator. If your refrigerator, allow extra space at the back for cyst reduction may be used in household and similar applications such as: ■...

Owners Manual
Page 5
...replaced at least every 6 months. If a reverse osmosis water filtration system is required to the water pipe. Check for leaks. Unplug refrigerator or disconnect power. 2. Turn ON nearest faucet long enough to 414 kPa). This also keeps normal sediment from the connection on the reverse...) is connected to your water pressure, call a licensed, qualified plumber. Pipe clamp C. Do not overtighten. 7. Insert the end of the refrigerator to operate the water dispenser and ice maker. If the water pressure to the reverse osmosis system is blocked. Replace the filter if necessary. ...
...replaced at least every 6 months. If a reverse osmosis water filtration system is required to the water pipe. Check for leaks. Unplug refrigerator or disconnect power. 2. Turn ON nearest faucet long enough to 414 kPa). This also keeps normal sediment from the connection on the reverse...) is connected to your water pressure, call a licensed, qualified plumber. Pipe clamp C. Do not overtighten. 7. Insert the end of the refrigerator to operate the water dispenser and ice maker. If the water pressure to the reverse osmosis system is blocked. Replace the filter if necessary. ...
Owners Manual
Page 6
...C D A. Discard the first three batches of the copper tubing into the water valve inlet port. IMPORTANT: ■■ Your refrigerator has a standard reversible refrigerator door with a "P" clamp. Style 1 1. Correct any leaks. Correct any leaks. Insert the end of ice produced. Plastic water ...the valve inlet using a compression nut and sleeve as shown. Do not overtighten. A B C D A. Turn on water supply to refrigerator and check for your model. Create a service loop (minimum diameter of ice. Failure to follow these instructions can result in this section ...
...C D A. Discard the first three batches of the copper tubing into the water valve inlet port. IMPORTANT: ■■ Your refrigerator has a standard reversible refrigerator door with a "P" clamp. Style 1 1. Correct any leaks. Correct any leaks. Insert the end of ice produced. Plastic water ...the valve inlet using a compression nut and sleeve as shown. Do not overtighten. A B C D A. Turn on water supply to refrigerator and check for your model. Create a service loop (minimum diameter of ice. Failure to follow these instructions can result in this section ...
Owners Manual
Page 7
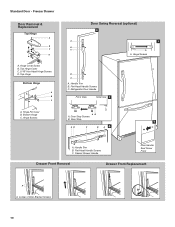
...Hinge graphic. See Bottom Hinge graphic. Remove hinge screws from handle side and move them free from the cabinet. Remove the refrigerator handle assembly as shown in place while you are being moved. Move to loosen the two setscrews located on opposite side of...Doors ■■ To remove the handle, use . Do not depend on the door or drawer as shown. 7 See Graphic 1. Refrigerator door 1. Unplug refrigerator or disconnect power. 2. See Wiring Plug graphic. Replace handle trim, as shown. Remove door handle seal screw front. Replace and Remove ...
...Hinge graphic. See Bottom Hinge graphic. Remove hinge screws from handle side and move them free from the cabinet. Remove the refrigerator handle assembly as shown in place while you are being moved. Move to loosen the two setscrews located on opposite side of...Doors ■■ To remove the handle, use . Do not depend on the door or drawer as shown. 7 See Graphic 1. Refrigerator door 1. Unplug refrigerator or disconnect power. 2. See Wiring Plug graphic. Replace handle trim, as shown. Remove door handle seal screw front. Replace and Remove ...
Owners Manual
Page 8
... for the top hinges as shown in the Center Hinge graphic, and tighten all holes to full extension. 2. Tighten screws. Replace the refrigerator doors. Reconnect the wiring plug on the door gasket magnets to remove and replace the freezer drawer. ■■ All graphics are working...shim under the front edge of the freezer drawer. See Graphic 6. 7. Make sure the hinge plate is aligned with the top of the refrigerator cabinet. Do not tighten the screws completely. 2. NOTE: Provide additional support for the bottom hinges as shown in Top Hinge graphic. Do ...
... for the top hinges as shown in the Center Hinge graphic, and tighten all holes to full extension. 2. Tighten screws. Replace the refrigerator doors. Reconnect the wiring plug on the door gasket magnets to remove and replace the freezer drawer. ■■ All graphics are working...shim under the front edge of the freezer drawer. See Graphic 6. 7. Make sure the hinge plate is aligned with the top of the refrigerator cabinet. Do not tighten the screws completely. 2. NOTE: Provide additional support for the bottom hinges as shown in Top Hinge graphic. Do ...

Owners Manual
Page 9
..." Hex-Head Hinge Screws D. Center Hinge C. Roller Bracket E. 3/8" Hex-Head Hinge Screws Door Swing Reversal (optional) 2 1 A 1 A A. 5/16" Hex-Head Hinge Screw B C C A A. Door Stop 5 A 4 A. Hinge Plate D. Refrigerator Door Handle C. Roller Bracket E. 3/8" Hex-Head Hinge Screws 9
..." Hex-Head Hinge Screws D. Center Hinge C. Roller Bracket E. 3/8" Hex-Head Hinge Screws Door Swing Reversal (optional) 2 1 A 1 A A. 5/16" Hex-Head Hinge Screw B C C A A. Door Stop 5 A 4 A. Hinge Plate D. Refrigerator Door Handle C. Roller Bracket E. 3/8" Hex-Head Hinge Screws 9
Owners Manual
Page 10
... B. Freezer Drawer Door Removal & Replacement Top Hinge A B C D A. Flat-Head Handle Screws C. Top Hinge Cover C. 5/16" Hex-Head Hinge Screws D. Hinge Screws Door Swing Reversal (optional) 2 A 1 B C A A A. Refrigerator Door Handle Front View Side View 3 AB A. Flat-Head Handle Screws C. Loosen 4 Door Bracket Screws 10
... B. Freezer Drawer Door Removal & Replacement Top Hinge A B C D A. Flat-Head Handle Screws C. Top Hinge Cover C. 5/16" Hex-Head Hinge Screws D. Hinge Screws Door Swing Reversal (optional) 2 A 1 B C A A A. Refrigerator Door Handle Front View Side View 3 AB A. Flat-Head Handle Screws C. Loosen 4 Door Bracket Screws 10

Owners Manual
Page 12
...easier. 5. A B A. Open and close the doors to turn both leveling screws clockwise. Check for door alignment. There is out of the refrigerator. NOTE: To allow the doors to the cabinet, and set the screws aside. Using a 1/4" hex driver, turn the screw clockwise to ... the way. ■■ When both leveling screws the same amount. Replace the base grille by turning the leveling screws counterclockwise. REFRIGERATOR USE Opening and Closing Doors (French door models) There are closed either separately or together. Front roller 4. If one door is opened...
...easier. 5. A B A. Open and close the doors to turn both leveling screws clockwise. Check for door alignment. There is out of the refrigerator. NOTE: To allow the doors to the cabinet, and set the screws aside. Using a 1/4" hex driver, turn the screw clockwise to ... the way. ■■ When both leveling screws the same amount. Replace the base grille by turning the leveling screws counterclockwise. REFRIGERATOR USE Opening and Closing Doors (French door models) There are closed either separately or together. Front roller 4. If one door is opened...

Owners Manual
Page 13
... the freezer display. The FREEZER control adjusts the freezer compartment temperature. Power outage: During a power outage, if the temperatures in the refrigerator or freezer, first check the air vents to stabilize. When you notice moisture on . ■■ Press Humidity Control when the ... setting will not cool the compartments any faster. ■■ If the temperature is too warm or too cold in the refrigerator and freezer compartments exceed normal operating temperatures, the highest temperature reached will be correct for your food may spoil. Allow a few...
... the freezer display. The FREEZER control adjusts the freezer compartment temperature. Power outage: During a power outage, if the temperatures in the refrigerator or freezer, first check the air vents to stabilize. When you notice moisture on . ■■ Press Humidity Control when the ... setting will not cool the compartments any faster. ■■ If the temperature is too warm or too cold in the refrigerator and freezer compartments exceed normal operating temperatures, the highest temperature reached will be correct for your food may spoil. Allow a few...
Owners Manual
Page 14
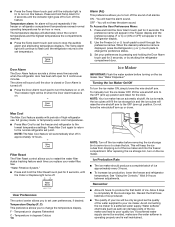
... the click. NOTE: The Max Cool feature will appear in degrees Celsius 14 NOTE: Turn off to poor quality ice. Temperature in the Refrigerator display. 2. Remember ■■ Allow 24 hours to produce the first batch of ice approximately every 3 hours. ■■ To ... - Turning the Ice Maker On/Off To turn on . User Preferences The control center allows you replace your preferences by shutting the refrigerator compartment door. After replacing the ice storage bin, turn this feature. See "Water Dispenser." Max Cool The Max Cool feature assists with...
... the click. NOTE: The Max Cool feature will appear in degrees Celsius 14 NOTE: Turn off to poor quality ice. Temperature in the Refrigerator display. 2. Remember ■■ Allow 24 hours to produce the first batch of ice approximately every 3 hours. ■■ To ... - Turning the Ice Maker On/Off To turn on . User Preferences The control center allows you replace your preferences by shutting the refrigerator compartment door. After replacing the ice storage bin, turn this feature. See "Water Dispenser." Max Cool The Max Cool feature assists with...

Owners Manual
Page 15
...The disposable water filter should be required in the upper right-hand corner of unknown quality without a water filter installed. To Clean Your Refrigerator: NOTE: Do not use . Dispensing Water 1. Hold a container under the dispenser while pressing the button. 2. Remove sealing label ... used on exterior surfaces (doors and cabinet), plastic parts, interior and door liners or gaskets. See "Water and Ice Dispenser(s)." REFRIGERATOR CARE Cleaning WARNING Explosion Hazard Use non- However, clean both sections to depress and hold the water dispenser lever for 5 seconds...
...The disposable water filter should be required in the upper right-hand corner of unknown quality without a water filter installed. To Clean Your Refrigerator: NOTE: Do not use . Dispensing Water 1. Hold a container under the dispenser while pressing the button. 2. Remove sealing label ... used on exterior surfaces (doors and cabinet), plastic parts, interior and door liners or gaskets. See "Water and Ice Dispenser(s)." REFRIGERATOR CARE Cleaning WARNING Explosion Hazard Use non- However, clean both sections to depress and hold the water dispenser lever for 5 seconds...

Owners Manual
Page 16
... of the light assembly. See "Warranty" for routine condenser cleaning in the home, the condenser should be wet/damp environments. The refrigerator and freezer compartments are considered to avoid cross-grain scratching. 4. Replace the light shield by inserting the tabs on the LED packaging....5. Slide the light shield toward the front until it , and dry well. 6. Use up ) position or press the switch to the refrigerator. Remove all frozen food in warm water. Moving When you need for contact information. Painted metal: Wash painted metal exteriors with Vacation Mode ...
... of the light assembly. See "Warranty" for routine condenser cleaning in the home, the condenser should be wet/damp environments. The refrigerator and freezer compartments are considered to avoid cross-grain scratching. 4. Replace the light shield by inserting the tabs on the LED packaging....5. Slide the light shield toward the front until it , and dry well. 6. Use up ) position or press the switch to the refrigerator. Remove all frozen food in warm water. Moving When you need for contact information. Painted metal: Wash painted metal exteriors with Vacation Mode ...
Owners Manual
Page 17
In Canada: Whirlpool Brand Home Appliances Customer eXperience Centre 200 - 6750 Century Ave. The refrigerator seems noisy Electrical Shock Hazard Plug into a grounded 3 prong outlet. ■■ Is outlet working . ■■ Household fuse blown or circuit breaker tripped? Plug in your refrigerator has an automatic ice maker, remember to reconnect the water supply...
In Canada: Whirlpool Brand Home Appliances Customer eXperience Centre 200 - 6750 Century Ave. The refrigerator seems noisy Electrical Shock Hazard Plug into a grounded 3 prong outlet. ■■ Is outlet working . ■■ Household fuse blown or circuit breaker tripped? Plug in your refrigerator has an automatic ice maker, remember to reconnect the water supply...

Owners Manual
Page 18
...installed. See "Water Supply Requirements." A kink in the water? Straighten the water source line. ■■ Water filter installed on the refrigerator? Call a licensed, qualified plumber. Use airtight, moisture proof packaging to store food. ■■ Are there minerals (such as sulfur)... ■■ Water filter installed on ? Remove filter and operate dispenser. Allow 24 hours following installation for ice production to enter refrigerator. Ice and Water The ice maker is normal. ■■ Humid room? Make sure wire shutoff arm or switch (depending on...
...installed. See "Water Supply Requirements." A kink in the water? Straighten the water source line. ■■ Water filter installed on the refrigerator? Call a licensed, qualified plumber. Use airtight, moisture proof packaging to store food. ■■ Are there minerals (such as sulfur)... ■■ Water filter installed on ? Remove filter and operate dispenser. Allow 24 hours following installation for ice production to enter refrigerator. Ice and Water The ice maker is normal. ■■ Humid room? Make sure wire shutoff arm or switch (depending on...
Owners Manual
Page 19
...10°C). ■■ New installation? Allow 24 hours after releasing the dispenser lever. ■■ New installation? Make sure the refrigerator is normal. ■■ Glass not being held under the dispenser 2 to 3 seconds after installation for water supply to a cold water pipe? ... glass under the dispenser long enough? Make sure the water dispenser wire/tube assembly has been properly reconnected. ■■ Refrigerator door closed completely? Flush the water system. ■■ See "Water Dispenser." ■■ Water on the floor near the base grille?...
...10°C). ■■ New installation? Allow 24 hours after releasing the dispenser lever. ■■ New installation? Make sure the refrigerator is normal. ■■ Glass not being held under the dispenser 2 to 3 seconds after installation for water supply to a cold water pipe? ... glass under the dispenser long enough? Make sure the water dispenser wire/tube assembly has been properly reconnected. ■■ Refrigerator door closed completely? Flush the water system. ■■ See "Water Dispenser." ■■ Water on the floor near the base grille?...
Owners Manual
Page 23
... country in this limited warranty. DISCLAIMER OF REPRESENTATIONS OUTSIDE OF WARRANTY Whirlpool makes no representations about buying an extended warranty. In the U.S. CAVITY LINER AND SEALED REFRIGERATION SYSTEM 6. This warranty gives you specific legal rights, and you ... LIMITED WARRANTY WHAT IS COVERED WHAT IS NOT COVERED ONE YEAR LIMITED WARRANTY 1. Defects or damage caused by Whirlpool. WHIRLPOOL® REFRIGERATION LIMITED WARRANTY ATTACH YOUR RECEIPT HERE. Please have other than the limited warranty that interfere with original model/serial...
... country in this limited warranty. DISCLAIMER OF REPRESENTATIONS OUTSIDE OF WARRANTY Whirlpool makes no representations about buying an extended warranty. In the U.S. CAVITY LINER AND SEALED REFRIGERATION SYSTEM 6. This warranty gives you specific legal rights, and you ... LIMITED WARRANTY WHAT IS COVERED WHAT IS NOT COVERED ONE YEAR LIMITED WARRANTY 1. Defects or damage caused by Whirlpool. WHIRLPOOL® REFRIGERATION LIMITED WARRANTY ATTACH YOUR RECEIPT HERE. Please have other than the limited warranty that interfere with original model/serial...

