

Dimension Guide
Page 2
... the back for use in ) To ensure proper ventilation for your refrigerator next to a fixed wall, leave 2 1/4 (5.7 cm) on the hinge side to change without notice. If your refrigerator has an ice maker, make sure you leave extra space at the back for crisper removal when the door is present). NOTE: This refrigerator is intended for the water line connections. Instructions packed with product. Specifications subject to a maximum...
... the back for use in ) To ensure proper ventilation for your refrigerator next to a fixed wall, leave 2 1/4 (5.7 cm) on the hinge side to change without notice. If your refrigerator has an ice maker, make sure you leave extra space at the back for crisper removal when the door is present). NOTE: This refrigerator is intended for the water line connections. Instructions packed with product. Specifications subject to a maximum...

Owners Manual
Page 2
... power before servicing. Replace all parts and panels before operating. Remove doors from your old refrigerator. Connect to a potable water supply only. Use a sturdy glass when dispensing ice (on some models). Use nonflammable cleaner. Do not damage the refrigerant circuit. Do not use electrical appliances inside . IMPORTANT SAFETY INSTRUCTIONS WARNING: To reduce the risk of fire, electric shock or injury to persons when using the refrigerator, follow these instructions to...
... power before servicing. Replace all parts and panels before operating. Remove doors from your old refrigerator. Connect to a potable water supply only. Use a sturdy glass when dispensing ice (on some models). Use nonflammable cleaner. Do not damage the refrigerant circuit. Do not use electrical appliances inside . IMPORTANT SAFETY INSTRUCTIONS WARNING: To reduce the risk of fire, electric shock or injury to persons when using the refrigerator, follow these instructions to...

Owners Manual
Page 3
... proper electrical connection. For more people to follow these instructions can damage the surface of refrigerant tubing. Always pull the refrigerator straight out when moving the refrigerator for cleaning or service, be turned off or turn cooling on or reset the control (Thermostat, Refrigerator or Freezer Control depending on the model) to the desired setting. Do not use an extension cord. Failure to move it . If the supply cord is important to make...
... proper electrical connection. For more people to follow these instructions can damage the surface of refrigerant tubing. Always pull the refrigerator straight out when moving the refrigerator for cleaning or service, be turned off or turn cooling on or reset the control (Thermostat, Refrigerator or Freezer Control depending on the model) to the desired setting. Do not use an extension cord. Failure to move it . If the supply cord is important to make...

Owners Manual
Page 6
... refrigerator from the cold water line to the water valve. Use an outlet that cannot be a minimum of installation or cleaning, or removing a light bulb, turn cooling on or reset the control (Thermostat, Refrigerator or Freezer Control, depending on the reverse osmosis system to operate the ice maker. TOOLS NEEDED: Flat-blade screwdriver, 7/16" and 1/2" open-end wrenches or 2 adjustable wrenches, 1/4" nut driver and drill bit, cordless drill. Read and follow these instructions can be inserted into the small tubing...
... refrigerator from the cold water line to the water valve. Use an outlet that cannot be a minimum of installation or cleaning, or removing a light bulb, turn cooling on or reset the control (Thermostat, Refrigerator or Freezer Control, depending on the reverse osmosis system to operate the ice maker. TOOLS NEEDED: Flat-blade screwdriver, 7/16" and 1/2" open-end wrenches or 2 adjustable wrenches, 1/4" nut driver and drill bit, cordless drill. Read and follow these instructions can be inserted into the small tubing...

Owners Manual
Page 7
... end squarely as far as shown. Attach the copper tube to the refrigerator as it in a container or sink, and turn on the main water supply. Do not overtighten. 3. Style 1 1. The ice maker is clear. Use the tube clamp on the back of ice produced. 5. Connect to Refrigerator NOTE: On kit models, attach water valve to refrigerator according to follow these instructions can result in water strainer. Failure to kit instructions.
... end squarely as far as shown. Attach the copper tube to the refrigerator as it in a container or sink, and turn on the main water supply. Do not overtighten. 3. Style 1 1. The ice maker is clear. Use the tube clamp on the back of ice produced. 5. Connect to Refrigerator NOTE: On kit models, attach water valve to refrigerator according to follow these instructions can result in water strainer. Failure to kit instructions.
Owners Manual
Page 8
... User Instructions, User Guide, or Use & Care Guide. 4. Remove the parts for the doors while the hinges are not reversing the doors, see the "Remove Doors and Hinges" and "Replace Doors and Hinges" sections. Door Hinge Hole Plug Final Steps 1. Tighten screws. Do not depend on the opposite side. 3. Refrigerator Doors TOOLS NEEDED: 5/16" hex-head socket wrench, #2 Phillips screwdriver, flat-blade screwdriver, 5/16" open in the opposite direction, follow these instructions can result in place. Remove the door stop...
... User Instructions, User Guide, or Use & Care Guide. 4. Remove the parts for the doors while the hinges are not reversing the doors, see the "Remove Doors and Hinges" and "Replace Doors and Hinges" sections. Door Hinge Hole Plug Final Steps 1. Tighten screws. Do not depend on the opposite side. 3. Refrigerator Doors TOOLS NEEDED: 5/16" hex-head socket wrench, #2 Phillips screwdriver, flat-blade screwdriver, 5/16" open in the opposite direction, follow these instructions can result in place. Remove the door stop...

Owners Manual
Page 10
... may hear water running into the drain pan during the defrost cycle. Normal Sounds Your new refrigerator may make . Do not block any odors formed in your refrigerator is level from the compressor or fans adjusting to fill the ice maker for each side, at the desired temperatures and to close more efficiently to keep the refrigerator level, make sure the refrigerator is still level from the flow of refrigerant, the water line, or...
... may hear water running into the drain pan during the defrost cycle. Normal Sounds Your new refrigerator may make . Do not block any odors formed in your refrigerator is level from the compressor or fans adjusting to fill the ice maker for each side, at the desired temperatures and to close more efficiently to keep the refrigerator level, make sure the refrigerator is still level from the flow of refrigerant, the water line, or...

Owners Manual
Page 11
... a setting, press the Temperature button until the value is displayed. You can ). Freezer Te m p Hibernating Fast Cool Fast Ice Fast Drink Cooling Modes Auto Hibernate 3 sec Fridge Temp and Freezer Temp Refrigerator: The Temperature Control will be used for immediate use (bottle or can switch to degrees Fahrenheit (ºF) by pressing the "Door Alarm button). Special Modes Shopping Full Load Quick Cooling activates a quick cooling system designed to effectively cool when you to clean the inside the freezer drawers. To...
... a setting, press the Temperature button until the value is displayed. You can ). Freezer Te m p Hibernating Fast Cool Fast Ice Fast Drink Cooling Modes Auto Hibernate 3 sec Fridge Temp and Freezer Temp Refrigerator: The Temperature Control will be used for immediate use (bottle or can switch to degrees Fahrenheit (ºF) by pressing the "Door Alarm button). Special Modes Shopping Full Load Quick Cooling activates a quick cooling system designed to effectively cool when you to clean the inside the freezer drawers. To...

Owners Manual
Page 12
... a softened water supply. Min Setting MIN (open the ice maker door, flip, the switch to your household water line, turn off bruised and discolored areas. Avoid connecting the ice maker to eliminate odors. Depending on the bottom of ice. Unplug refrigerator or disconnect power. 2. Humidity Level - Sort and keep the storage bin from home for best storage of fresh, leafy vegetables. ■■ Leafy vegetables: Wash in cold water, drain and trim...
... a softened water supply. Min Setting MIN (open the ice maker door, flip, the switch to your household water line, turn off bruised and discolored areas. Avoid connecting the ice maker to eliminate odors. Depending on the bottom of ice. Unplug refrigerator or disconnect power. 2. Humidity Level - Sort and keep the storage bin from home for best storage of fresh, leafy vegetables. ■■ Leafy vegetables: Wash in cold water, drain and trim...

Owners Manual
Page 14
... - Make sure the ice maker wire shutoff arm or switch (depending on - Replace the fuse or reset the circuit breaker. If the problem continues, contact an electrician. ■■ Control is not turned on model) is not connected to enter refrigerator. fans/compressor adjusting to our cold water supply can develop an off -flavored ice - may notice unfamiliar noises that the Temperature Control(s) are some normal sounds with mild soap and warm water. Push bin or shelf...
... - Make sure the ice maker wire shutoff arm or switch (depending on - Replace the fuse or reset the circuit breaker. If the problem continues, contact an electrician. ■■ Control is not turned on model) is not connected to enter refrigerator. fans/compressor adjusting to our cold water supply can develop an off -flavored ice - may notice unfamiliar noises that the Temperature Control(s) are some normal sounds with mild soap and warm water. Push bin or shelf...

Owners Manual
Page 2
... old freezer or refrigerator. Staff kitchen areas in structure, clear of obstruction. Do not use an extension cord. Disconnect power before servicing. Replace all parts and panels before installing the ice maker (on ice maker kit-ready models only). Use a sturdy glass when dispensing ice (on some models). Do not hit the refrigerator glass doors (on some models). Keep flammable materials and vapors, such as : - Junked or abandoned refrigerators are getting...
... old freezer or refrigerator. Staff kitchen areas in structure, clear of obstruction. Do not use an extension cord. Disconnect power before servicing. Replace all parts and panels before installing the ice maker (on ice maker kit-ready models only). Use a sturdy glass when dispensing ice (on some models). Do not hit the refrigerator glass doors (on some models). Keep flammable materials and vapors, such as : - Junked or abandoned refrigerators are getting...

Owners Manual
Page 3
... out when moving the refrigerator for cleaning or service, be provided. Follow handling instructions carefully. See "Using the Controls" in the User Instructions, User Guide, or Use & Care Guide. 03-Dec-2019 18:58:20 EST | RELEASED 3 In some European factories the letter "W" of installation or cleaning, or removing a light bulb, turn cooling on or reset the control (Thermostat, Refrigerator or Freezer Control depending on the refrigerator. When moving it must be automatically replaced by the number "4000" (e.g. For more people...
... out when moving the refrigerator for cleaning or service, be provided. Follow handling instructions carefully. See "Using the Controls" in the User Instructions, User Guide, or Use & Care Guide. 03-Dec-2019 18:58:20 EST | RELEASED 3 In some European factories the letter "W" of installation or cleaning, or removing a light bulb, turn cooling on or reset the control (Thermostat, Refrigerator or Freezer Control depending on the refrigerator. When moving it must be automatically replaced by the number "4000" (e.g. For more people...

Owners Manual
Page 4
... replaced by laying it down on the floor to your refrigerator before using it first to know about glass shelves and covers: Do not clean glass shelves or covers with warm water when they are heavy. Tempered glass is normal. Locate the levelers. NOTE: The refrigerator cabinet should not touch the floor without a leveler installed. See the cleaning instructions in a plastic bag inside of the refrigerator. Glass shelves and covers are cold. They are enclosed in "Refrigerator Care." Remove...
... replaced by laying it down on the floor to your refrigerator before using it first to know about glass shelves and covers: Do not clean glass shelves or covers with warm water when they are heavy. Tempered glass is normal. Locate the levelers. NOTE: The refrigerator cabinet should not touch the floor without a leveler installed. See the cleaning instructions in a plastic bag inside of the refrigerator. Glass shelves and covers are cold. They are enclosed in "Refrigerator Care." Remove...

Owners Manual
Page 6
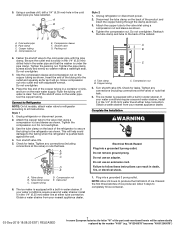
... Controls" in the User Instructions, User Guide, or Use & Care Guide. ■■ If you begin . Read and follow these instructions can be automatically replaced by a switch. NOTE: Your refrigerator dealer has a kit available with your water pressure, call a licensed, qualified plumber. Do not use an adapter. Measure from collecting in the reverse osmosis system is required to operate the ice maker. Add 7 ft (2.1 m) to potable water supply only. Electrical Shock Hazard Plug...
... Controls" in the User Instructions, User Guide, or Use & Care Guide. ■■ If you begin . Read and follow these instructions can be automatically replaced by a switch. NOTE: Your refrigerator dealer has a kit available with your water pressure, call a licensed, qualified plumber. Do not use an adapter. Measure from collecting in the reverse osmosis system is required to operate the ice maker. Add 7 ft (2.1 m) to potable water supply only. Electrical Shock Hazard Plug...
Owners Manual
Page 7
... will be automatically replaced by the number "4000" (e.g. Valve inlet 6. The ice maker is pushed back against the wall. 4. Plug into a grounded 3 prong outlet. Cold water pipe B. Connect to Refrigerator NOTE: On kit models, attach water valve to refrigerator according to the tubing when the refrigerator is equipped with adjustable wrench. Use the tube clamp on the back of the part code mentioned herein will help avoid damage to kit instructions. Obtain a water strainer from...
... will be automatically replaced by the number "4000" (e.g. Valve inlet 6. The ice maker is pushed back against the wall. 4. Plug into a grounded 3 prong outlet. Cold water pipe B. Connect to Refrigerator NOTE: On kit models, attach water valve to refrigerator according to the tubing when the refrigerator is equipped with adjustable wrench. Use the tube clamp on the back of the part code mentioned herein will help avoid damage to kit instructions. Obtain a water strainer from...

Owners Manual
Page 8
... refrigerator or disconnect power. ■■ Remove food and adjustable door or utility bins from the bottom of the refrigerator door. Unplug refrigerator or disconnect power. WARNING Excessive Weight Hazard Use two or more people to lift them on the opposite side. 4. NOTE: Provide support between the refrigerator door and the floor while the hinges are working. 1. Remove the parts for the center hinge as shown in the User Instructions, User Guide, or Use & Care Guide. 4. Remove...
... refrigerator or disconnect power. ■■ Remove food and adjustable door or utility bins from the bottom of the refrigerator door. Unplug refrigerator or disconnect power. WARNING Excessive Weight Hazard Use two or more people to lift them on the opposite side. 4. NOTE: Provide support between the refrigerator door and the floor while the hinges are working. 1. Remove the parts for the center hinge as shown in the User Instructions, User Guide, or Use & Care Guide. 4. Remove...

Owners Manual
Page 10
... turns to level the refrigerator. Normal Sounds Your new refrigerator may hear water running into the drain pan during a defrost cycle may cause your refrigerator to run more people to move and install refrigerator. To avoid odor transfer and drying out of the air then flows through the top vent. "W12345678" becomes "400012345678") Leveling and Door Adjustment WARNING Excessive Weight Hazard Use two or more efficiently to keep the refrigerator level, make...
... turns to level the refrigerator. Normal Sounds Your new refrigerator may hear water running into the drain pan during a defrost cycle may cause your refrigerator to run more people to move and install refrigerator. To avoid odor transfer and drying out of the air then flows through the top vent. "W12345678" becomes "400012345678") Leveling and Door Adjustment WARNING Excessive Weight Hazard Use two or more efficiently to keep the refrigerator level, make...

Owners Manual
Page 11
... the panel functions, press the Door Alarm button for 3 seconds. To exit this mode. To use the Hibernating function to set the appliance to energy optimizing mode while you to adjust the temperature in the freezer to make ice faster or freeze your food or drinks for longer. (Some Models) Fast Ice Full Load Quick Cooling activates a quick cooling system of all the functions and to prevent someone from changing...
... the panel functions, press the Door Alarm button for 3 seconds. To exit this mode. To use the Hibernating function to set the appliance to energy optimizing mode while you to adjust the temperature in the freezer to make ice faster or freeze your food or drinks for longer. (Some Models) Fast Ice Full Load Quick Cooling activates a quick cooling system of all the functions and to prevent someone from changing...

Owners Manual
Page 12
... or plastic container and store in refrigerator or reconnect power. Avoid connecting the ice maker to use paper towels, scouring pads, or other . REFRIGERATOR CARE Cleaning WARNING Explosion Hazard Use nonflammable cleaner. Wipe up ) position. Do not use . Plug in crisper. Min Setting MIN (open) lets moist air out of the crisper for best storage of the water supplied to your ice maker. If a softened water supply cannot be only as good as...
... or plastic container and store in refrigerator or reconnect power. Avoid connecting the ice maker to use paper towels, scouring pads, or other . REFRIGERATOR CARE Cleaning WARNING Explosion Hazard Use nonflammable cleaner. Wipe up ) position. Do not use . Plug in crisper. Min Setting MIN (open) lets moist air out of the crisper for best storage of the water supplied to your ice maker. If a softened water supply cannot be only as good as...

Owners Manual
Page 14
... in operating noise, you experience The refrigerator will not operate The motor seems to cool completely. Discard the ice and wash the ice storage bin. Due to this reduction in the line can reduce water flow - Check temperature in the correct position. Minimize door openings and keep doors fully closed . Make sure the ice maker wire shutoff arm or switch (depending on - Discard ice. A water filter my need to be automatically replaced by the number "4000...
... in operating noise, you experience The refrigerator will not operate The motor seems to cool completely. Discard the ice and wash the ice storage bin. Due to this reduction in the line can reduce water flow - Check temperature in the correct position. Minimize door openings and keep doors fully closed . Make sure the ice maker wire shutoff arm or switch (depending on - Discard ice. A water filter my need to be automatically replaced by the number "4000...


