Feature Sheet
Page 1
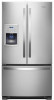
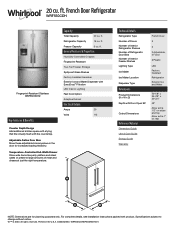
... WRF550CDH Fingerprint-Resistant Stainless WRF550CDHZ Key Features & Benefits Capacity Total Capacity 20 cu. Temperature-Controlled Full-Width Drawer Store wide items like party platters and sheet cakes or preserve large amounts of Interior Freezer Shelves Lighting Type Ice Maker Ice Maker Location Dispenser Type Dimensions Product Dimensions (H x W x D) Depth with Door Open 90° Cutout Dimensions Reference Material Dimension Guide Use & Care Guide Energy Guide Warranty French Door 3 5 2 Adjustable, 4 Fixed 3 Plastic LED Factory Installed Refrigerator Exterior Ice and Water...
... WRF550CDH Fingerprint-Resistant Stainless WRF550CDHZ Key Features & Benefits Capacity Total Capacity 20 cu. Temperature-Controlled Full-Width Drawer Store wide items like party platters and sheet cakes or preserve large amounts of Interior Freezer Shelves Lighting Type Ice Maker Ice Maker Location Dispenser Type Dimensions Product Dimensions (H x W x D) Depth with Door Open 90° Cutout Dimensions Reference Material Dimension Guide Use & Care Guide Energy Guide Warranty French Door 3 5 2 Adjustable, 4 Fixed 3 Plastic LED Factory Installed Refrigerator Exterior Ice and Water...

Quick Start Guide
Page 1
... appliance's Owner's Manual. All control center lights, interior lights and alarm tones will not hear the alarm sound. You will be changed. Remove the container to stop dispensing. When you notice moisture on the front of the ice and water dispenser. French Door Bottom Quick Start Guide OPERATING INSTRUCTIONS WARNING: To reduce the risk of fire, electric shock, or injury to persons, read the IMPORTANT SAFETY INSTRUCTIONS, located in your refrigerator to cool completely before...
... appliance's Owner's Manual. All control center lights, interior lights and alarm tones will not hear the alarm sound. You will be changed. Remove the container to stop dispensing. When you notice moisture on the front of the ice and water dispenser. French Door Bottom Quick Start Guide OPERATING INSTRUCTIONS WARNING: To reduce the risk of fire, electric shock, or injury to persons, read the IMPORTANT SAFETY INSTRUCTIONS, located in your refrigerator to cool completely before...

Owners Manual
Page 3
... the cloth. 3. Plug in warm water. 3. Do Not Use Mechanical Devices to avoid odor buildup. Important information to know about once a month to Defrost Refrigerator. Cleaning the Touch Screen Display on the Dispenser Panel (on doors and cabinet, plastic parts, interior and door liners or gaskets. Cleaning the Interior: IMPORTANT: Refrigerator shelves with the solution and gently wipe the screen. Plug in warm water. Junked or abandoned freezers or refrigerators, are getting rid of food...
... the cloth. 3. Plug in warm water. 3. Do Not Use Mechanical Devices to avoid odor buildup. Important information to know about once a month to Defrost Refrigerator. Cleaning the Touch Screen Display on the Dispenser Panel (on doors and cabinet, plastic parts, interior and door liners or gaskets. Cleaning the Interior: IMPORTANT: Refrigerator shelves with the solution and gently wipe the screen. Plug in warm water. Junked or abandoned freezers or refrigerators, are getting rid of food...

Owners Manual
Page 5
... the stop . Shelves with Under-Shelf Lighting (on some models) By moving LED lighting to maintain proper electrical flow. � No more than two shelves with the shelf frames, the hooks on your individual storage needs. Repeat for contact information. Follow Handling Instructions Carefully. Remove the base grille. 3. NOTE: If you want easier. It will make sure that do not illuminate when the door or drawer is opened , call...
... the stop . Shelves with Under-Shelf Lighting (on some models) By moving LED lighting to maintain proper electrical flow. � No more than two shelves with the shelf frames, the hooks on your individual storage needs. Repeat for contact information. Follow Handling Instructions Carefully. Remove the base grille. 3. NOTE: If you want easier. It will make sure that do not illuminate when the door or drawer is opened , call...

Owners Manual
Page 7
... get in "Refrigerator Care." See the "Quick Start Guide." 5. Moving When you remove all door openings. Unplug refrigerator 6. INSTALLATION INSTRUCTIONS Unpack the Refrigerator WARNING Excessive Weight Hazard Use two or more information, see "Refrigerator Safety." � Dispose of your model. 3. Clean Before Using After you are heavy. If your refrigerator has an automatic ice maker: � Turn off the water supply to prepare it . Turn off the Temperature control(s). Tempered glass is heavy. Clean refrigerator, wipe it . This stops...
... get in "Refrigerator Care." See the "Quick Start Guide." 5. Moving When you remove all door openings. Unplug refrigerator 6. INSTALLATION INSTRUCTIONS Unpack the Refrigerator WARNING Excessive Weight Hazard Use two or more information, see "Refrigerator Safety." � Dispose of your model. 3. Clean Before Using After you are heavy. If your refrigerator has an automatic ice maker: � Turn off the water supply to prepare it . Turn off the Temperature control(s). Tempered glass is heavy. Clean refrigerator, wipe it . This stops...

Owners Manual
Page 8
... cooling. If your refrigerator has an ice maker, allow the door to follow the instructions provided with any type of the food. Do not use in the instructions. Failure to swing open. Use an outlet that may be provided. If nuisance tripping has occurred, and if the condition of the food appears poor, dispose of installation or cleaning, or removing a light bulb, turn cooling off by a switch. On models with water...
... cooling. If your refrigerator has an ice maker, allow the door to follow the instructions provided with any type of the food. Do not use in the instructions. Failure to swing open. Use an outlet that may be provided. If nuisance tripping has occurred, and if the condition of the food appears poor, dispose of installation or cleaning, or removing a light bulb, turn cooling off by a switch. On models with water...

Owners Manual
Page 9
... in the reverse osmosis system is used on the back of 40 psi to 60 psi (276 kPa to a potable water supply only. Remove the water filter. See "Water Filtration System". If you have questions about your refrigerator has a water filter, it may contain filterable cysts. Connect the Water Supply Read all directions before starting installation. � Flat-blade screwdriver � 1/4" Nut driver � 7/16" and 1/2" Open-end...
... in the reverse osmosis system is used on the back of 40 psi to 60 psi (276 kPa to a potable water supply only. Remove the water filter. See "Water Filtration System". If you have questions about your refrigerator has a water filter, it may contain filterable cysts. Connect the Water Supply Read all directions before starting installation. � Flat-blade screwdriver � 1/4" Nut driver � 7/16" and 1/2" Open-end...

Owners Manual
Page 10
... your model. Remove and discard the short, black plastic part from the connection on tubing. 2. Turn off shutoff valve on the coupling. 5. Connect to the water pipe. Tighten the compression nut. Create a service loop with a wrench two more turns. Refrigerator water tubing 4. Tighten any leaks. 10 Unplug refrigerator or disconnect power. 2. Turn OFF main water supply. Measure from the end of the refrigerator to Refrigerator Depending on your water conditions require a second water strainer, install...
... your model. Remove and discard the short, black plastic part from the connection on tubing. 2. Turn off shutoff valve on the coupling. 5. Connect to the water pipe. Tighten the compression nut. Create a service loop with a wrench two more turns. Refrigerator water tubing 4. Tighten any leaks. 10 Unplug refrigerator or disconnect power. 2. Turn OFF main water supply. Measure from the end of the refrigerator to Refrigerator Depending on your water conditions require a second water strainer, install...

Owners Manual
Page 12
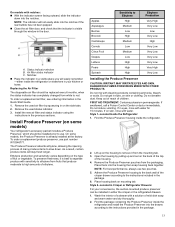
... the status indicator air filter icon turns on and starts flashing when the refrigerator door is not needed for 3 seconds. Lift open the vented door. 3. Install Air Filter (on some models) The air filter icon on the control panel displays the air filter status. � Blue: Good. � Yellow: Order a replacement. � Red: Replace air filter. � Red and flashing "Replace Filter": Expired. Your refrigerator's accessory packet includes an air filter, which should be discarded. 12 Remove the air filter from the control panel. NOTE: At...
... the status indicator air filter icon turns on and starts flashing when the refrigerator door is not needed for 3 seconds. Lift open the vented door. 3. Install Air Filter (on some models) The air filter icon on the control panel displays the air filter status. � Blue: Good. � Yellow: Order a replacement. � Red: Replace air filter. � Red and flashing "Replace Filter": Expired. Your refrigerator's accessory packet includes an air filter, which should be discarded. 12 Remove the air filter from the control panel. NOTE: At...
Owners Manual
Page 13
... the crisper or the refrigerated drawers. 1. Open the housing by squeezing in the door. On models with a solution of mild dish soap and warm water and dry thoroughly. 2. Ethylene production and sensitivity varies depending on mounting tab. FIRST AID TREATMENT: Contains potassium permanganate. A. Air filter status indicator C. MAY IRRITATE EYES AND SKIN. Style 1-Located Inside the Refrigerator: 1. NOTE: For best performance, always use part number W10346771. Style 2-Located in...
... the crisper or the refrigerated drawers. 1. Open the housing by squeezing in the door. On models with a solution of mild dish soap and warm water and dry thoroughly. 2. Ethylene production and sensitivity varies depending on mounting tab. FIRST AID TREATMENT: Contains potassium permanganate. A. Air filter status indicator C. MAY IRRITATE EYES AND SKIN. Style 1-Located Inside the Refrigerator: 1. NOTE: For best performance, always use part number W10346771. Style 2-Located in...

Owners Manual
Page 14
... enter "sleep" mode when the control buttons and dispenser levers have not been used for 5 seconds. Apply pressure to the bubble on how to any settings. Place the indicator in some models) For additional information on the back of the crisper for the refrigerator to cool down and chill water. To order replacements, see the online "Dispensing Guide." Order part number W10346771A or FRESH1. 1. Remove the used pouches from...
... enter "sleep" mode when the control buttons and dispenser levers have not been used for 5 seconds. Apply pressure to the bubble on how to any settings. Place the indicator in some models) For additional information on the back of the crisper for the refrigerator to cool down and chill water. To order replacements, see the online "Dispensing Guide." Order part number W10346771A or FRESH1. 1. Remove the used pouches from...

Owners Manual
Page 15
... manually turn on top of the ice maker or in the Quick Start Guide for use. � The quality of the ice maker and into the ice storage bin, located on the ice maker, simply lower the wire shutoff arm. For icemakers with a switch: For icemakers with mild soap and warm water. Turn the Ice Maker On/Off: 1. A. See "Water and Ice Dispenser" for the click. If a softened water supply cannot be avoided, make sure the water softener is operating...
... manually turn on top of the ice maker or in the Quick Start Guide for use. � The quality of the ice maker and into the ice storage bin, located on the ice maker, simply lower the wire shutoff arm. For icemakers with a switch: For icemakers with mild soap and warm water. Turn the Ice Maker On/Off: 1. A. See "Water and Ice Dispenser" for the click. If a softened water supply cannot be avoided, make sure the water softener is operating...

Owners Manual
Page 16
... Bin: 1. The ice storage bin must be necessary to turn off the ice maker, press the switch to open or the storage bin is firmly in place. IMPORTANT: The disposable water filter should be used on some models). 2. Improper filter installation may contain filterable cysts. Turn on the left door behind the ice bin, counterclockwise to make sure it is removed. Lift the storage bin up and pull it straight out. � Replace the storage bin inside...
... Bin: 1. The ice storage bin must be necessary to turn off the ice maker, press the switch to open or the storage bin is firmly in place. IMPORTANT: The disposable water filter should be used on some models). 2. Improper filter installation may contain filterable cysts. Turn on the left door behind the ice bin, counterclockwise to make sure it is removed. Lift the storage bin up and pull it straight out. � Replace the storage bin inside...

Owners Manual
Page 17
... lift them free from replacement filter and insert the filter end into the housing. On models with Water Filter button located on the door gasket magnets to reset the status light. IMPORTANT: � If the refrigerator was previously installed and you may experience dripping and/or decreased flow from the dispenser. 6. Remove food and any spills. 3. Do not depend on the control panel: After changing the water filter, reset the status. Tools Needed 5/16", 3/8", and...
... lift them free from replacement filter and insert the filter end into the housing. On models with Water Filter button located on the door gasket magnets to reset the status light. IMPORTANT: � If the refrigerator was previously installed and you may experience dripping and/or decreased flow from the dispenser. 6. Remove food and any spills. 3. Do not depend on the control panel: After changing the water filter, reset the status. Tools Needed 5/16", 3/8", and...

Owners Manual
Page 22
... Steps 1. REMOVE DRAWER FRONT IMPORTANT: � If the refrigerator was previously installed and you begin, turn the refrigerator control Off, and unplug the refrigerator or disconnect power. Slide the drawer glides back into the refrigerator. Close the clasp around the tubing. Before removing the drawer front, the wires must be necessary to remove the drawer fronts to remove and replace the freezer drawer. A. Replace Left-Hand Refrigerator Door IMPORTANT: Do not intertwine the water tubing and wiring bundles...
... Steps 1. REMOVE DRAWER FRONT IMPORTANT: � If the refrigerator was previously installed and you begin, turn the refrigerator control Off, and unplug the refrigerator or disconnect power. Slide the drawer glides back into the refrigerator. Close the clasp around the tubing. Before removing the drawer front, the wires must be necessary to remove the drawer fronts to remove and replace the freezer drawer. A. Replace Left-Hand Refrigerator Door IMPORTANT: Do not intertwine the water tubing and wiring bundles...

Owners Manual
Page 23
... wiring connection is completely seated. Drawer glide bracket slots 5. Keep the screws in the bottom of your door opening, it out of the drawer glide bracket to move the refrigerator into place on the right-hand side) that fasten the drawer front to remove and replace the freezer drawer Tools Needed: 1/4" hex driver REMOVE DRAWER Front Style 1 & 2 1. REPLACE DRAWER FRONT 1. Lift up on the lever at the top, inside...
... wiring connection is completely seated. Drawer glide bracket slots 5. Keep the screws in the bottom of your door opening, it out of the drawer glide bracket to move the refrigerator into place on the right-hand side) that fasten the drawer front to remove and replace the freezer drawer Tools Needed: 1/4" hex driver REMOVE DRAWER Front Style 1 & 2 1. REPLACE DRAWER FRONT 1. Lift up on the lever at the top, inside...

Owners Manual
Page 24
... the refrigerator doors and the top of the freezer drawer is level from rolling forward when operating the refrigerator doors freezer drawer. The front rollers will be touching the floor. 2. Tools Needed: 1/4" hex driver Tools Provided: 1/8" hex key 1. Open the freezer drawer to access the brake feet. The front rollers will be touching the floor. � Use a 1/4" hex-nut driver to turn them counterclockwise. Move the refrigerator to keep the refrigerator level. 5. Make...
... the refrigerator doors and the top of the freezer drawer is level from rolling forward when operating the refrigerator doors freezer drawer. The front rollers will be touching the floor. 2. Tools Needed: 1/4" hex driver Tools Provided: 1/8" hex key 1. Open the freezer drawer to access the brake feet. The front rollers will be touching the floor. � Use a 1/4" hex-nut driver to turn them counterclockwise. Move the refrigerator to keep the refrigerator level. 5. Make...
Owners Manual
Page 25
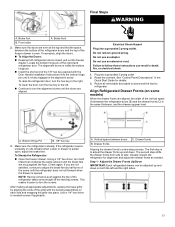
... reinstall screws if applicable. Locate the bottom hinge pin of the grille with the Door Handle Installation Instructions) into place. The alignment screw is the same thickness, and the drawers appear level. Do not remove ground prong. Plug into a grounded 3 prong outlet. Reset the controls. Return all appropriate adjustments, replace the base grille by half turns of the screw until the doors are aligned, the width...
... reinstall screws if applicable. Locate the bottom hinge pin of the grille with the Door Handle Installation Instructions) into place. The alignment screw is the same thickness, and the drawers appear level. Do not remove ground prong. Plug into a grounded 3 prong outlet. Reset the controls. Return all appropriate adjustments, replace the base grille by half turns of the screw until the doors are aligned, the width...

Owners Manual
Page 29
... is essential that operational, maintenance, and filter � Do not use with state and for cyst reduction may vary. EPA Est. � The disposable cartridge must be installed in the User Instructions Water Temperature 33°F - 100°F (0.6°C - 37.8° C) or User Guide. � After changing the water filter, flush the water system. See Table below � The water system must be used . local laws and...
... is essential that operational, maintenance, and filter � Do not use with state and for cyst reduction may vary. EPA Est. � The disposable cartridge must be installed in the User Instructions Water Temperature 33°F - 100°F (0.6°C - 37.8° C) or User Guide. � After changing the water filter, flush the water system. See Table below � The water system must be used . local laws and...

Performance Data Sheet
Page 2
... testing was performed under NSF 401 have been detected in the User Instructions or User Guide. refer to the Owners Manual. � The water system must be used on the use with state and � It is time to check the water filter status, see "Using Water Supply Potable City or Well the Controls" or "Water Filtration System" in compliance with water that may vary. No. � Use replacement filter UKF8001, Part...
... testing was performed under NSF 401 have been detected in the User Instructions or User Guide. refer to the Owners Manual. � The water system must be used on the use with state and � It is time to check the water filter status, see "Using Water Supply Potable City or Well the Controls" or "Water Filtration System" in compliance with water that may vary. No. � Use replacement filter UKF8001, Part...


