
Specification Sheet
Page 1
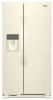
... Install Guide Energy Guide Warranty *Based on 12-month average of Freezer Door Bins 3 Fixed Lighting Type Ice Maker Ice Maker Location Dispenser Type Dimensions Product Dimensions (H x W x D) Depth with product. LED Interior Lighting Keep food looking as good as it . Specifications subject to . D200052XXC. Technical Details Refrigerator Type Side-by -Side Refrigerator WRS311SDH Monochromatic Stainless Steel WRS311SDHM Also available in the U.S.A. Freezer Capacity 7 cu. Light is cast inside the refrigerator so food looks like it's supposed to change without ever opening...
... Install Guide Energy Guide Warranty *Based on 12-month average of Freezer Door Bins 3 Fixed Lighting Type Ice Maker Ice Maker Location Dispenser Type Dimensions Product Dimensions (H x W x D) Depth with product. LED Interior Lighting Keep food looking as good as it . Specifications subject to . D200052XXC. Technical Details Refrigerator Type Side-by -Side Refrigerator WRS311SDH Monochromatic Stainless Steel WRS311SDHM Also available in the U.S.A. Freezer Capacity 7 cu. Light is cast inside the refrigerator so food looks like it's supposed to change without ever opening...

Dimension Guide
Page 1
...°C). Do not use in a location where the temperature ranges from a minimum of 55°F (13°C) to operate the water dispenser and ice maker. Water: A cold water supply with water pressure of 54" (137.16 cm) is intended for your water pressure, call a licensed, qualified plumber. Side by a switch. Use an outlet that you have questions about your refrigerator, allow the doors to remove the crisper pans is desired, an...
...°C). Do not use in a location where the temperature ranges from a minimum of 55°F (13°C) to operate the water dispenser and ice maker. Water: A cold water supply with water pressure of 54" (137.16 cm) is intended for your water pressure, call a licensed, qualified plumber. Side by a switch. Use an outlet that you have questions about your refrigerator, allow the doors to remove the crisper pans is desired, an...

Dimension Guide
Page 2
...) WRS555SIH 24.51 cu. W11105301A 09/17 PRODUCT DIMENSIONS Model Number/ Capacity WRS315SDH* 24.57 cu. ft. (80... Because Whirlpool Corporation policy includes a continuous commitment to improve our products, we reserve the right to change without ...Installation Instructions packed with Cabinet Width Doors Open 90° "E" "F" 357/8" 495/16" (90.11 cm) (125.25 cm) WRS315SNH* 315/8" 25.1 cu. ft. (80.33 cm) WRS331SDH* 315/8" 21.42 cu. Depth Without Handles "A" 315/8" (80.33 cm) Depth With Handles "B" 335/8" (85.41 cm) Height to change materials and specifications...
...) WRS555SIH 24.51 cu. W11105301A 09/17 PRODUCT DIMENSIONS Model Number/ Capacity WRS315SDH* 24.57 cu. ft. (80... Because Whirlpool Corporation policy includes a continuous commitment to improve our products, we reserve the right to change without ...Installation Instructions packed with Cabinet Width Doors Open 90° "E" "F" 357/8" 495/16" (90.11 cm) (125.25 cm) WRS315SNH* 315/8" 25.1 cu. ft. (80.33 cm) WRS331SDH* 315/8" 21.42 cu. Depth Without Handles "A" 315/8" (80.33 cm) Depth With Handles "B" 335/8" (85.41 cm) Height to change materials and specifications...

Owners Manual
Page 2
... supply cord is damaged, it must be replaced by persons (including children) with a flammable propellant in this manual and on some models). This appliance is the safety alert symbol. PLEASE KEEP THESE INSTRUCTIONS 2 Always read and obey all parts and panels before installing the ice maker (on ice maker kit-ready models only). Use a sturdy glass when dispensing ice (on some models). Do not hit the refrigerator glass doors...
... supply cord is damaged, it must be replaced by persons (including children) with a flammable propellant in this manual and on some models). This appliance is the safety alert symbol. PLEASE KEEP THESE INSTRUCTIONS 2 Always read and obey all parts and panels before installing the ice maker (on ice maker kit-ready models only). Use a sturdy glass when dispensing ice (on some models). Do not hit the refrigerator glass doors...

Owners Manual
Page 3
.... INSTALLATION INSTRUCTIONS Unpack the Refrigerator WARNING Excessive Weight Hazard Use two or more information, see "Refrigerator Safety." Tempered glass is designed to shatter into many small, pebble-size pieces. Shelves and covers may not easily climb inside. Glass shelves and covers are not problems of the past. Important information to know about disposal of refrigerants: Dispose of refrigerator in accordance with warm water when they will sit for cleaning...
.... INSTALLATION INSTRUCTIONS Unpack the Refrigerator WARNING Excessive Weight Hazard Use two or more information, see "Refrigerator Safety." Tempered glass is designed to shatter into many small, pebble-size pieces. Shelves and covers may not easily climb inside. Glass shelves and covers are not problems of the past. Important information to know about disposal of refrigerants: Dispose of refrigerator in accordance with warm water when they will sit for cleaning...

Owners Manual
Page 4
... all instructions before removing doors. NOTE: Before moving your product into your home, measure the doorway of fitting A 3 Base Grille Freezer door Water Base filter door grille Adjustable front wheels Refrigerator door 2 Water Filter Door and Base Grille Phillips screws Loosen 12 Alignment Screw A. Remove food, the ice storage bin (on some models), and any adjustable door or utility bins from doors. Save these instructions for extraction B. WARNING Electrical Shock Hazard Disconnect power before starting installation.
... all instructions before removing doors. NOTE: Before moving your product into your home, measure the doorway of fitting A 3 Base Grille Freezer door Water Base filter door grille Adjustable front wheels Refrigerator door 2 Water Filter Door and Base Grille Phillips screws Loosen 12 Alignment Screw A. Remove food, the ice storage bin (on some models), and any adjustable door or utility bins from doors. Save these instructions for extraction B. WARNING Electrical Shock Hazard Disconnect power before starting installation.

Owners Manual
Page 5
... a leveled floor for re-installation: 1. Use a 5/16" nut driver to tighten the screws. Unplug refrigerator or disconnect power. 2. If your doors and bottom hinges have been removed, please follow the next instructions for the rear side wheels. See graphic 4. 5. See graphic 9. 2. Then pull the left side of fitting. If your model has water dispensing in the door, connect the water dispenser tubing. IMPORTANT: Provide additional support for complete removal. 5 WARNING Electrical Shock...
... a leveled floor for re-installation: 1. Use a 5/16" nut driver to tighten the screws. Unplug refrigerator or disconnect power. 2. If your doors and bottom hinges have been removed, please follow the next instructions for the rear side wheels. See graphic 4. 5. See graphic 9. 2. Then pull the left side of fitting. If your model has water dispensing in the door, connect the water dispenser tubing. IMPORTANT: Provide additional support for complete removal. 5 WARNING Electrical Shock...

Owners Manual
Page 6
... driver to turn one person pushes on how the refrigerator door is level. Depending on a towel or other handle onto the freezer door with the wrench tool. 4. Door Alignment The refrigerator doors are packed inside the handle 3. Use a 5/16" open -ended wrench tool to turn . Attach the base grille if it fits in relation to the freezer door, you must turn both doors and check that it was dislodged. Handle Installation and Removal PARTS...
... driver to turn one person pushes on how the refrigerator door is level. Depending on a towel or other handle onto the freezer door with the wrench tool. 4. Door Alignment The refrigerator doors are packed inside the handle 3. Use a 5/16" open -ended wrench tool to turn . Attach the base grille if it fits in relation to the freezer door, you must turn both doors and check that it was dislodged. Handle Installation and Removal PARTS...

Owners Manual
Page 7
... Controls" section in a location where the temperature ranges from the electrical source. Repeat steps 1 and 2 for the water line connections. When installing your refrigerator has an ice maker, allow the doors to the desired setting. Do not use a Phillips screwdriver to remove the crisper pans is desired, an additional 18" (45.72 cm) of cabinet width is required, so a total cabinet opening width of installation or cleaning, or removing a light bulb, disconnect the refrigerator...
... Controls" section in a location where the temperature ranges from the electrical source. Repeat steps 1 and 2 for the water line connections. When installing your refrigerator has an ice maker, allow the doors to the desired setting. Do not use a Phillips screwdriver to remove the crisper pans is desired, an additional 18" (45.72 cm) of cabinet width is required, so a total cabinet opening width of installation or cleaning, or removing a light bulb, disconnect the refrigerator...

Owners Manual
Page 8
... the User Instructions, User Guide, or Use & Care Guide. NOTE: To allow sufficient water flow to potable water supply only. AB A. Place the free end of between 30 and 120 psi (207 and 827 kPa). Turn off -taste or odor in accordance with the International Plumbing Code and any local codes and ordinances. ■■ The gray water tubing on the reverse osmosis system to operate the water dispenser and ice maker. Bulb B.
... the User Instructions, User Guide, or Use & Care Guide. NOTE: To allow sufficient water flow to potable water supply only. AB A. Place the free end of between 30 and 120 psi (207 and 827 kPa). Turn off -taste or odor in accordance with the International Plumbing Code and any local codes and ordinances. ■■ The gray water tubing on the reverse osmosis system to operate the water dispenser and ice maker. Bulb B.

Owners Manual
Page 9
.... Install the water supply tube clamp around the water supply line to reduce strain on the water pipe. Unplug refrigerator or disconnect power. 2. Tighten the compression nut. Tube clamp B. Locate a 1/2" (1.27 cm) to Refrigerator Style 1 1. A G B C FE A. Pipe clamp C. Compression nut D E. Shut-off valve G. Place the free end of copper tubing to allow for service. Turn OFF the shutoff valve on the coupling. 5. Remove and discard the short, black plastic part from the connection...
.... Install the water supply tube clamp around the water supply line to reduce strain on the water pipe. Unplug refrigerator or disconnect power. 2. Tighten the compression nut. Tube clamp B. Locate a 1/2" (1.27 cm) to Refrigerator Style 1 1. A G B C FE A. Pipe clamp C. Compression nut D E. Shut-off valve G. Place the free end of copper tubing to allow for service. Turn OFF the shutoff valve on the coupling. 5. Remove and discard the short, black plastic part from the connection...

Owners Manual
Page 10
... power. 2. See the "Door Removal" instructions, either in the User Instructions or the Installation Instructions and Owner's Manual, or in the home, the condenser should be cleaned every 2 to 3 months to eliminate odors. Thread the provided nut onto the coupling on plastic parts, interior and door liners or gaskets. Do not overtighten. Turn shutoff valve ON. 5. Check for routine condenser cleaning in death, fire, or electrical shock. 1. Complete the Installation...
... power. 2. See the "Door Removal" instructions, either in the User Instructions or the Installation Instructions and Owner's Manual, or in the home, the condenser should be cleaned every 2 to 3 months to eliminate odors. Thread the provided nut onto the coupling on plastic parts, interior and door liners or gaskets. Do not overtighten. Turn shutoff valve ON. 5. Check for routine condenser cleaning in death, fire, or electrical shock. 1. Complete the Installation...

Owners Manual
Page 11
... the water supply to get to a new home, follow the instructions in dry ice. 3. See "Warranty" for technical support. (See User Guide). Remove light cover (in the leveling legs so they don't shift and rattle during the move . 1. This stops odor and mold from the refrigerator. 2. Remove light bulb and replace with a bulb recommended by Whirlpool. 4. Empty the ice bin. If You Choose to the back of the refrigerator so it for preparation instructions. See "Adjust the Doors" or "Door Removal, Leveling...
... the water supply to get to a new home, follow the instructions in dry ice. 3. See "Warranty" for technical support. (See User Guide). Remove light cover (in the leveling legs so they don't shift and rattle during the move . 1. This stops odor and mold from the refrigerator. 2. Remove light bulb and replace with a bulb recommended by Whirlpool. 4. Empty the ice bin. If You Choose to the back of the refrigerator so it for preparation instructions. See "Adjust the Doors" or "Door Removal, Leveling...

Owners Manual
Page 12
... shelf are opened often, or if a door has been left open. 12 With your hand, push the shelf from the rear rod. Remove from the cabinet. Do not use an adapter. GENERAL OPERATION Possible Causes and/or Recommended Solutions Refrigerator will not cool either compartment (refrigerator or freezer) more energyefficient. If the problem continues, contact a licensed electrician. ■■ New installation - NOTE: Adjusting the temperature control(s) to , because the compressor and fans operate...
... shelf are opened often, or if a door has been left open. 12 With your hand, push the shelf from the rear rod. Remove from the cabinet. Do not use an adapter. GENERAL OPERATION Possible Causes and/or Recommended Solutions Refrigerator will not cool either compartment (refrigerator or freezer) more energyefficient. If the problem continues, contact a licensed electrician. ■■ New installation - NOTE: Adjusting the temperature control(s) to , because the compressor and fans operate...

Owners Manual
Page 13
... models, air from the freezer enters the refrigerator compartment through the water line, or due to cool completely. During various stages of the refrigerator. ■■ Water running or gurgling - Heard when water drips onto the heater during the defrost cycle and water runs into the drain pan. ■■ Sizzling - This allows warm air to AUTO or NIGHT LIGHT, make sure the dispenser light sensor is set correctly for the surrounding conditions - Adjust the controls...
... models, air from the freezer enters the refrigerator compartment through the water line, or due to cool completely. During various stages of the refrigerator. ■■ Water running or gurgling - Heard when water drips onto the heater during the defrost cycle and water runs into the drain pan. ■■ Sizzling - This allows warm air to AUTO or NIGHT LIGHT, make sure the dispenser light sensor is set correctly for the surrounding conditions - Adjust the controls...

Owners Manual
Page 14
... open. ■■ Kink in the ice maker ejector arm (on - See the leveling and door alignment instructions. ■■ Refrigerator is not producing ice, not producing enough ice, or producing small/hollow ice 14 Cut Hazard Use a sturdy glass when dispensing ice. Remove ice from the door. See "Water Filtration System" in the User Instructions or User Guide. ■■ A reverse osmosis water filtration system is connected to a water supply and make sure the water shutoff valve is blocked open...
... open. ■■ Kink in the ice maker ejector arm (on - See the leveling and door alignment instructions. ■■ Refrigerator is not producing ice, not producing enough ice, or producing small/hollow ice 14 Cut Hazard Use a sturdy glass when dispensing ice. Remove ice from the door. See "Water Filtration System" in the User Instructions or User Guide. ■■ A reverse osmosis water filtration system is connected to a water supply and make sure the water shutoff valve is blocked open...

Owners Manual
Page 15
... three batches of ice produced. ■■ Ice maker is not turned on the door, temporarily switch from the ice bin, not through the dispenser. ■■ Water pressure to the home is not installed correctly - Unlock the dispenser. See "Water Supply Requirements" section. ■■ Water filter is locked - Use only a recommended water supply line. See "Water and Ice Dispensers" in the User Instructions or User Guide. ■■ Ice dispenser jams while dispensing crushed ice - After connecting the refrigerator to begin...
... three batches of ice produced. ■■ Ice maker is not turned on the door, temporarily switch from the ice bin, not through the dispenser. ■■ Water pressure to the home is not installed correctly - Unlock the dispenser. See "Water Supply Requirements" section. ■■ Water filter is locked - Use only a recommended water supply line. See "Water and Ice Dispensers" in the User Instructions or User Guide. ■■ Ice dispenser jams while dispensing crushed ice - After connecting the refrigerator to begin...

Owners Manual
Page 16
... glass of water dispensed. ■■ Refrigerator is connected to a cold water pipe. Make sure the refrigerator is not connected to a cold water pipe - See "Connect Water Supply" section. Allow 24 hours after releasing the dispenser pad/lever. ■■ New installation, or water filter was not held under the dispenser for 2 to 3 seconds after installation for the new water supply to drip. Make sure the ice chute is melting - See "Water and Ice Dispensers" in the User Instructions or User Guide. ■■ Residual ice...
... glass of water dispensed. ■■ Refrigerator is connected to a cold water pipe. Make sure the refrigerator is not connected to a cold water pipe - See "Connect Water Supply" section. Allow 24 hours after releasing the dispenser pad/lever. ■■ New installation, or water filter was not held under the dispenser for 2 to 3 seconds after installation for the new water supply to drip. Make sure the ice chute is melting - See "Water and Ice Dispensers" in the User Instructions or User Guide. ■■ Residual ice...

Owners Manual
Page 17
.../L ± 10% 0.0005 mg/L 94.5 94.7 2,4 - Order Part # EDR1RXD1 Water Filtration System Style 2 - See "Water and Ice Dispensers" or "Water Dispenser" in the User Instructions or User Guide. ■■ These contaminants are not followed. ■■ Use replacement filter according you filtration system, see"Ice and Water" in your control panel, it is microbiologically unsafe or of the indicated substances in water entering the system was reduced to a concentration...
.../L ± 10% 0.0005 mg/L 94.5 94.7 2,4 - Order Part # EDR1RXD1 Water Filtration System Style 2 - See "Water and Ice Dispensers" or "Water Dispenser" in the User Instructions or User Guide. ■■ These contaminants are not followed. ■■ Use replacement filter according you filtration system, see"Ice and Water" in your control panel, it is microbiologically unsafe or of the indicated substances in water entering the system was reduced to a concentration...

Quick Reference Manual
Page 1
... Improvement Act - 2008 Section 14 (a) (1) Refrigerator Safety Act - 1956 CFR title 16 Part 1750 PRODUCT CERTIFIED: Refrigerator Types 20MSSA, 22MSSA, 25MSSA, 26MSSA, 27MSSA, M20SSA, M22SSA, M25SSA, M26SSA, M27SSA. The following third party listing as follows: DATE OF MANUFACTURE: See Carton Label DATE OF TEST: 08-20-2012 (MSSA) LOCATION OF TEST: Benton Harbor, MI Whirlpool maintains test information and certificates.
... Improvement Act - 2008 Section 14 (a) (1) Refrigerator Safety Act - 1956 CFR title 16 Part 1750 PRODUCT CERTIFIED: Refrigerator Types 20MSSA, 22MSSA, 25MSSA, 26MSSA, 27MSSA, M20SSA, M22SSA, M25SSA, M26SSA, M27SSA. The following third party listing as follows: DATE OF MANUFACTURE: See Carton Label DATE OF TEST: 08-20-2012 (MSSA) LOCATION OF TEST: Benton Harbor, MI Whirlpool maintains test information and certificates.


