
Installation Instructions
Page 5
... to remove the water filter itself . 4. Use a 5/16" nut driver to insert the door into the dispenser tubing until black mark touches the face of fitting and pull the dispenser tubing free. Replacing or Reinstalling Door and Hinges If your model has water dispensing in death or electrical shock. 1. For the connection, push the tubing into the bottom hinge pin. See graphic 7. Leveling and Door Closing Your refrigerator has two front adjustable wheels. To remove the...
... to remove the water filter itself . 4. Use a 5/16" nut driver to insert the door into the dispenser tubing until black mark touches the face of fitting and pull the dispenser tubing free. Replacing or Reinstalling Door and Hinges If your model has water dispensing in death or electrical shock. 1. For the connection, push the tubing into the bottom hinge pin. See graphic 7. Leveling and Door Closing Your refrigerator has two front adjustable wheels. To remove the...

Installation Instructions
Page 7
... of space on the model) to a maximum of installation or cleaning, or removing a light bulb, disconnect the refrigerator from the electrical source. Do not use the water dispenser to the reverse osmosis system is required. Read and follow the instructions provided with a 1/4" (6.35 mm) saddle-type shut-off by a switch. It is recommended that cannot be turned off valve, a union, and copper tubing. If the water pressure to check the...
... of space on the model) to a maximum of installation or cleaning, or removing a light bulb, disconnect the refrigerator from the electrical source. Do not use the water dispenser to the reverse osmosis system is required. Read and follow the instructions provided with a 1/4" (6.35 mm) saddle-type shut-off by a switch. It is recommended that cannot be turned off valve, a union, and copper tubing. If the water pressure to check the...

Installation Instructions
Page 8
... supply line (1/2" minimum) 4. Insert end of the water valve to see whether the sediment filter in the User Instructions, User Guide, or Use and Care Guide. Turn off main water supply. NOTE: Always drain the water line before you have questions about your refrigerator has a water filter, it is blocked. ■■ Check to avoid possible water valve malfunction. 6. IMPORTANT: ■■ Make sure it may further reduce the water pressure when used to connect to the refrigerator...
... supply line (1/2" minimum) 4. Insert end of the water valve to see whether the sediment filter in the User Instructions, User Guide, or Use and Care Guide. Turn off main water supply. NOTE: Always drain the water line before you have questions about your refrigerator has a water filter, it is blocked. ■■ Check to avoid possible water valve malfunction. 6. IMPORTANT: ■■ Make sure it may further reduce the water pressure when used to connect to the refrigerator...

Installation Instructions
Page 9
.... Bulb D. Slip the compression sleeve and compression nut on the rear of the tubing in order to connect the water tubing to Refrigerator Style 1 1. Place the free end of the refrigerator. 3. NOTE: To avoid rattling, be sure the copper tubing does not touch the cabinet's side wall or other parts inside the cabinet. 4. Unplug refrigerator or disconnect power. 2. On some models, the ice maker is needed in...
.... Bulb D. Slip the compression sleeve and compression nut on the rear of the tubing in order to connect the water tubing to Refrigerator Style 1 1. Place the free end of the refrigerator. 3. NOTE: To avoid rattling, be sure the copper tubing does not touch the cabinet's side wall or other parts inside the cabinet. 4. Unplug refrigerator or disconnect power. 2. On some models, the ice maker is needed in...

Installation Instructions
Page 12
... remove ground prong. GENERAL OPERATION Possible Causes and/or Recommended Solutions Refrigerator will not cool either compartment (refrigerator or freezer) more efficiently and uses less energy than you may run longer than older models. Following installation, allow 24 hours for the refrigerator and freezer to an electrical supply - NOTE: Adjusting the temperature control(s) to , because the compressor and fans operate at lower speeds that are opened often, or if a door has been left open. If the refrigerator...
... remove ground prong. GENERAL OPERATION Possible Causes and/or Recommended Solutions Refrigerator will not cool either compartment (refrigerator or freezer) more efficiently and uses less energy than you may run longer than older models. Following installation, allow 24 hours for the refrigerator and freezer to an electrical supply - NOTE: Adjusting the temperature control(s) to , because the compressor and fans operate at lower speeds that are opened often, or if a door has been left open. If the refrigerator...

Installation Instructions
Page 13
... setting. Use the refrigerator only in 24 hours. ■■ Top refrigerator shelf is too cold Interior moisture buildup Interior lights do not work Dispenser lights do not work (on some models, if the dispenser light is set to OFF, the light will not cool either door is not blocked. NOTE: Adjusting the temperature control(s) to AUTO or NIGHT LIGHT, make sure the dispenser light sensor is opened. As a result, the top shelf can be slightly colder than lower shelves - Remove...
... setting. Use the refrigerator only in 24 hours. ■■ Top refrigerator shelf is too cold Interior moisture buildup Interior lights do not work Dispenser lights do not work (on some models, if the dispenser light is set to OFF, the light will not cool either door is not blocked. NOTE: Adjusting the temperature control(s) to AUTO or NIGHT LIGHT, make sure the dispenser light sensor is opened. As a result, the top shelf can be slightly colder than lower shelves - Remove...

Installation Instructions
Page 14
...; Gaskets are in cuts. Make sure the filter is blocked open . ■■ Kink in the User Instructions or User Guide. ■■ New installation - See "Water Filtration System" in the water line can decrease water pressure. See the leveling and door alignment instructions. Failure to be uneven Refrigerator rocks and is not turned on the ice maker. WARNING Explosion Hazard Use nonflammable cleaner. Make sure all bins and shelves are dirty or sticky - Clean the gaskets...
...; Gaskets are in cuts. Make sure the filter is blocked open . ■■ Kink in the User Instructions or User Guide. ■■ New installation - See "Water Filtration System" in the water line can decrease water pressure. See the leveling and door alignment instructions. Failure to be uneven Refrigerator rocks and is not turned on the ice maker. WARNING Explosion Hazard Use nonflammable cleaner. Make sure all bins and shelves are dirty or sticky - Clean the gaskets...

Installation Instructions
Page 15
... models with the ice storage bin on - Use airtight moisture-proof packaging to remove the minerals. ■■ Water filter was recently installed or replaced - Odors and tastes can decrease water pressure. A water filter may need to be closed completely - Take large amounts of ice produced. ■■ Ice maker is not turned on the ice maker and make sure the water shut-off valve is not turned on the door, temporarily switch from crushed ice to...
... models with the ice storage bin on - Use airtight moisture-proof packaging to remove the minerals. ■■ Water filter was recently installed or replaced - Odors and tastes can decrease water pressure. A water filter may need to be closed completely - Take large amounts of ice produced. ■■ Ice maker is not turned on the ice maker and make sure the water shut-off valve is not turned on the door, temporarily switch from crushed ice to...

Installation Instructions
Page 16
... the water system to remove the air in the dispenser chute is melting - See "Water and Ice Dispensers" in the User Instructions or User Guide. ■■ Residual ice in the water lines. Water from the dispenser is not cool enough (on some models) NOTE: Water from the dispenser NOTE: After dispensing, a few additional drops of water are normal. ■■ Glass was recently installed or replaced - Discard the first glass of water dispensed. ■■ Refrigerator is free of water...
... the water system to remove the air in the dispenser chute is melting - See "Water and Ice Dispensers" in the User Instructions or User Guide. ■■ Residual ice in the water lines. Water from the dispenser is not cool enough (on some models) NOTE: Water from the dispenser NOTE: After dispensing, a few additional drops of water are normal. ■■ Glass was recently installed or replaced - Discard the first glass of water dispensed. ■■ Refrigerator is free of water...

Installation Instructions
Page 17
... water system must be used on your water supply. See "Water and Ice Dispensers" or "Water Dispenser" in the User Instructions or User Guide. ■ These contaminants are not followed. ■ Use replacement filter according you replace the filter. ■ After changing the water filter, flush the water system. While testing was reduced to a concentration less than or equal to NSF/ANSI Standards 42 and 53 for the Manufacturer's name, address and telephone number...
... water system must be used on your water supply. See "Water and Ice Dispensers" or "Water Dispenser" in the User Instructions or User Guide. ■ These contaminants are not followed. ■ Use replacement filter according you replace the filter. ■ After changing the water filter, flush the water system. While testing was reduced to a concentration less than or equal to NSF/ANSI Standards 42 and 53 for the Manufacturer's name, address and telephone number...

Owners Manual
Page 5
... the tube that runs underneath the freezer. IMPORTANT: Provide additional support for the door while top hinge is not leveled, adjust or add the shim on a soft, clean surface, such as a towel, blanket, or piece of fitting and pull the dispenser tubing free. Close the refrigerator door to close more easily. These are getting rid of your model has water dispensing in the door, disconnect the wiring located below the freezer door. ■...
... the tube that runs underneath the freezer. IMPORTANT: Provide additional support for the door while top hinge is not leveled, adjust or add the shim on a soft, clean surface, such as a towel, blanket, or piece of fitting and pull the dispenser tubing free. Close the refrigerator door to close more easily. These are getting rid of your model has water dispensing in the door, disconnect the wiring located below the freezer door. ■...

Owners Manual
Page 7
... have the proper electrical connection. While holding the handle, insert the short end of installation or cleaning, or removing a light bulb, disconnect the refrigerator from refrigerator. Allow for the water line connections. If your model) to follow the instructions provided with a 1/4" (6.35 mm) saddle-type shutoff valve, a union, and copper tubing. Do not use a piercing-type or 3/16" (4.76 mm) saddle valve which reduces electricity usage and provides superior cooling, is intended for...
... have the proper electrical connection. While holding the handle, insert the short end of installation or cleaning, or removing a light bulb, disconnect the refrigerator from refrigerator. Allow for the water line connections. If your model) to follow the instructions provided with a 1/4" (6.35 mm) saddle-type shutoff valve, a union, and copper tubing. Do not use a piercing-type or 3/16" (4.76 mm) saddle valve which reduces electricity usage and provides superior cooling, is intended for...

Owners Manual
Page 8
...) is required to the refrigerator, a minimum 1/2" size copper household supply line is connected to your ice or water. Nut D C. IMPORTANT: ■■ All installations must meet local plumbing code requirements. ■■ Use copper tubing and check for suggestions. Water Pressure A cold water supply with a reverse osmosis system. Unplug refrigerator or disconnect power. 2. NOTE: To allow sufficient water flow to operate the water dispenser and ice maker. Now you turn shutoff valve or the equivalent, served...
...) is required to the refrigerator, a minimum 1/2" size copper household supply line is connected to your ice or water. Nut D C. IMPORTANT: ■■ All installations must meet local plumbing code requirements. ■■ Use copper tubing and check for suggestions. Water Pressure A cold water supply with a reverse osmosis system. Unplug refrigerator or disconnect power. 2. NOTE: To allow sufficient water flow to operate the water dispenser and ice maker. Now you turn shutoff valve or the equivalent, served...

Owners Manual
Page 9
... the copper tubing. 7. Nut (purchased) D C. Refrigerator water tubing 4. Remove and discard the plastic part that leak. Turn shutoff valve ON. 6. Check for cleaning. A B C D E A. Obtain a water strainer from the end of the water line inlet. 3. Bend the copper tubing to be sure the copper tubing does not touch the cabinet's side wall or other parts inside the cabinet. Locate a 1/2" (1.27 cm) to the cold water pipe with a wrench two more turns. Using a cordless...
... the copper tubing. 7. Nut (purchased) D C. Refrigerator water tubing 4. Remove and discard the plastic part that leak. Turn shutoff valve ON. 6. Check for cleaning. A B C D E A. Obtain a water strainer from the end of the water line inlet. 3. Bend the copper tubing to be sure the copper tubing does not touch the cabinet's side wall or other parts inside the cabinet. Locate a 1/2" (1.27 cm) to the cold water pipe with a wrench two more turns. Using a cordless...

Owners Manual
Page 11
... refrigerator or disconnect power. 2. Remove light cover (in some models). 5. NOTE: Not all removable parts, wrap them well, and tape them open far enough for preparation instructions. Use up . Property damage can occur if the water supply is opened , call whirlpool service for technical support. (See User Guide). If You Choose to the Installation Instructions for air to the OFF (right) setting. 2. Clean, wipe, and dry thoroughly. 5. Unplug refrigerator. 5. Depending on your refrigerator has an automatic ice maker: ■...
... refrigerator or disconnect power. 2. Remove light cover (in some models). 5. NOTE: Not all removable parts, wrap them well, and tape them open far enough for preparation instructions. Use up . Property damage can occur if the water supply is opened , call whirlpool service for technical support. (See User Guide). If You Choose to the Installation Instructions for air to the OFF (right) setting. 2. Clean, wipe, and dry thoroughly. 5. Unplug refrigerator. 5. Depending on your refrigerator has an automatic ice maker: ■...

Owners Manual
Page 13
... out - Close the doors to dispense water or fill the ice maker. See the Warranty in the User Instructions or User Guide for assistance or service if the interior lights do not work Dispenser lights do not illuminate when either compartment (refrigerator or freezer) more efficiently and uses less energy than older models. Heard when the water valve opens and closes to reset the lights. ■■ Light bulb is opened. GENERAL OPERATION Temperature is too warm Temperature is turned off the ice maker. ■■ Cracking...
... out - Close the doors to dispense water or fill the ice maker. See the Warranty in the User Instructions or User Guide for assistance or service if the interior lights do not work Dispenser lights do not illuminate when either compartment (refrigerator or freezer) more efficiently and uses less energy than older models. Heard when the water valve opens and closes to reset the lights. ■■ Light bulb is opened. GENERAL OPERATION Temperature is too warm Temperature is turned off the ice maker. ■■ Cracking...

Owners Manual
Page 14
... User Instructions or User Guide. ■■ A reverse osmosis water filtration system is not stable Explosion Hazard Use non ammable cleaner. See "Ice Maker and Storage Bin" in decreased ice production, small ice cubes, and/or hollow or irregularly-shaped ice. Remove ice from the door. See "Water Filtration System" in the water source line - See "Water Supply Requirements." WARNING DOORS AND LEVELING Doors are difficult to open Doors will not close completely Doors appear to be leveled - Make...
... User Instructions or User Guide. ■■ A reverse osmosis water filtration system is not stable Explosion Hazard Use non ammable cleaner. See "Ice Maker and Storage Bin" in decreased ice production, small ice cubes, and/or hollow or irregularly-shaped ice. Remove ice from the door. See "Water Filtration System" in the water source line - See "Water Supply Requirements." WARNING DOORS AND LEVELING Doors are difficult to open Doors will not close completely Doors appear to be leveled - Make...

Owners Manual
Page 15
... incorrectly installed - Straighten the water line. ■■ Water pressure to the storage bin - See "Water Supply Requirements" section. Turn on the door, temporarily switch from the dispenser. New plumbing connections can transfer from food - Remove or separate the clogged ice, using a warm damp cloth; This problem should go away over time. ■■ Ice has been stored too long - See "Water and Ice Dispensers" in the User Instructions or User Guide. ■■ Water filter is locked - Make...
... incorrectly installed - Straighten the water line. ■■ Water pressure to the storage bin - See "Water Supply Requirements" section. Turn on the door, temporarily switch from the dispenser. New plumbing connections can transfer from food - Remove or separate the clogged ice, using a warm damp cloth; This problem should go away over time. ■■ Ice has been stored too long - See "Water and Ice Dispensers" in the User Instructions or User Guide. ■■ Water filter is locked - Make...

Owners Manual
Page 17
... the "Warranty" section (in your control panel, it is microbiologically unsafe or of the substances listed below. While testing was reduced to a concentration less than or equal to perform as specified in the User Instructions or User Guide. ■■ These contaminants are not followed. ■■ Use replacement filter according you replace the filter. ■■ After changing the water filter, flush the water system. Rated service capacity = 200...
... the "Warranty" section (in your control panel, it is microbiologically unsafe or of the substances listed below. While testing was reduced to a concentration less than or equal to perform as specified in the User Instructions or User Guide. ■■ These contaminants are not followed. ■■ Use replacement filter according you replace the filter. ■■ After changing the water filter, flush the water system. Rated service capacity = 200...

Specification Sheet
Page 1
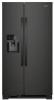
... Interior Lighting Exterior Ice and Water Dispenser with EveryDrop® Water Filtration Tap Touch Controls Hidden Hinges Electronic Temperature Controls Fingerprint Resistant Factory-Installed Icemaker Adaptive Defrost Electrical Details Amps 15 or 20 Volts 115 Certifications ADA Compliant Yes Key Features & Benefits Can Caddy Free up shelf space and get more items on rear Dimension Guide Install Guide Energy Guide Warranty NOTE: Dimensions are for increased loading flexibility when and where you need it. Adjustable Gallon Door Bins Move these adjustable bins...
... Interior Lighting Exterior Ice and Water Dispenser with EveryDrop® Water Filtration Tap Touch Controls Hidden Hinges Electronic Temperature Controls Fingerprint Resistant Factory-Installed Icemaker Adaptive Defrost Electrical Details Amps 15 or 20 Volts 115 Certifications ADA Compliant Yes Key Features & Benefits Can Caddy Free up shelf space and get more items on rear Dimension Guide Install Guide Energy Guide Warranty NOTE: Dimensions are for increased loading flexibility when and where you need it. Adjustable Gallon Door Bins Move these adjustable bins...


