
System Administration Guide
Page 15
... and press [Enter]. Ethernet Port Setup If the speed setting of the Ethernet port needs to be disabled. Network [Ethernet] Xerox WorkCentre 4118 System Administration Guide Page 2-3 NOTE: The Ethernet port cannot be changed perform the following steps: 1 ¾ Connect the device...the System Admin Tools have been passcode protected, type in the password and press [Enter]. System Admin Tools [Passcode Protect] 4 ¾ Press or until Ethernet displays and press [Enter]. Basic Network Installation Ethernet Port The Ethernet port is the default interface used on the WorkCentre 4118.
... and press [Enter]. Ethernet Port Setup If the speed setting of the Ethernet port needs to be disabled. Network [Ethernet] Xerox WorkCentre 4118 System Administration Guide Page 2-3 NOTE: The Ethernet port cannot be changed perform the following steps: 1 ¾ Connect the device...the System Admin Tools have been passcode protected, type in the password and press [Enter]. System Admin Tools [Passcode Protect] 4 ¾ Press or until Ethernet displays and press [Enter]. Basic Network Installation Ethernet Port The Ethernet port is the default interface used on the WorkCentre 4118.
System Administration Guide
Page 57
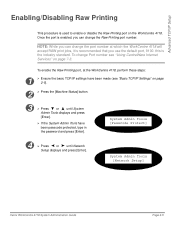
...Xerox WorkCentre 4118 System Administration Guide Page 6-5 To change Port number see "Basic TCP/IP Settings" on page 2-5). 2 ¾ Press the [Machine Status] button. 3 ¾ Press or until Network Setup displays and press [Enter]. NOTE: While you can change the port number at the WorkCentre 4118... the WorkCentre 4118. Advanced TCP/IP Setup Enabling/Disabling Raw Printing This procedure is recommended that you use the default port, 9100. To enable the Raw Printing port, at which the WorkCentre 4118 will... been passcode protected, type in the password and press [Enter].
...Xerox WorkCentre 4118 System Administration Guide Page 6-5 To change Port number see "Basic TCP/IP Settings" on page 2-5). 2 ¾ Press the [Machine Status] button. 3 ¾ Press or until Network Setup displays and press [Enter]. NOTE: While you can change the port number at the WorkCentre 4118... the WorkCentre 4118. Advanced TCP/IP Setup Enabling/Disabling Raw Printing This procedure is recommended that you use the default port, 9100. To enable the Raw Printing port, at which the WorkCentre 4118 will... been passcode protected, type in the password and press [Enter].

System Administration Guide
Page 106
...]. ¾ If the System Admin Tools has already been passcode protected, type in the password and press [Enter]. Network Setup [Reset NIC] Page 10-2 Xerox WorkCentre 4118 System Administration Guide resets the network card after changes have been implemented. ¾ Factory Defaults- provides you with a hard copy of the network settings. Reset NIC To reset...
...]. ¾ If the System Admin Tools has already been passcode protected, type in the password and press [Enter]. Network Setup [Reset NIC] Page 10-2 Xerox WorkCentre 4118 System Administration Guide resets the network card after changes have been implemented. ¾ Factory Defaults- provides you with a hard copy of the network settings. Reset NIC To reset...

System Administration Guide
Page 107
...Defaults] Xerox WorkCentre 4118 System Administration Guide Page 10-3 Administration Tools Set Factory Defaults To reset the factory defaults: 1 ¾ Press the [Machine Status] button. 2 ¾ Press or until System Admin Tools displays and press [Enter]. ¾ If the System Admin Tools has already been passcode protected, type in the password... and press [Enter]. 3 ¾ Press or until Network Setup displays and press [Enter]. 4 ¾ Press or until Factory Default displays and press [Enter].
...Defaults] Xerox WorkCentre 4118 System Administration Guide Page 10-3 Administration Tools Set Factory Defaults To reset the factory defaults: 1 ¾ Press the [Machine Status] button. 2 ¾ Press or until System Admin Tools displays and press [Enter]. ¾ If the System Admin Tools has already been passcode protected, type in the password... and press [Enter]. 3 ¾ Press or until Network Setup displays and press [Enter]. 4 ¾ Press or until Factory Default displays and press [Enter].


