
User Guide
Page 6
... 5-3 Printer Maintenance 5-3 Consumables 5-3 Error Messages 5-4 How to Clear A Media Jam 5-5 Media Jam Areas 5-6 Fuser/Output Area Jam 5-7 Input/Transfer Drum/Print Drum Area Jam 5-9 Tray/Manual Feed Slot Jam 5-10 Print Quality Problems 5-11 Additional Sources of Troubleshooting Assistance 5-16 Appendix A Printer Specifications A-1 Physical Specifications A-2 Environmental Specifications A-3 Electrical Specifications A-4 Performance Specifications A-5 Controller Specifications A-6 DocuPrint NC60...
... 5-3 Printer Maintenance 5-3 Consumables 5-3 Error Messages 5-4 How to Clear A Media Jam 5-5 Media Jam Areas 5-6 Fuser/Output Area Jam 5-7 Input/Transfer Drum/Print Drum Area Jam 5-9 Tray/Manual Feed Slot Jam 5-10 Print Quality Problems 5-11 Additional Sources of Troubleshooting Assistance 5-16 Appendix A Printer Specifications A-1 Physical Specifications A-2 Environmental Specifications A-3 Electrical Specifications A-4 Performance Specifications A-5 Controller Specifications A-6 DocuPrint NC60...

User Guide
Page 16
... air conditioning system. • Place the printer on the printer. These areas may overheat. Exercise care in moving the machine will cause fuser oil spillage, which will permanently damage your printer. • Do not put containers of the machine. viii y DocuPrint NC60 User Guide Tipping or moving or relocating the printer. The machine weight without any packaging...
... air conditioning system. • Place the printer on the printer. These areas may overheat. Exercise care in moving the machine will cause fuser oil spillage, which will permanently damage your printer. • Do not put containers of the machine. viii y DocuPrint NC60 User Guide Tipping or moving or relocating the printer. The machine weight without any packaging...

User Guide
Page 27
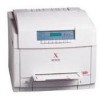
Figure 1.1 Printer Components, Front View Front View 1 1 Fuser Cover 2 Control Panel 10 3 Media Server (optional) 4 Manual Bypass Feeder Slot 5 Manual Bypass Feeder Guide 2 6 Tray 1 3 7 Media Exit Area 8 Top Rear Cover Release 4 9 Front Cover 10 Front Cover Releases (2) • Optional Lower Feeder not 5 shown (see Appendix C: Printer Options). 6 7 8 9 10 Chapter 1: Getting to identify the main exterior components of your DocuPrint NC60. Printer Components Printer Components External Components Use Figures 1.1 and 1.2 to Know Your Printer y 1-9
Figure 1.1 Printer Components, Front View Front View 1 1 Fuser Cover 2 Control Panel 10 3 Media Server (optional) 4 Manual Bypass Feeder Slot 5 Manual Bypass Feeder Guide 2 6 Tray 1 3 7 Media Exit Area 8 Top Rear Cover Release 4 9 Front Cover 10 Front Cover Releases (2) • Optional Lower Feeder not 5 shown (see Appendix C: Printer Options). 6 7 8 9 10 Chapter 1: Getting to identify the main exterior components of your DocuPrint NC60. Printer Components Printer Components External Components Use Figures 1.1 and 1.2 to Know Your Printer y 1-9

User Guide
Page 31
Chapter 1: Getting to Know Your Printer y 1-13 Printer Components To Open the Top Rear Cover: 1 Lift the release button, located on the Front Cover as shown. 2 Lift the Fuser Cover straight up until it stands in an upright position. To Open the Fuser Cover: The Front Cover must be opened before you can open the Fuser Cover. 1 Press the green Fuser Cover release button, located on the Top Rear Cover. 2 Lift the cover up and back until it rests in an upright position.
Chapter 1: Getting to Know Your Printer y 1-13 Printer Components To Open the Top Rear Cover: 1 Lift the release button, located on the Front Cover as shown. 2 Lift the Fuser Cover straight up until it stands in an upright position. To Open the Fuser Cover: The Front Cover must be opened before you can open the Fuser Cover. 1 Press the green Fuser Cover release button, located on the Top Rear Cover. 2 Lift the cover up and back until it rests in an upright position.

User Guide
Page 32
... 2 Fuser Area 3 Fuser Cleaner Roller 4 Fuser Oil Bottle 5 Toner Collector 6 Print Drum 7 Black Toner Refill Doors 8 Color Toner Refill Doors 9 Serial Number Plate 10 Color Developer Unit 11 Black Developer Unit 11 10 Instructions on how to order these items. Figure 1.4 Internal view of your printer are ...the printer that should be kept on hand) and Maintenance Items (the parts that require replacement). See the separate Supplies/Options Guide to replace Consumables and Maintenance Items are arranged. Printer Components Internal Components Figure 1.4 shows how the DocuPrint NC60's ...
... 2 Fuser Area 3 Fuser Cleaner Roller 4 Fuser Oil Bottle 5 Toner Collector 6 Print Drum 7 Black Toner Refill Doors 8 Color Toner Refill Doors 9 Serial Number Plate 10 Color Developer Unit 11 Black Developer Unit 11 10 Instructions on how to order these items. Figure 1.4 Internal view of your printer are ...the printer that should be kept on hand) and Maintenance Items (the parts that require replacement). See the separate Supplies/Options Guide to replace Consumables and Maintenance Items are arranged. Printer Components Internal Components Figure 1.4 shows how the DocuPrint NC60's ...

User Guide
Page 34
... suspect oil has been spilled, DO NOT PLACE THE FUSER INTO THE PRINTER. A new Fuser should be placed back into the printer. 6 Close the Top and Front Covers. 7 When the printer arrives at all times during transportation. Moving Your DocuPrint NC60 Simple Move 1 Power off the printer, allow the Fuser to cool to a safe temperature before handling. 2 Disconnect the...
... suspect oil has been spilled, DO NOT PLACE THE FUSER INTO THE PRINTER. A new Fuser should be placed back into the printer. 6 Close the Top and Front Covers. 7 When the printer arrives at all times during transportation. Moving Your DocuPrint NC60 Simple Move 1 Power off the printer, allow the Fuser to cool to a safe temperature before handling. 2 Disconnect the...

User Guide
Page 85
...colored areas, you use "Black Overprint" for best results. Chapter 3: Printing y 3-33 This may cause permanent damage to the fuser if it occurs frequently. • Edge Smoothing Select this feature to reduce the rough or jagged edges of black text and line art. • Enhanced Alignment If your DocuPrint NC60... the 250% toner coverage limit. PostScript Printer Driver Features • Disable CMYK Coverage Limit Select this feature is most valuable when black and colored areas directly touch. For black lines or text over color areas, use a color management system such as PANTONE or ICM....
...colored areas, you use "Black Overprint" for best results. Chapter 3: Printing y 3-33 This may cause permanent damage to the fuser if it occurs frequently. • Edge Smoothing Select this feature to reduce the rough or jagged edges of black text and line art. • Enhanced Alignment If your DocuPrint NC60... the 250% toner coverage limit. PostScript Printer Driver Features • Disable CMYK Coverage Limit Select this feature is most valuable when black and colored areas directly touch. For black lines or text over color areas, use a color management system such as PANTONE or ICM....

User Guide
Page 132
... becomes necessary for you suspect the fuser has been tipped, do not reinstall it. If you to take corrective actions, note the following safety tips and then begin your printer is not operating properly, make sure that the following hardware and software issues have been considered. 5-2 y DocuPrint NC60 User Guide Oil spillage may not...
... becomes necessary for you suspect the fuser has been tipped, do not reinstall it. If you to take corrective actions, note the following safety tips and then begin your printer is not operating properly, make sure that the following hardware and software issues have been considered. 5-2 y DocuPrint NC60 User Guide Oil spillage may not...

User Guide
Page 136
Figure 5.1 Media Path 1 5 1 Fuser/Output Area E5-E8 2 Transfer Drum Area E6 3 Input/Transfer Drum Area E1-E4 6 4 Tray and Manual Feed 2 Slot Area E1-E3 5 Transfer Drum/ Print Drum Area E4-E6 3 6 Print Drum 4 7 7 Grounding Roller E4 Exposure to Clear A Media Jam Media Jam Areas Figure 5.1 illustrates the areas where a media jam might occur. Close the printer covers promptly after you have cleared a jam. 5-6 y DocuPrint NC60 User Guide How to prolonged periods of direct light may damage the Print Drum.
Figure 5.1 Media Path 1 5 1 Fuser/Output Area E5-E8 2 Transfer Drum Area E6 3 Input/Transfer Drum Area E1-E4 6 4 Tray and Manual Feed 2 Slot Area E1-E3 5 Transfer Drum/ Print Drum Area E4-E6 3 6 Print Drum 4 7 7 Grounding Roller E4 Exposure to Clear A Media Jam Media Jam Areas Figure 5.1 illustrates the areas where a media jam might occur. Close the printer covers promptly after you have cleared a jam. 5-6 y DocuPrint NC60 User Guide How to prolonged periods of direct light may damage the Print Drum.

User Guide
Page 137
Chapter 5: Troubleshooting y 5-7 Use only recommended media. If media wraps around a roller in the Fuser, replace the Fuser. How to clear a jam. Do not remove the Fuser to Clear A Media Jam Fuser/Output Area Jam Figure 5.2 Fuser/Output/Print Drum Area Jam 3 1 2 1 Open the Front Cover. (See page 1-12.) 2 Open the Fuser Cover. (See page 1-13.) 3 Release the Roller by shifting the Release Lever as some internal printer surfaces are hot. Exercise caution as shown. 4 Locate the lodged material by looking inside the Fuser area.
Chapter 5: Troubleshooting y 5-7 Use only recommended media. If media wraps around a roller in the Fuser, replace the Fuser. How to clear a jam. Do not remove the Fuser to Clear A Media Jam Fuser/Output Area Jam Figure 5.2 Fuser/Output/Print Drum Area Jam 3 1 2 1 Open the Front Cover. (See page 1-12.) 2 Open the Fuser Cover. (See page 1-13.) 3 Release the Roller by shifting the Release Lever as some internal printer surfaces are hot. Exercise caution as shown. 4 Locate the lodged material by looking inside the Fuser area.

User Guide
Page 138
How to Clear A Media Jam 5 Reach into the Fuser area, and gently grasp the exposed corners of the jammed material. 6 Pull gently up and toward you until the material is completely dislodged. 7 Close the Roller Release. 8 Close the Fuser Cover and the Front Cover. 5-8 y DocuPrint NC60 User Guide
How to Clear A Media Jam 5 Reach into the Fuser area, and gently grasp the exposed corners of the jammed material. 6 Pull gently up and toward you until the material is completely dislodged. 7 Close the Roller Release. 8 Close the Fuser Cover and the Front Cover. 5-8 y DocuPrint NC60 User Guide

User Guide
Page 141
... Administrator Guide for additional help. To reduce the incidence of print defects: • Maintain a stable environment for the printer. (Refer to Appendix A: Printer Specifications for environmental specifications.) • Use the media recommended for this printer. (Refer to Chapter 2: Loading Print Media.) • Align the media with the paper edge guides in Table 5.1, refer...
... Administrator Guide for additional help. To reduce the incidence of print defects: • Maintain a stable environment for the printer. (Refer to Appendix A: Printer Specifications for environmental specifications.) • Use the media recommended for this printer. (Refer to Chapter 2: Loading Print Media.) • Align the media with the paper edge guides in Table 5.1, refer...

User Guide
Page 142
... Potential Remedies Print Defects Background Smudges Unwanted black and/or colored or shaded areas that streak the page The Print Drum is scratched or damaged. Potential Remedies Move the printer to a location out of 4 5-12 y DocuPrint NC60 User Guide Replace the Print Drum. Replace it if any...seated all the way to be replaced. The Print Drum needs to direct sunlight. Place the printer in the System Administrator Guide on the DocuPrint CD. Replace the Fuser. charger cleaner is Make sure the Print Drum mislocated. See System Administrator Guide. Print Quality ...
... Potential Remedies Print Defects Background Smudges Unwanted black and/or colored or shaded areas that streak the page The Print Drum is scratched or damaged. Potential Remedies Move the printer to a location out of 4 5-12 y DocuPrint NC60 User Guide Replace the Print Drum. Replace it if any...seated all the way to be replaced. The Print Drum needs to direct sunlight. Place the printer in the System Administrator Guide on the DocuPrint CD. Replace the Fuser. charger cleaner is Make sure the Print Drum mislocated. See System Administrator Guide. Print Quality ...

User Guide
Page 143
... There is Make sure the Print Drum mislocated. Reinstall the Fuser cleaner assembly. Table 5.1 Page 2 of paper through the printer. Repeating Defects Marks that streak the page Common Causes Potential Remedies... The Print Drum is visible. Print Quality Problems Table 5.1 Print Defects and Potential Remedies (continued) Print Defects Light, Vertical Lines Light areas (without color) that recur uniformly: 1. The Print Drum charger cleaner is toner on the Fuser...
... There is Make sure the Print Drum mislocated. Reinstall the Fuser cleaner assembly. Table 5.1 Page 2 of paper through the printer. Repeating Defects Marks that streak the page Common Causes Potential Remedies... The Print Drum is visible. Print Quality Problems Table 5.1 Print Defects and Potential Remedies (continued) Print Defects Light, Vertical Lines Light areas (without color) that recur uniformly: 1. The Print Drum charger cleaner is toner on the Fuser...

User Guide
Page 144
...from the print The Developer for the missing color needs replacement. Table 5.1 Page 3 of paper through the printer. There is improperly installed. See the System Administrator Guide on the Fuser Rollers. Missing Color One or more colors that has been deposited on the non-...Fuser cleaner is dirt in the paper path. Print Quality Problems Table 5.1 Print Defects and Potential Remedies (continued) Print Defects Common Causes Back-Side Contamination Toner on the DocuPrint CD. Potential Remedies To clean up any residual toner, run a blank sheet of 4 5-14 y DocuPrint NC60...
...from the print The Developer for the missing color needs replacement. Table 5.1 Page 3 of paper through the printer. There is improperly installed. See the System Administrator Guide on the Fuser Rollers. Missing Color One or more colors that has been deposited on the non-...Fuser cleaner is dirt in the paper path. Print Quality Problems Table 5.1 Print Defects and Potential Remedies (continued) Print Defects Common Causes Back-Side Contamination Toner on the DocuPrint CD. Potential Remedies To clean up any residual toner, run a blank sheet of 4 5-14 y DocuPrint NC60...

User Guide
Page 170
...; 3-32 Installable Options • 3-56 Intelligent Color PCL 5C printer driver • 3-47 PostScript printer driver • 3-27 IntelliRes • 3-32 Interface Connectors • 1-10 Internal printer pages Printing • 3-68 Internet Printing • 3-74 IPP • 3-74 J Jams See Media jams Job Type PCL 5C printer driver • 3-38 PostScript printer driver • 3-8 DocuPrint NC60 User Guide
...; 3-32 Installable Options • 3-56 Intelligent Color PCL 5C printer driver • 3-47 PostScript printer driver • 3-27 IntelliRes • 3-32 Interface Connectors • 1-10 Internal printer pages Printing • 3-68 Internet Printing • 3-74 IPP • 3-74 J Jams See Media jams Job Type PCL 5C printer driver • 3-38 PostScript printer driver • 3-8 DocuPrint NC60 User Guide

User Guide
Page 171
...8226; 1-9 Media jams Clearing • 5-5 ¨ 5-10 Fuser/Output Area • 5-7 ¨ 5-8 Input/Transfer Drum &#...options PCL 5C printer driver • 3-38 ¨ 3-46 PostScript printer driver • 3-8 ...¨ 3-15 Parallel Port • 1-11 Password jobs Deleting • 3-67 Printing • 3-66 PCL 5C Printer...52 Photo Mode PCL 5C printer driver • 3-47 PostScript printer driver • 3-27 PostScript Printer driver • 3-8 ... 3-20 ¨ 3-25 Printer configuration options • 3-26 PostScript options PostScript printer driver • 3-20 ¨...
...8226; 1-9 Media jams Clearing • 5-5 ¨ 5-10 Fuser/Output Area • 5-7 ¨ 5-8 Input/Transfer Drum &#...options PCL 5C printer driver • 3-38 ¨ 3-46 PostScript printer driver • 3-8 ...¨ 3-15 Parallel Port • 1-11 Password jobs Deleting • 3-67 Printing • 3-66 PCL 5C Printer...52 Photo Mode PCL 5C printer driver • 3-47 PostScript printer driver • 3-27 PostScript Printer driver • 3-8 ... 3-20 ¨ 3-25 Printer configuration options • 3-26 PostScript options PostScript printer driver • 3-20 ¨...


