

RX-V6A User Guide
Page 4
... listen to the radio...124 Listening to the radio...127 Displaying the Radio Data System information...128 Displaying the DAB information...129 Registering a radio station manually...130 Registering FM radio stations automatically (Auto Preset 131 Clearing preset stations...132 4
... listen to the radio...124 Listening to the radio...127 Displaying the Radio Data System information...128 Displaying the DAB information...129 Registering a radio station manually...130 Registering FM radio stations automatically (Auto Preset 131 Clearing preset stations...132 4
RX-V6A User Guide
Page 8
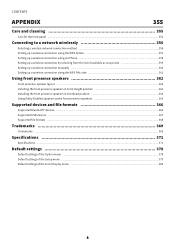
... up a wireless connection using an iPhone...358 Setting up a wireless connection by selecting from the list of available access points 359 Setting up a wireless connection manually...360 Setting up a wireless connection using the WPS PIN code 361 Using front presence speakers 362 Front presence speaker layout...362 Installing the front presence...
... up a wireless connection using an iPhone...358 Setting up a wireless connection by selecting from the list of available access points 359 Setting up a wireless connection manually...360 Setting up a wireless connection using the WPS PIN code 361 Using front presence speakers 362 Front presence speaker layout...362 Installing the front presence...

RX-V6A User Guide
Page 10
https://manual.yamaha.com/av/cm/glossary/ 10 BEFORE USING THE UNIT > Read me first Glossary For a glossary of terms and technologies for Yamaha AV products in general. There are explanations of terms used in this product and also for this guide, refer to the site below.
https://manual.yamaha.com/av/cm/glossary/ 10 BEFORE USING THE UNIT > Read me first Glossary For a glossary of terms and technologies for Yamaha AV products in general. There are explanations of terms used in this product and also for this guide, refer to the site below.

RX-V6A User Guide
Page 62
If you are connected before connecting the speaker cables. Refer to place speakers (speaker systems) NOTICE ( Before making bi-amp connections, make sure that the brackets or cables are not making bi-amp connections, remove any brackets or cables that connect a woofer with a tweeter. NOTE The following speakers cannot be connected simultaneously. ( Surround back speakers ( Bi-amp speakers Related links ( "Setting your speaker system" (p.188) ( "Speaker requirements" (p.63) 62 PREPARATIONS > How to the instruction manual of the speakers for details.
If you are connected before connecting the speaker cables. Refer to place speakers (speaker systems) NOTICE ( Before making bi-amp connections, make sure that the brackets or cables are not making bi-amp connections, remove any brackets or cables that connect a woofer with a tweeter. NOTE The following speakers cannot be connected simultaneously. ( Surround back speakers ( Bi-amp speakers Related links ( "Setting your speaker system" (p.188) ( "Speaker requirements" (p.63) 62 PREPARATIONS > How to the instruction manual of the speakers for details.

RX-V6A User Guide
Page 68
... eARC/ARC, the TV audio is played back on the TV. PREPARATIONS > Connecting a TV Connecting a TV HDMI connection with a TV Connect a TV to the instruction manual for the TV.
... eARC/ARC, the TV audio is played back on the TV. PREPARATIONS > Connecting a TV Connecting a TV HDMI connection with a TV Connect a TV to the instruction manual for the TV.

RX-V6A User Guide
Page 77
Related links ( "Setting the network parameters manually" (p.270) ( "Checking the network information of the unit" (p.267) ( "Connecting an external power amplifier" (p.79) 77 When using a router that supports DHCP, you want to ... a network cable (wired connection) Connect the unit to your router does not support DHCP or if you do not need to configure the network parameters manually.
Related links ( "Setting the network parameters manually" (p.270) ( "Checking the network information of the unit" (p.267) ( "Connecting an external power amplifier" (p.79) 77 When using a router that supports DHCP, you want to ... a network cable (wired connection) Connect the unit to your router does not support DHCP or if you do not need to configure the network parameters manually.

RX-V6A User Guide
Page 87
... MusicCast Surround function Configuring wireless speakers Using devices that support the MusicCast Surround function for details on settings and operations. NOTE Refer to the instruction manual of April 1, 2020 Network Subwoofer MusicCast 50 MusicCast 20 MusicCast SUB 100 n Sample speaker layout The following is a 5.1.2-channel system using two MusicCast 20 speakers...
... MusicCast Surround function Configuring wireless speakers Using devices that support the MusicCast Surround function for details on settings and operations. NOTE Refer to the instruction manual of April 1, 2020 Network Subwoofer MusicCast 50 MusicCast 20 MusicCast SUB 100 n Sample speaker layout The following is a 5.1.2-channel system using two MusicCast 20 speakers...

RX-V6A User Guide
Page 93
PREPARATIONS > Configuring the speaker settings Assigning speaker configuration If you use any of the following speaker configurations, configure the corresponding speaker settings manually. ( When using the surround back speakers ( When using bi-amp connections or zone connections ( When using the surround speakers placed in front (Virtual CINEMA FRONT) ( When using the front presence speakers for Dolby Atmos or DTS:X playback Related links ( "Setting your speaker system" (p.188) ( "Setting the use of Virtual CINEMA FRONT" (p.195) ( "Front presence speaker layout" (p.362) 93
PREPARATIONS > Configuring the speaker settings Assigning speaker configuration If you use any of the following speaker configurations, configure the corresponding speaker settings manually. ( When using the surround back speakers ( When using bi-amp connections or zone connections ( When using the surround speakers placed in front (Virtual CINEMA FRONT) ( When using the front presence speakers for Dolby Atmos or DTS:X playback Related links ( "Setting your speaker system" (p.188) ( "Setting the use of Virtual CINEMA FRONT" (p.195) ( "Front presence speaker layout" (p.362) 93

RX-V6A User Guide
Page 118
... Basic procedure for playing back video and music is as follows. 1 Turn on the external device or select a radio station. 4 Press VOLUME to the instruction manual for the external device. 118 NOTE ( To mute the audio output, press MUTE.
... Basic procedure for playing back video and music is as follows. 1 Turn on the external device or select a radio station. 4 Press VOLUME to the instruction manual for the external device. 118 NOTE ( To mute the audio output, press MUTE.

RX-V6A User Guide
Page 122
PLAYBACK > Playing back TV audio Playing back TV audio Playback of the unit will be manually switched to "TV" to play back the TV audio on the unit. The input source must be played back on the TV. NOTE ( When using ... may set the HDMI Control and ARC function to "Off". Related links ( "HDMI connection with an HDMI cable to the unit. Refer to the instruction manual for the TV. ( If your TV that supports eARC/ARC to the unit with a TV" (p.68) ( "Setting the use of HDMI Control" (p.201) ( "Setting the...
PLAYBACK > Playing back TV audio Playing back TV audio Playback of the unit will be manually switched to "TV" to play back the TV audio on the unit. The input source must be played back on the TV. NOTE ( When using ... may set the HDMI Control and ARC function to "Off". Related links ( "HDMI connection with an HDMI cable to the unit. Refer to the instruction manual for the TV. ( If your TV that supports eARC/ARC to the unit with a TV" (p.68) ( "Setting the use of HDMI Control" (p.201) ( "Setting the...

RX-V6A User Guide
Page 123
NOTE ( When you play back TV audio with a cable other than a digital optical cable, set "TV Audio Input" in the "Setup" menu to "TV" manually, and then, select a video content (a TV program) with the TV remote control. PLAYBACK > Playing back TV audio Playback of TV audio with a digital optical cable ...
NOTE ( When you play back TV audio with a cable other than a digital optical cable, set "TV Audio Input" in the "Setup" menu to "TV" manually, and then, select a video content (a TV program) with the TV remote control. PLAYBACK > Playing back TV audio Playback of TV audio with a digital optical cable ...

RX-V6A User Guide
Page 127
Hold down TUNING for FM radio reception, press MODE. Related links ( "Registering a radio station manually" (p.130) ( "Selecting a video source to select a frequency for an FM radio station is displayed on the front display when the unit is not receiving a stereo ...
Hold down TUNING for FM radio reception, press MODE. Related links ( "Registering a radio station manually" (p.130) ( "Selecting a video source to select a frequency for an FM radio station is displayed on the front display when the unit is not receiving a stereo ...

RX-V6A User Guide
Page 130
... input select mode automatically without operations for 3 seconds. 3 Press PRESET to select the preset number. 4 Press MEMORY. PLAYBACK > Listening to the radio Registering a radio station manually Tune in to a radio station and register it to the next empty (unused) preset number after tuning in to the desired radio station. 2 Hold down...
... input select mode automatically without operations for 3 seconds. 3 Press PRESET to select the preset number. 4 Press MEMORY. PLAYBACK > Listening to the radio Registering a radio station manually Tune in to a radio station and register it to the next empty (unused) preset number after tuning in to the desired radio station. 2 Hold down...

RX-V6A User Guide
Page 131
... preset number from which to the radio Registering FM radio stations automatically (Auto Preset) You can register up to the radio" (p.127) ( "Registering a radio station manually" (p.130) 131 FM radio stations with strong signals are registered automatically by the Auto Preset function. PLAYBACK > Listening to start the registration. 4 Press [jTUNING].
... preset number from which to the radio Registering FM radio stations automatically (Auto Preset) You can register up to the radio" (p.127) ( "Registering a radio station manually" (p.130) 131 FM radio stations with strong signals are registered automatically by the Auto Preset function. PLAYBACK > Listening to start the registration. 4 Press [jTUNING].

RX-V6A User Guide
Page 138
For details, refer to the instruction manual for playback of contents. ( You can also use the Digital Media Controller (DMC) to configure the media sharing setting on the TV. The browse screen ...
For details, refer to the instruction manual for playback of contents. ( You can also use the Digital Media Controller (DMC) to configure the media sharing setting on the TV. The browse screen ...

RX-V6A User Guide
Page 140
..."Checking the network information of the Yamaha website or the MusicCast CONTROLLER app. For details on supported music streaming services, refer to products information of the unit" (p.267) ( "Adding the unit to the MusicCast network" (p.86) 140 We ask for it. https://manual.yamaha.com/av/mc/ss/ NOTE ...( You need a pay application in advance that Yamaha Corporation would not bear any liability for your understanding in some streaming services. PLAYBACK > Listening to music...
..."Checking the network information of the Yamaha website or the MusicCast CONTROLLER app. For details on supported music streaming services, refer to products information of the unit" (p.267) ( "Adding the unit to the MusicCast network" (p.86) 140 We ask for it. https://manual.yamaha.com/av/mc/ss/ NOTE ...( You need a pay application in advance that Yamaha Corporation would not bear any liability for your understanding in some streaming services. PLAYBACK > Listening to music...

RX-V6A User Guide
Page 153
..." is selected as the zone input. ( To adjust the zone volume, press VOLUME or MUTE when using the unit's internal amplifier. ( Refer to the instruction manual for playback in zone is as follows. The zone selected by the zone switch can be operated. 1 Turn on the zone. 2 Turn on the external...
..." is selected as the zone input. ( To adjust the zone volume, press VOLUME or MUTE when using the unit's internal amplifier. ( Refer to the instruction manual for playback in zone is as follows. The zone selected by the zone switch can be operated. 1 Turn on the zone. 2 Turn on the external...

RX-V6A User Guide
Page 198
... of equalizer to achieve the same characteristics. Setup menu "Speaker" > "Equalizer" > "EQ Select" Settings GEQ YPAO:Flat YPAO:Front YPAO:Natural Off Adjusts the equalizer manually. Setting range -6.0 dB to adjust the equalizer while confirming its effect ( "YPAO:Flat", "YPAO:Front", and "YPAO:Natural" are available only when the YPAO has...
... of equalizer to achieve the same characteristics. Setup menu "Speaker" > "Equalizer" > "EQ Select" Settings GEQ YPAO:Flat YPAO:Front YPAO:Natural Off Adjusts the equalizer manually. Setting range -6.0 dB to adjust the equalizer while confirming its effect ( "YPAO:Flat", "YPAO:Front", and "YPAO:Natural" are available only when the YPAO has...

RX-V6A User Guide
Page 220
Adjusts the delay between video and audio output manually. This setting is available only when a TV that supports an automatic lipsync function is applied to the unit via HDMI. Related links ( "Adjusting the delay ...) ( "Basic operation of the Lipsync function Selects the method for adjusting the delay between video and audio output (Lipsync). Setup menu "Sound" > "Lipsync" > "Select" Settings Manual Auto Adjusts the delay between video and audio output automatically. The setting in "Adjustment". You can fine-adjust the audio output timing in "Adjustment" is...
Adjusts the delay between video and audio output manually. This setting is available only when a TV that supports an automatic lipsync function is applied to the unit via HDMI. Related links ( "Adjusting the delay ...) ( "Basic operation of the Lipsync function Selects the method for adjusting the delay between video and audio output (Lipsync). Setup menu "Sound" > "Lipsync" > "Select" Settings Manual Auto Adjusts the delay between video and audio output automatically. The setting in "Adjustment". You can fine-adjust the audio output timing in "Adjustment" is...

RX-V6A User Guide
Page 221
Setup menu "Sound" > "Lipsync" > "Adjustment" Setting range 0 ms to 500 ms NOTE You can fine-adjust the audio output timing when "Select" in the "Setup" menu is set to "Auto". Related links ( "Setting the adjustment method of the Lipsync function" (p.220) ( "Basic operation of the Lipsync function Adjusts the delay between video and audio output (Lipsync) manually. CONFIGURATIONS > Configuring various functions (Setup menu) Adjusting the delay of the Setup menu" (p.177) 221
Setup menu "Sound" > "Lipsync" > "Adjustment" Setting range 0 ms to 500 ms NOTE You can fine-adjust the audio output timing when "Select" in the "Setup" menu is set to "Auto". Related links ( "Setting the adjustment method of the Lipsync function" (p.220) ( "Basic operation of the Lipsync function Adjusts the delay between video and audio output (Lipsync) manually. CONFIGURATIONS > Configuring various functions (Setup menu) Adjusting the delay of the Setup menu" (p.177) 221


