

UX256 Owners Manual
Page 2
... therefore the owners responsibility. SPECIAL MESSAGE SECTION This product utilizes batteries or an external power supply (adapter). WARNING: Do not place this manual is soldered in combination with any battery. IMPORTANT: The louder the sound, the shorter the time period before requesting service. This product may have benches and / or accessory mounting fixtures that is approximately five years. Mismatches or incorrect installation may be...
... therefore the owners responsibility. SPECIAL MESSAGE SECTION This product utilizes batteries or an external power supply (adapter). WARNING: Do not place this manual is soldered in combination with any battery. IMPORTANT: The louder the sound, the shorter the time period before requesting service. This product may have benches and / or accessory mounting fixtures that is approximately five years. Mismatches or incorrect installation may be...

UX256 Owners Manual
Page 3
... on the buttons, switches or connectors. • Use only the rack specified for all volume levels to minimum. When attaching the rack, use . Always turn off for the instrument. WARNING Always follow the basic precautions listed below to avoid the possibility of time at their minimum levels and gradually raise the volume controls while playing the instrument to set all components, set the...
... on the buttons, switches or connectors. • Use only the rack specified for all volume levels to minimum. When attaching the rack, use . Always turn off for the instrument. WARNING Always follow the basic precautions listed below to avoid the possibility of time at their minimum levels and gradually raise the volume controls while playing the instrument to set all components, set the...

UX256 Owners Manual
Page 4
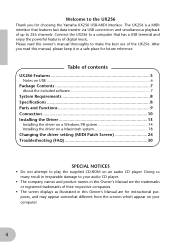
... audio CD player. Table of contents UX256 Features 5 Notes on USB 6 Package Contents 7 About the included software 7 System Requirements 8 Specifications 8 Parts and Functions 9 Connection 10 Installing the Driver 13 Installing the driver on a Windows 98 system 14 Installing the driver on a Macintosh system 18 Changing the driver setting (MIDI Patch Screen 24 Troubleshooting (FAQ 30 SPECIAL NOTICES • Do not attempt to a computer that features fast data transfer via USB connection and simultaneous playback of the...
... audio CD player. Table of contents UX256 Features 5 Notes on USB 6 Package Contents 7 About the included software 7 System Requirements 8 Specifications 8 Parts and Functions 9 Connection 10 Installing the Driver 13 Installing the driver on a Windows 98 system 14 Installing the driver on a Macintosh system 18 Changing the driver setting (MIDI Patch Screen 24 Troubleshooting (FAQ 30 SPECIAL NOTICES • Do not attempt to a computer that features fast data transfer via USB connection and simultaneous playback of the...
UX256 Owners Manual
Page 6
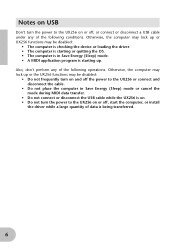
... is in Save Energy (Sleep) mode or cancel the mode during MIDI data transfer. • Do not connect or disconnect the USB cable while the UX256 is on. • Do not turn the power to the UX256 on or off , start the computer, or install the driver while a large quantity of data is being transferred. 6 Also, don't perform any of the following operations. Notes on USB Don't turn the power to the UX256 on...
... is in Save Energy (Sleep) mode or cancel the mode during MIDI data transfer. • Do not connect or disconnect the USB cable while the UX256 is on. • Do not turn the power to the UX256 on or off , start the computer, or install the driver while a large quantity of data is being transferred. 6 Also, don't perform any of the following operations. Notes on USB Don't turn the power to the UX256 on...

UX256 Owners Manual
Page 7
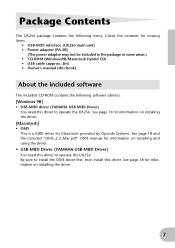
... for missing items. • USB-MIDI interface (UX256 main unit) • Power adaptor (PA-3B) (The power adaptor may not be included in the package in some areas.) • CD-ROM (Windows98/Macintosh hybrid CD) • USB cable (approx. 2m) • Owner's manual (this book) About the included software The included CD-ROM contains the following software (driver). [Windows 98] • USB-MIDI driver (YAMAHA USB-MIDI Driver) You need this driver to operate the UX256.
... for missing items. • USB-MIDI interface (UX256 main unit) • Power adaptor (PA-3B) (The power adaptor may not be included in the package in some areas.) • CD-ROM (Windows98/Macintosh hybrid CD) • USB cable (approx. 2m) • Owner's manual (this book) About the included software The included CD-ROM contains the following software (driver). [Windows 98] • USB-MIDI driver (YAMAHA USB-MIDI Driver) You need this driver to operate the UX256.

UX256 Owners Manual
Page 8
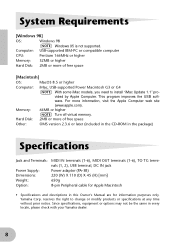
... program improves the USB soft- ware. Memory: 64MB or higher NOTE Turn off virtual memory. reserves the right to install "iMac Update 1.1" pro- For more of free space [Macintosh] OS: MacOS 8.5 or higher Computer: iMac, USB-supported Power Macintosh G3 or G4 NOTE With some iMac models, you need to change or modify products or specifications at any time without prior notice. Yamaha Corp. Hard Disk...
... program improves the USB soft- ware. Memory: 64MB or higher NOTE Turn off virtual memory. reserves the right to install "iMac Update 1.1" pro- For more of free space [Macintosh] OS: MacOS 8.5 or higher Computer: iMac, USB-supported Power Macintosh G3 or G4 NOTE With some iMac models, you need to change or modify products or specifications at any time without prior notice. Yamaha Corp. Hard Disk...

UX256 Owners Manual
Page 11
... control the connected MIDI device. At this time, set the HOST SELECT switch of the MIDI device to "MIDI." serial cable MIDI device (4) Connecting the MIDI terminals to a MIDI device Use optional MIDI cables to connect the MIDI IN terminal of the MIDI device to the UX256 before making the connection. Connection (2) Connecting a computer Connect the USB terminal of a computer to the USB terminal of the UX256 using an optional serial cable (8-pin Macintosh Peripheral cable). Be sure to turn off the power...
... control the connected MIDI device. At this time, set the HOST SELECT switch of the MIDI device to "MIDI." serial cable MIDI device (4) Connecting the MIDI terminals to a MIDI device Use optional MIDI cables to connect the MIDI IN terminal of the MIDI device to the UX256 before making the connection. Connection (2) Connecting a computer Connect the USB terminal of a computer to the USB terminal of the UX256 using an optional serial cable (8-pin Macintosh Peripheral cable). Be sure to turn off the power...

UX256 Owners Manual
Page 14
Turn on a Windows 98 system • Follow the steps below to select search method. 14 Start the computer. 2. Connect the USB terminal of the UX256 using the included USB cable. 3. Click [Next]. The system displays a screen that the power to the UX256 is turned off (standby). Make sure that enables you to install the driver. 1. Installing the Driver Installing the driver on the power to the USB terminal of the computer or the USB hub to the UX256. The system displays the "Add New Hardware Wizard." 4.
Turn on a Windows 98 system • Follow the steps below to select search method. 14 Start the computer. 2. Connect the USB terminal of the UX256 using the included USB cable. 3. Click [Next]. The system displays a screen that the power to the UX256 is turned off (standby). Make sure that enables you to install the driver. 1. Installing the Driver Installing the driver on the power to the USB terminal of the computer or the USB hub to the UX256. The system displays the "Add New Hardware Wizard." 4.

UX256 Owners Manual
Page 17
... number (page 24). Turn on the UX256s using the USB cables. 3. Click the "MIDI" tab and check to set up your sequence software, refer to the owner's manual for the software. 1. Installing the Driver • Selecting the destination for the MIDI signal output This section explains how to see if "Yamaha USB OUT xx-yy" is listed. Connect the USB terminal of the connected tone generator, and click [OK]. • Connecting multiple UX256s Follow the steps...
... number (page 24). Turn on the UX256s using the USB cables. 3. Click the "MIDI" tab and check to set up your sequence software, refer to the owner's manual for the software. 1. Installing the Driver • Selecting the destination for the MIDI signal output This section explains how to see if "Yamaha USB OUT xx-yy" is listed. Connect the USB terminal of the connected tone generator, and click [OK]. • Connecting multiple UX256s Follow the steps...

UX256 Owners Manual
Page 18
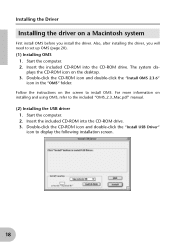
...-ROM drive. 3. Follow the instructions on the screen to install OMS. For more information on installing and using OMS, refer to display the following installation screen. 18 Double-click the CD-ROM icon and double-click the "Install USB Driver" icon to the included "OMS_2.3_Mac.pdf" manual. (2) Installing the USB driver 1. Installing the Driver Installing the driver on a Macintosh system First install OMS before you will need to set up...
...-ROM drive. 3. Follow the instructions on the screen to install OMS. For more information on installing and using OMS, refer to display the following installation screen. 18 Double-click the CD-ROM icon and double-click the "Install USB Driver" icon to the included "OMS_2.3_Mac.pdf" manual. (2) Installing the USB driver 1. Installing the Driver Installing the driver on a Macintosh system First install OMS before you will need to set up...

UX256 Owners Manual
Page 30
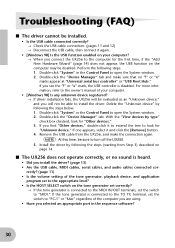
... USB cable from Step 3) described on the tone generator set correctly? → If the tone generator is heard. • Did you connect the UX256 to turn off the UX256. 5. Install the driver by following the steps (starting from the UX256, and make sure that no sound is connected to the MIDI IN/OUT terminals, set to open the System window. 2. rectly? (page 11) • Is the volume setting of the computer you are using...
... USB cable from Step 3) described on the tone generator set correctly? → If the tone generator is heard. • Did you connect the UX256 to turn off the UX256. 5. Install the driver by following the steps (starting from the UX256, and make sure that no sound is connected to the MIDI IN/OUT terminals, set to open the System window. 2. rectly? (page 11) • Is the volume setting of the computer you are using...
UX256 Owners Manual
Page 31
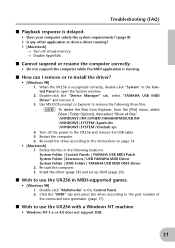
... 4. Turn off virtual memory. → Disable AppleTalk. Troubleshooting (FAQ) s Playback response is running ? • [Macintosh] → Turn off the power to the UX256 and remove the USB cable. 5. Restart the computer. 6. Double-click the "Device Manager" tab, select "YAMAHA USB MIDI Driver" and remove it. 3. Delete the files in the Control Panel. 2. Click the "MIDI" tab and select the driver according to the port number of the connected tone generator...
... 4. Turn off virtual memory. → Disable AppleTalk. Troubleshooting (FAQ) s Playback response is running ? • [Macintosh] → Turn off the power to the UX256 and remove the USB cable. 5. Restart the computer. 6. Double-click the "Device Manager" tab, select "YAMAHA USB MIDI Driver" and remove it. 3. Delete the files in the Control Panel. 2. Click the "MIDI" tab and select the driver according to the port number of the connected tone generator...
UX256 Owners Manual
Page 2
.... Mismatches or incorrect installation may also use of an extension cord is believed to assist you should be rechargeable. Model Serial No. This product, either supplied with the components supplied or; IMPORTANT: The louder the sound, the shorter the time period before requesting service. ENVIRONMENTAL ISSUES: Yamaha strives to how a function or effect works (when the unit is uncomfortable. Batteries MUST be dealer...
.... Mismatches or incorrect installation may also use of an extension cord is believed to assist you should be rechargeable. Model Serial No. This product, either supplied with the components supplied or; IMPORTANT: The louder the sound, the shorter the time period before requesting service. ENVIRONMENTAL ISSUES: Yamaha strives to how a function or effect works (when the unit is uncomfortable. Batteries MUST be dealer...

UX256 Owners Manual
Page 3
... cleaning the instrument, always remove the electric plug from the outlet, and have the instrument inspected by qualified Yamaha service personnel. • Use the specified adaptor (PA-3B or an equivalent recommended by Yamaha) only. Before turning the power on it , immediately turn off the power switch, disconnect the adaptor plug from the outlet. Yamaha cannot be sure to set the volumes of all components at a high...
... cleaning the instrument, always remove the electric plug from the outlet, and have the instrument inspected by qualified Yamaha service personnel. • Use the specified adaptor (PA-3B or an equivalent recommended by Yamaha) only. Before turning the power on it , immediately turn off the power switch, disconnect the adaptor plug from the outlet. Yamaha cannot be sure to set the volumes of all components at a high...
UX256 Owners Manual
Page 4
... MIDI interface that has a USB terminal and enjoy the powerful features of up to 256 channels. Connect the UX256 to a computer that features fast data transfer via USB connection and simultaneous playback of digital music. Table of contents UX256 Features 5 Notes on USB 6 Package Contents 7 About the included software 7 System Requirements 8 Specifications 8 Parts and Functions 9 Connection 10 Installing the Driver 13 Installing the driver on a Windows 98 system 14 Installing the driver on a Macintosh system 18 Changing the driver setting (MIDI Patch Screen 24 Troubleshooting...
... MIDI interface that has a USB terminal and enjoy the powerful features of up to 256 channels. Connect the UX256 to a computer that features fast data transfer via USB connection and simultaneous playback of digital music. Table of contents UX256 Features 5 Notes on USB 6 Package Contents 7 About the included software 7 System Requirements 8 Specifications 8 Parts and Functions 9 Connection 10 Installing the Driver 13 Installing the driver on a Windows 98 system 14 Installing the driver on a Macintosh system 18 Changing the driver setting (MIDI Patch Screen 24 Troubleshooting...
UX256 Owners Manual
Page 7
...; Power adaptor (PA-3B) (The power adaptor may not be included in the package in some areas.) • CD-ROM (Windows98/Macintosh hybrid CD) • USB cable (approx. 2m) • Owner's manual (this book) About the included software The included CD-ROM contains the following software (driver). [Windows 98] • USB-MIDI driver (YAMAHA USB-MIDI Driver) You need this driver to operate the UX256. See page 14 for information on installing the driver. [Macintosh...
...; Power adaptor (PA-3B) (The power adaptor may not be included in the package in some areas.) • CD-ROM (Windows98/Macintosh hybrid CD) • USB cable (approx. 2m) • Owner's manual (this book) About the included software The included CD-ROM contains the following software (driver). [Windows 98] • USB-MIDI driver (YAMAHA USB-MIDI Driver) You need this driver to operate the UX256. See page 14 for information on installing the driver. [Macintosh...
UX256 Owners Manual
Page 8
... NOTE Turn off virtual memory. reserves the right to install "iMac Update 1.1" pro- Computer: USB-supported IBM-PC or compatible computer CPU: Pentium 166MHz or higher Memory: 32MB or higher Hard Disk: 2MB or more of free space Other: OMS version 2.3.6 or later (included in the CD-ROM in the package) Specifications Jack and Terminals: Power Supply: Dimensions: Weight: Option: MIDI IN terminals (1-6), MIDI...
... NOTE Turn off virtual memory. reserves the right to install "iMac Update 1.1" pro- Computer: USB-supported IBM-PC or compatible computer CPU: Pentium 166MHz or higher Memory: 32MB or higher Hard Disk: 2MB or more of free space Other: OMS version 2.3.6 or later (included in the CD-ROM in the package) Specifications Jack and Terminals: Power Supply: Dimensions: Weight: Option: MIDI IN terminals (1-6), MIDI...

UX256 Owners Manual
Page 17
... the power. Installing the Driver • Selecting the destination for the MIDI signal output This section explains how to set up your sequence software, refer to the owner's manual for use with 0, to the units in the order in the Control Panel to install the driver again. 1. If only one UX256 is connected, the device number is assigned, starting with Media Player (included in Windows 98) or an equivalent program...
... the power. Installing the Driver • Selecting the destination for the MIDI signal output This section explains how to set up your sequence software, refer to the owner's manual for use with 0, to the units in the order in the Control Panel to install the driver again. 1. If only one UX256 is connected, the device number is assigned, starting with Media Player (included in Windows 98) or an equivalent program...
UX256 Owners Manual
Page 18
... "OMS" folder. Also, after installing the driver, you install the driver. Start the computer. 2. plays the CD-ROM icon on installing and using OMS, refer to the included "OMS_2.3_Mac.pdf" manual. (2) Installing the USB driver 1. Installing the Driver Installing the driver on a Macintosh system First install OMS before you will need to display the following installation screen. 18 Follow the instructions on the screen to install OMS. For more information on...
... "OMS" folder. Also, after installing the driver, you install the driver. Start the computer. 2. plays the CD-ROM icon on installing and using OMS, refer to the included "OMS_2.3_Mac.pdf" manual. (2) Installing the USB driver 1. Installing the Driver Installing the driver on a Macintosh system First install OMS before you will need to display the following installation screen. 18 Follow the instructions on the screen to install OMS. For more information on...
UX256 Owners Manual
Page 30
... the USB cable from Step 3) described on page 14. If the tone generator is connected to the MIDI IN/OUT terminals, set the switch to "PC-1" or "Mac" regardless of the computer you are using. • Have you selected an appropriate port in the Control Panel to open the System window. 2. Troubleshooting (FAQ) s The driver cannot be installed. • Is the USB cable connected correctly? → Check the USB cable connection. (pages...
... the USB cable from Step 3) described on page 14. If the tone generator is connected to the MIDI IN/OUT terminals, set the switch to "PC-1" or "Mac" regardless of the computer you are using. • Have you selected an appropriate port in the Control Panel to open the System window. 2. Troubleshooting (FAQ) s The driver cannot be installed. • Is the USB cable connected correctly? → Check the USB cable connection. (pages...

