Get support for Dymo LabelManager 260P

Dymo LabelManager 260P Support Question

Dymo LabelManager 260P Support Question

Find answers below for this question about Dymo LabelManager 260P.
Need a Dymo LabelManager 260P manual? We have 1 online manual for this item!
Question posted by jessicajacobs on July 23rd, 2013

It Prints A Horizontal Line Through The Middle Of The Label

How do I stop the label from printing without this horizontal line, I have tried changing the battery and fiddling around with the buttons but there is still a horizontal lined gap in the ink? Please get back to me asap   thanks

Current Answers

Answer #1: Posted by DYMOhelpdesk on July 24th, 2013 6:25 AM
This answer was accepted by the poster of the original question.
DYMOhelpdesk

Member since:
January 10th, 2013

Points: 35,050
1,100
points
You may try using a different cassette but the most likely cause of the issue is the dirt on the print head. To clean, use the brush supplied (see under the cover). Soak it in pure alcohol and clean the print head (right opposite the rubber wheel).

Related Dymo LabelManager 260P Manual Pages

User Guide 1 - Page 2

Contents About Your New Label Maker 5 Product Registration 5 Getting Started 5 Connecting the Power 5 Inserting the Battery Pack 6 Recharging the Battery Pack 6 Inserting the Label Cassette 7 Using the Label Maker for the First Time 8 Getting to Know the Label Maker 9 Power ...9 LCD Display 10 Format 11 Insert ...11 Settings 11 CAPS Mode 11 Backspace 11 Clear ...11 Navigation Keys ...
User Guide 1 - Page 3

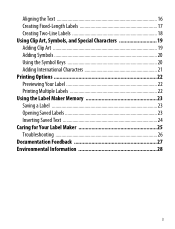
... 16 Creating Fixed-Length Labels 17 Creating Two-Line Labels 18 Using Clip Art, Symbols, and Special Characters 19 Adding Clip Art 19 Adding Symbols 20 Using the Symbol Keys 20 Adding International Characters 21 Printing Options 22 Previewing Your Label 22 Printing Multiple Labels 22 Using the Label Maker Memory 23 Saving a Label 23 Opening Saved Labels 23 Inserting Saved...
User Guide 1 - Page 4

... 10 Caps 11 Numeric Keys 12 Symbols - 18 19 20 21 22 23 1 17 16 2 15 3 14 4 13 5 12 6 11 7 10 9 8 Figure 1 DYMO® LabelManager 260P Electronic Label Maker 1 Cutter button 2 Print 3 Preview 4 Settings 5 Backspace 6 Symbols - Currency 13 Insert 14 Open 15 Format 16 On/Off 17 LCD display 18 Clear 19 AC Power adapter 20...
User Guide 1 - Page 5

.... Getting Started Follow the instructions in this section to register your label maker online. Connecting the Power The label maker is powered by a rechargeable, Lithium-ion battery pack. About Your New Label Maker With the DYMO® LabelManager 260P electronic label maker, you can choose to print your labels in many different fonts, font sizes, and styles. You can create a wide variety of...
User Guide 1 - Page 6

... a long period of the power adapter into the battery compartment. 3 Replace the battery compartment cover. NOTE Remove the battery pack if the label maker will not be used for recharging the battery pack; Inserting the Battery Pack The battery pack included with your label maker for recharging the battery pack. To recharge the battery pack 1 Plug the power adapter into the power...
User Guide 1 - Page 7

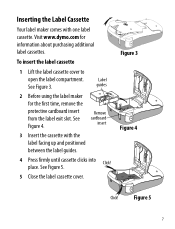
... 3 Figure 4 Click! place. Figure 5 7 guides 2 Before using the label maker for information about purchasing additional label cassettes. See Figure 4. Inserting the Label Cassette Your label maker comes with the label facing up and positioned between the label guides. 4 Press firmly until cassette clicks into Click! Label See Figure 3. Remove cardboard insert 3 Insert the cassette...
User Guide 1 - Page 8

... the Label Maker for creating labels. 8 To set until you are now ready to cut the label. You printed your first label. These selections remain set up the label maker 1 Press to turn on the power. 2 Select the language and press . 3 Select the width of copies. 4 Press or to print. 5 Press the cutter button to print your first label. You can change them...
User Guide 1 - Page 9

... back on . After two minutes of the feature and function keys on and off. Refer to save the label when you turn the power off. 9 Power The button turns the power on your label maker. If the current label is switched off automatically. The following sections describe each feature in detail. Getting to Know the...
User Guide 1 - Page 10

... formatting you know when a feature is selected. 1 Font 6 Uppercase 2 Font size 7 Lowercase 3 Mirror text 8 Accented character 4 Text alignment 9 Fixed label length 5 Battery 10 Edit area 10 The number of characters displayed on each line will vary due to let you add is visible instantly. 1 2 3 4 5 6 7 8 9 10 Feature indicators along the top of text at...
User Guide 1 - Page 11

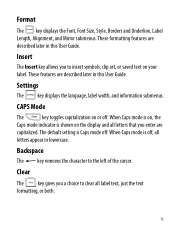
...clip art, or saved text on or off. When Caps mode is Caps mode off , all label text, just the text formatting, or both. 11 The default setting is off . These features are... The Insert key allows you enter are capitalized. CAPS Mode The key toggles capitalization on your label. Backspace The key removes the character to clear all letters appear in lowercase. Clear The key...
User Guide 1 - Page 16

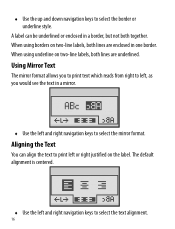
Using Mirror Text The mirror format allows you to print text which reads from right to left, as you would see the text in one border. A label can align the text to select the border or underline style. When using borders on two-line labels, both lines are underlined. Aligning the Text You can be underlined...
User Guide 1 - Page 18

Creating Two-Line Labels You can print a maximum of text can be printed on a label. To create a two-line label 1 Type the text for the first line and press . 2 Type the text for the second line. 3 Press to print. 18 Only one line of two lines on labels.
User Guide 1 - Page 19

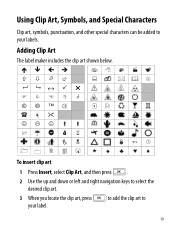
to add the clip art to 19 Adding Clip Art The label maker includes the clip art shown below. ♠♣♥♦ To insert clip art 1 Press Insert, ...navigation keys to select the desired clip art. 3 When you locate the clip art, press your labels. Using Clip Art, Symbols, and Special Characters Clip art, symbols, punctuation, and other special characters can be added to your...
User Guide 1 - Page 20

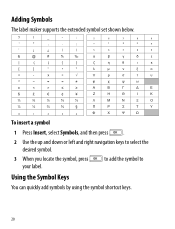
Adding Symbols The label maker supports the extended symbol set shown below. ? ! _ - : ' " , . ; ' ¡ ¿ / \ & @ # % ‰ | ( ) { } [ ] ° • * + - to add the symbol to select the desired symbol. 3 When you locate the symbol, press your label. x ÷ √ ^ ~ ≈ = ≠ ± < > ≤ ≥ $ £ &#...
User Guide 1 - Page 21

... press . 21 The character variations and the order in which the variations appear depend on the language you want and press . Adding International Characters The label maker supports the extended Latin character set. After pressing the Accent key, pressing a letter brings up a menu containing all the variations available. The accent variations are...
User Guide 1 - Page 22

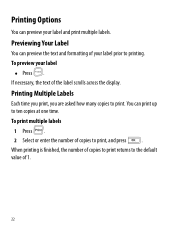
... one time. If necessary, the text of your label ♦ Press . You can print up to print, and press . To print multiple labels 1 Press . 2 Select or enter the number of copies to print returns to print. To preview your label prior to printing. Previewing Your Label You can preview your label and print multiple labels. Printing Options You can preview the text and formatting...
User Guide 1 - Page 23

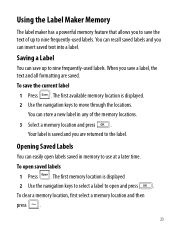
... in any of up to the label. Saving a Label You can save the text of the memory locations. 3 Select a memory location and press . Opening Saved Labels You can recall saved labels and you save the current label 1 Press . You can insert saved text into a label. Using the Label Maker Memory The label maker has a powerful memory feature that allows you...
User Guide 1 - Page 25

.... Press and hold the cutter button to clean both sides of the tool across the print head. See Figure 6. To clean the print head 1 Remove the label cassette. See Figure 6. 25 Caring for Your Label Maker Your label maker is designed to keep it working properly. Clean your label maker from inside the label compartment cover. 3 Gently wipe the padded side...
User Guide 1 - Page 26

... discharged. See Caring for Your Label Maker. Printing... Too many lines Exceeded maximum number of lines. • Delete a line to recharge the battery pack. Delete some or all of characters in buffer. See Recharging the Battery Pack. 26 See Recharging the Battery Pack. See Recharging the Battery Pack. • Clean the print head. • Ensure the label cassette is finished. No action...
User Guide 1 - Page 27

... about additional topics you would like to : [email protected] Please keep in the documentation. Problem/Error Message Solution Battery Failure! • Ensure the battery pack is stalled due to recharge before unplugging the label maker. Motor is inserted correctly. Wait - Battery pack not inserted properly See Inserting the Battery Pack. or damaged. • Replace the...

Similar Questions

Label Stall Detected
what does label stall detected on Rhino 5200 mean And how can I fix it?
(Posted by Merck008 2 years ago)
Label Jam 160
Each time I attempt to use my label maker DYMO 160 it comes up Label jam; I have tried reinserting t...
(Posted by deedeeinwv 6 years ago)
Labelmanager 260p
I tried registering my 260P on your website, but the list of products does NOT include the 260P. I t...
(Posted by lewsherman 11 years ago)
Ask a New Question
Use the box below to post a new question about this Dymo product .
Points & Prizes
  • You can earn points for nearly everything you do on HelpOwl.com
  • You can trade in those points for gift cards at leading retailers such as Amazon.com and Walmart
  • It's that simple!
See How it Works
Create a Free Account

Dymo Manuals

Find free Dymo LabelManager 260P manuals and user guides available at ManualOwl.com. Try out our unique manual viewer allowing you to interact with manuals from directly within your browser!

Dymo Reviews

View thousands of Dymo user reviews and customer ratings available at ReviewOwl.com.

Contact Information

Complete Dymo customer service contact information including steps to reach representatives, hours of operation, customer support links and more from ContactHelp.com.

Scoreboard Ratings

See detailed Dymo customer service rankings, employee comments and much more from our sister site.

Dymo Recalls

Find comprehensive Dymo recall information updated hourly on RecallOwl.com.