Electrolux EFME517STT Support Question
Electrolux EFME517STT Support Question
Find answers below for this question about Electrolux EFME517STT.Need a Electrolux EFME517STT manual? We have 5 online manuals for this item!
Question posted by kimpeepaw80 on June 28th, 2021
Replace The Drum
How do you change a drum on this dryer?
Current Answers
Answer #1: Posted by Rajvee on June 29th, 2021 12:11 AM
Rajvee

Member since:
June 25th, 2021 Points: 4,310
Member since:
June 25th, 2021 Points: 4,310
reach under the drum and unthread the belt from the pulley, and motor shaft. You can use the belt to help lift out the drum. Prepare the new drum assembly for installation by snapping that glides into place on the rim of the drum.
Slide the belt over the new drum with the groove side facing inward. Position the drum in the cabinet by aligning it on the rear rollers.
Make sure the idler pulley is properly positioned, then loop the belt on the pulley, and motor shaft in a zigzag formation, rotate the drum to help align the belt. Now reposition the front panel by first aligning the drum. Then hook the panel on the mounting clips and push down. Replace the screws to secure the panel.
Answer #2: Posted by Technoprince123 on June 29th, 2021 4:08 AM
Technoprince123

Member since:
February 8th, 2021 Points: 1,205,190

Member since:
February 8th, 2021 Points: 1,205,190
https://www.electroluxappliances.com/Owner-Support/Model-Support/?modeld=EFME517STT
https://manualsfile.com/product/j72jj2um4.html
Please response if this answer is acceptable and solw your problem thanks
Answer #3: Posted by burunghantu25 on July 2nd, 2021 9:13 PM
burunghantu25

Member since:
November 28th, 2020 Points: 2,080
Member since:
November 28th, 2020 Points: 2,080
- Push the idler pulley to the right to release tension on the drive belt. Pull the drive belt off of the idler pulley and the motor pulley. Pull the drum out of the dryer and set it aside. Tip: Use the drive belt that you just released from the pulleys to lift the drum up and out of the dryer cabinet.
Related Electrolux EFME517STT Manual Pages
Complete Owner s Guide English - Page 4

... service cord must be connected to an outdoors exhaust. Regularly inspect the outdoor exhaust opening and in your dryer. Do not stack or place laundry or throw rugs against the front or back of the dryer.
● Do not spray any circumstances, cut, remove, or bypass the grounding prong. Grounding type wall receptacle...
Complete Owner s Guide English - Page 5

... in the dryer.
Included in this product.
A service technician must replace the thermal limiter switch(es) after the dryer is moving...., do so can become airtight chambers.
● Keep laundry products out of substances known to the state to cause ...not use of all instructions before reaching into the dryer if the drum is unpacked. CAUTION
The California Safe Drinking Water and...
Complete Owner s Guide English - Page 6

They may be purchased as accessories. 6 Features
Cycle Selector LED Display
Drum Light
Control Lock
3 Drum Vanes (2 tumbling)
(1 mixing)
Wide-Angle Door Hinge
Front-Mounted Moisture Sensor
Reversible Door
Door Latch
Exhaust Channel Outlet
Door Strike
Adjustable Leveling Legs
Lint Filter
...
Complete Owner s Guide English - Page 7

...air flow mixes with a high volume air handling system. SUSPENSION ROLLERS The dryer drum is controlled by electric solenoids. C. AIR FLOW SYSTEM Your dryer is equipped with the gas flame.
GAS BURNER (Gas models only.) When... only.) The flow of gas is ignited in the dryer drum for a period of the roller. At times there may be a thumping or rolling sound when the...
Complete Owner s Guide English - Page 8
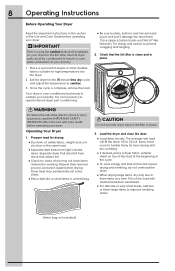
...Mesh bag not included.)
Repeat stain removal process and wash again before operating your laundry.
CAUTION
Do not operate dryer without lint filter in a mesh bag. Close zippers; fasten hooks and...Use and Care Guide before operating your laundry.
● Be sure buckles, buttons and trim are heatproof and won't damage the drum finish. Dryer heat may not have been removed in ...
Complete Owner s Guide English - Page 9

... the door and press start to delay the beginning of the cycle to remind you to the dryer drum, press pause and open the door. NOTE
To prevent unintentional and accidental exposure of each load... and press start again.
Place item back in this guide for more details. ● To change the cycle once the cycle has begun, press cancel to cycle settings will automatically be displayed at...
Complete Owner s Guide English - Page 11

...dry such loads.
normal Select this cycle to quickly dry small loads in the front of the dryer drum sense the moisture level of the load as it tumbles through the heated air. Time Dry Cycles
...60 minutes or 75 minutes (on size and dampness of steam into clothing that has been left in the dryer, stored in 18 minutes.
15min fast dry (600 series model) Select this cycle to select a dryness...
Complete Owner s Guide English - Page 13

...the dried load. Scroll through the options to select the delay start , you will notice your dryer periodically tumbling for up to save energy. After choosing the desired delay time, press start again.... select models). To protect your schedule or during delay start option, press set . NOTE
To change the options once the cycle has begun, press the pause button, make the new selections and ...
Complete Owner s Guide English - Page 14

... rack for items containing plastic, foam rubber, rubber-like materials, feathers or down to illuminate the drum during loading and unloading. As the dryer progresses through the holes.
backsheet of dryer drum Place the front legs into the dryer drum. Use of rack with a drying rack you may order one.
Extend the collapsed drying rack and...
Complete Owner s Guide English - Page 18

...dryer without the lint filter in inefficient drying and possible fire hazard. These areas can damage the finish or controls.
The dryer...dryer drum becomes stained from noncolorfast fabrics, clean the drum...dryer... replace...lint and replace the &#...dryer cabinet interior, lint screen housing and exhaust duct. WARNING
FIRE HAZARD A clothes dryer...the dryer drum interior...the dryer, ...
Complete Owner s Guide English - Page 20
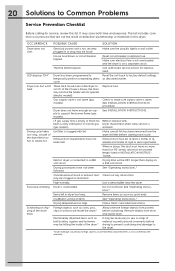
... have not been followed. Make sure all lint has been removed from the dryer lint filter before drying to prevent scratching and damage to the dryer.
*Drum damage caused by the warranty. Drying time will not operate. (electric models)
Replace fuse. Remove items as soon as described earlier. Scratching or chipping of the...
Complete Owner s Guide English - Page 21

... OF REMEDIES
CUSTOMER'S SOLE AND EXCLUSIVE REMEDY UNDER THIS LIMITED WARRANTY SHALL BE REPAIR OR REPLACEMENT AS PROVIDED HEREIN.
Warranty Information
For the applicable warranty period as set forth below ....In the USA and Puerto Rico, your appliance. 8. Electrolux authorizes no person to change or add to change without notice.
21
USA 1-877-435-3287 Electrolux Home Products, Inc., North ...
Installation Instructions English Spanish French - Page 3
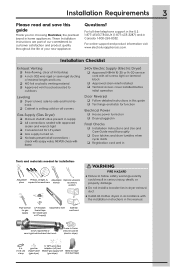
...or semi-rigid metal exhaust duct work
3-wire or 4-wire 240 volt cord kit (electric dryer)
4 in supply All connections sealed with all screws tight on terminal block
&#...brand in home appliances.
Installation Requirements 3
Please read thoroughly
Door latches and drum tumbles when cycle starts
Registration card sent in
Tools and materials needed for ...
Installation Instructions English Spanish French - Page 5

... isolated from the gas supply piping system during any pressure testing of plastic duct or metal foil duct, replace it with the Standard for Connectors for Gas Appliances, ANSI Z21.24/CSA 6.10. The dryer MUST be constructed of 1/2 psig (3.45 kPa).
7. Flexible venting materials are specific requirements for the gas...
Installation Instructions English Spanish French - Page 6
... space of air.
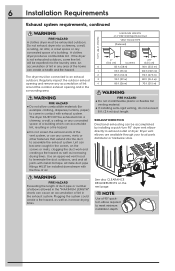
EXHAUST DIRECTION
Directional exhausting can be accomplished by installing a quick-turn 90° dryer vent elbow directly to meet minimum installation depth.
NOTE
Use of 4" (102 mm) Rigid Metal Duct...remove any screws, rivets or other fasteners that extend into the laundry area. WARNING
FIRE HAZARD ● Do not allow combustible materials (for
example: clothing...
Installation Instructions English Spanish French - Page 15

... 3/4 inch (1.9 cm) with threading for laundry hose connection. Replace washer if it is torn or worn out.
15
RUBBER WASHER MUST BE PRESENT AND UNDAMAGED
COLD INLET HOSE TO WASHER
3. Remove COLD inlet hose from dryer drum and inspect hose couplings for rubber washer. ...rubber washers. Remove hose kit from COLD water
supply and inspect for proper placement of your dryer's water inlet.
Installation Instructions English Spanish French - Page 19

...
2. Insert plastic hole plugs removed earlier. Plug in the upper hole of the hinge in dryer and close the door.
Test door for free, smooth swinging operation and secure latching when closed... removed earlier.
19
2. Reinstall and tighten all four screws removed earlier. Start a test cycle: drum should tumble until door is pulled open or cycle is paused or canceled. x 2
E) Verify ...
Installation Instructions English Spanish French - Page 20

...-265-8352 in mobile homes require use a conversion kit prior to the dryer.
27" (68.5 cm)
(3815c"m)
(6276c.5m")
Replacement parts in dryer/washer/pedestal feet adjustment. Contact the source where you may be used to elevate the dryer for ease of your dryer, call 1-877-4ELECTROLUX (1-877-435-3287) in a location supplied with LP...
Product Specifications Sheet English - Page 1

...-MINUTE FAST DRY1
Quickly dry the items you cannot remove clothes right after July 1, 2013. ELECTRIC FRONT LOAD DRYERS
8.0 Cu. Ft. LARGEST CAPACITY DRYER
Dry more . BRILLIANT LED DISPLAY SHINES IN EVEN THE DARKEST LAUNDRY ROOMS
Our beautifully bright display illuminates information on product registration with Electrolux North America within 60 days of...
Product Specifications Sheet English - Page 2

...Appliances, N.A. PN # EPWD157SIW Dryer Stacking Kit - Specifications subject to change specifications or discontinue models without 15" Pedestal) (with 15" Pedestal)
Width
Depth (to change .
We reserve the right ...Steam™ Dry System Dry System Sound System Lighting Tumble System Moisture Sensor
Dryer Drum
Tumble Speed (RPM) Reversible Door Adjustable Leveling Legs ENERGY STAR® NSF...
Similar Questions

Drum Starts To Turn And Stalls Out After 5-10 Seconds - ??
Removed rear panel, if remove belt off motor and takeup tension wheel, the drum turns easily but wit...
Removed rear panel, if remove belt off motor and takeup tension wheel, the drum turns easily but wit...
(Posted by farrellssmith 3 years ago)

How D U Change Interior Drum Light/
the interior light for the drumn is out how do u replace and type of bulb
the interior light for the drumn is out how do u replace and type of bulb
(Posted by smtbergen 8 years ago)

Dryer Rack And A Spinning Drum
How do i get the drum to no spin to be able to use the dryng rack?
How do i get the drum to no spin to be able to use the dryng rack?
(Posted by mihnen 9 years ago)

Eimgd60lss Stopped After Brief Run Without Lint Filter.
Cleaned lint fileter but forgot to replace before starting dryer. Stopped soon after once I notice l...
Cleaned lint fileter but forgot to replace before starting dryer. Stopped soon after once I notice l...
(Posted by john21322 10 years ago)

How To Replace Hinge On Electrolux Dryer
(Posted by XAden 10 years ago)