Quick Start Guide
Page 3
Network Bullet Camera·Quick Start Guide ● Other trademarks and logos mentioned are the properties of their respective owners. IN NO EVENT WILL HIKVISION BE LIABLE TO YOU FOR ANY ...SOFTWARE AND FIRMWARE, ARE PROVIDED "AS IS" AND "WITH ALL FAULTS AND ERRORS". HOWEVER, HIKVISION WILL PROVIDE TIMELY TECHNICAL SUPPORT IF REQUIRED. 2 HIKVISION MAKES NO WARRANTIES, EXPRESS OR IMPLIED, INCLUDING WITHOUT LIMITATION, MERCHANTABILITY, SATISFACTORY QUALITY, OR FITNESS FOR A PARTICULAR PURPOSE. YOU ACKNOWLEDGE THAT THE NATURE OF INTERNET PROVIDES FOR INHERENT SECURITY RISKS, AND HIKVISION...
Network Bullet Camera·Quick Start Guide ● Other trademarks and logos mentioned are the properties of their respective owners. IN NO EVENT WILL HIKVISION BE LIABLE TO YOU FOR ANY ...SOFTWARE AND FIRMWARE, ARE PROVIDED "AS IS" AND "WITH ALL FAULTS AND ERRORS". HOWEVER, HIKVISION WILL PROVIDE TIMELY TECHNICAL SUPPORT IF REQUIRED. 2 HIKVISION MAKES NO WARRANTIES, EXPRESS OR IMPLIED, INCLUDING WITHOUT LIMITATION, MERCHANTABILITY, SATISFACTORY QUALITY, OR FITNESS FOR A PARTICULAR PURPOSE. YOU ACKNOWLEDGE THAT THE NATURE OF INTERNET PROVIDES FOR INHERENT SECURITY RISKS, AND HIKVISION...
Quick Start Guide
Page 9
... with this sticker, this device is intended for installation in a restricted access location, access can only be gained by service persons or by users who have been instructed about any precautions that shall be taken. Avertissements ...Suivez ces mesures de sécurité afin d'éviter des blessures graves ou la mort. Cautions Follow these safeguards to prevent serious injury or death. Network Bullet Camera·Quick Start Guide...
... with this sticker, this device is intended for installation in a restricted access location, access can only be gained by service persons or by users who have been instructed about any precautions that shall be taken. Avertissements ...Suivez ces mesures de sécurité afin d'éviter des blessures graves ou la mort. Cautions Follow these safeguards to prevent serious injury or death. Network Bullet Camera·Quick Start Guide...

Quick Start Guide
Page 10
... les yeux. May be connected reliably. Ne pas regarder la source de lumière. Ground wire cross-sectional area of the installer and/or end-user. Network Bullet Camera·Quick Start Guide ● Proper configuration of all passwords and other security settings is the responsibility of not less than the phase connector cross-sectional area level, at the operating light source. Les mises...
... les yeux. May be connected reliably. Ne pas regarder la source de lumière. Ground wire cross-sectional area of the installer and/or end-user. Network Bullet Camera·Quick Start Guide ● Proper configuration of all passwords and other security settings is the responsibility of not less than the phase connector cross-sectional area level, at the operating light source. Les mises...
Quick Start Guide
Page 19
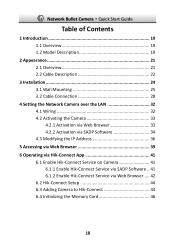
Network Bullet Camera·Quick Start Guide Table of Contents 1 Introduction 19 1.1 Overview 19 1.2 Model Description 19 2 Appearance 21 2.1 Overview 21 2.2 Cable Description 22 3 Installation 24 3.1 Wall Mounting 25 3.2 Cable Connection 28 4 Setting the Network Camera over the LAN 32 4.1 Wiring 32 4.2 Activating the Camera 33 4.2.1 Activation via Web Browser 33 4.2.2 Activation via SADP Software 34 4.3 Modifying the IP Address 36 5 Accessing via Web Browser 39 6 Operating via Hik-Connect App 41 6.1 Enable Hik-Connect Service on Camera 41 6.1.1 Enable Hik-Connect Service via...
Network Bullet Camera·Quick Start Guide Table of Contents 1 Introduction 19 1.1 Overview 19 1.2 Model Description 19 2 Appearance 21 2.1 Overview 21 2.2 Cable Description 22 3 Installation 24 3.1 Wall Mounting 25 3.2 Cable Connection 28 4 Setting the Network Camera over the LAN 32 4.1 Wiring 32 4.2 Activating the Camera 33 4.2.1 Activation via Web Browser 33 4.2.2 Activation via SADP Software 34 4.3 Modifying the IP Address 36 5 Accessing via Web Browser 39 6 Operating via Hik-Connect App 41 6.1 Enable Hik-Connect Service on Camera 41 6.1.1 Enable Hik-Connect Service via...
Quick Start Guide
Page 20
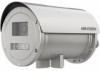
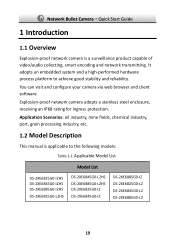
You can visit and configure your camera via web browser and client software. Application Scenarios: oil industry, mine fields, chemical industry, port, grain processing industry, etc. 1.2 Model Description This manual is a surveillance product capable of video/audio collecting, smart encoding and network transmitting. Network Bullet Camera·Quick Start Guide 1 Introduction 1.1 Overview Explosion-proof network camera is applicable to achieve good stability and reliability. It adopts an embedded system...
You can visit and configure your camera via web browser and client software. Application Scenarios: oil industry, mine fields, chemical industry, port, grain processing industry, etc. 1.2 Model Description This manual is a surveillance product capable of video/audio collecting, smart encoding and network transmitting. Network Bullet Camera·Quick Start Guide 1 Introduction 1.1 Overview Explosion-proof network camera is applicable to achieve good stability and reliability. It adopts an embedded system...

Quick Start Guide
Page 25
... enough to withstand four times the weight of the camera and the bracket. Network Bullet Camera·Quick Start Guide 3 Installation Before you are included. ● The standard power supply is 100 to 240 VAC, please make sure your power supply matches with your camera. ● Make sure all the related equipment is power-off during the installation. ● Check the specification of the products for...
... enough to withstand four times the weight of the camera and the bracket. Network Bullet Camera·Quick Start Guide 3 Installation Before you are included. ● The standard power supply is 100 to 240 VAC, please make sure your power supply matches with your camera. ● Make sure all the related equipment is power-off during the installation. ● Check the specification of the products for...

Quick Start Guide
Page 26
... flush against the inner surface of the bubble to the Camera 25 Figure 3-2 Install Fixed Mount to isolate the lens from the IR LEDS. Fixed Mount Bottom Base Figure 3-1 PT Joint Steps: 1. Network Bullet Camera·Quick Start Guide ● Make sure that the foam ring and the dome cover are attached seamlessly. 3.1 Wall Mounting Before you start: Loosen the screws on the side...
... flush against the inner surface of the bubble to the Camera 25 Figure 3-2 Install Fixed Mount to isolate the lens from the IR LEDS. Fixed Mount Bottom Base Figure 3-1 PT Joint Steps: 1. Network Bullet Camera·Quick Start Guide ● Make sure that the foam ring and the dome cover are attached seamlessly. 3.1 Wall Mounting Before you start: Loosen the screws on the side...

Quick Start Guide
Page 27
Drill holes on the mounting plate and install the bracket to the camera and the bracket. Hook the safety rope to the mounting plate with the screws. Install the bottom base of the PT joint to the bracket with the screws. Safety Rope Figure 3-5 Hook the Safety Rope 5. Install the camera to the wall mounting bracket with the screws. 26 Figure 3-3 Install Bottom Base to the Bracket 3. Figure 3-4 Install the Bracket 4. Network Bullet Camera·Quick Start Guide 2.
Drill holes on the mounting plate and install the bracket to the camera and the bracket. Hook the safety rope to the mounting plate with the screws. Install the bottom base of the PT joint to the bracket with the screws. Safety Rope Figure 3-5 Hook the Safety Rope 5. Install the camera to the wall mounting bracket with the screws. 26 Figure 3-3 Install Bottom Base to the Bracket 3. Figure 3-4 Install the Bracket 4. Network Bullet Camera·Quick Start Guide 2.

Quick Start Guide
Page 31
...Network Bullet Camera·Quick Start Guide Figure 3-10 Secure Adapter to the corresponding terminal blocks and fasten the gland nut. 6. Connect the cables to the Back Cover 5. Figure 3-11 Install the Back Cover Note: ● The flexible conduit shall then connect to the figure below. 30 Route the camera cables according to a junction box use in Canada. 7. The cable needs...conduit seal shall be applied by the installer or user of the equipment according to the camera with the screws. Install the back cover to the National Electrical Code® or the equivalent in hazardous locations....
...Network Bullet Camera·Quick Start Guide Figure 3-10 Secure Adapter to the corresponding terminal blocks and fasten the gland nut. 6. Connect the cables to the Back Cover 5. Figure 3-11 Install the Back Cover Note: ● The flexible conduit shall then connect to the figure below. 30 Route the camera cables according to a junction box use in Canada. 7. The cable needs...conduit seal shall be applied by the installer or user of the equipment according to the camera with the screws. Install the back cover to the National Electrical Code® or the equivalent in hazardous locations....
Quick Start Guide
Page 34
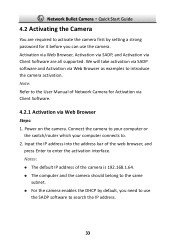
..., and Activation via Client Software are required to activate the camera first by default, you can use the SADP software to introduce the camera activation. Note: Refer to the User Manual of Network Camera for it before you need to use the camera. Power on the camera. Notes: The default IP address of the web browser, and press Enter to . 2. Network Bullet Camera·Quick Start Guide 4.2 Activating the Camera You are all supported.
..., and Activation via Client Software are required to activate the camera first by default, you can use the SADP software to introduce the camera activation. Note: Refer to the User Manual of Network Camera for it before you need to use the camera. Power on the camera. Notes: The default IP address of the web browser, and press Enter to . 2. Network Bullet Camera·Quick Start Guide 4.2 Activating the Camera You are all supported.

Quick Start Guide
Page 35
... security system, resetting the password monthly or weekly can better protect your product. Confirm the password. 5. Get the SADP software from the supplied disk or the official website, and install the SADP according to the prompts. 34 And we recommend you create a strong password of your own choosing (using a minimum of your product. 4. Network Bullet Camera·Quick Start Guide Figure 4-3 Activation Interface (Web...
... security system, resetting the password monthly or weekly can better protect your product. Confirm the password. 5. Get the SADP software from the supplied disk or the official website, and install the SADP according to the prompts. 34 And we recommend you create a strong password of your own choosing (using a minimum of your product. 4. Network Bullet Camera·Quick Start Guide Figure 4-3 Activation Interface (Web...
Quick Start Guide
Page 37
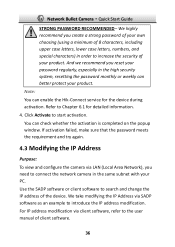
... on the popup window. Refer to connect the network camera in the high security system, resetting the password monthly or weekly can better protect your PC. We take modifying the IP Address via client software, refer to introduce the IP address modification. Network Bullet Camera·Quick Start Guide STRONG PASSWORD RECOMMENDED- For IP address modification via SADP software as an example to the user manual of your product...
... on the popup window. Refer to connect the network camera in the high security system, resetting the password monthly or weekly can better protect your PC. We take modifying the IP Address via client software, refer to introduce the IP address modification. Network Bullet Camera·Quick Start Guide STRONG PASSWORD RECOMMENDED- For IP address modification via SADP software as an example to the user manual of your product...

Quick Start Guide
Page 40
... user/operator). 39 You are recommended to change the IP address to enter the login interface. Note: The default IP address is 192.168.1.64. Input the user name and password. Network Bullet Camera·Quick Start Guide 5 Accessing via Web Browser System Requirement: Operating System: Microsoft Windows XP SP1 and above version CPU: 2.0 GHz or higher RAM: 1G or higher Display: 1024×768 resolution or higher Web Browser: Internet Explorer 8.0 and above version...
... user/operator). 39 You are recommended to change the IP address to enter the login interface. Note: The default IP address is 192.168.1.64. Input the user name and password. Network Bullet Camera·Quick Start Guide 5 Accessing via Web Browser System Requirement: Operating System: Microsoft Windows XP SP1 and above version CPU: 2.0 GHz or higher RAM: 1G or higher Display: 1024×768 resolution or higher Web Browser: Internet Explorer 8.0 and above version...

Quick Start Guide
Page 41
Click Login. Note: For detailed instructions of further configuration, please refer to login. Install the plug-in 6. Figure 5-2 Download Plug-in before viewing the live video and managing the camera. Network Bullet Camera·Quick Start Guide 4. Follow the installation prompts to finish the installation of network camera. 40 Figure 5-1 Login Interface 5. Note: You may have to close the web browser to install the plug-in . Reopen the web browser after the installation of the plug-in and repeat steps 2 to 4 to the user manual of the plug-in .
Click Login. Note: For detailed instructions of further configuration, please refer to login. Install the plug-in 6. Figure 5-2 Download Plug-in before viewing the live video and managing the camera. Network Bullet Camera·Quick Start Guide 4. Follow the installation prompts to finish the installation of network camera. 40 Figure 5-1 Login Interface 5. Note: You may have to close the web browser to install the plug-in . Reopen the web browser after the installation of the plug-in and repeat steps 2 to 4 to the user manual of the plug-in .

Quick Start Guide
Page 42
... camera, receive alarm notification and so on. "Activate the Device" page during modifying IP address, refer to Chapter 4.2.2. 2). With the App, you can enable the service through SADP software or web browser. 6.1.1 Enable Hik-Connect Service via Hik-Connect App Purpose: Hik-Connect is not supported by certain camera models. 6.1 Enable Hik-Connect Service on Camera Purpose: Hik-Connect service should be enabled on : 1). Or "Modify Network Parameters" page during camera activation, refer to Chapter 4.3. 2. Network Bullet Camera·Quick Start Guide 6 Operating...
... camera, receive alarm notification and so on. "Activate the Device" page during modifying IP address, refer to Chapter 4.2.2. 2). With the App, you can enable the service through SADP software or web browser. 6.1.1 Enable Hik-Connect Service via Hik-Connect App Purpose: Hik-Connect is not supported by certain camera models. 6.1 Enable Hik-Connect Service on Camera Purpose: Hik-Connect service should be enabled on : 1). Or "Modify Network Parameters" page during camera activation, refer to Chapter 4.3. 2. Network Bullet Camera·Quick Start Guide 6 Operating...
Quick Start Guide
Page 44
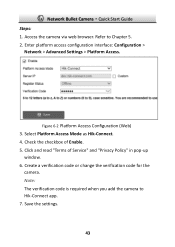
... camera via web browser. Figure 6-2 Platform Access Configuration (Web) 3. Note: The verification code is required when you add the camera to Chapter 5. 2. Select Platform Access Mode as Hik-Connect. 4. Check the checkbox of Service" and "Privacy Policy" in pop-up window. 6. Click and read "Terms of Enable. 5. Create a verification code or change the verification code for the camera. Enter platform access configuration interface: Configuration > Network > Advanced Settings > Platform Access. Save the settings. 43 Network Bullet Camera·Quick Start Guide...
... camera via web browser. Figure 6-2 Platform Access Configuration (Web) 3. Note: The verification code is required when you add the camera to Chapter 5. 2. Select Platform Access Mode as Hik-Connect. 4. Check the checkbox of Service" and "Privacy Policy" in pop-up window. 6. Click and read "Terms of Enable. 5. Create a verification code or change the verification code for the camera. Enter platform access configuration interface: Configuration > Network > Advanced Settings > Platform Access. Save the settings. 43 Network Bullet Camera·Quick Start Guide...
Quick Start Guide
Page 45
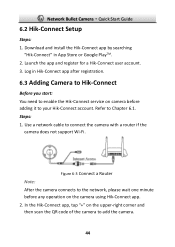
... to add the camera. 44 Steps: 1. In the Hik-Connect app, tap "+" on the camera using Hik-Connect app. 2. Use a network cable to enable the Hik-Connect service on camera before any operation on the upper-right corner and then scan the QR code of the camera to Chapter 6.1. Launch the app and register for a Hik-Connect user account. 3. Log in App Store or Google PlayTM. 2. Network Bullet Camera·Quick Start Guide 6.2 Hik-Connect Setup Steps: 1. Figure 6-3 Connect a Router...
... to add the camera. 44 Steps: 1. In the Hik-Connect app, tap "+" on the camera using Hik-Connect app. 2. Use a network cable to enable the Hik-Connect service on camera before any operation on the upper-right corner and then scan the QR code of the camera to Chapter 6.1. Launch the app and register for a Hik-Connect user account. 3. Log in App Store or Google PlayTM. 2. Network Bullet Camera·Quick Start Guide 6.2 Hik-Connect Setup Steps: 1. Figure 6-3 Connect a Router...
Quick Start Guide
Page 46
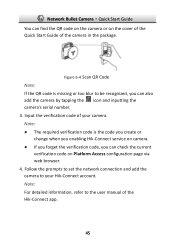
... code on the camera or on Platform Access configuration page via web browser. 4. Follow the prompts to set the network connection and add the camera to the user manual of your Hik-Connect account. Input the verification code of the Hik-Connect app. 45 Note: For detailed information, refer to your camera. Figure 6-4 Scan QR Code Note: If the QR code is the code you create or change when you enabling Hik-Connect service on camera...
... code on the camera or on Platform Access configuration page via web browser. 4. Follow the prompts to set the network connection and add the camera to the user manual of your Hik-Connect account. Input the verification code of the Hik-Connect app. 45 Note: For detailed information, refer to your camera. Figure 6-4 Scan QR Code Note: If the QR code is the code you create or change when you enabling Hik-Connect service on camera...

Data Sheet
Page 2
... detection, up to 4 regions configurable Unattended baggage detection, up to 4 regions configurable Object removal detection, up to 4 regions configurable Scene change detection, audio exception detection, defocus detection Motion detection, video tampering alarm, exception (network disconnected, IP address conflict, illegal login, HDD full, HDD error) Detects up to 40 faces simultaneously Detects up to 30 human targets simultaneously Supports up to 4 shield regions Upload to FTP/NAS/memory card, notify surveillance center, send e-mail, trigger alarm output, trigger recording...
... detection, up to 4 regions configurable Unattended baggage detection, up to 4 regions configurable Object removal detection, up to 4 regions configurable Scene change detection, audio exception detection, defocus detection Motion detection, video tampering alarm, exception (network disconnected, IP address conflict, illegal login, HDD full, HDD error) Detects up to 40 faces simultaneously Detects up to 30 human targets simultaneously Supports up to 4 shield regions Upload to FTP/NAS/memory card, notify surveillance center, send e-mail, trigger alarm output, trigger recording...
Data Sheet
Page 3
Specifications (continued) Image Image Enhancement Image Settings Target Cropping Day/Night Switch Picture Overlay Network Network Storage Protocols API Security Simultaneous Live View User/Host Client Web Browser Interface Communication Interface Audio Alarm Interface Style Video Out On-Board Storage General Firmware Version Web Client Language General Function Reset Startup and Operating Conditions Storage Conditions Power Supply Power Consumption and Current Material Heater Dimensions Weight Approvals EMC Safety Environment Protection Explosion-Proof Certificate DS-2XE6825G0-IZHS DS-...
Specifications (continued) Image Image Enhancement Image Settings Target Cropping Day/Night Switch Picture Overlay Network Network Storage Protocols API Security Simultaneous Live View User/Host Client Web Browser Interface Communication Interface Audio Alarm Interface Style Video Out On-Board Storage General Firmware Version Web Client Language General Function Reset Startup and Operating Conditions Storage Conditions Power Supply Power Consumption and Current Material Heater Dimensions Weight Approvals EMC Safety Environment Protection Explosion-Proof Certificate DS-2XE6825G0-IZHS DS-...