
Operation Manual
Page 3
... on 13 Turning the power off 13 Adjusting the screen display and speaker volume 15 Adjusting the screen display 15 Automatic screen adjustment 15 Adjusting the backlight 16 Manual screen adjustment 17 Adjusting the speaker volume 19 Monitor care and repair 20 Monitor care 20 Storage 20 Troubleshooting 20 Specifications 21 Instructions for installing a VESA compliant...
... on 13 Turning the power off 13 Adjusting the screen display and speaker volume 15 Adjusting the screen display 15 Automatic screen adjustment 15 Adjusting the backlight 16 Manual screen adjustment 17 Adjusting the speaker volume 19 Monitor care and repair 20 Monitor care 20 Storage 20 Troubleshooting 20 Specifications 21 Instructions for installing a VESA compliant...
Operation Manual
Page 9
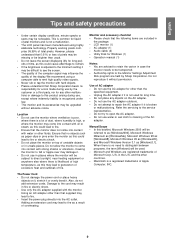
...other than usual. - This is common for any objects on top of the AC adapter. The LCD panel has been manufactured using a computer able to emit high quality video signals. - LCD monitor (1) - Operation manual (1) Notes: - Do not use the AC adapter for errors made during use the AC adapter ...near heating equipment or anywhere else where there is likelihood of dust, where humidity is not used . - Do not use by Sharp Corporation. Causing the monitor to fall or topple over may lead to fire as this booklet, Microsoft Windows 2000 will be used for long time. - Audio...
...other than usual. - This is common for any objects on top of the AC adapter. The LCD panel has been manufactured using a computer able to emit high quality video signals. - LCD monitor (1) - Operation manual (1) Notes: - Do not use the AC adapter for errors made during use the AC adapter ...near heating equipment or anywhere else where there is likelihood of dust, where humidity is not used . - Do not use by Sharp Corporation. Causing the monitor to fall or topple over may lead to fire as this booklet, Microsoft Windows 2000 will be used for long time. - Audio...

Operation Manual
Page 13
...appears, repeat the installation commands beginning from the A drive. If so, follow the computer's own operation manual while reading this.) For Windows95 Installing monitor set-up this monitor for the first time or after having changed an aspect of the current system, perform an automatic screen... adjustment before use the computer to use (p. 15). Click on the type of monitor set -up information into Windows95. Click on [Display]. 4. The power LED will be necessary to operate the ...
...appears, repeat the installation commands beginning from the A drive. If so, follow the computer's own operation manual while reading this.) For Windows95 Installing monitor set-up this monitor for the first time or after having changed an aspect of the current system, perform an automatic screen... adjustment before use the computer to use (p. 15). Click on the type of monitor set -up information into Windows95. Click on [Display]. 4. The power LED will be necessary to operate the ...

Operation Manual
Page 15
...Remove the adjustment lock before use the Adjustment Pattern on the screen. 3. Turn off the monitor power. 2. All Reset MENU All adjustment values can be displayed. When setting up this ...button (i.e. First display an image that makes the entire screen very bright.) 15 Press the power button to either use the Adjustment Pattern or try displaying an...The clock, phase, H-POS (horizontal positioning) and VPOS (vertical positioning) functions can be displayed. Manual adjustment (p. 17) Fine adjustments can be displayed in one command. 1. Note: - All adjustments ...
...Remove the adjustment lock before use the Adjustment Pattern on the screen. 3. Turn off the monitor power. 2. All Reset MENU All adjustment values can be displayed. When setting up this ...button (i.e. First display an image that makes the entire screen very bright.) 15 Press the power button to either use the Adjustment Pattern or try displaying an...The clock, phase, H-POS (horizontal positioning) and VPOS (vertical positioning) functions can be displayed. Manual adjustment (p. 17) Fine adjustments can be displayed in one command. 1. Note: - All adjustments ...

Operation Manual
Page 17
...To go to MENU 2: MENU button CLOCK The figure below demonstrates how to adjust so that horizontal flicker noise is not emitted. ( buttons) Note: - Manual screen adjustment Fine adjustments can open and use the Adjustment Pattern on using On Screen Display (OSD) Menu provided. 1. POS 1 4 0 5 060 05 ...1024x768 V : 60Hz H : 4 8kHz MANUAL: Individual menu options are manually adjusted. Each time the MENU button is pressed the next menu is based on the accompanying Utility Disk. (p. 16) 2. Note: -...
...To go to MENU 2: MENU button CLOCK The figure below demonstrates how to adjust so that horizontal flicker noise is not emitted. ( buttons) Note: - Manual screen adjustment Fine adjustments can open and use the Adjustment Pattern on using On Screen Display (OSD) Menu provided. 1. POS 1 4 0 5 060 05 ...1024x768 V : 60Hz H : 4 8kHz MANUAL: Individual menu options are manually adjusted. Each time the MENU button is pressed the next menu is based on the accompanying Utility Disk. (p. 16) 2. Note: -...

Operation Manual
Page 18
...] will display the setting values for further alteration.) WH I N CONTROL [ MANUA L AUTO ] BLACK LEVEL 3 0 CONTRAST 40 DISPLAY COLORS 2 6 0K 16 M 1024x768 V : 60Hz H : 4 8kHz MANUAL: Individual menu options are manually adjusted. The Auto Gain Control adjusts contrast and black level based on the brightest color of white displayed, and if not adjustments may...
...] will display the setting values for further alteration.) WH I N CONTROL [ MANUA L AUTO ] BLACK LEVEL 3 0 CONTRAST 40 DISPLAY COLORS 2 6 0K 16 M 1024x768 V : 60Hz H : 4 8kHz MANUAL: Individual menu options are manually adjusted. The Auto Gain Control adjusts contrast and black level based on the brightest color of white displayed, and if not adjustments may...

Operation Manual
Page 22
... signal), [NO SIGNAL] will appear. The connector pin Mini D-sub connector with the monitor. - Follow your computer's instruction manual to set the timing to be compatible with 15 pins Number 1 2 3 4 5 6 7 8 9 10 11 12 13 14 15 Function Red video signal input Green video signal input Blue video signal input N.C. N.C. Signal....5MHz 65.0MHz 75.0MHz 78.75MHz 28.3MHz 30.5MHz 57.3MHz 80.0MHz Notes: - All are reference values. - If the monitor is receiving timing signals that are not compatible, [OUT OF TIMING] will appear. For red video signal GND For green video signal GND ...
... signal), [NO SIGNAL] will appear. The connector pin Mini D-sub connector with the monitor. - Follow your computer's instruction manual to set the timing to be compatible with 15 pins Number 1 2 3 4 5 6 7 8 9 10 11 12 13 14 15 Function Red video signal input Green video signal input Blue video signal input N.C. N.C. Signal....5MHz 65.0MHz 75.0MHz 78.75MHz 28.3MHz 30.5MHz 57.3MHz 80.0MHz Notes: - All are reference values. - If the monitor is receiving timing signals that are not compatible, [OUT OF TIMING] will appear. For red video signal GND For green video signal GND ...

