
Owners Manual
Page 7
... ...Warning/Indicator Lights ...KIPASS (Kawasaki's Intelligent Proximity Activation Start System) System...Spare FOB ...Ignition Switch ...Left Handlebar Switches ...Dimmer Switch ...Turn Signal Switch...Horn Button ...Meter Mode Button ...8 12 13 16 19 19 20 21 54 K-ACT ABS Button ...KTRC Button ...Electric Windshield Adjusting Button ...Right Handlebar Switches...Engine Stop Switch ...Starter Button ...Hazard Switch ...Grip Warmer...Headlight Aiming Adjuster Knob ...Accessory Socket/Connectors ...Brake/Clutch Lever Adjuster ...Fuel Tank Cap ...Fuel Tank ...Fuel Requirement ...Stands ...Seat...
... ...Warning/Indicator Lights ...KIPASS (Kawasaki's Intelligent Proximity Activation Start System) System...Spare FOB ...Ignition Switch ...Left Handlebar Switches ...Dimmer Switch ...Turn Signal Switch...Horn Button ...Meter Mode Button ...8 12 13 16 19 19 20 21 54 K-ACT ABS Button ...KTRC Button ...Electric Windshield Adjusting Button ...Right Handlebar Switches...Engine Stop Switch ...Starter Button ...Hazard Switch ...Grip Warmer...Headlight Aiming Adjuster Knob ...Accessory Socket/Connectors ...Brake/Clutch Lever Adjuster ...Fuel Tank Cap ...Fuel Tank ...Fuel Requirement ...Stands ...Seat...
Owners Manual
Page 8
... Maintenance Chart...Engine Oil ...Final Gear Case Oil...Cooling System ...Spark Plugs...Evaporative Emission Control System (California model only)...Valve Clearance ...Kawasaki Clean Air System ...Air Cleaner ...Throttle Control System ...Engine Vacuum Synchronization ...Idle Speed ...Clutch ...Brakes ... 159 161 163 163 166 169 171 176 188 193 196 201 202 203 204 205 212 214 215 216 218 Saddlebags (Accessory) ...Storage Case ...Rear Carrier ...Tool Kit Compartment...Air Intake ...BREAK-IN ...HOW TO RIDE THE MOTORCYCLE . Starting the Engine...
... Maintenance Chart...Engine Oil ...Final Gear Case Oil...Cooling System ...Spark Plugs...Evaporative Emission Control System (California model only)...Valve Clearance ...Kawasaki Clean Air System ...Air Cleaner ...Throttle Control System ...Engine Vacuum Synchronization ...Idle Speed ...Clutch ...Brakes ... 159 161 163 163 166 169 171 176 188 193 196 201 202 203 204 205 212 214 215 216 218 Saddlebags (Accessory) ...Storage Case ...Rear Carrier ...Tool Kit Compartment...Air Intake ...BREAK-IN ...HOW TO RIDE THE MOTORCYCLE . Starting the Engine...

Owners Manual
Page 9
Brake Light Switches...Front Fork...Rear Shock Absorber...Wheels ...Battery...Headlight Beam...Fuses ...General Lubrication...Cleaning Your Motorcycle ... 221 223 227 230 235 244 246 248 249 Bolt and Nut Tightening...STORAGE ...TROUBLESHOOTING GUIDE...YOUR WARRANTY/OWNER SATISFACTION ...REPORTING SAFETY DEFECTS ...ENVIRONMENTAL PROTECTION ...MAINTENANCE RECORD ...LOCATION OF LABELS... 256 259 262 263 269 270 271 275
Brake Light Switches...Front Fork...Rear Shock Absorber...Wheels ...Battery...Headlight Beam...Fuses ...General Lubrication...Cleaning Your Motorcycle ... 221 223 227 230 235 244 246 248 249 Bolt and Nut Tightening...STORAGE ...TROUBLESHOOTING GUIDE...YOUR WARRANTY/OWNER SATISFACTION ...REPORTING SAFETY DEFECTS ...ENVIRONMENTAL PROTECTION ...MAINTENANCE RECORD ...LOCATION OF LABELS... 256 259 262 263 269 270 271 275

Owners Manual
Page 17
LOCATION OF PARTS 15 36. Muffler 42. Rear Shock Absorber Center Stand Rear Brake Pedal Oil Level Gauge Swingarm 44. Saddlebag (Accessory) 37. Battery 39. Rear Brake Light Switch 45. 46. 47. 48. Fuse Box 38. Fuel Tank Cap 40. Windsheild 41. Brake Fluid Reservoir (Rear) 43.
LOCATION OF PARTS 15 36. Muffler 42. Rear Shock Absorber Center Stand Rear Brake Pedal Oil Level Gauge Swingarm 44. Saddlebag (Accessory) 37. Battery 39. Rear Brake Light Switch 45. 46. 47. 48. Fuse Box 38. Fuel Tank Cap 40. Windsheild 41. Brake Fluid Reservoir (Rear) 43.

Owners Manual
Page 20
... front fork will not be remedied under warranty. Kawasaki does not manufacture sidecars or trailers for the results of such unintended use of the motorcycle. Furthermore, any trailer or other vehicle. Poorly designed or installed items can result in an unsafe riding condition. 9. Weight attached to tow any adverse effects on handling or stability, but also due to the...
... front fork will not be remedied under warranty. Kawasaki does not manufacture sidecars or trailers for the results of such unintended use of the motorcycle. Furthermore, any trailer or other vehicle. Poorly designed or installed items can result in an unsafe riding condition. 9. Weight attached to tow any adverse effects on handling or stability, but also due to the...

Owners Manual
Page 23
... Meter The multifunction meter displays the following modes. KAWASAKI Display Odometer/Trip Meters (Trip Meter A/B) Clock Mileage (Average Mileage/Current Mileage/Cruising Range) Tire Air Pressure Battery Voltage Outside Temperature Gear Position Coolant Temperature Gauge Fuel Gauge K-ACT ABS Standard Mode (mode 1)/High Combined Mode (mode 2) Economical Riding Indicator Fuel Economy Assistance Mode The symbol of the key knob is displayed in the multifunction meter for...
... Meter The multifunction meter displays the following modes. KAWASAKI Display Odometer/Trip Meters (Trip Meter A/B) Clock Mileage (Average Mileage/Current Mileage/Cruising Range) Tire Air Pressure Battery Voltage Outside Temperature Gear Position Coolant Temperature Gauge Fuel Gauge K-ACT ABS Standard Mode (mode 1)/High Combined Mode (mode 2) Economical Riding Indicator Fuel Economy Assistance Mode The symbol of the key knob is displayed in the multifunction meter for...

Owners Manual
Page 28
... to 1:00 and starts working again when the battery is disconnected, the clock resets to the "Setting Menu" item in this section. Mileage (Average Mileage/Current Mileage/Cruising Range) "AVERAGE" This display shows the average mileage by numerical value, and indicates the average fuel consumption counted from the back-up power while the ignition switch is turned off. żWhen the battery is connected.
... to 1:00 and starts working again when the battery is disconnected, the clock resets to the "Setting Menu" item in this section. Mileage (Average Mileage/Current Mileage/Cruising Range) "AVERAGE" This display shows the average mileage by numerical value, and indicates the average fuel consumption counted from the back-up power while the ignition switch is turned off. żWhen the battery is connected.

Owners Manual
Page 48
... to the other setting menu. Push the upper button and lower button simultaneously for 2 seconds. Align the cursor and select language to the setting menu for changing the unit of the mileage and the tire air pressure, or adjusting the clock. Push the upper button, if ...advancing to display by pushing the lower button. Language Setting Menu B. A. Cursor 46 GENERAL INFORMATION Language ...
... to the other setting menu. Push the upper button and lower button simultaneously for 2 seconds. Align the cursor and select language to the setting menu for changing the unit of the mileage and the tire air pressure, or adjusting the clock. Push the upper button, if ...advancing to display by pushing the lower button. Language Setting Menu B. A. Cursor 46 GENERAL INFORMATION Language ...

Owners Manual
Page 54
... position shifts in the following order. NOTE żWhen the engine starts, the windshield moves to the set the dis• Push play unit after it is turned to set position automatically. When the ignition switch is turned to the "OFF" position, the windshield automatically moves to a correct position. soon after setting. Turn the ignition switch to "OFF" again to move correctly. Push Lower Button...
... position shifts in the following order. NOTE żWhen the engine starts, the windshield moves to the set the dis• Push play unit after it is turned to set position automatically. When the ignition switch is turned to the "OFF" position, the windshield automatically moves to a correct position. soon after setting. Turn the ignition switch to "OFF" again to move correctly. Push Lower Button...

Owners Manual
Page 56
... power while the ignition switch is turned off. żWhen the battery is disconnected, the clock resets to 1:00 and starts working . The displays stop blinking and the clock starts working again when the battery is pushed to advance the minutes. NOTE żPushing the upper button advances the hours or minutes step by step. Warning/Indicator Lights : When the transmission is in neutral...
... power while the ignition switch is turned off. żWhen the battery is disconnected, the clock resets to 1:00 and starts working . The displays stop blinking and the clock starts working again when the battery is pushed to advance the minutes. NOTE żPushing the upper button advances the hours or minutes step by step. Warning/Indicator Lights : When the transmission is in neutral...

Owners Manual
Page 99
... switching the ignition to the "basic" (bottom) position. Be sure nobody is turned to the "OFF" position, the windshield automatically moves to "OFF." NOTICE Do not leave the key knob at the lock position when parking the motorcycle. If the FOB is not correctly communicated when the key knob is removed at the FSS position only when opening the fuel tank...
... switching the ignition to the "basic" (bottom) position. Be sure nobody is turned to the "OFF" position, the windshield automatically moves to "OFF." NOTICE Do not leave the key knob at the lock position when parking the motorcycle. If the FOB is not correctly communicated when the key knob is removed at the FSS position only when opening the fuel tank...

Owners Manual
Page 152
.... żK-ACT ABS does not function if the battery is turned on. The light does not go on under motorcycle riding condition. (ex. When driving with an insufficiently charged battery, K-ACT ABS may go on when the ignition switch is discharged. 150 HOW TO RIDE THE MOTORCYCLE at the speed of approx. 5 If the K-ACT ABS fails, the front and rear brakes work normally as...
.... żK-ACT ABS does not function if the battery is turned on. The light does not go on under motorcycle riding condition. (ex. When driving with an insufficiently charged battery, K-ACT ABS may go on when the ignition switch is discharged. 150 HOW TO RIDE THE MOTORCYCLE at the speed of approx. 5 If the K-ACT ABS fails, the front and rear brakes work normally as...

Owners Manual
Page 169
No oil leakage. All lights (Head, Tail/Brake, Turn Signal, License Plate, Warning/Indicator) and horn work. Coolant level between level lines (when engine is cold). SAFE OPERATION 167 Tires ...Air pressure (when cold): Front Rear 290 kPa (2.90 kgf/cm², 42 psi) 290 kPa (2.90 kgf/cm², 42 psi) Nuts, Bolts, Fasteners Steering ...Brakes ...Throttle ...Clutch ...Coolant ...Final Gear Case ...Electrical Equipment ...Engine Stop Switch ... Action smooth but not loose from lock to lock. Brake pad wear: Lining thickness...
No oil leakage. All lights (Head, Tail/Brake, Turn Signal, License Plate, Warning/Indicator) and horn work. Coolant level between level lines (when engine is cold). SAFE OPERATION 167 Tires ...Air pressure (when cold): Front Rear 290 kPa (2.90 kgf/cm², 42 psi) 290 kPa (2.90 kgf/cm², 42 psi) Nuts, Bolts, Fasteners Steering ...Brakes ...Throttle ...Clutch ...Coolant ...Final Gear Case ...Electrical Equipment ...Engine Stop Switch ... Action smooth but not loose from lock to lock. Brake pad wear: Lining thickness...

Owners Manual
Page 181
MAINTENANCE AND ADJUSTMENT 179 2. Periodic Inspection (Chassis Related Items) Frequency Whichever comes first *Odometer Reading km × 1 000 (mile × 1 000) Operation (Chassis Items) Clutch operation (play, engagement, disengagement) - inspect Clutch hose damage inspect See Page Every 1 6 12 18 24 30 36 (0.6) (3.75) (7.5) (11.25) (15) (18.75) (22.5) Clutch and drive train: • 6 months year year 216 • • • 217 - - inspect Clutch fluid level - inspect Clutch fluid leak -
MAINTENANCE AND ADJUSTMENT 179 2. Periodic Inspection (Chassis Related Items) Frequency Whichever comes first *Odometer Reading km × 1 000 (mile × 1 000) Operation (Chassis Items) Clutch operation (play, engagement, disengagement) - inspect Clutch hose damage inspect See Page Every 1 6 12 18 24 30 36 (0.6) (3.75) (7.5) (11.25) (15) (18.75) (22.5) Clutch and drive train: • 6 months year year 216 • • • 217 - - inspect Clutch fluid level - inspect Clutch fluid leak -

Owners Manual
Page 184
182 MAINTENANCE AND ADJUSTMENT Frequency Whichever comes first *Odometer Reading km × 1 000 (mile × 1 000) 1 6 12 18 24 30 36 (0.6) (3.75) (7.5) (11.25) (15) (18.75) (22.5) Operation (Chassis Items) Brake hose installation condition inspect Brake fluid level - inspect See Page Every year 218 6 months 219 year 220 221 inspect Brake operation (effectiveness, play, drag) inspect Brake light switch operation -
182 MAINTENANCE AND ADJUSTMENT Frequency Whichever comes first *Odometer Reading km × 1 000 (mile × 1 000) 1 6 12 18 24 30 36 (0.6) (3.75) (7.5) (11.25) (15) (18.75) (22.5) Operation (Chassis Items) Brake hose installation condition inspect Brake fluid level - inspect See Page Every year 218 6 months 219 year 220 221 inspect Brake operation (effectiveness, play, drag) inspect Brake light switch operation -
Owners Manual
Page 190
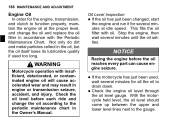
... wear and may result in accordance with oil. Check the engine oil level through the oil level gauge. This fills the oil filter with the Periodic Maintenance Chart. 188 MAINTENANCE AND ADJUSTMENT Engine Oil In order for the engine, transmission, and clutch to function properly, maintain the engine oil at idle speed. Oil Level Inspection If the oil has just been changed, start the engine and run it for several minutes at the proper...
... wear and may result in accordance with oil. Check the engine oil level through the oil level gauge. This fills the oil filter with the Periodic Maintenance Chart. 188 MAINTENANCE AND ADJUSTMENT Engine Oil In order for the engine, transmission, and clutch to function properly, maintain the engine oil at idle speed. Oil Level Inspection If the oil has just been changed, start the engine and run it for several minutes at the proper...

Owners Manual
Page 223
WARNING Air in the brake lines diminish braking performance and can cause an accident resulting in accordance with the Periodic Maintenance Chart. If the brake lever or pedal feels mushy when it does not, ask your authorized Kawasaki dealer to ON. Inspection Turn the key knob to inspect the front brake light switch. Have the brake checked immediately by an authorized Kawasaki dealer. • • •...
WARNING Air in the brake lines diminish braking performance and can cause an accident resulting in accordance with the Periodic Maintenance Chart. If the brake lever or pedal feels mushy when it does not, ask your authorized Kawasaki dealer to ON. Inspection Turn the key knob to inspect the front brake light switch. Have the brake checked immediately by an authorized Kawasaki dealer. • • •...

Owners Manual
Page 224
D. 222 MAINTENANCE AND ADJUSTMENT the operation of the rear brake • Check light switch by turning the adjusting nut. • A. C. Rear Brake Light Switch Adjusting Nut Lights sooner Lights later Brake Pedal B. 10 mm (0.39 in .) A. B. Adjustment To adjust the rear brake light switch, move the switch up or down by depressing the brake pedal. The brake light should go on after the proper pedal travel. Brake Pedal Travel 10 mm (0.39 in .) the light does not go on , adjust the • If rear brake light switch.
D. 222 MAINTENANCE AND ADJUSTMENT the operation of the rear brake • Check light switch by turning the adjusting nut. • A. C. Rear Brake Light Switch Adjusting Nut Lights sooner Lights later Brake Pedal B. 10 mm (0.39 in .) A. B. Adjustment To adjust the rear brake light switch, move the switch up or down by depressing the brake pedal. The brake light should go on after the proper pedal travel. Brake Pedal Travel 10 mm (0.39 in .) the light does not go on , adjust the • If rear brake light switch.

Owners Manual
Page 252
... windshield, headlight cover, and other abrasive pads or brushes. If debris or flammable materials have collected, park the vehicle outside and stop the engine. Allow the engine to seals, • Avoid brake pads, and tires. Gasoline, brake fluid, clutch fluid, and coolant will damage the finish of painted and plastic surfaces: wash them off immediately. sure the engine and exhaust are • Be cool before washing. Avoid using pressure washers; 250 MAINTENANCE...
... windshield, headlight cover, and other abrasive pads or brushes. If debris or flammable materials have collected, park the vehicle outside and stop the engine. Allow the engine to seals, • Avoid brake pads, and tires. Gasoline, brake fluid, clutch fluid, and coolant will damage the finish of painted and plastic surfaces: wash them off immediately. sure the engine and exhaust are • Be cool before washing. Avoid using pressure washers; 250 MAINTENANCE...

Owners Manual
Page 259
Front Axle 12. Side Stand Bolt 14. MAINTENANCE AND ADJUSTMENT 257 6. Brake Disc Mounting Bolts 10. Uni-trak Lever Rod Nuts 16. Footpeg Mounting Bolts 17. Swingarm Pivot Shaft Nut 15. Caliper Mounting Bolts 13. Engine Mounting Bolts and Nuts 8. Front Gear Case Mounting Bolts Front Axle Clamp Bolts 11. Rear Shock Absorber Mounting Nuts 18. Front Fender Mounting Bolts 7. Rear Frame Mounting Bolts 9.
Front Axle 12. Side Stand Bolt 14. MAINTENANCE AND ADJUSTMENT 257 6. Brake Disc Mounting Bolts 10. Uni-trak Lever Rod Nuts 16. Footpeg Mounting Bolts 17. Swingarm Pivot Shaft Nut 15. Caliper Mounting Bolts 13. Engine Mounting Bolts and Nuts 8. Front Gear Case Mounting Bolts Front Axle Clamp Bolts 11. Rear Shock Absorber Mounting Nuts 18. Front Fender Mounting Bolts 7. Rear Frame Mounting Bolts 9.