
Owners Manual
Page 7
... INFORMATION ...Meter Instruments ...Tachometer ...Instrument Display Brightness Control ...Multifunction Meter ...Warning/Indicator Lights ...Keys ...Ignition Switch/Steering Lock ...Left Handlebar Switches ...Dimmer Switch ...Turn Signal Switch...Horn Button ...LAP/Passing Button...Power/S-KTRC Button...9 13 14 17 20 20 22 26 28 48 58 60 61 62 62 62 62 62 Right Handlebar Switches...Engine Stop Switch ...Starter Button ...START/STOP Switch (for Stop Watch) ...Brake Lever Adjuster...Fuel Tank Cap ...Fuel Tank ...Fuel Requirement ...Side Stand ...Seats ...Tool Kit ...Air Cleaner Intake ...Front...
... INFORMATION ...Meter Instruments ...Tachometer ...Instrument Display Brightness Control ...Multifunction Meter ...Warning/Indicator Lights ...Keys ...Ignition Switch/Steering Lock ...Left Handlebar Switches ...Dimmer Switch ...Turn Signal Switch...Horn Button ...LAP/Passing Button...Power/S-KTRC Button...9 13 14 17 20 20 22 26 28 48 58 60 61 62 62 62 62 62 Right Handlebar Switches...Engine Stop Switch ...Starter Button ...START/STOP Switch (for Stop Watch) ...Brake Lever Adjuster...Fuel Tank Cap ...Fuel Tank ...Fuel Requirement ...Side Stand ...Seats ...Tool Kit ...Air Cleaner Intake ...Front...

Owners Manual
Page 8
... ADJUSTMENT Periodic Maintenance Chart...Engine Oil ...Cooling System ...Spark Plugs... 88 89 92 92 93 95 96 100 103 103 106 109 111 115 128 133 140 Evaporative Emission Control System (California model only)...Valve Clearance ...Kawasaki Clean Air System ...Exhaust Device ...Air Cleaner ...Throttle Control System ...Engine Vacuum Synchronization ...Idle Speed ...Clutch ...Drive Chain ...Brakes ...Brake Light Switches...Electronic Steering Damper ...Front Fork...Rear Shock Absorber...Wheels ...Battery...Headlight Beam...Fuses ...General Lubrication...Cleaning Your Motorcycle ...Bolt and Nut...
... ADJUSTMENT Periodic Maintenance Chart...Engine Oil ...Cooling System ...Spark Plugs... 88 89 92 92 93 95 96 100 103 103 106 109 111 115 128 133 140 Evaporative Emission Control System (California model only)...Valve Clearance ...Kawasaki Clean Air System ...Exhaust Device ...Air Cleaner ...Throttle Control System ...Engine Vacuum Synchronization ...Idle Speed ...Clutch ...Drive Chain ...Brakes ...Brake Light Switches...Electronic Steering Damper ...Front Fork...Rear Shock Absorber...Wheels ...Battery...Headlight Beam...Fuses ...General Lubrication...Cleaning Your Motorcycle ...Bolt and Nut...

Owners Manual
Page 15
Rebound Damping Force Adjuster (Front Fork) 4. Compression damping force adjuster (Front Fork) 5. Meter Instruments 6. 7. 8. 9. 10. 11. Left Handlebar Switches 3. Brake Fluid Reservoir (Front) Right Handlebar Switches Front Brake Lever Throttle Grip Ignition Switch/Steering Lock Electronic Steering Damper Clutch Lever 2. 14 LOCATION OF PARTS LOCATION OF PARTS 1.
Rebound Damping Force Adjuster (Front Fork) 4. Compression damping force adjuster (Front Fork) 5. Meter Instruments 6. 7. 8. 9. 10. 11. Left Handlebar Switches 3. Brake Fluid Reservoir (Front) Right Handlebar Switches Front Brake Lever Throttle Grip Ignition Switch/Steering Lock Electronic Steering Damper Clutch Lever 2. 14 LOCATION OF PARTS LOCATION OF PARTS 1.

Owners Manual
Page 17
Fuse Boxes Battery Rebound damping force adjuster Fuel Tank Cap Coolant Reserve Tank Muffler 38. 39. 40. 41. 42. 43. Swingarm Rear Shock Absorber Brake Fluid Reservoir (Rear) Rear Brake Pedal Rear Brake Light Switch Oil Level Inspection Window 16 LOCATION OF PARTS 32. 33. 34. 35. 36. 37.
Fuse Boxes Battery Rebound damping force adjuster Fuel Tank Cap Coolant Reserve Tank Muffler 38. 39. 40. 41. 42. 43. Swingarm Rear Shock Absorber Brake Fluid Reservoir (Rear) Rear Brake Pedal Rear Brake Light Switch Oil Level Inspection Window 16 LOCATION OF PARTS 32. 33. 34. 35. 36. 37.

Owners Manual
Page 20
... and handling of the motorcycle, not only due to their weight, but can only warn that impairs the performance of the motorcycle. Weight attached to tow any adverse effects on handling or stability...windshields, backrests, and other large items have not adversely affected any lighting components, road clearance, banking capability (i.e., lean angle), control operation, wheel travel, front fork movement, or any other vehicles. Do not install accessories or carry baggage that the effects can result in an unsafe riding condition. 8. Kawasaki does not manufacture sidecars or trailers...
... and handling of the motorcycle, not only due to their weight, but can only warn that impairs the performance of the motorcycle. Weight attached to tow any adverse effects on handling or stability...windshields, backrests, and other large items have not adversely affected any lighting components, road clearance, banking capability (i.e., lean angle), control operation, wheel travel, front fork movement, or any other vehicles. Do not install accessories or carry baggage that the effects can result in an unsafe riding condition. 8. Kawasaki does not manufacture sidecars or trailers...

Owners Manual
Page 34
Trip Meter B. "TRIP A" • To reset the trip meter: Push the upper button to the "Unit Setting" item in this section. GENERAL INFORMATION 33 • Push the lower button and hold it in. ○The data is maintained by the back NOTE up power if the ignition switch is turned "OFF". ○When the trip meter reaches 9999.9 while riding, the meter resets to 0.0 and continues counting. ○When the battery is disconnected, the meter display resets to 0.0. ○The display unit modes can be changed, refer to select the trip meter A or B. A.
Trip Meter B. "TRIP A" • To reset the trip meter: Push the upper button to the "Unit Setting" item in this section. GENERAL INFORMATION 33 • Push the lower button and hold it in. ○The data is maintained by the back NOTE up power if the ignition switch is turned "OFF". ○When the trip meter reaches 9999.9 while riding, the meter resets to 0.0 and continues counting. ○When the battery is disconnected, the meter display resets to 0.0. ○The display unit modes can be changed, refer to select the trip meter A or B. A.

Owners Manual
Page 36
.... ○When the battery is not displayed until the fuel consumption values resets to After resetting the average mileage, the numerical value is disconnected, the average mileage resets to "0.0". power if the ignition switch is turned "OFF". ○The display unit modes can be changed, refer to the "Unit Setting" item in until 5 mL (0.2 US oz.) of measuring to present time. Fuel Consumption B.
.... ○When the battery is not displayed until the fuel consumption values resets to After resetting the average mileage, the numerical value is disconnected, the average mileage resets to "0.0". power if the ignition switch is turned "OFF". ○The display unit modes can be changed, refer to the "Unit Setting" item in until 5 mL (0.2 US oz.) of measuring to present time. Fuel Consumption B.

Owners Manual
Page 37
... up NOTE start the stop watch starts timing laps. The stop watch is disconnected, the fuel consumption resets to display the stop watch can be used in closed course competition. power if the ignition switch is turned "OFF". ○The display unit modes can be changed, refer to the "Unit Setting" item in this section. ○When the battery is...
... up NOTE start the stop watch starts timing laps. The stop watch is disconnected, the fuel consumption resets to display the stop watch can be used in closed course competition. power if the ignition switch is turned "OFF". ○The display unit modes can be changed, refer to the "Unit Setting" item in this section. ○When the battery is...

Owners Manual
Page 41
... set to the "Unit Setting" item in this section. ○The coolant temperature meter and intake air temperature meter cannot be shifted while displaying the stop watch or adjusting the clock. ○When the battery is reconnected, the meter display is selected. Coolant Temperature Meter B. Coolant Temperature Meter The coolant temperature gauge indicates temperature of the engine coolant. Warning Indicator Light (Red) C. " " Symbol A.
... set to the "Unit Setting" item in this section. ○The coolant temperature meter and intake air temperature meter cannot be shifted while displaying the stop watch or adjusting the clock. ○When the battery is reconnected, the meter display is selected. Coolant Temperature Meter B. Coolant Temperature Meter The coolant temperature gauge indicates temperature of the engine coolant. Warning Indicator Light (Red) C. " " Symbol A.

Owners Manual
Page 47
... Indicator When the operator is driving the motorcycle for optimum fuel-efficiency, the economical riding indicator appears on the multifunction meter to 1:00 and starts working . ○Pushing the upper button momentarily advances the hour or minute step by the back -up power while the ignition switch is turned "OFF". ○When the battery is disconnected, the clock is...
... Indicator When the operator is driving the motorcycle for optimum fuel-efficiency, the economical riding indicator appears on the multifunction meter to 1:00 and starts working . ○Pushing the upper button momentarily advances the hour or minute step by the back -up power while the ignition switch is turned "OFF". ○When the battery is disconnected, the clock is...

Owners Manual
Page 66
Insert the ignition key into place with the key inserted. To close the cap, or the cap cannot be removed by turning it down into the fuel tank cap and turn the key to the original position. The key can be locked. Mark Fuel Tank Cap ○The fuel tank cap cannot be closed without the key inserted, and the key cannot be removed unless the cap is locked properly. ○Do not push...
Insert the ignition key into place with the key inserted. To close the cap, or the cap cannot be removed by turning it down into the fuel tank cap and turn the key to the original position. The key can be locked. Mark Fuel Tank Cap ○The fuel tank cap cannot be closed without the key inserted, and the key cannot be removed unless the cap is locked properly. ○Do not push...

Owners Manual
Page 75
Projections C. Holes D. Tab E. Passenger's Seat B. Insert the projections at the front of the passenger's seat into the slot in the frame. A. 74 GENERAL INFORMATION Passenger's Seat Installation Insert the tab on the rear of the passenger's seat into the holes on the frame. • • down the front part of the pas• Push senger's seat until the lock clicks. Slot up the front and rear ends of • Pull the passenger's and rider's seats to make sure they are securely locked.
Projections C. Holes D. Tab E. Passenger's Seat B. Insert the projections at the front of the passenger's seat into the slot in the frame. A. 74 GENERAL INFORMATION Passenger's Seat Installation Insert the tab on the rear of the passenger's seat into the holes on the frame. • • down the front part of the pas• Push senger's seat until the lock clicks. Slot up the front and rear ends of • Pull the passenger's and rider's seats to make sure they are securely locked.

Owners Manual
Page 88
... → 2nd 2nd → 1st km/h (mph) 30 (19) 25 (15) 20 (12) 15 ( 9) 15 ( 9) ○The transmission is standing still, the transmission cannot be shifted past neutral from 1st gear. HOW TO RIDE THE MOTORCYCLE 87 Vehicle speed when shifting Shifting up 1st → 2nd 2nd → 3rd 3rd → 4th 4th → 5th 5th → 6th km...
... → 2nd 2nd → 1st km/h (mph) 30 (19) 25 (15) 20 (12) 15 ( 9) 15 ( 9) ○The transmission is standing still, the transmission cannot be shifted past neutral from 1st gear. HOW TO RIDE THE MOTORCYCLE 87 Vehicle speed when shifting Shifting up 1st → 2nd 2nd → 3rd 3rd → 4th 4th → 5th 5th → 6th km...

Owners Manual
Page 108
... and suspension components, axles, and all controls are properly tightened or fastened. Electronic Steering Damper Unit: No oil leakage. Brakes ...Brake pad wear: Lining thickness more than 1 mm (0.04 in .). Coolant ...No coolant leakage. Engine stop switch ...Stops engine. Nuts, bolts, fasteners .. Clutch ...Clutch lever play 2 ∼ 3 mm (0.08 ∼ 0.12 in .). Electrical equipment ...All lights (Headlight, Tail/Brake Lights, Turn Signal Lights, Warning/Indicator Lights) and horn work. Clutch lever operates smoothly. SAFE OPERATION 107 Tires ...Air pressure (when cold): Front Rear...
... and suspension components, axles, and all controls are properly tightened or fastened. Electronic Steering Damper Unit: No oil leakage. Brakes ...Brake pad wear: Lining thickness more than 1 mm (0.04 in .). Coolant ...No coolant leakage. Engine stop switch ...Stops engine. Nuts, bolts, fasteners .. Clutch ...Clutch lever play 2 ∼ 3 mm (0.08 ∼ 0.12 in .). Electrical equipment ...All lights (Headlight, Tail/Brake Lights, Turn Signal Lights, Warning/Indicator Lights) and horn work. Clutch lever operates smoothly. SAFE OPERATION 107 Tires ...Air pressure (when cold): Front Rear...

Owners Manual
Page 110
... riding safety. Engine Oil: To avoid engine seizure and resulting loss of control, make sure that the headlight, tail/brake light, turn signals, horn, etc., all safety related parts are in the steering can cause loss of the brakes, especially during high speed operation. Coolant: To avoid overheating, check that all work properly. Additional Considerations for the high fuel consumption during high speed operation, cannot be overemphasized. Fuel: Have sufficient fuel for High Speed...
... riding safety. Engine Oil: To avoid engine seizure and resulting loss of control, make sure that the headlight, tail/brake light, turn signals, horn, etc., all safety related parts are in the steering can cause loss of the brakes, especially during high speed operation. Coolant: To avoid overheating, check that all work properly. Additional Considerations for the high fuel consumption during high speed operation, cannot be overemphasized. Fuel: Have sufficient fuel for High Speed...

Owners Manual
Page 123
inspect Suspensions: Front forks/rear shock absorber operation (damping and smooth stroke) inspect Front forks/rear shock absorber oil leak - 122 MAINTENANCE AND ADJUSTMENT Frequency Whichever comes first Operation (Chassis Items) Brake operation (effectiveness, play, drag) - inspect year *Odometer Reading km × 1000 (mile × 1000) See Page Every year 1 6 12 18 24 30 36 (0.6) (3.75) (7.5) (11.25) (15) (18.75) (22.5) • • • • • • • • 168 169 172/ 178 172/ 178 inspect Brake light switch operation -
inspect Suspensions: Front forks/rear shock absorber operation (damping and smooth stroke) inspect Front forks/rear shock absorber oil leak - 122 MAINTENANCE AND ADJUSTMENT Frequency Whichever comes first Operation (Chassis Items) Brake operation (effectiveness, play, drag) - inspect year *Odometer Reading km × 1000 (mile × 1000) See Page Every year 1 6 12 18 24 30 36 (0.6) (3.75) (7.5) (11.25) (15) (18.75) (22.5) • • • • • • • • 168 169 172/ 178 172/ 178 inspect Brake light switch operation -
Owners Manual
Page 129
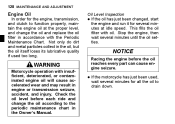
... at the proper level, and change the oil according to the periodic maintenance chart in accordance with the Periodic Maintenance Chart. WARNING Motorcycle operation with oil. Engine Oil Oil Level Inspection If the oil has just been changed, start the engine and run it for all the oil to drain down. 128 MAINTENANCE AND ADJUSTMENT In order for the engine, transmission, and clutch to function properly, maintain the engine oil at idle speed.
... at the proper level, and change the oil according to the periodic maintenance chart in accordance with the Periodic Maintenance Chart. WARNING Motorcycle operation with oil. Engine Oil Oil Level Inspection If the oil has just been changed, start the engine and run it for all the oil to drain down. 128 MAINTENANCE AND ADJUSTMENT In order for the engine, transmission, and clutch to function properly, maintain the engine oil at idle speed.

Owners Manual
Page 169
... braking performance and can cause an accident resulting in the brake lines or the brake may be air in injury or death. 168 MAINTENANCE AND ADJUSTMENT Front and Rear Brakes Disc and disc pad wear is applied, there might be defective. C. Reservoir Cap Clockwise 1/6 turn Fluid Change Have the brake fluid changed by an authorized Kawasaki dealer. If the brake lever or pedal feels mushy when it is automatically...
... braking performance and can cause an accident resulting in the brake lines or the brake may be air in injury or death. 168 MAINTENANCE AND ADJUSTMENT Front and Rear Brakes Disc and disc pad wear is applied, there might be defective. C. Reservoir Cap Clockwise 1/6 turn Fluid Change Have the brake fluid changed by an authorized Kawasaki dealer. If the brake lever or pedal feels mushy when it is automatically...

Owners Manual
Page 199
...drop at 7.6 m (25 ft) measured from the center of the headlight, with the motorcycle on its wheels and the rider seated. If adjusted too high, the high beam will fail ...MAINTENANCE AND ADJUSTMENT move the headlight beam right• To ward, turn the left adjuster counterclockwise and turn the both adjusters counterclockmove the headlight beam down• To ward, turn ...road close ahead, and the low beam will illuminate the road far enough ahead. Left Adjuster B. If adjusted too low, neither low nor high beam will blind oncoming drivers. move the headlight beam upward, • To turn...
...drop at 7.6 m (25 ft) measured from the center of the headlight, with the motorcycle on its wheels and the rider seated. If adjusted too high, the high beam will fail ...MAINTENANCE AND ADJUSTMENT move the headlight beam right• To ward, turn the left adjuster counterclockwise and turn the both adjusters counterclockmove the headlight beam down• To ward, turn ...road close ahead, and the low beam will illuminate the road far enough ahead. Left Adjuster B. If adjusted too low, neither low nor high beam will blind oncoming drivers. move the headlight beam upward, • To turn...

Owners Manual
Page 205
..., park the vehicle outside and stop the engine. Do not park or store the vehicle in and around the vehicle, inspect the engine, electrical component and exhaust areas frequently. water can easily be scratched. applying degreaser to inspecting for build-up of debris or flammable material in an enclosed space prior to seals, • Avoid brake pads, and tires. 204 MAINTENANCE AND ADJUSTMENT WARNING Build...
..., park the vehicle outside and stop the engine. Do not park or store the vehicle in and around the vehicle, inspect the engine, electrical component and exhaust areas frequently. water can easily be scratched. applying degreaser to inspecting for build-up of debris or flammable material in an enclosed space prior to seals, • Avoid brake pads, and tires. 204 MAINTENANCE AND ADJUSTMENT WARNING Build...