
Getting Started Guide
Page 1
DUA1770-0AAA05 Published September 2003 SuperStack® 3 Switch 4900 Family Getting Started Guide Switch 4900 (3C17700) Switch 4900 SX (3C17702) Switch 4924 (3C17701) Switch 4950 (3C17706) http://www.3com.com/ Part No.
DUA1770-0AAA05 Published September 2003 SuperStack® 3 Switch 4900 Family Getting Started Guide Switch 4900 (3C17700) Switch 4900 SX (3C17702) Switch 4924 (3C17701) Switch 4950 (3C17706) http://www.3com.com/ Part No.
Getting Started Guide
Page 2
... trademarks are registered in the United States and may or may be registered in other countries. 3Com, the 3Com logo, and SuperStack are registered trademarks of 3Com Corporation. Intel and Pentium are registered trademarks of Intel Corporation. UNIX is a registered trademark of any ...by any means or used to make any derivative work (such as translation, transformation, or adaptation) without written permission from 3Com Corporation. 3Com Corporation reserves the right to revise this documentation and to the following: All technical data and computer software are registered trademarks...
... trademarks are registered in the United States and may or may be registered in other countries. 3Com, the 3Com logo, and SuperStack are registered trademarks of 3Com Corporation. Intel and Pentium are registered trademarks of Intel Corporation. UNIX is a registered trademark of any ...by any means or used to make any derivative work (such as translation, transformation, or adaptation) without written permission from 3Com Corporation. 3Com Corporation reserves the right to revise this documentation and to the following: All technical data and computer software are registered trademarks...

Getting Started Guide
Page 3
... Ports 16 1000BASE-SX Ports 16 GBIC Ports 16 LEDs 17 Switch - Rear View Detail 18 Unit Information Label 19 Power Socket 19 Redundant Power System Socket 19 Console Port 20 Expansion Module Slot 20 Default Settings 20 2 INSTALLING THE SWITCH Package Contents 22 ...22 Rack-mounting 23 Placing Units On Top of Hardware Features 13 Switch - CONTENTS ABOUT THIS GUIDE Conventions 8 Related Documentation 9 Accessing Online Documentation 9 Documentation Comments 10 1 INTRODUCING THE SUPERSTACK 3 SWITCH 4900 FAMILY About the Switches 12 Summary of Each Other 24 Creating an XRN Distributed Fabric ...
... Ports 16 1000BASE-SX Ports 16 GBIC Ports 16 LEDs 17 Switch - Rear View Detail 18 Unit Information Label 19 Power Socket 19 Redundant Power System Socket 19 Console Port 20 Expansion Module Slot 20 Default Settings 20 2 INSTALLING THE SWITCH Package Contents 22 ...22 Rack-mounting 23 Placing Units On Top of Hardware Features 13 Switch - CONTENTS ABOUT THIS GUIDE Conventions 8 Related Documentation 9 Accessing Online Documentation 9 Documentation Comments 10 1 INTRODUCING THE SUPERSTACK 3 SWITCH 4900 FAMILY About the Switches 12 Summary of Each Other 24 Creating an XRN Distributed Fabric ...

Getting Started Guide
Page 4
...Removing a GBIC Transceiver 31 3 SETTING UP FOR MANAGEMENT Setting Up Overview 34 IP Configuration 35 Preparing for Correct Operation of Managing a Switch 46 Command Line Interface Management 46 Web Interface Management 47 SNMP Management 47 Setting Up Command Line Interface Management 48 CLI Management via ...IP Information 37 Connecting to a Front Panel Port 37 Connecting to the Console Port 40 Viewing Automatically Configured IP Information 43 Using 3Com Network Supervisor 43 Connecting to the Console Port 44 Methods of LEDs 27 Connecting a Redundant Power System 27 Choosing the Correct 10...
...Removing a GBIC Transceiver 31 3 SETTING UP FOR MANAGEMENT Setting Up Overview 34 IP Configuration 35 Preparing for Correct Operation of Managing a Switch 46 Command Line Interface Management 46 Web Interface Management 47 SNMP Management 47 Setting Up Command Line Interface Management 48 CLI Management via ...IP Information 37 Connecting to a Front Panel Port 37 Connecting to the Console Port 40 Viewing Automatically Configured IP Information 43 Using 3Com Network Supervisor 43 Connecting to the Console Port 44 Methods of LEDs 27 Connecting a Redundant Power System 27 Choosing the Correct 10...
Getting Started Guide
Page 5
Solving Hardware Problems 55 Solving Communication Problems 57 Solving Software Upgrade Problems 58 A SAFETY INFORMATION Power Cord Set - Japan 59 Important Safety Information 60 L'information de Sécurité Importante 63 Wichtige Sicherheitsinformationen 66 B PIN-OUTS Null Modem Cable 69 PC-AT Serial Cable 69 Modem Cable 70 RJ-45 Pin Assignments 70 C TECHNICAL SPECIFICATIONS D OBTAINING SUPPORT FOR YOUR PRODUCT Register Your Product to Gain Service Benefits 75 Purchase Value-Added Services 75 Troubleshoot Online 75 Access Software Downloads 76 Contact Us 76 Telephone Technical Support ...
Solving Hardware Problems 55 Solving Communication Problems 57 Solving Software Upgrade Problems 58 A SAFETY INFORMATION Power Cord Set - Japan 59 Important Safety Information 60 L'information de Sécurité Importante 63 Wichtige Sicherheitsinformationen 66 B PIN-OUTS Null Modem Cable 69 PC-AT Serial Cable 69 Modem Cable 70 RJ-45 Pin Assignments 70 C TECHNICAL SPECIFICATIONS D OBTAINING SUPPORT FOR YOUR PRODUCT Register Your Product to Gain Service Benefits 75 Purchase Value-Added Services 75 Troubleshoot Online 75 Access Software Downloads 76 Contact Us 76 Telephone Technical Support ...
Getting Started Guide
Page 7
... state: ■ SuperStack® 3 Switch 4900 (3C17700) ■ SuperStack® 3 Switch 4900 SX (3C17702) ■ SuperStack® 3 Switch 4924 (3C17701) ■ SuperStack® 3 Switch 4950 (3C17706) This guide is intended for installing and setting up network equipment; If the information in the release notes that are available in Adobe Acrobat Reader Portable Document Format (PDF) or HTML on the 3Com World Wide Web...
... state: ■ SuperStack® 3 Switch 4900 (3C17700) ■ SuperStack® 3 Switch 4900 SX (3C17702) ■ SuperStack® 3 Switch 4924 (3C17701) ■ SuperStack® 3 Switch 4950 (3C17706) This guide is intended for installing and setting up network equipment; If the information in the release notes that are available in Adobe Acrobat Reader Portable Document Format (PDF) or HTML on the 3Com World Wide Web...

Getting Started Guide
Page 8
The word "syntax" means that you must evaluate the syntax provided and then supply the appropriate values for . Do not press Return or Enter when an instruction simply says "type." Table 2 Text Conventions Convention Screen displays Syntax Commands The words "enter" and "type" Keyboard key names Words in italics Description This typeface represents information as shown and then press Return or Enter. Example: To display port information, enter the following syntax: system password In this guide. Examples: From the Help menu, select Contents. Table 1 Notice Icons Icon Notice ...
The word "syntax" means that you must evaluate the syntax provided and then supply the appropriate values for . Do not press Return or Enter when an instruction simply says "type." Table 2 Text Conventions Convention Screen displays Syntax Commands The words "enter" and "type" Keyboard key names Words in italics Description This typeface represents information as shown and then press Return or Enter. Example: To display port information, enter the following syntax: system password In this guide. Examples: From the Help menu, select Contents. Table 1 Notice Icons Icon Notice ...
Getting Started Guide
Page 9
...PDF format) ■ Management Interface Reference Guide (HTML format) ■ Other documentation relating to the Switch 4900 Family (PDF format) There are other publications you to optimize your Switch contains the following : ■ Management Quick Reference Guide This guide contains: ■ a list ... Advanced Redundant Power System. ■ Documentation accompanying the Expansion Modules. ■ Documentation accompanying 3Com Network Supervisor. It is supplied on the CD-ROM that accompanies the Switch. This is supplied in HTML format on the CD-ROM that accompanies the...
...PDF format) ■ Management Interface Reference Guide (HTML format) ■ Other documentation relating to the Switch 4900 Family (PDF format) There are other publications you to optimize your Switch contains the following : ■ Management Quick Reference Guide This guide contains: ■ a list ... Advanced Redundant Power System. ■ Documentation accompanying the Expansion Modules. ■ Documentation accompanying 3Com Network Supervisor. It is supplied on the CD-ROM that accompanies the Switch. This is supplied in HTML format on the CD-ROM that accompanies the...

Getting Started Guide
Page 10
..., a splash screen will help make our documentation more useful to you copy the Docs/referenceguide directory as a whole to 3Com at: pddtechpubs_comments@3com.com Please include the following information when commenting: Document title, Document part number (on the CD-ROM. Please e-mail ...structure of the CD-ROM. 3Com recommends that you . The documentation is accessed using the index.htm file. ■ The PDF Implementation Guide is stored in the Docs/implementation directory of the files. Example: Part Number DUA1770-0AAA0x, SuperStack 3 Switch 4900 Family Getting Started Guide, ...
..., a splash screen will help make our documentation more useful to you copy the Docs/referenceguide directory as a whole to 3Com at: pddtechpubs_comments@3com.com Please include the following information when commenting: Document title, Document part number (on the CD-ROM. Please e-mail ...structure of the CD-ROM. 3Com recommends that you . The documentation is accessed using the index.htm file. ■ The PDF Implementation Guide is stored in the Docs/implementation directory of the files. Example: Part Number DUA1770-0AAA0x, SuperStack 3 Switch 4900 Family Getting Started Guide, ...

Getting Started Guide
Page 11
...your network. It covers summary information about the Switch 4900, 4900 SX, 4924 and 4950 and how they can be used in the Switch 4900 Family is the same unless otherwise stated. ■ About the Switches ■ Summary of Hardware Features ■ Switch - Rear View Detail ■ Unit Information ... ■ Default Settings Front View Detail ■ 100/1000BASE-T and 10/100/1000BASE-T Ports ■ 1000BASE-SX Ports ■ GBIC Ports ■ LEDs ■ Switch - 1 INTRODUCING THE SUPERSTACK 3 SWITCH 4900 FAMILY This chapter contains introductory information about the hardware.
...your network. It covers summary information about the Switch 4900, 4900 SX, 4924 and 4950 and how they can be used in the Switch 4900 Family is the same unless otherwise stated. ■ About the Switches ■ Summary of Hardware Features ■ Switch - Rear View Detail ■ Unit Information ... ■ Default Settings Front View Detail ■ 100/1000BASE-T and 10/100/1000BASE-T Ports ■ 1000BASE-SX Ports ■ GBIC Ports ■ LEDs ■ Switch - 1 INTRODUCING THE SUPERSTACK 3 SWITCH 4900 FAMILY This chapter contains introductory information about the hardware.
Getting Started Guide
Page 12
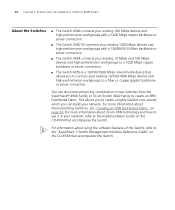
... the Switch. For information about interconnecting Switches, see "Creating an XRN Distributed Fabric" on the CD-ROM that accompanies the Switch. For more information about using the software features of two Switches from the SuperStack® 4900 Family or 3Com Switch 40x0 ...network. 12 CHAPTER 1: INTRODUCING THE SUPERSTACK 3 SWITCH 4900 FAMILY About the Switches ■ The Switch 4900 connects your existing 100 Mbps devices and high-performance workgroups with a 1000 Mbps copper backbone or server connection. ■ The Switch 4900 SX connects your existing 1000 Mbps devices...
... the Switch. For information about interconnecting Switches, see "Creating an XRN Distributed Fabric" on the CD-ROM that accompanies the Switch. For more information about using the software features of two Switches from the SuperStack® 4900 Family or 3Com Switch 40x0 ...network. 12 CHAPTER 1: INTRODUCING THE SUPERSTACK 3 SWITCH 4900 FAMILY About the Switches ■ The Switch 4900 connects your existing 100 Mbps devices and high-performance workgroups with a 1000 Mbps copper backbone or server connection. ■ The Switch 4900 SX connects your existing 1000 Mbps devices...

Getting Started Guide
Page 13
... units to SuperStack 3 Advanced Redundant Power System (ARPS) (3C16071B) eXpandable Resilient Networking (XRN) support. Table 3 Hardware features Feature Fast Ethernet and Gigabit Ethernet Ports Addresses Forwarding Modes Duplex Modes Flow Control Smart auto-sensing Traffic Prioritization Layer 3 Switching RPS Support XRN Support Mounting Switch 4900 Family Switch 4900: 12 Auto-negotiating 100BASE-TX/1000BASE-T ports Switch 4900 SX: 12...
... units to SuperStack 3 Advanced Redundant Power System (ARPS) (3C16071B) eXpandable Resilient Networking (XRN) support. Table 3 Hardware features Feature Fast Ethernet and Gigabit Ethernet Ports Addresses Forwarding Modes Duplex Modes Flow Control Smart auto-sensing Traffic Prioritization Layer 3 Switching RPS Support XRN Support Mounting Switch 4900 Family Switch 4900: 12 Auto-negotiating 100BASE-TX/1000BASE-T ports Switch 4900 SX: 12...

Getting Started Guide
Page 14
Front View Detail Figure 1 Switch 4900 - front view front view 1x 3C17700 Status Module Unit green = 1000 Mbps yellow = 100 Mbps on = enabled, link OK flashing = disabled Packet 1 2 3 4 5 6 7 8 9 10 11 12 6x Status 1 2 3 4 5 6 7 8 9 10 11 12 12 34 Power/Self Test 7x Layer 3 Switch 4900 12x 3C17700 SuperStack 3 Port Status LEDs 100BASE-TX / 1000BASE-T Ports Module Status LEDs Power / Self Test LED and Layer 3 LED Unit LEDs 100BASE-TX / 1000BASE-T Ports Figure 2 Switch 4900 SX - 14 CHAPTER 1: INTRODUCING THE SUPERSTACK 3 SWITCH 4900 FAMILY Switch -
Front View Detail Figure 1 Switch 4900 - front view front view 1x 3C17700 Status Module Unit green = 1000 Mbps yellow = 100 Mbps on = enabled, link OK flashing = disabled Packet 1 2 3 4 5 6 7 8 9 10 11 12 6x Status 1 2 3 4 5 6 7 8 9 10 11 12 12 34 Power/Self Test 7x Layer 3 Switch 4900 12x 3C17700 SuperStack 3 Port Status LEDs 100BASE-TX / 1000BASE-T Ports Module Status LEDs Power / Self Test LED and Layer 3 LED Unit LEDs 100BASE-TX / 1000BASE-T Ports Figure 2 Switch 4900 SX - 14 CHAPTER 1: INTRODUCING THE SUPERSTACK 3 SWITCH 4900 FAMILY Switch -

Getting Started Guide
Page 15
Front View Detail 15 Figure 3 Switch 4924 - Only connect RJ-45 data connectors, network telephony systems, or network telephones to these sockets. front view Figure 4 Switch 4950 - Switch - front view WARNING: RJ-45 Ports. Either shielded or unshielded data cables with shielded or unshielded jacks can be used as standard traditional telephone sockets, or to connect the unit to a traditional PBX or public telephone network. They cannot be connected to these data sockets. These are shielded RJ-45 data sockets.
Front View Detail 15 Figure 3 Switch 4924 - Only connect RJ-45 data connectors, network telephony systems, or network telephones to these sockets. front view Figure 4 Switch 4950 - Switch - front view WARNING: RJ-45 Ports. Either shielded or unshielded data cables with shielded or unshielded jacks can be used as standard traditional telephone sockets, or to connect the unit to a traditional PBX or public telephone network. They cannot be connected to these data sockets. These are shielded RJ-45 data sockets.
Getting Started Guide
Page 16
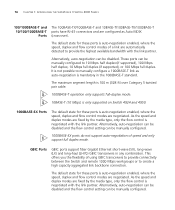
.... These ports can be manually configured. The maximum segment length is 100 m (328 ft) over ). 16 CHAPTER 1: INTRODUCING THE SUPERSTACK 3 SWITCH 4900 FAMILY 100/1000BASE-T and The 100BASE-TX/1000BASE-T and 10BASE-T/100BASE-TX/1000BASE-T 10/100/1000BASE-T ports have RJ-45 connectors and... connection. The default state for these ports is negotiated with the link partner. Alternatively, auto-negotiation can be manually configured. 1000BASE-SX ports do not support auto-negotiation of a link are automatically detected to manually configure a 1000BASE-T link as Auto MDIX Ports (...
.... These ports can be manually configured. The maximum segment length is 100 m (328 ft) over ). 16 CHAPTER 1: INTRODUCING THE SUPERSTACK 3 SWITCH 4900 FAMILY 100/1000BASE-T and The 100BASE-TX/1000BASE-T and 10BASE-T/100BASE-TX/1000BASE-T 10/100/1000BASE-T ports have RJ-45 connectors and... connection. The default state for these ports is negotiated with the link partner. Alternatively, auto-negotiation can be manually configured. 1000BASE-SX ports do not support auto-negotiation of a link are automatically detected to manually configure a 1000BASE-T link as Auto MDIX Ports (...

Getting Started Guide
Page 17
.... A fault has occurred. The Module is installed and supported. The Module is installed but the port is enabled. No packets are being transmitted/received on 4900 SX.) No link is present. A high speed (1000 Mbps) link is present, and the port is disabled. (Not applicable on the port. A low speed... (100 Mbps on 4900, 10/100 Mbps on 4924/4950) link is present, and the port is enabled. (Not applicable on 4900 SX.) A low speed (100 Mbps on 4900, 10/100 Mbps on 4924/4950) link is present, but not supported. Switch -
.... A fault has occurred. The Module is installed and supported. The Module is installed but the port is enabled. No packets are being transmitted/received on 4900 SX.) No link is present. A high speed (1000 Mbps) link is present, and the port is disabled. (Not applicable on the port. A low speed... (100 Mbps on 4900, 10/100 Mbps on 4924/4950) link is present, and the port is enabled. (Not applicable on 4900 SX.) A low speed (100 Mbps on 4900, 10/100 Mbps on 4924/4950) link is present, but not supported. Switch -

Getting Started Guide
Page 18
The Switch has failed its Power On Self Test. Rear View Detail LED Color Green flashing Yellow Off Layer 3 LED Green Off Indicates The Switch is either downloading software or is not receiving power. Figure 5 Switch 4900 - The Switch software does not support Layer 3. The Switch software supports Layer 3. rear view rear view Figure 6 Switch 4900 SX - 18 CHAPTER 1: INTRODUCING THE SUPERSTACK 3 SWITCH 4900 FAMILY Switch - The Switch is initializing (which includes running a Power On Self Test).
The Switch has failed its Power On Self Test. Rear View Detail LED Color Green flashing Yellow Off Layer 3 LED Green Off Indicates The Switch is either downloading software or is not receiving power. Figure 5 Switch 4900 - The Switch software does not support Layer 3. The Switch software supports Layer 3. rear view rear view Figure 6 Switch 4900 SX - 18 CHAPTER 1: INTRODUCING THE SUPERSTACK 3 SWITCH 4900 FAMILY Switch - The Switch is initializing (which includes running a Power On Self Test).

Getting Started Guide
Page 19
... Label This label shows the following: ■ The 3Com product name of the Switch ■ The 3Com 3C number of the Switch ■ The unique MAC address (Ethernet address) of the Switch ■ The serial number of the Switch You may need this socket System Socket to connect a SuperStack 3 Advanced Redundant Power System (RPS) to any supply...
... Label This label shows the following: ■ The 3Com product name of the Switch ■ The 3Com 3C number of the Switch ■ The unique MAC address (Ethernet address) of the Switch ■ The serial number of the Switch You may need this socket System Socket to connect a SuperStack 3 Advanced Redundant Power System (RPS) to any supply...
Getting Started Guide
Page 20
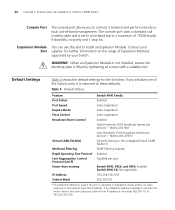
WARNING: When an Expansion Module is not installed, ensure the blanking plate is returned to these defaults. 20 CHAPTER 1: INTRODUCING THE SUPERSTACK 3 SWITCH 4900 FAMILY Console Port The console port allows you initialize one of -band management. The console port uses a standard null modem cable ... the network have this slot to the untagged Default VLAN (VLAN 1) IGMP filtering enabled Enabled Disabled per port Switch 4900, 4924, and 4950: Enabled Switch 4900 SX: Not applicable 169.254.100.100* 255.255.0.0 * This default IP address is used if the unit is already in use this IP...
WARNING: When an Expansion Module is not installed, ensure the blanking plate is returned to these defaults. 20 CHAPTER 1: INTRODUCING THE SUPERSTACK 3 SWITCH 4900 FAMILY Console Port The console port allows you initialize one of -band management. The console port uses a standard null modem cable ... the network have this slot to the untagged Default VLAN (VLAN 1) IGMP filtering enabled Enabled Disabled per port Switch 4900, 4924, and 4950: Enabled Switch 4900 SX: Not applicable 169.254.100.100* 255.255.0.0 * This default IP address is used if the unit is already in use this IP...

Getting Started Guide
Page 21
...Choosing a Suitable Site ■ Rack-mounting ■ Placing Units On Top of this guide. Bevor Sie Komponenten aus dem Switch entfernen oder dem Switch hinzufuegen oder Instandhaltungsarbeiten verrichten, lesen Sie die Sicherheitsanweisungen, die in Anhang A in Appendix A of Each Other ■ Creating an... XRN Distributed Fabric ■ The Power-up the Switch. 2 INSTALLING THE SWITCH This chapter contains the information you must read the safety information provided in diesem Handbuch aufgefuehrt sind. Before installing or...
...Choosing a Suitable Site ■ Rack-mounting ■ Placing Units On Top of this guide. Bevor Sie Komponenten aus dem Switch entfernen oder dem Switch hinzufuegen oder Instandhaltungsarbeiten verrichten, lesen Sie die Sicherheitsanweisungen, die in Anhang A in Appendix A of Each Other ■ Creating an... XRN Distributed Fabric ■ The Power-up the Switch. 2 INSTALLING THE SWITCH This chapter contains the information you must read the safety information provided in diesem Handbuch aufgefuehrt sind. Before installing or...