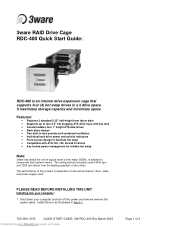
Quick Start Guide
Page 1
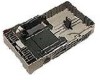
... self-contained ventilation • Individual hard drive power and activity indicators • Front access design to component built system towers. PLEASE READ BEFORE INSTALLING THIS UNIT Installing into your computer and turn off the power and remove remove the power cable. Features: • Requires 3 standard 5.25" half-height form factor slots • Supports up to four 3.5" hot plugging ATA drive trays with key lock • Accommodates four 1" height ATA disk drives • Back plane design •...
... self-contained ventilation • Individual hard drive power and activity indicators • Front access design to component built system towers. PLEASE READ BEFORE INSTALLING THIS UNIT Installing into your computer and turn off the power and remove remove the power cable. Features: • Requires 3 standard 5.25" half-height form factor slots • Supports up to four 3.5" hot plugging ATA drive trays with key lock • Accommodates four 1" height ATA disk drives • Back plane design •...

Quick Start Guide
Page 2
... on the hard drive. Connect the 40-pin ATA cable to the IDE connector on the subsystem chassis. 3. Remove an empty disk tray. 2. CAUTION: Static electrical discharge (ESD) can damage your drive or other components. Refer to the IDE bus make sure the numerical pins are lined up with pin 1 of the connector. 720-0091-00 B QUICK START GUIDE, 3W-RDC-400 Rev March 2003 Downloaded from www.Manualslib.com manuals search...
... on the hard drive. Connect the 40-pin ATA cable to the IDE connector on the subsystem chassis. 3. Remove an empty disk tray. 2. CAUTION: Static electrical discharge (ESD) can damage your drive or other components. Refer to the IDE bus make sure the numerical pins are lined up with pin 1 of the connector. 720-0091-00 B QUICK START GUIDE, 3W-RDC-400 Rev March 2003 Downloaded from www.Manualslib.com manuals search...

Quick Start Guide
Page 3
... this. Hot Add/Removing Disk The cage supports 'Hot add and remove' by turning the key counter-clockwise. This will lock the disk tray into place. 8. See your package) into the disk tray. 6. Slide the tray into a slot until it supports this feature and for the specific procedure to secure the drive in the disk tray. 7. If you are replacing a hard drive, make sure to the drive when the key is being accessed, the HDD activity LED illuminates. Insert the hard drive into...
... this. Hot Add/Removing Disk The cage supports 'Hot add and remove' by turning the key counter-clockwise. This will lock the disk tray into place. 8. See your package) into the disk tray. 6. Slide the tray into a slot until it supports this feature and for the specific procedure to secure the drive in the disk tray. 7. If you are replacing a hard drive, make sure to the drive when the key is being accessed, the HDD activity LED illuminates. Insert the hard drive into...

Quick Start Guide
Page 4
... GUIDE, 3W-RDC-400 Rev March 2003 Downloaded from the date of original purchase. assumes no responsibility for a period of twelve (12) months from www.Manualslib.com manuals search engine Page 4 of 4 All rights reserved. No part of this document, nor does 3ware make any means, electronic, mechanical, photocopying, recording or otherwise, without drives) Copyright ©2003 3ware, Inc. Some states...
... GUIDE, 3W-RDC-400 Rev March 2003 Downloaded from the date of original purchase. assumes no responsibility for a period of twelve (12) months from www.Manualslib.com manuals search engine Page 4 of 4 All rights reserved. No part of this document, nor does 3ware make any means, electronic, mechanical, photocopying, recording or otherwise, without drives) Copyright ©2003 3ware, Inc. Some states...


